Stem replacement is one of the bread-and-butter jobs for any pipe repair shop. I have fit hundreds of stems over the last decade or so, from relatively simple jobs using pre-cast stem blanks in Vulcanite and Acrylic to fully custom hand cut stems crafted completely in-house from Ebonite, Acrylic or Resin rod.
As a writer, I try not to inundate you, the reader, with too many blog posts on the same subject, but it’s hard to get away from talking about stems sometimes. They are, after all, “wear items” – parts that will eventually wear down through use, even by the most diligent of pipe smokers.
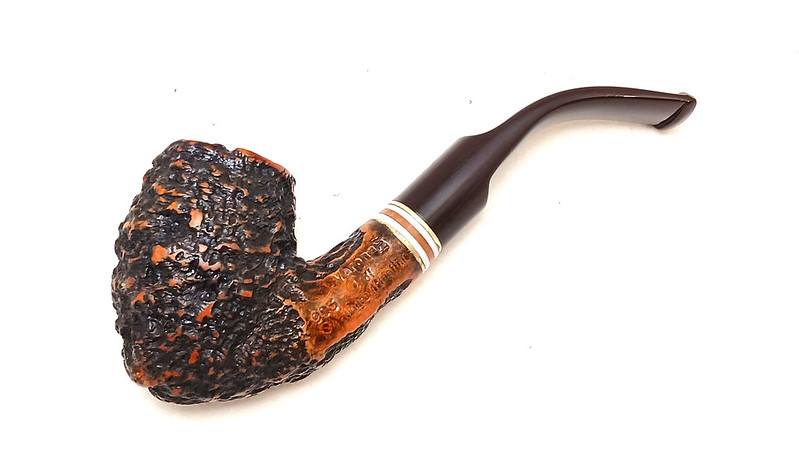
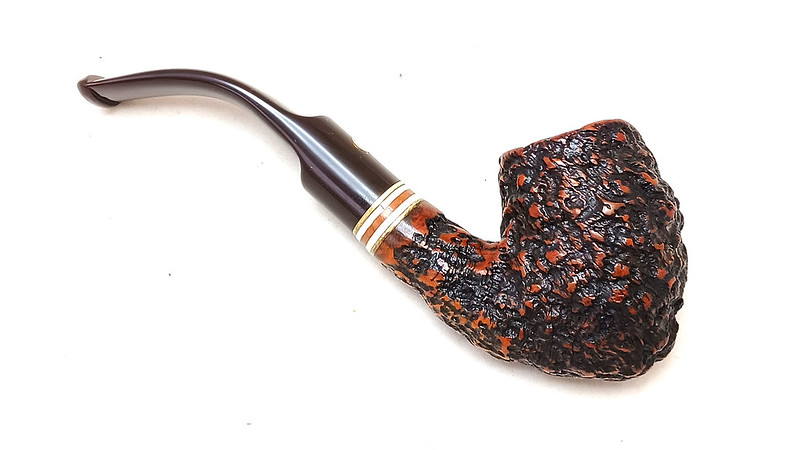
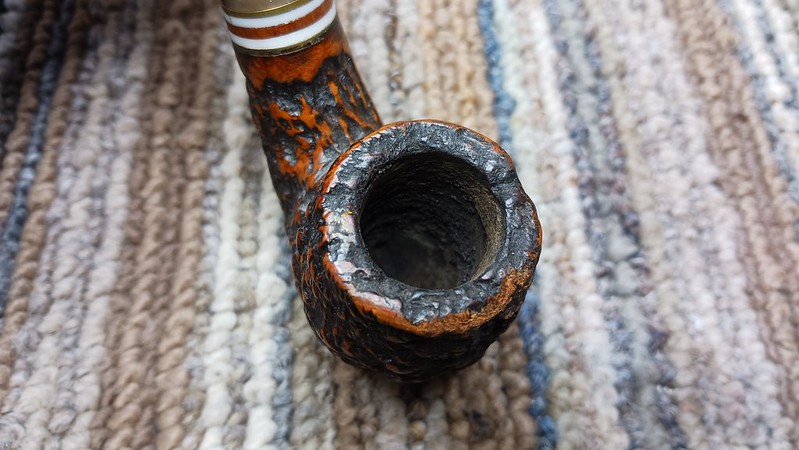
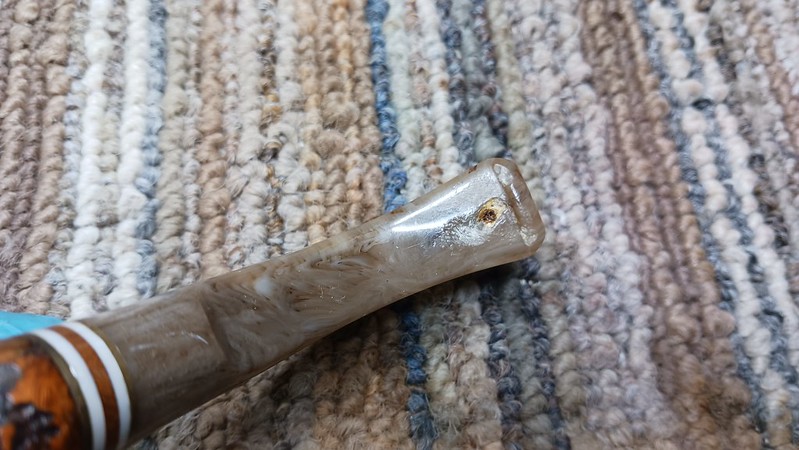
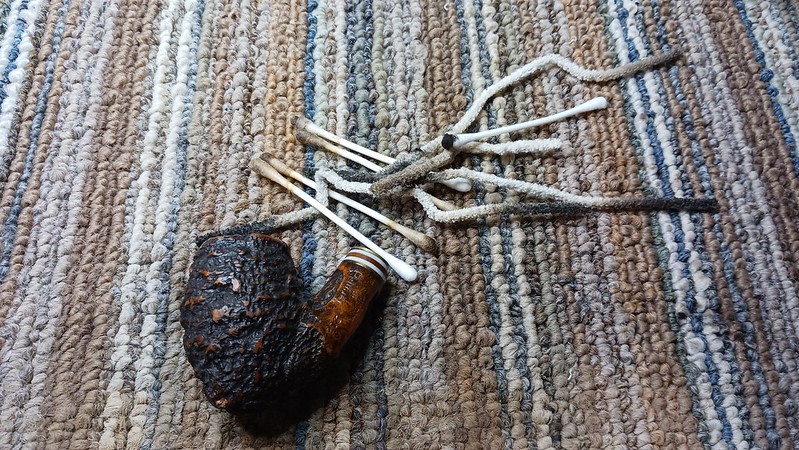
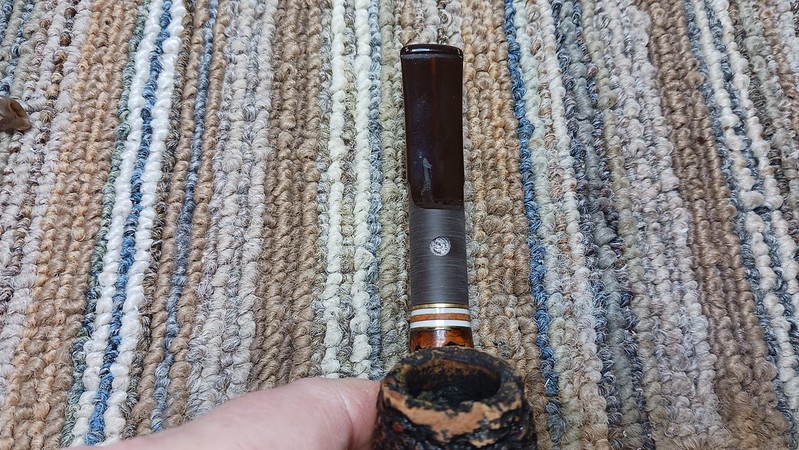
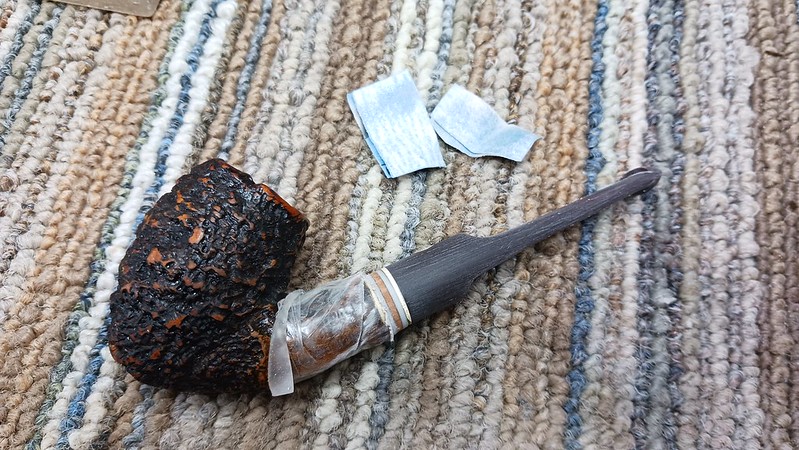
The pipe on the bench this week is an Italian Bent Billiard made by Armellini whose stem had definitely seen better days. Made from Acrylic in a Faux Horn pattern, the stem had deep tooth dents on both top and bottom of the bite zone, with the bottom dent puncturing the airway. The rest of the pipe was in quite good condition for an estate pipe, with the exception of a loose trim ring at the end of the shank. This series of images shows the pipe’s condition when I brought it to the bench.

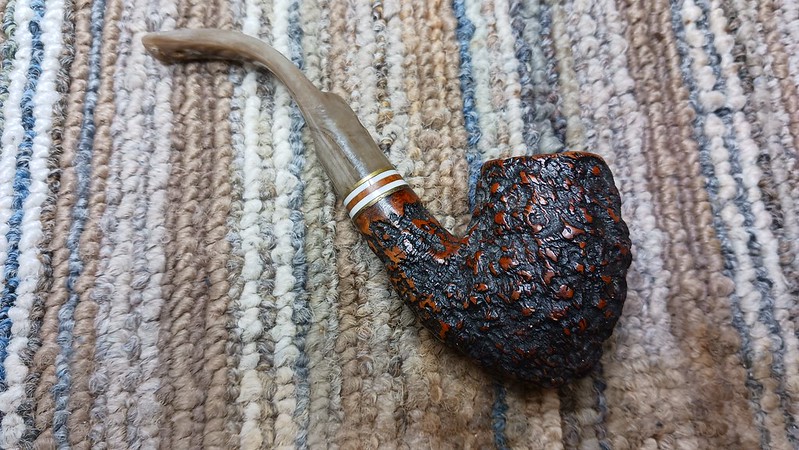
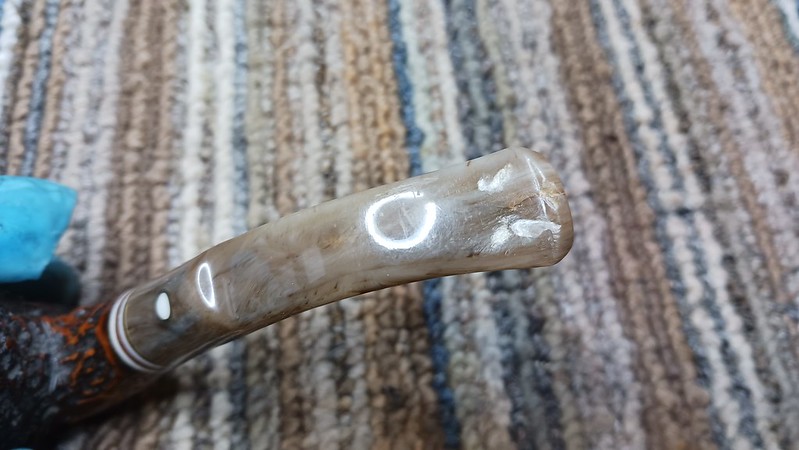
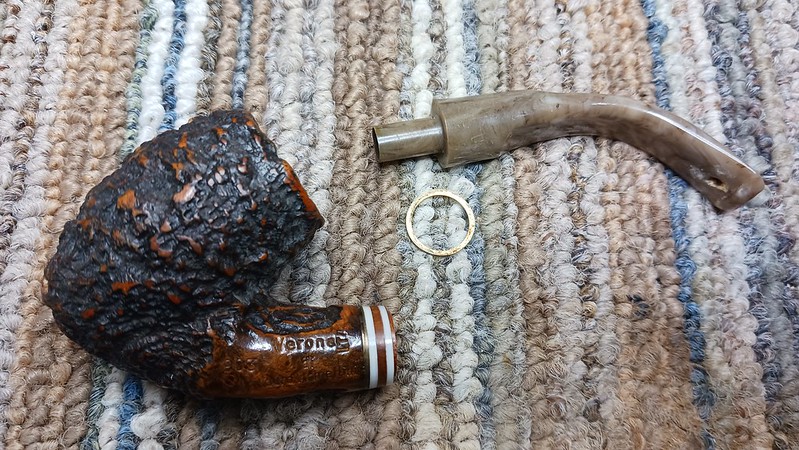
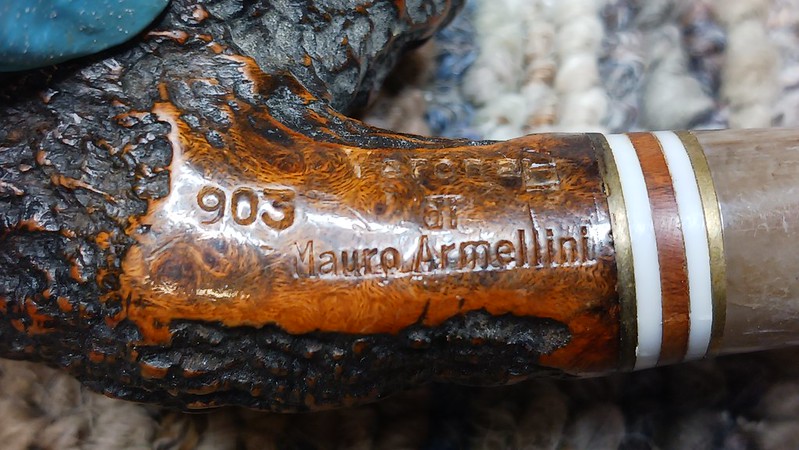
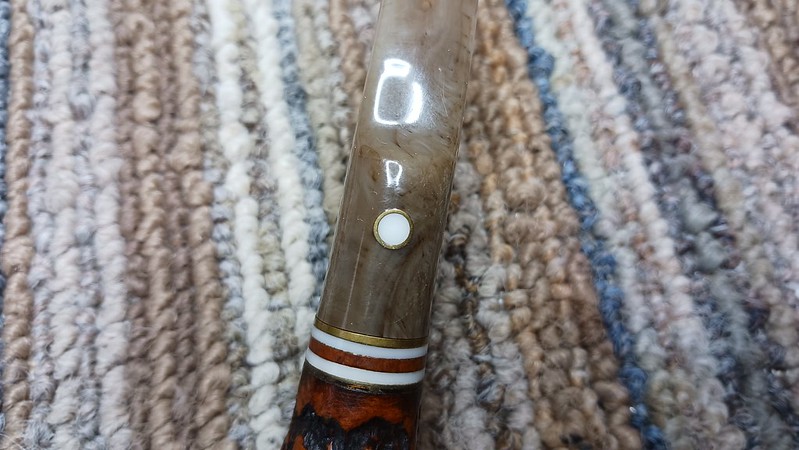
The pipe is stamped with a shape number, “903” followed by “Verona” over “di” over “Mauro Armellini” on the left shank. The stem carries a logo consisting of a large white dot inside a brass ring.
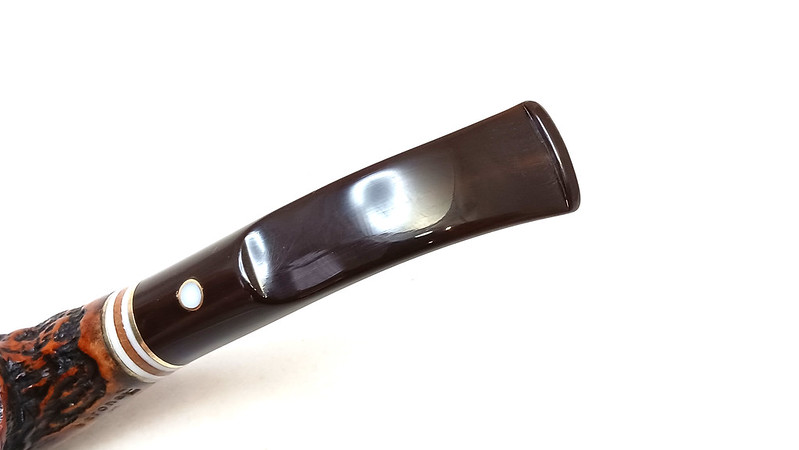
There were two aspects of the original stem that the pipe’s new steward wanted to preserve – the offset saddle (taller in front, lower in back) and the Armellini logo. Thankfully, I could create the first by altering a stock Round Saddle stem blank; the logo, while slightly more complex than, say, Dunhill’s White Spot, was also within reach.
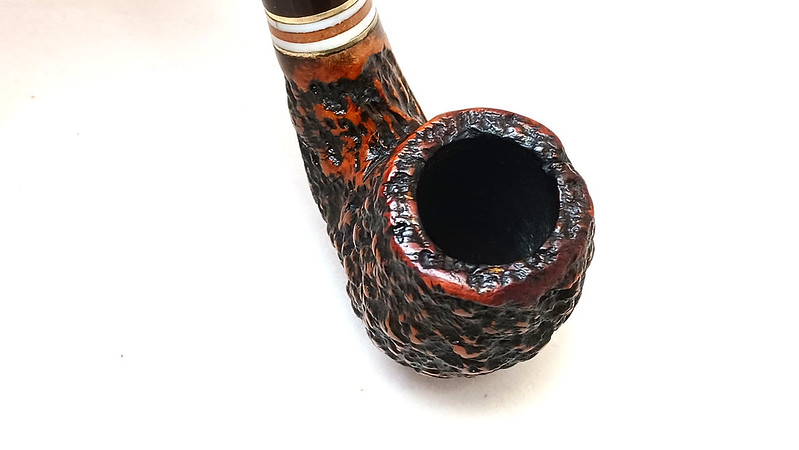
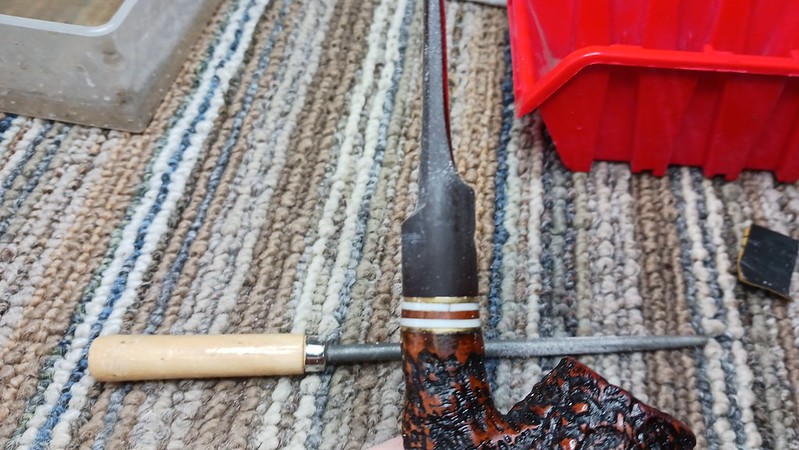
Before I got to any of that, though, I needed to clean the stummel. A few pipe cleaners and cotton swabs dipped in 99% isopropyl alcohol cleared away a modest amount of tars and carbon deposits from the shank and airway. I tidied up the chamber itself with a bit of sandpaper wrapped around a dowel, removing a light layer of carbon cake from the bowl.
To clean the nooks and crannies of the rusticated briar, I scrubbed the exterior of the stummel with Murphy’s Oil Soap and an old toothbrush. The soap removes dirt and dust as well as any old wax, leaving the briar clean and fresh.

With the stummel clean, I could reattach the loose brass ring with a few drops of CA glue.

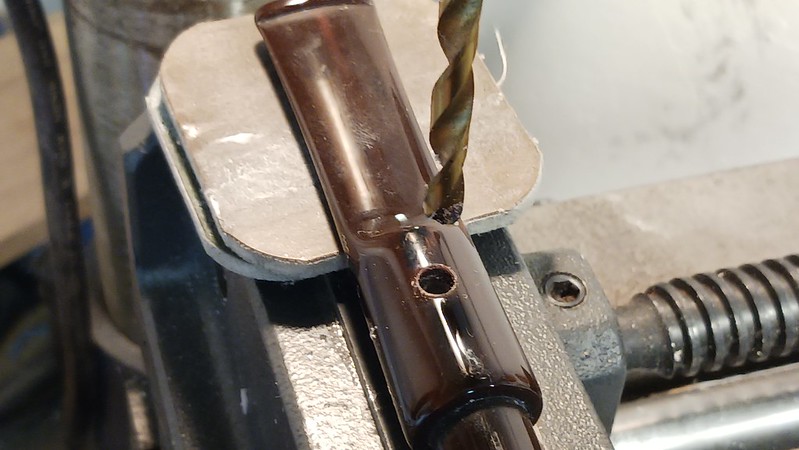
After some discussion with the pipe’s steward, it was decided that the new stem would be a dark chocolate brown rather than the original faux horn. I decided to begin work on the new stem by drilling a socket into which the white and brass logo would be inserted. This could also be done after fitting the stem to the shank. Getting the placement of the logo correct is more important here than order of operations.
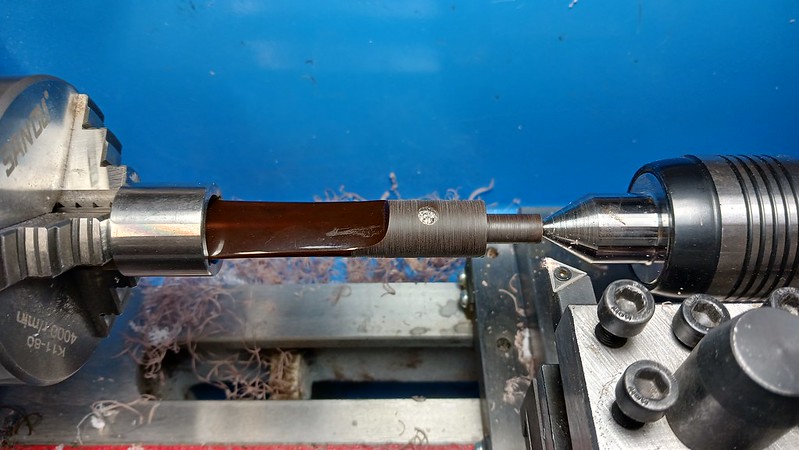
I took the drilled stem to the lathe where I turned it to fit the diameter of the shank. I aim for within a few hundredths of a millimetre here, on the plus side, of course. Final sanding and polishing will remove the remaining sliver of stem material.
A test fit of the new stem provided a nice snug-but-not-too-snug fit at the tenon. The stem would need just a little bit of hand sanding to fit the shank perfectly.
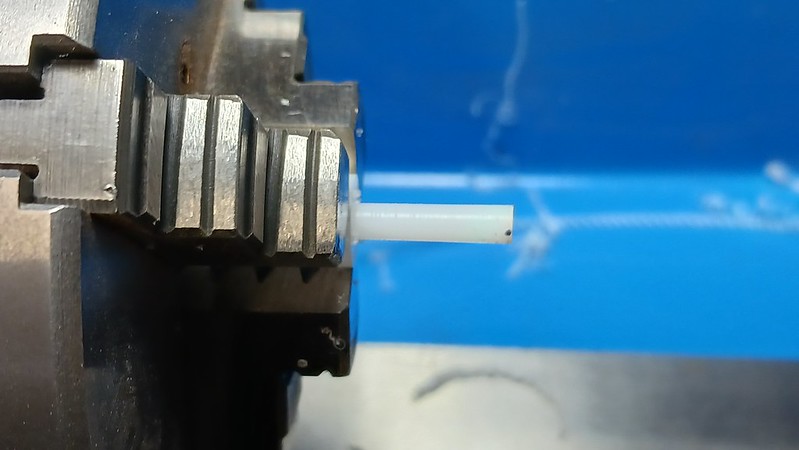
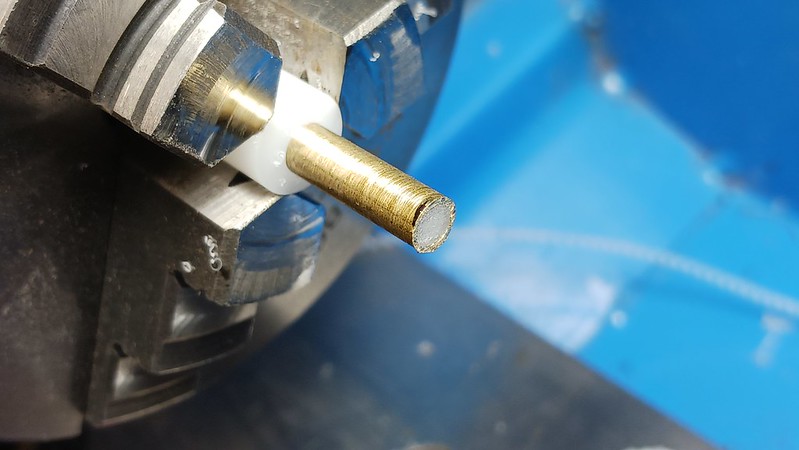
To recreate the brass and white stem inlay, I first turned a short section of white Delrin rod to size on the lathe, then epoxied some brass tubing over the turned section of rod. This roughly 2cm length of prepared rod will produce at least 4 inlays; I’ll hold onto the unused portion for the next time an Armellini pipe crosses the bench.
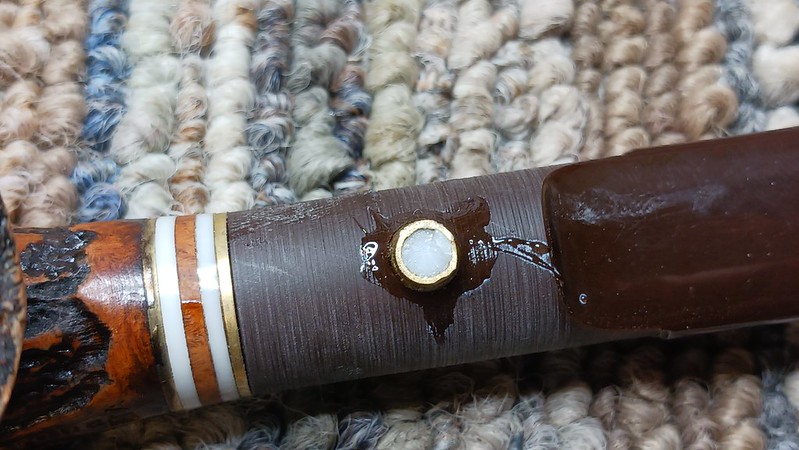
I cut a roughly 3mm thick slice off the end of the prepared inlay rod and used a bit of CA glue to install it in the predrilled socket. I set the stem aside for the night, allowing the glue to cure completely before filing and sanding the inlay flush to the surrounding Acrylic.
While I had tools in hand, I used a round file to cut down the rear shoulder of the stock saddle stem blank to recreate the offset saddle feature of the original stem.

Then it was time for some hand sanding to bring it all together. After wrapping the shank with some tape to protect it from any errant tools, I sanded the stem with 220 and 320 grit sandpapers to remove the file marks and bring the diameter of the new stem to its final dimensions.
Switching to wet sanding, I repeated the exercise with 600 and 2000 grit papers to prep the stem for final buffing.
Just before taking the pipe to the buffing wheel, I needed to bend the new stem to match the original. I slid a pipe cleaner into the airway to prevent it from kinking or collapsing while I heated the acrylic over the heat gun until the stem became pliable.
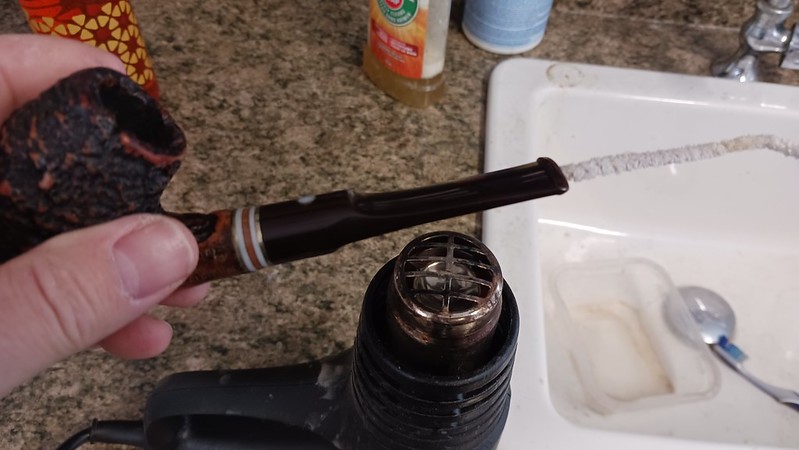
Using the original stem as a guide, I applied the bend and set the new shape by running the stem under cool water.

Finally, I gave the new stem a run on both the Red Tripoli and White Diamond wheels to erase the last sanding scratches and bring the acrylic to a high shine. The stummel also got a quick polishing, though much more lightly to avoid jamming buffing compound into the rustication.
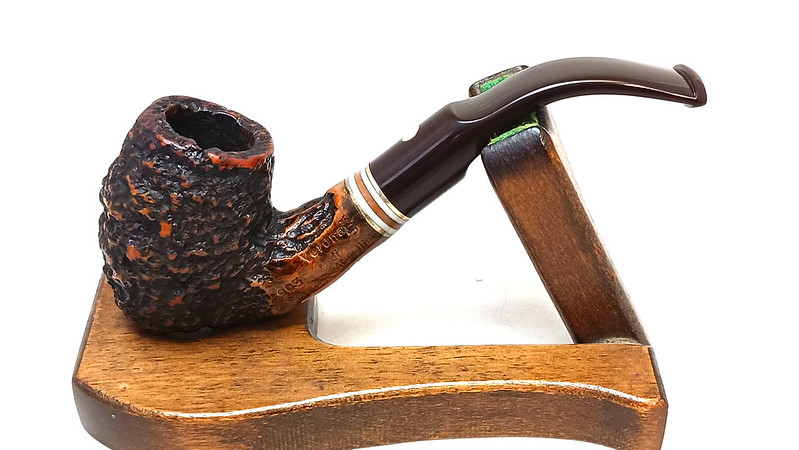
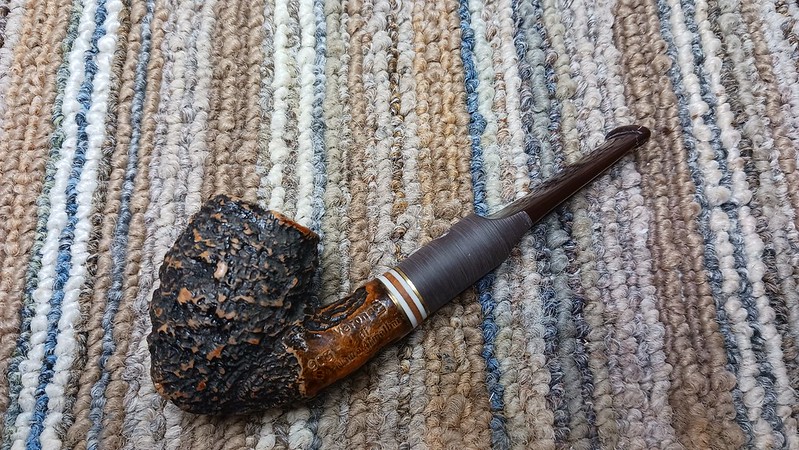
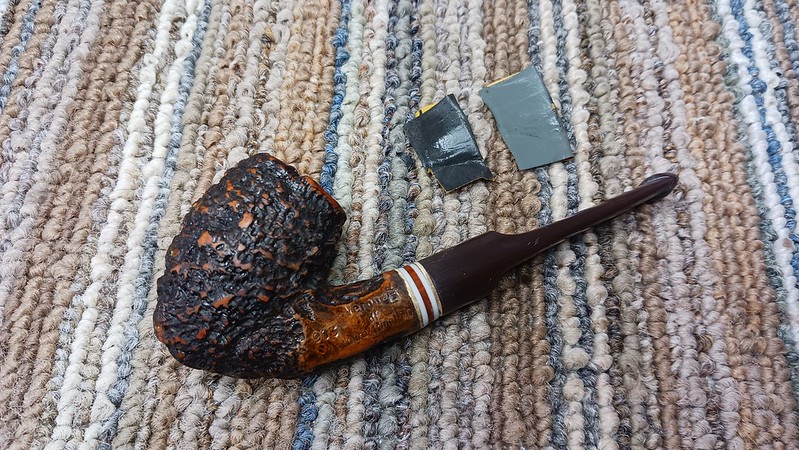
The finished pipe is looking good after its time on the bench. The new chocolate Acrylic stem works well with the earthy tones of the rusticated briar and the brass and white inlay gives it a touch of class. Better yet, the new stem is free from the rather extensive damage suffered by the original. This Armellini Verona should be good to go for many more years of service with its new steward.
Thanks for joining me for this estate pipe restoration. This stem replacement was an interesting change of pace from the more standard jobs; I hope you enjoyed following along.
Until next time, Happy Piping! Here’s the finished pipe.