
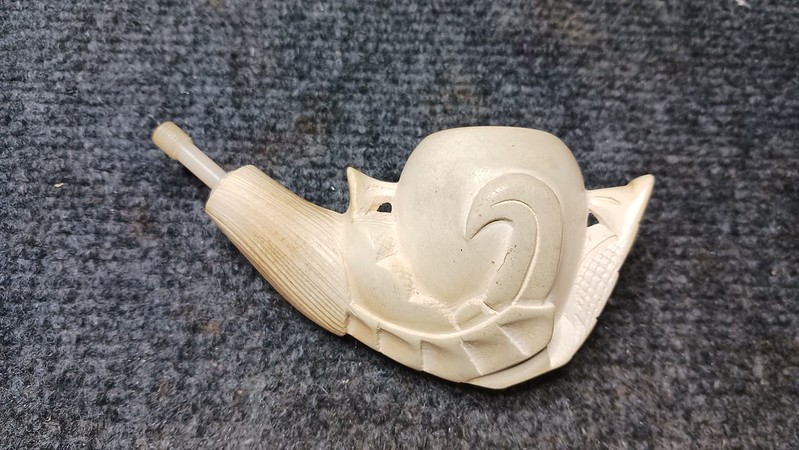
Meerschaum pipes have long been known for their capacity to be carved into an extraordinary range of shapes and styles, from sleek classic shapes like a Billiard or Bulldog to fanciful smokable sculptures. The pipe on the worktable today provides a rather geometric take on the venerable Egg & Claw shape.
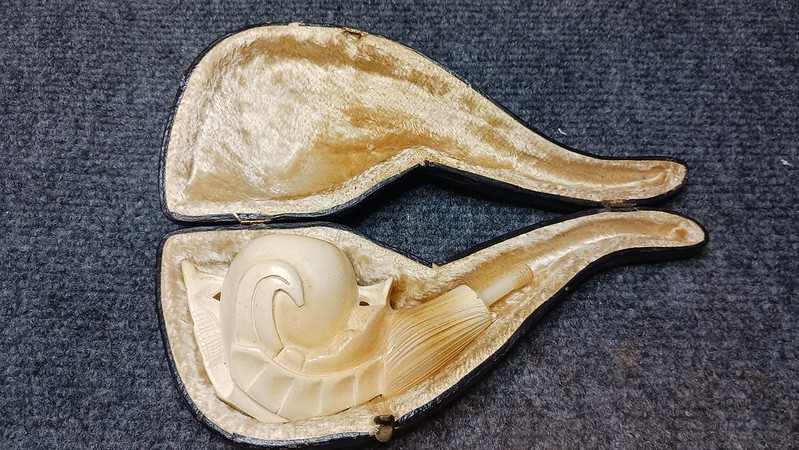
As this initial series of images illustrates, the pipe came to the table without a stem but otherwise in pretty good estate condition. I acquired the piece several years ago, gave it a good cleaning, then set is aside in favour of other projects until today, when I decided that it was high time to make the pipe whole and useful again.
As you can see, the pipe was gently used and beginning to show some colouration in the shank and bottom half of the bowl. Though the stem was missing, the stummel retained the nylon/teflon push-pull tenon set.


As mentioned above, the stummel had been cleaned previously, so I didn’t have to repeat that step in the restoration process. Instead, I began the work by tidying up the rim of the pipe using some micromesh sanding pads to remove a light amount of carbon and some handling marks from the meerschaum.
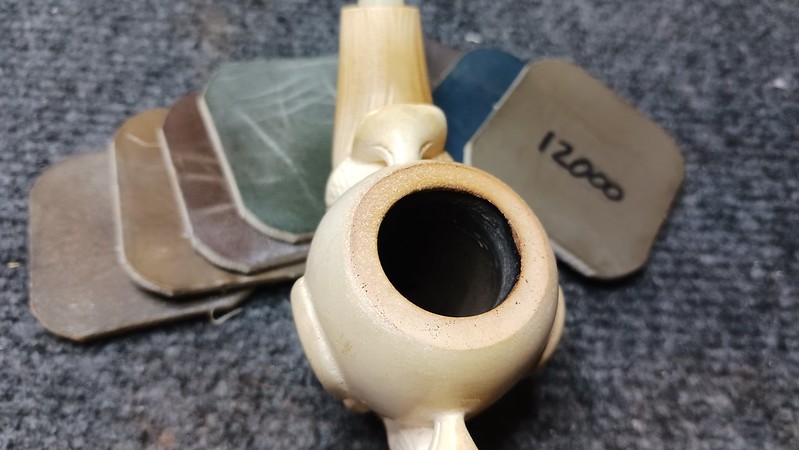
Next up was a quick scrub of the exterior of the stummel with clean water and a toothbrush to dislodge the dust and dirt from the many nooks and crannies of the carving.

This close-up shot of the stummel immediately after the scrub holds a taste of things to come. The water temporarily brings some of the colouration from inside the meerschaum to the surface. Later in the process, I will wax the stummel with melted beeswax, which will pull even more colour permanently to the surface.

In preparation for the waxing, I wrapped the old nylon tenon with tape to seal the airway. but before I started heating the wax I wanted to fit a new stem to the pipe. After digging through my supplies, I decided to work with the handsome Acrylic Cumberland stem shown in this shot. Note the mark on the stem near the tenon end, indicating where the stem needed to be shortened to fit properly in the case.

I cut the stem at the marked position, then used the topping board to square up the new stem face.


To fit the screw-in tenon, I opened the end of the airway and tapped the appropriate threads into the new mortise. Key to this process is keeping the mortise and threads square. Any deviation will result in an angled tenon and a misaligned stem to shank junction.

I also made some adjustments to the shank mortise, adding a countersink that allowed the shank insert to seat fully, flush with the end of the shank.


And here is the pipe assembled for the first time. Note the addition of a slim brass shank band I installed to square up the slightly knocked-about shank face.

With the structural work complete, I plugged my wax pot in and began to melt the beeswax within. A cork in the chamber opening and the taped up tenon in the shank prevents hot wax from pouring into and clogging the pipe’s internals.

When the wax was fully liquid in the pot, I popped the stummel in, turning it over every few minutes to ensure an even distribution of wax. When the meerschaum had absorbed as much wax as it could hold, I pulled the stummel from the wax pot and set it on a towel to cool enough to handle. The potential revealed by the water during the initial cleaning was realized – just look at that gorgeous honey-amber colour now!


When the stummel was cool enough to handle, I removed the corks and hand buffed the meerschaum with a clean towel to remove the excess wax from the surface. Cotton swabs are helpful here to get the wax out of the details.
The new stem was a pretty good fit but did need a bit of shaping to achieve a smooth flow from one end of the shape to the other. A little work with files and sandpaper did the trick.

I wet sanded the stem to 2000-grit, then slid a pipe cleaner through the stem’s airway and warmed the acrylic over the heat gun. When the stem became pliable, I added the required bend, using the pipe’s case as a template to ensure a good fit.

To complete this restoration project, I took the pipe to the buffer and polished the new stem with both Red Tripoli and White Diamond compounds. A light run with Carnauba wax added even more shine to the new stem.
The finished pipe is quite something to look at, transformed not only by the new Cumberland Acrylic stem but also by a fresh waxing that brought out all that colour. This Egg & Claw meerschaum is clean, fresh and ready to find its next pipe steward.
Thanks for joining me for this estate pipe project. If nothing else, this post stands as a great reminder to wax your meerschaum pipe every now and again to make it look its very best.
Until next time, Happy Piping! Here’s the finished pipe.


Stunning !!!
LikeLiked by 1 person
Thanks! This one will be available soon for Father’s Day.
LikeLike
Thanx for the professional wisdom in restoring and adding to that magnificent Meerschaum jewel. Hopefully my two new meers will look half that good.
LikeLike