
After taking on a number of more complicated restorations lately, it was a nice change to see this Charatan’s Make Special cross the worktable. An estate purchase for its current steward, the pipe was sent directly to DadsPipes for a good cleanup to get it ready for active service after an indeterminant period in storage.
As you can see from the opening set of pictures, the pipe was in pretty good estate condition, though it showed the usual hallmarks of time and neglect – dirty, greasy feeling briar, a healthy amount of carbon cake in the chamber, a crust of “lava” on the broad rim of the bowl, and a lightly oxidized Vulcanite stem that carried its fair share of tooth chatter. Not visible in these pics is the stem fit – the tenon was loose in the shank mortise.
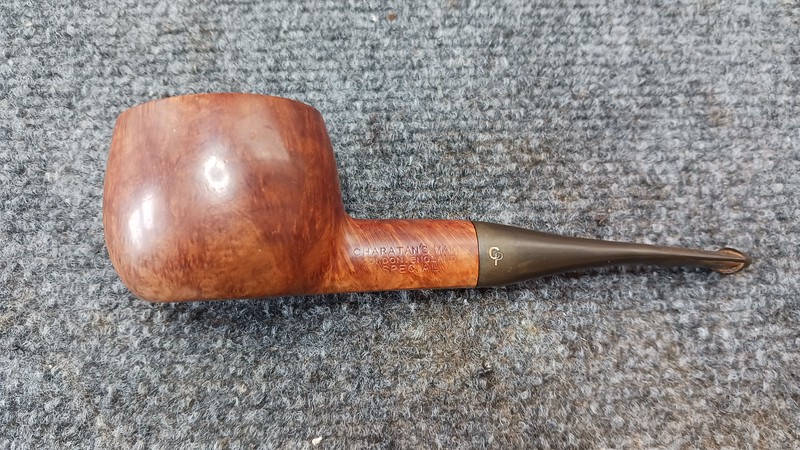


The shank is marked “Charatan’s Make” over “London, England” over “Special” on the left flank, while the right flank is stamped with a “3”. The original stem shows the intertwined “CP” logo of the marque.


As with all of my restorations, I began this project by reaming the old cake from the tobacco chamber and tidying up the chamber walls and floor with sandpaper wrapped around a dowel.

The carbon cake evidently did its job well – the chamber looked quite good underneath it all, with no sign of heat damage or other issues.

I took a few minutes to clean the lava crust off the rim using a few cotton swabs wetted with saliva. The enzymes in human saliva are a surprisingly effective and gentle cleaner. This pic shows the state of the briar after the lava came off. There is one large section of briar worn away from the inner edge of the rim at about the 7 o’clock position along with a few nicks and dings that could be improved.

To restore the round appearance of the chamber bore, I sanded a bevel into the inner rim with a scrap of 220-grit sandpaper. This is a relatively simply task, but it can be a bit tricky to maintain an even bevel so care is required.

With the rim sorted, I moved on to cleaning the shank and airway of years of accumulated tars and other goodies. There was quite a deposit of gunk at the end of the mortise, which I scraped out using the flat end of a needle file. When the bulk of the tars were out, I could switch to shank brushes, cotton swabs and pipe cleaners dipped in 99% isopropyl alcohol to clear up the rest.

To ensure that all the tars were removed (along with any associated smells or flavours), I packed the bowl and shank with cotton wool and filled the stummel with more isopropyl alcohol. I set the stummel aside for the night to give the alcohol time to do its work.

The following morning, I removed the cotton wool from the stummel and gave the shank and airway one more pass with a pipe cleaner to remove any last traces of old tars. Satisfied that the briar was now clean and sweet smelling, I set the bowl aside to rest while I worked on the stem.
Surprisingly, the stem’s airway was reasonably clean. It only took one pipe cleaner dipped in alcohol to clear out the few bits of tar and tobacco debris. With the internals sorted, I sanded the exterior of the stem with 600-grit wet sandpaper to remove the light oxidation and smooth out the tooth chatter. When I was happy with the state of the Vulcanite, I sanded it again to 2000 grit in preparation for buffing. As you can see in these pics below, there was a bit of oxidation remaining at the stem face and button. These would eventually surrender to the buffing wheel during final polishing. Buffing the pipe as a complete piece also avoids the possibility of rounding over the sharp edge of the stem face where it meets the shank.

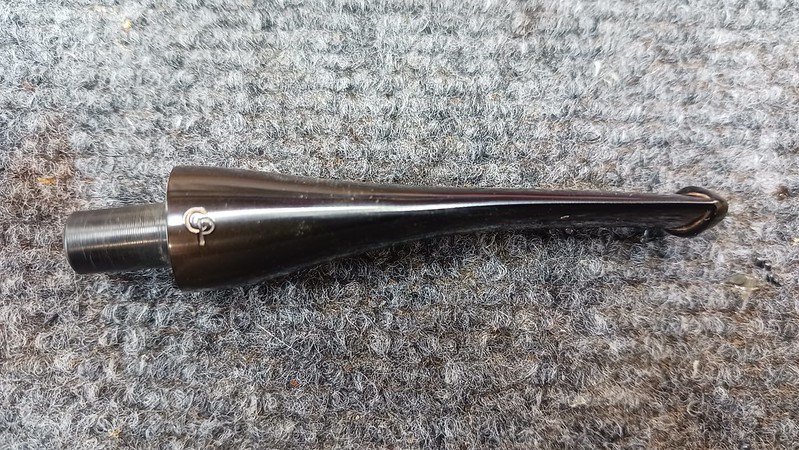
The CP logo was looking a bit tired, so I revived it using a white wax filler crayon.

Before taking the pipe to the buffer, I addressed the loose fitting tenon. Very often the tenon gets compressed when the pipe stem is removed while the pipe is warm after a smoke. Reheating the tenon allows the Vulcanite to expand and “remember” its original shape. In this case though, the tenon needed a bit more encouragement to fill the shank mortise properly.
I heated the tenon by “painting” it with the flame from a lighter until it became pliable, at which point I pushed the smooth end of a drill bit into the airway. The selected drill bit was slightly larger than the airway, so inserting it into the softened tenon pushed the walls outward just enough to achieve a good fit in the shank. Be careful here not to tilt or bend the tenon to one side as it will result in a gap at the shank face.

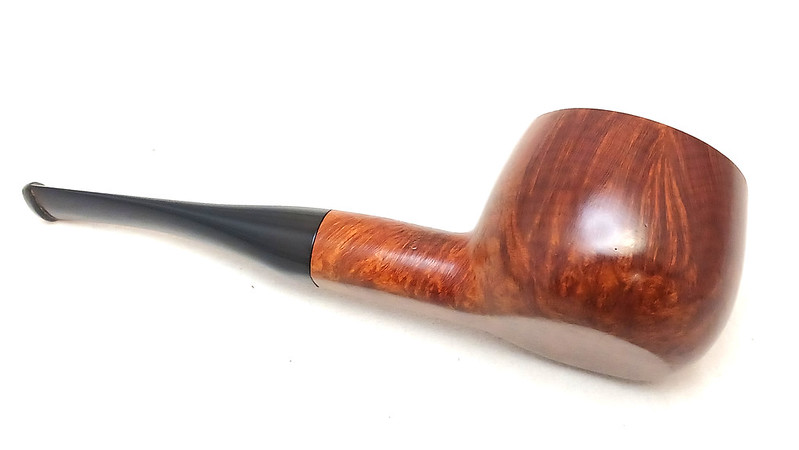
Finally I reassembled stem and stummel and took the complete pipe to the buffer for a run of Red Tripoli and White Diamond polishing compounds to erase any stray sanding marks and bring up the shine. A few thin coats of Carnauba wax finished the restoration and added a layer of UV protection for both the renewed briar and Vulcanite stem.
This Charatan’s Make Chubby Pot is now refreshed and ready to provide many more years of active service to its new steward, with only a relatively modest investment of time and labour. I hope this post encourages you to take on an estate pipe cleanup of your own!
Thanks for following along on this quick estate pipe refurbishment. Until next time, Happy Piping!
Here’s the finished pipe.


What a nice looking pipe. That was a good pickup by its owner. Now it just needs a load of Plum Pudding on a snowy evening. Great tip on enlarging the tenon. I, of course, have been complicating that job by adding a bit of CA glue and sanding it down for a tight fit. Your method seems much less invasive. Cheers!
LikeLiked by 1 person
Thanks, David. The tenon expansion trick works within certain limits, after which I too use CA glue to bulk up a skinny tenon. 👍
LikeLike