
In the tobacco pipe world, pipe shops can usually be divided into two camps – those that make pipes and those that repair/restore pipes. It is somewhat counterintuitive, but these two activities are very different and require different skill sets and different equipment. I’ve been repairing and restoring smoking pipes since 2014 but have never carved a pipe from scratch, until now.
Last year I ordered myself a pre-drilled hobby block pipe kit from Vermont Freehand. When it came in, I sketched a profile I thought might work on the side of the block, then set the kit aside until I had a bit of free time to work on it. That free time finally materialized so I dusted off the block of briar and set about turning it into a pipe.
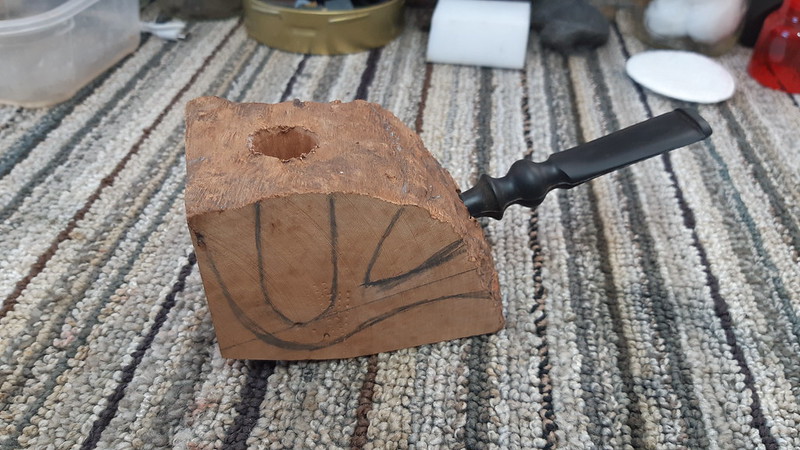
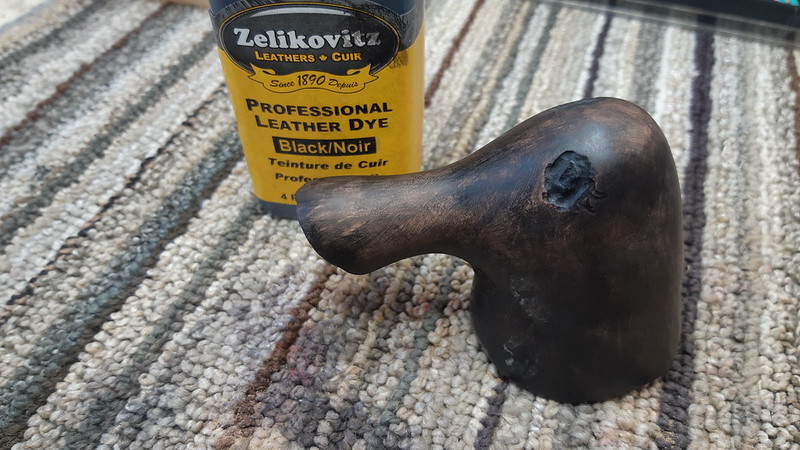
As you can see from the above closeup shot, there was quite a bit of excess briar to remove to get the block looking less like random chunk of wood and more like a freehand pipe. A bandsaw would have come in very handy for removing the bulk of the extra material, but I don’t have one. What I DO own is a small benchtop 1″x30″ belt sander, which I used to rough out the basic shape of the stummel fairly quickly.


The belt sander did a decent job hogging off the extra briar, but I needed a different tool to carve the stummel’s flowing contours. For this, I mounted a sanding disk onto the shaft of my buffing wheel, repositioning the dust collection boot to capture the worst of the sanding dust.

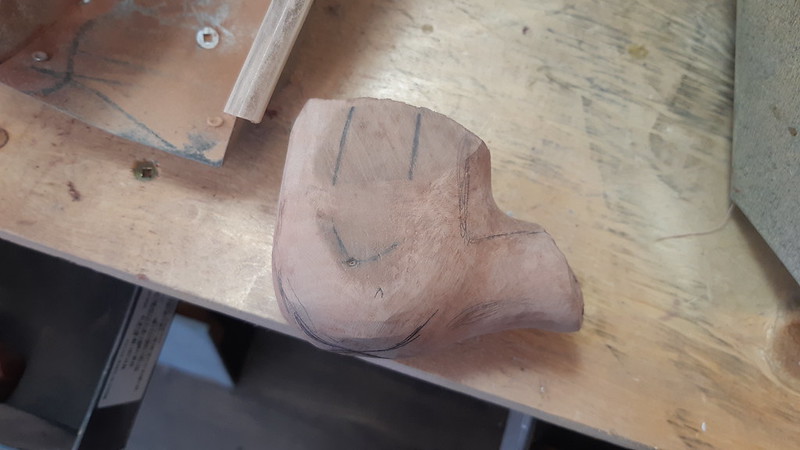
Starting with a 150-grit sanding disc, I refined the rough-carved shape of the stummel one pass at a time. As the stummel got closer and closer to the final shape, I switched from power sanding to hand tools, pulling out a handful of files and sandpapers. The needle files in this pic below were particularly useful for working in the “elbow” between the rear of the bowl and the top of the shank.


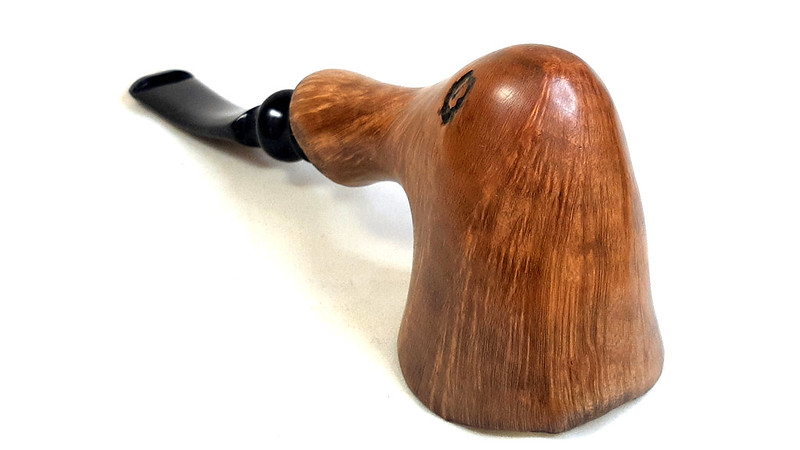
As I worked, I noticed the grain of the briar coming into focus. This shot shows the stummel after a quick wipe with isopropyl alcohol. The alcohol temporarily shows what the grain will look like after the briar is finished – This block has some really nice vertical grain!

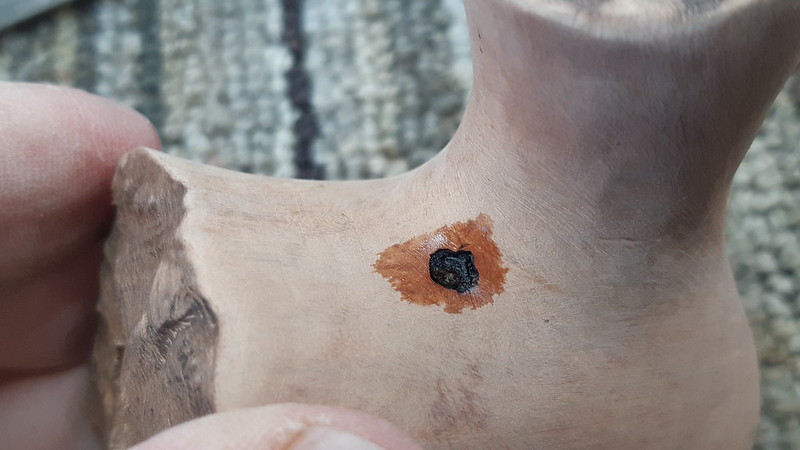
If you speak to a pipe maker long enough, the subject of sand pits, occlusions and cracks will inevitably arise. This block showed no outward signs of flaws when I began shaping it, but as more briar was removed, I uncovered a trio of small flaws – one behind the bowl and two on the bowl’s bottom. While I was slightly disappointed by these blemishes, I was not surprised when they made their presence known. A perfect piece of briar is indeed a rare thing.

To seal the sand pits, I hit each with a drop or two of regular, thin CA glue.
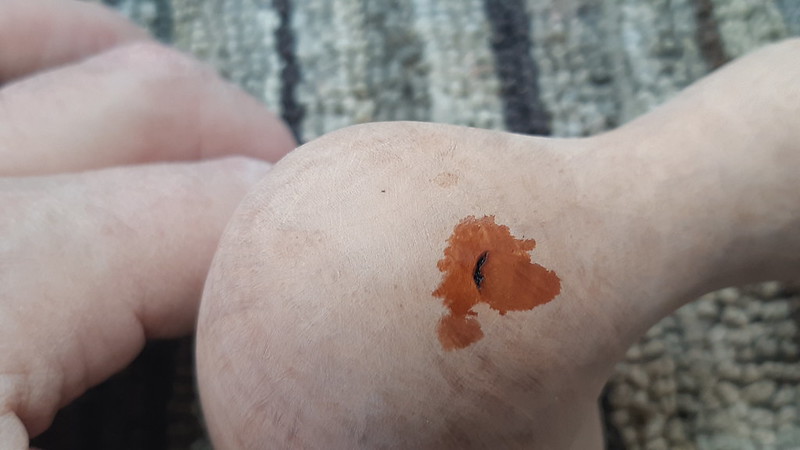
Sometimes the CA glue on its own is enough to fill small flaws, but in this case the pits needed a bit more help. To fill them completely and prepare for the next step in the process, I mixed thick CA glue with briar dust and applied the patch mixture to all three pits.


While I waited for the patches to cure, I worked on the stem, knocking off the molding marks from the seams and sanding the Vulcanite from 220 through 2000-grit. A final buffing would bring up the shine the rest of the way.

I also used a countersink bit to funnel the end of the stem tenon. This eases the airflow through the shank and stem by reducing the turbulence of the smoke stream.

I originally had planned to rusticate a patch of briar encompassing all three fills, but after a bit more consideration I decided to rein things in a bit. In the end, I spot-rusticated the areas immediately around the fills, covering up as little of the vertical grain pattern as necessary to deal with the blemishes.


After a final hand sanding, I applied a coat of black leather dye to the entire stummel. When the stain was dry, I removed as much of the excess colour as I could, leaving the black only in the softer grain.

A top coat of tan leather dye finished off the two-part contrast stain. This was a new colour for me, and as such the finish was a bit experimental. The tan dye covered a bit more of the grain than I had hoped, but a good run on the buffing wheel allowed the darker grain to shine through.

When I was happy with the briar finish, I wipe on a layer of mineral oil to both help set the stain and give the finish depth and pop. I allowed the oil to sit on the pipe for a few minutes then hand buffed it with a towel to remove the excess oil.
With the stummel ready for the buffer, I only had one task left – bending the stem. This is a quick job, needing only a pipe cleaner nd a heat gun. The pipe cleaner, slipped through the stem’s airway, keeps the airway open during the bending process. A few minutes over the heat gun softened the Vulcanite enough to apply the bend, which was then set by running the stem under cold water.

Then it was off to the buffer where the entire pipe was treated to a run on both the Red Tripoli and White Diamond wheels to erase the fine sanding marks and bring up the shine. Finally, I applied a few light coats of Carnauba wax to add a deep lustre and a layer of UV protection.
The finished pipe is far from perfect – there are small ripples in the briar here and there, and I’m sure the shape could be refined even more than it has been – but for a first attempt at pipe carving, I’m pretty happy with the results. The stummel sits comfortably in the hand and the pipe is reasonably well-balanced and comfortable in the teeth when clenching the pipe. I’m also happy to report that it smokes really well, without any gurgles or multiple relights.
Thanks for following along with this departure from my regular restoration posts. I had a lot of fun with this weekend project. If you haven’t tried carving your own pipe from a hobby block, I heartily recommend it to any pipe smoker. While I primarily used a sanding disc to shape this pipe, it is completely manageable to accomplish similar results using just a few simple hand tools. Even better, you get to add a handmade pipe to your rack and rotation while claiming bragging rights when you show off your work at the next pipe club meeting!
Until next time, Happy Piping! Here’s the finished pipe.


Wow…Nörding move over, here comes Lemon. Very well done, Charles. You made it look easy…maybe I’ll give one a try.
LikeLiked by 1 person
Thanks David. With the hard task of drilling the stummel done for me on this hobby block, shaping the pipe was actually not terribly difficult. You’ll definitely want dust collection and/or PPE to deal with a LOT of sawdust though! 😁
LikeLike
I have an old workhorse Craftsman combo belt/disk sander with a dust guard that I connect to my vacuum. Plus it’s portable enough that I can move it out of the garage and work outside. I’ll be looking for kits today! Have you fired it up yet?
LikeLiked by 1 person
Sounds like fun! And yes, I’ve smoked mine a few times now. Performs really well!
LikeLike
Witnessing the evolution of Canada’s next great pipe carver!
Excellent job Charles!
Ps I’m already making room for a lemon hand carved in my pipe case.
LikeLiked by 1 person
Ha! I’m not sure I’d go quite that far, Adam, but I appreciate the confidence! 😄
LikeLike
And so it begins. Nice job! A little over a year ago I started with 3 hobby blocks, and then dove in to making pipes from A-Z myself from raw blocks and rod stock. I’m working on #21 and 22 now. It’s fair to say, I’m hooked. My restoration and modification stuff has slowed because of it, but I truly enjoy doing all 3. Best of luck with more of your own, Charles!
LikeLiked by 1 person
Reblogged this on rebornpipes and commented:
Nice job on this one Charles. Quite different carving a block than refitting and older pipe. Looks great. Did you enjoy it? I have done quite a few of them here but I love restoration over carving.
LikeLiked by 1 person
It was a lot of fun, and I got a nice pipe out of it. With the essential drilling already done, a hobby block is a good way to test the waters with your carving skills., for sure. I may progress to making my own pipes eventually but for now repairs and restorations keep me busy enough. 🙂
LikeLiked by 1 person
Awesome job, Charles! I love the freehand look—and that grain flame! Oooh 😉
LikeLiked by 2 people
Thanks AJ! I got lucky with the grain on this block. 👍
LikeLiked by 1 person
Another great write up and adventure and a dandy pipe too! Well done, thanks for sharing.
Eric
LikeLiked by 2 people
Wonderful pipe carving exploration Charles – thank you for sharing this wild and wooly process! 🙂
LikeLiked by 2 people