
This is the second heirloom pipe send to me for work, along with the Medico Square Pot about which I wrote last time. This time I’m working on an LL Bean Bent Billiard fitted with an interesting Smokemaster filter system first produced by Briarcraft in the USA in the early 210th Century, and again later by Grabow between the mid 1960s and 1990s. We’ll take a closer look at the system later, but for now let’s focus on the pipe itself.
As this first series of pics illustrates, the pipe arrived in two pieces, with the remains of the stem tenon lodged inside the pipe’s shank. The rim of the bowl was hidden under a crust of carbon “lava”, but not enough to disguise a fair amount of dents and dings around the outer rim edge. As the rest of the stummel was in good shape, these dents are most likely the result of carelessly knocking the pipe against hard surfaces to clear the dottle from the bowl.
The tobacco chamber held a middling amount of carbon cake, which would need to be removed before I could evaluate the briar underneath. The stem, other than the broken tenon, was in pretty good shape, with some light tooth chatter showing on both upper and lower bite surfaces near the button.

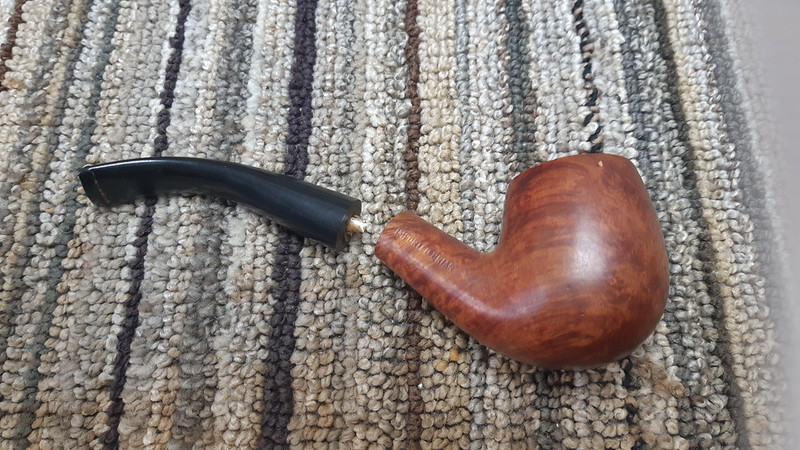

The stummel is marked “L.L. Bean” over “Freeport, ME” on the left shank and “Imported Briar” on the right. The stem carries an orange diamond logo on the left flank, a variation of the red diamond used on Smokemaster pipes.


A closer look at the broken tenon shows the details of the Smokemaster system. The stem is drilled three times, in a sort of cloverleaf pattern, with the airway, fitted with a long aluminum innertube, on top of two shafts designed to hold the ends of a folded pipe cleaner underneath.


I picked out the remnants of the old pipe cleaner and inner tube from the stem face. The inner tube was trashed, but the pieces came out easily enough.


I needed to use a wood screw to extract the broken tenon from the pipe shank. While obscured by dirt and tars, the inner tube and pipe cleaner were still in place on the front end. The Smokemaster setup is one attempt among many to provide the Holy Grail of pipe smoking, a “cool, dry smoke”. I would not, however, be attempting to recreate the triple-drilled tenon when I repaired the stem.

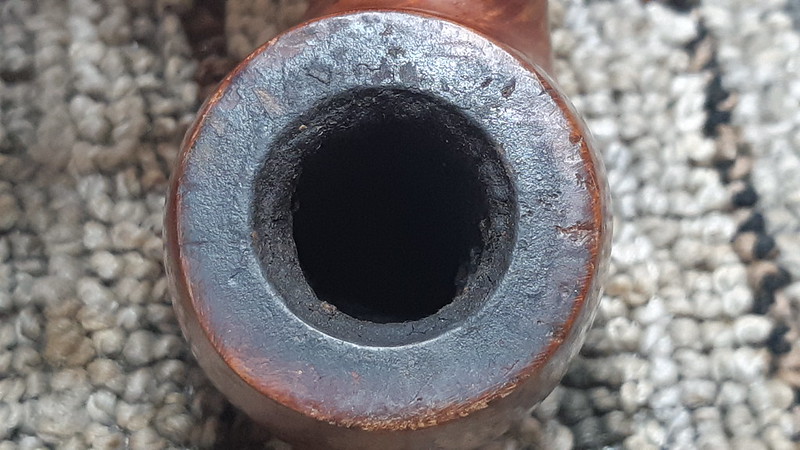
Setting the stem aside for the moment, I moved to the stummel and reamed away all the old carbon cake from the chamber. This is a critical part of any estate pipe restoration, and one that can go either way. Sometimes I find perfectly protected briar under the cake, and sometimes the cake is hiding larger problems.

Unfortunately, this pipe is an example of the latter. After reaming the chamber back to briar, I discovered a rather large pit in the chamber wall below the rim. This is an unusual place to find a burnout, which typically occurs near the bottom of the chamber; my guess is that there was some sort of natural flaw in the briar that made it more susceptible to heat damage. The pit would need to be repaired before the pipe could be used again.

As you may have noticed in the above pic, I also scraped the worst of the carbon lava from the rim surface. Thankfully, there was no major damage hiding underneath, though the dents around the outer rim edge became much easier to see. The stummel’s internals also got a good cleaning, using 99% isopropyl alcohol and a handful of cotton swabs and pipe cleaners.

To finish off the cleaning and remove the ghosts of tobaccos past from the briar, I packed the bowl and shank with cotton wool and filled the pipe with more isopropyl alcohol and let it sit overnight.

When I came back to the shop the next morning, the alcohol had done its work, dissolving the remaining tars inside the pipe, which were then trapped in the cotton. I removed the spent cotton and set the stummel aside for a bit to air out and allow the remaining alcohol to evaporate.

While the stummel rested, I worked on replacing the stem tenon. I began by running a couple of pipe cleaners through the stem’s airway to clean out the old tars. No picture of that, but it wasn’t very dirty. I then moved on to drilling out the airway at the stem face to make a mortise into which I could glue the new Delrin tenon. This proved a bit tricky, as the triple bore of the Smokemaster system tended to catch the edges of the drill bits. I was surprised by how deeply the triple bore extended into the stem. I drilled a roughly 5/8″ mortise for the new tenon and a look down the airway showed that the triple bore continued on for a ways yet.

With the stem prepped, it was time to make the new tenon. I chucked a section of Delrin rod into the drill press and used a shop-made jig to drill a 1/8″ airway through the rod.


I then used my tenon-turning tool to cut down the stem end of the tenon to roughly 1/4″ (6mm). A bit of fine tuning on the shank end of the Delrin tenon provided a snug but not overly tight fit in the shank mortise.


A few minutes with a flat needle file tweaked the stem end of the tenon to ensure that the stem slid easily over the tenon and sat flush with the shank face for a light-tight fit at the transition. When I was happy with the fit, I cut a few slots around the circumference of the tenon to provide a bit of mechanical grip for the epoxy used to glue the tenon into the stem. I also cut a few divots into the inner walls of the stem mortise to encourage the epoxy to lock the parts together permanently.


A dab of petroleum jelly on the shank face helped protect the briar from any epoxy squeeze-out during glue-up. After all this work, permanently gluing the stem to the shank would not be good!

After mixing a small batch of two-part epoxy, I applied the glue to both the tenon end and the inside walls of the stem mortise, then slipped the stem into place. After aligning the stem and shank properly, I held the parts in position for a few moments until the epoxy started to grab hold. A bit of masking tape held the stem in position as I gently clamped the pipe upright in my vise overnight to allow the epoxy to fully cure before removing the stem.

The next day, I gently removed the repaired stem from the shank and drilled the excess epoxy from the airway. This usually restores the open draw of air through the stem, but here the draw remained restricted – a side effect of the original triple drilling. To get things moving, I straightened the stem and used a 1/8″ drill bit, a similarly sized round needle file and my slot cutting tool to gently open the airway beyond the new tenon.

I hit a snag when re-bending the stem to its original shape. The stem’s airway was very close to the top of the stem – a necessity for the original triple drilling. By opening up the airway I inadvertently thinned the vulcanite between the top of the airway and outer surface of the stem. This thinner area cracked during the bending process. Ouch.


To repair the crack, I first slid a pipe cleaner dipped in petroleum jelly through the stem to prevent the patch mixture form filling the airway. Then I filled the crack with a mixture of thick CA glue and charcoal powder, ensuring that the patch extended beyond the edges of the damaged area.

The CA glue set quickly but would need time to cure completely before I could smooth out the repair. I set the stem aside carefully and once again reached for the stummel.

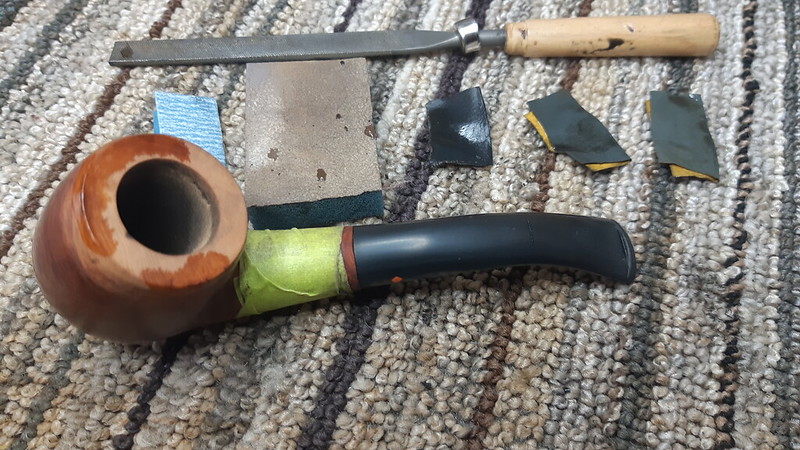
I topped the rim lightly to remove the last of the carbon lava and smooth out the worst of the dents and dings in the rim surface.

This pic shows the rim after topping. The outer edge needed some more attention to sort out the larger dents. I took a combined approach here, both sanding out some of the damage and filling the remaining small irregularities with CA glue.

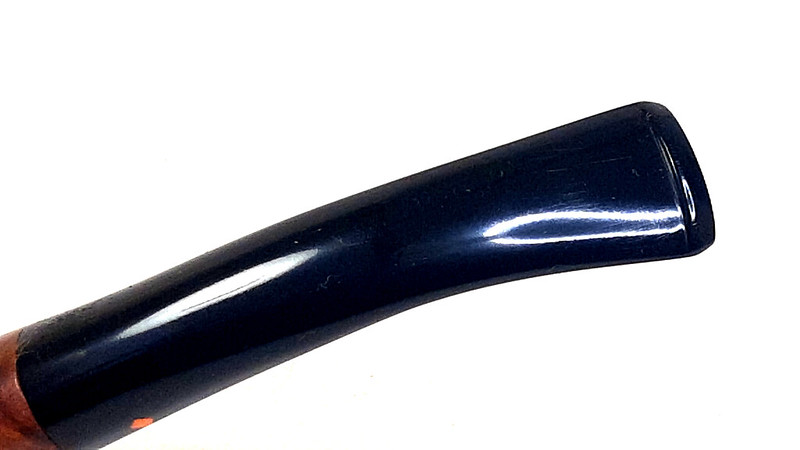
I let the CA glue dry on the rim, then used files and various grades of abrasives to smooth out the stem patch and begin the polishing process. This pic shows the stem sanded to 2000-grit. You can also see one of several layers of thin CA glue I applied to the outer rim to fill the small dents.
A closer look at the stem surface identified a few bubbles in the patch as well as an area of file marks that would need to be dealt with. A skim coat of thin CA glue over the entire area filled these tiny imperfections and allowed me to sand the stem perfectly smooth.

I was getting towards the end of the restoration at this point. The briar was once again smooth and whole, as was the stem. The only remaining task was to sort out the burnout in the chamber wall. For this I mixed up a small batch of pipe mud and pressed it into and over the pit in the briar.

When the pipe mud was dry, I sanded the chamber walls smooth, then applied a quick bowl coating of maple syrup and activated charcoal powder. The bowl coating serves two purposes – first, it encourages the development of a new carbon cake layer that would protect the briar and the pipe mud repair. Secondly, it makes the chamber look great!


I let the pipe sit overnight again to give the bowl coating time to dry and harden before I reassembled the pipe and took it to the buffer for final polishing. I gave the entire pipe a run on both the Red Tripoli and White Diamond wheels, followed by several light coats of Carnauba wax to shine and protect.
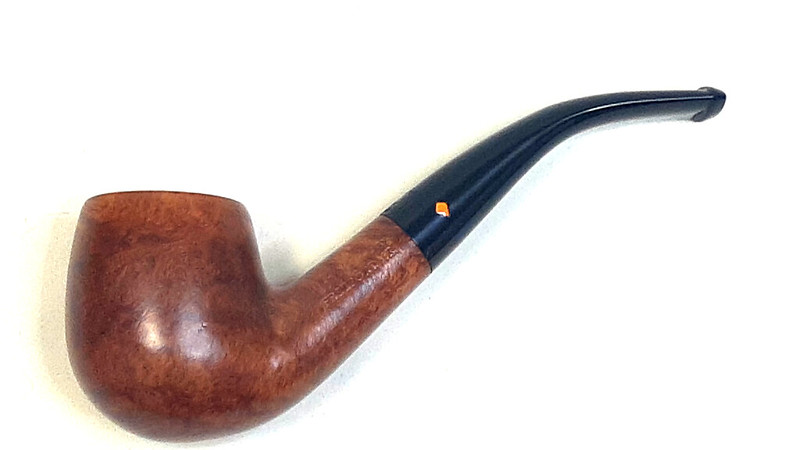
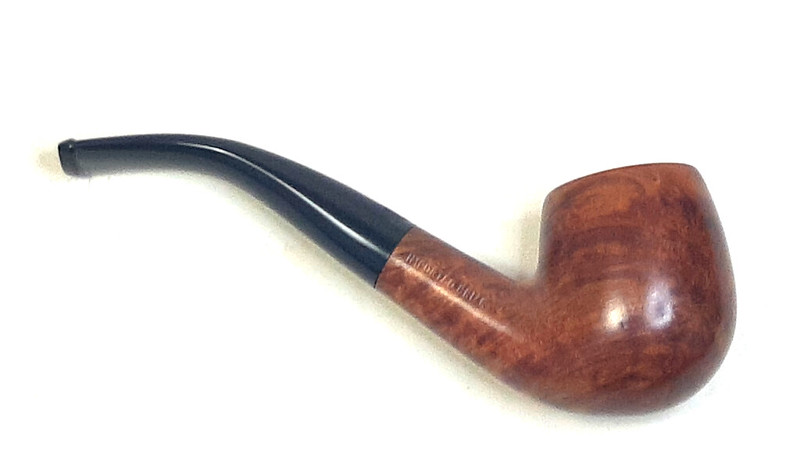
The finished pipe is looking much improved after its time on the bench. Back in one piece, the refreshed briar, now clean, smooth and polished, glows almost as much as the jet black Vulcanite stem. A few small handling marks and other scars still show here and there, but I think that’s appropriate for a pipe handed down from father to son. It would be a shame to erase all signs of the pipe’s history in this case.
This LL Bean Bent Billiard has been returned to its steward, who is thrilled to have both of his father’s pipes in his rack and rotation. Mission accomplished!
Thanks for joining me for this estate pipe restoration. I hope you enjoyed following along. Until next time, Happy Piping!
Here’s the finished pipe.


Reblogged this on rebornpipes and commented:
Reading this restoration I was reminded of a few of the LL Bean pipes I have worked on. Nice job on the new tenon and removing the strange metal tubes! Well done.
LikeLiked by 2 people
Thanks, Steve. The pipe cleaner filter setup was certainly inventive but it was a bit of a bear to drill out!
LikeLiked by 1 person
Great series of solutions to problems arising in the course of the restoration – thank you for sharing your process Sir!
LikeLiked by 2 people