
Not all estate pipes need major refurbishment work to bring them back to life, but, like everything else, benefit from regular cleaning and, every so often, a bit more involved TLC. The pipe on the worktable this time is a handsome Dunhill Chestnut in a classic Straight Billiard shape. It presented in reasonably good estate condition, but was showing signs of age and use – a slightly irregular inner rim, some darkening of the briar, and a handful of shallow but noticeable tooth dents in the stem.


The pipe is stamped on the left shank with “DUNHILL” over “CHESTNUT”, and on the right shank with “51033” followed by “MADE IN” over “ENGLAND22” with the date code in superscript. From this info, we can tell that this Dunhill was made in 1982 (1960 + 22 = 1982). The shape number breaks down as a Group 5, Taper stem, Shape 03 Billiard.
Interestingly, the Dunhill website says this about the Chestnut line: “Introduced in 1983 to commemorate the closing of the Cumberland Road warehouse. The same stain and stem material as used on the Cumberland, but on a smooth bowl.” The roll-out date doesn’t jive with the date stamp on the pipe itself, but even Dunhill is not infallible, with many examples of unique stampings and contradictory information.


Without dwelling too much on the dating irregularity, I moved on to cleaning the pipe. The chamber had only a light cake, which surrendered easily to a bit of sandpaper wrapped around a dowel. Similarly, the shank and airway were very clean for an estate pipe, so these first cleaning tasks were completed so quickly I forgot to take my usual pictures. I did remember to snap a shot of the stem after cleaning the airway there with a few pipe cleaners dipped in isopropyl alcohol.

I used a scrap of worn 800-grit wet sandpaper to remove a thin layer of smoke residue from the rim of the bowl, then used 220-grit paper and 0000 steel wool to smooth out the rim’s inner edge to restore a round appearance.

With most of the work on the stummel complete, I packed the bowl and shank with cotton wool and filled the pipe with alcohol to remove any lingering tars and odour.

While the stummel sat for its deep cleaning, I worked to repair the tooth dents on the Cumberland stem. The pics below show how a light sanding makes the low spots stand out sharply. Judging by the shape and size of the dents, I’d guess that this pipe’s previous steward liked to hold the stem in his molars.
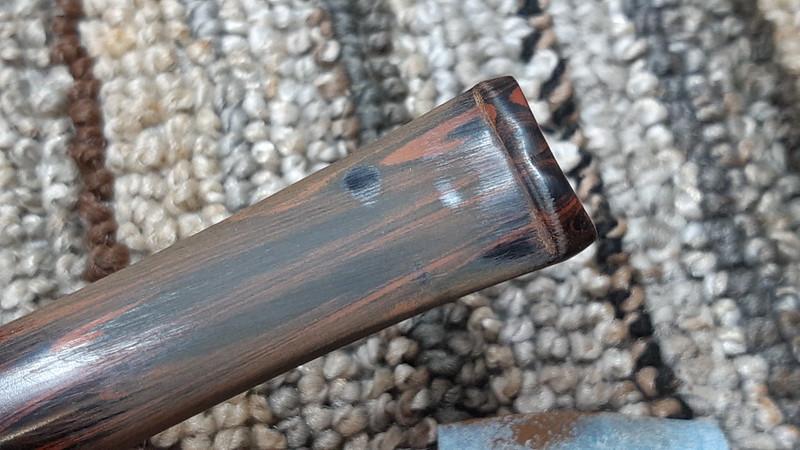

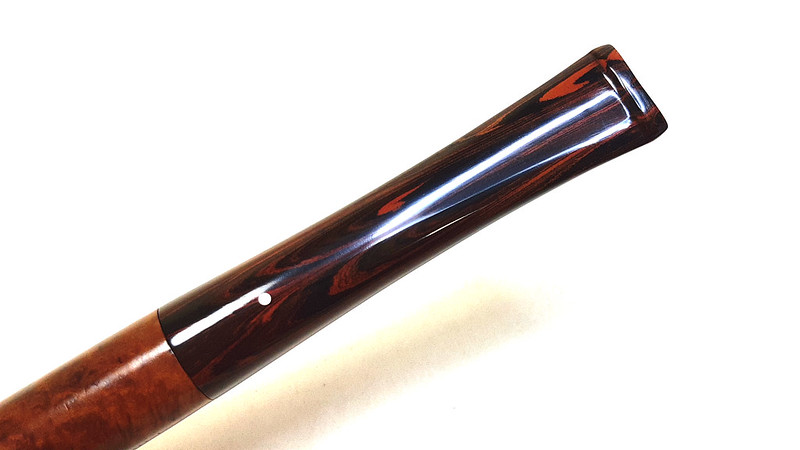
To fill the low spots, I added a skim coat of clear CA glue to the affected areas and let it cure. I needed to sand lightly and reapply the glue several times before the depressions were full and the stem smooth from end to end. When I was happy with the repairs, I polished the entire stem to 2000-grit to erase the sanding scratches and prep it for buffing.


Meanwhile, the stummel had finished its alcohol treatment, so I removed the cotton wool and used a pipe cleaner to remove any residual loose tars from the shank and airway. A bit of alcohol on a cotton pad removed the old wax and light dirt from the stummel’s exterior. The original finish was in good shape underneath, but benefitted from a wipe of mineral oil to add some lustre and inject some moisture into the briar.

Then it was time to reassemble the pipe and take it to the buffer for a light run on both the Red Tripoli and White Diamond wheels. A few light coats of Carnauba wax added shine and a layer of protection to the freshly refurbished pipe.
Now looking every inch the classic Dunhill Billiard that it is, this 1982 Chestnut is on its way to a new steward for another lifetime of faithful smoking companionship. From a restoration viewpoint, it stands as a good example of the effect of a good cleaning and some relatively straightforward touch-up work.
Thanks for following along with me on this estate pipe restoration. I hope this post inspires you to look at the pipes in your own collection and show them a bit of extra attention. This sort of periodic TLC will not only help maintain the value of your pipes but will make them much more enjoyable to smoke.
Until next time, Happy Piping! Here’s the finished pipe.


Wow. Thank you for this post. Very interesting. Beautiful job.
LikeLiked by 1 person