
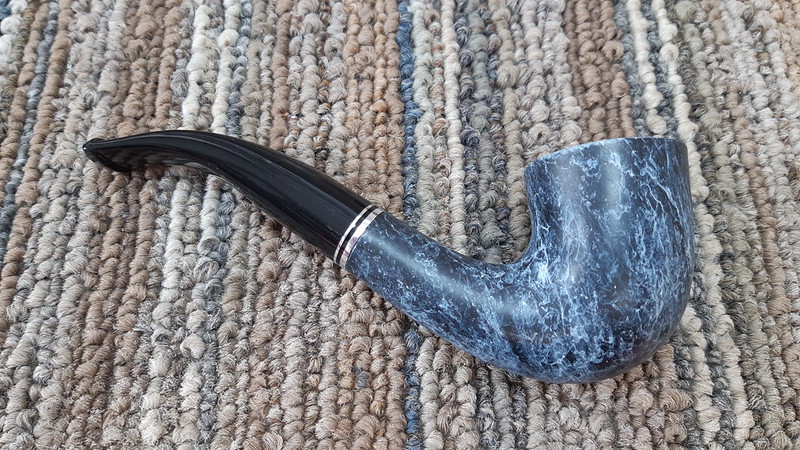
Pipe manufacturers are constantly looking for ways to make their products more appealing to a wider audience – new shapes, new finishes, new colours, etc. The Chacom Atlas Calabash on the worktable today demonstrates one such innovation, the dip-dye finish.
First seen in the 1990s, the finish process seen here consists of a solid base coat topped with a multicolour, marbled finish coat achieved by floating the colours on top of a water bath, then dipping the stummel into the water. The coloured finish clings to the pipe when it is removed from the dip, et voila! A marbled finish.
This pipe was sent to me for work on the rim. The marbled topcoat of finish had begun to peel up – sadly a not uncommon occurrence with this type of finish – and the pipe’s owner had attempted to halt the damage by applying a clear coat of some kind to the rim surface. Unhappy with the results, he contacted me for assistance.


The pipe is stamped “Chacom” over “Atlas” on the left shank. A football-shaoed COM stamp on the underside of the shank reads “Made in France”. A shape number, “863” is stamped at the end of the shank.


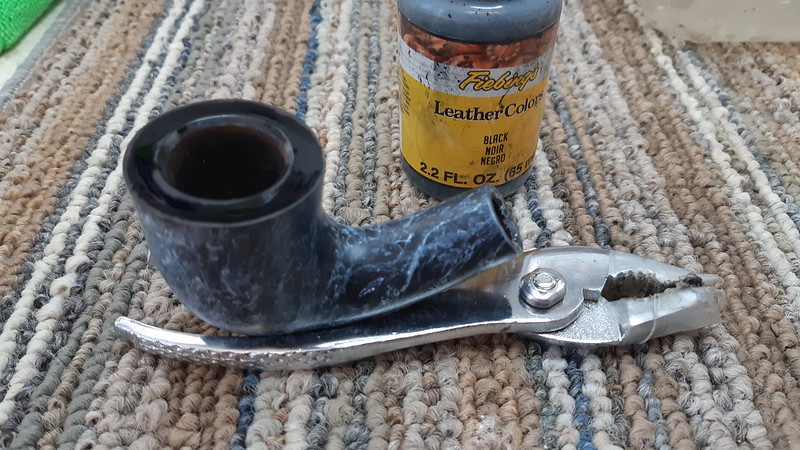
Now let’s take a closer look at that rim. Here again is what the rim looked like when the pipe arrived on the worktable. The finish is uneven and a bit lumpy due to the peeling dip coat underneath the clear layer.
I was able to remove the clear coat applied by the pipe’s owner using nail polish remover and a few cotton swabs. The result is a less glaring rim, but the damage to the dip-dye layer is evident.

Unfortunately, making spot repairs to this type of pipe finish is not possible. Even if a repair shop could duplicate the original process, the pipe would need to be completely stripped and refinished to achieve a factory look. That’s a lot of effort to put into a finish that will, ultimately, peel again with use.
All is not lost, however. In this case the damage is limited to the rim surface. This provides a way forward to refinish the rim in a way that compliments the original marbled finish. I began by gently wet-sanding the rim using 600-grit sandpaper on the topping board to strip the rim back to bare briar. This removed the damaged finish and leveled the rim surface.


From here, the rim can be refinished to taste – it can be left natural, stained a traditional wood colour, or, as I did here, stained black to match the undercoat used in the factory dip-dye process. I simply wiped on a bit of Fiebing’s Black leather dye with a cotton swab and left the stummel to sit for a bit.
When the dye had dried, I hand buffed the excess from the rim with a towel then applied a light coat of mineral oil to help set the colour and inject a bit of moisture into the briar.

I allowed the oil to sit on the rim for a few minutes, then wipe away the excess with a clean rag. I again left the pipe to sit for a couple of hours to let the briar find its new equilibrium before taking it to the buffer. I polished the entire pipe with Red Tripoli and White Diamond compounds, then applied a few light coats of Carnauba wax to protect the new finish.
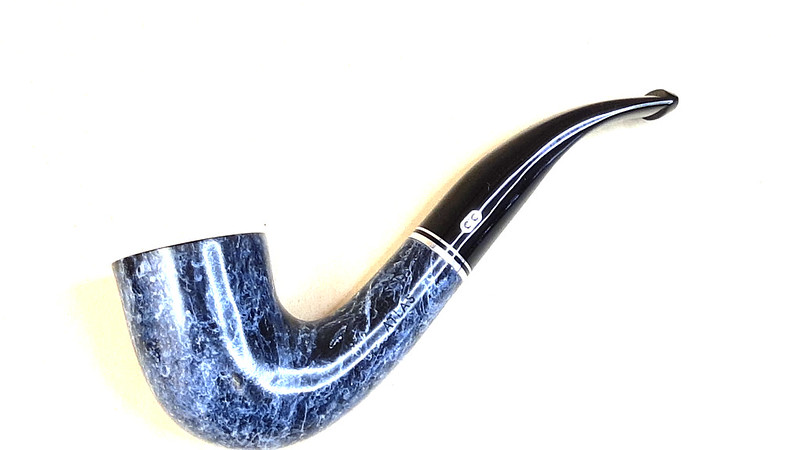
The finished pipe looks great after this quick rehabilitation. The rim is smooth and the finish is even; unless I knew otherwise, I would take the new look as factory original. That’s job done!
Thanks for joining me for this quick pipe rehab post. I have used this approach on several pipes with this sort of dip-dye finish and think it would be a valuable addition to every repair tool box.
Until next time, Happy Piping! Here’s the finished pipe.


Nice save, Charles. The black rim is a better look.
LikeLiked by 1 person
Thanks Dal. When it’s bit possible to recreate the original finish, it’s time to get a bit creative. 😁
LikeLiked by 1 person