
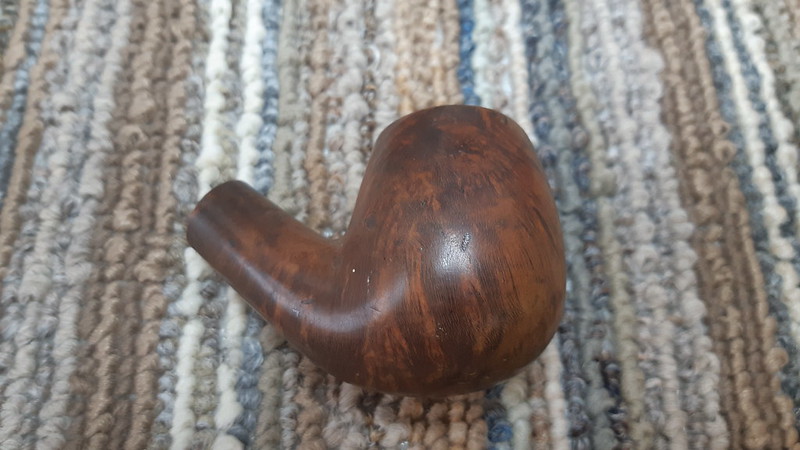
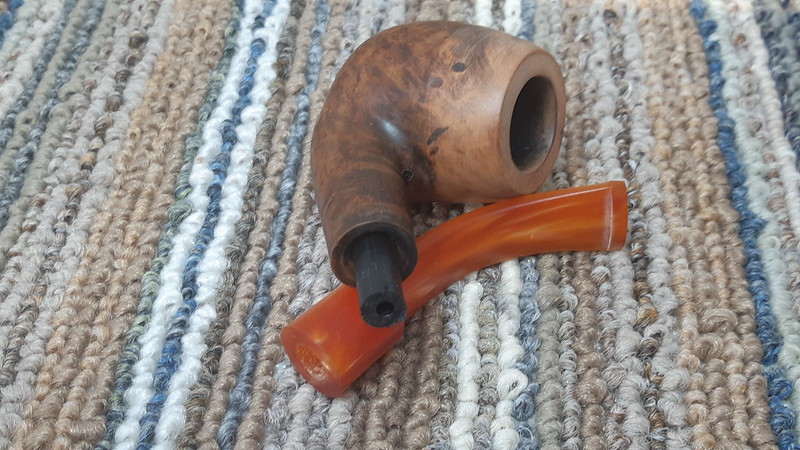
Temporarily in between repair jobs the other day as I waited for a parts order to come in, I rummaged around in my refurb box and came out with a rather battered and neglected Bent Billiard stummel. An old “Pipes by Lee” briar, the original stem had departed long ago; I had, however, recently jumped on a mixed lot of acrylic stems during a Vermont Freehand clearance sale. I decided that one of those stems and this old stummel would be used to create a “new” pipe.
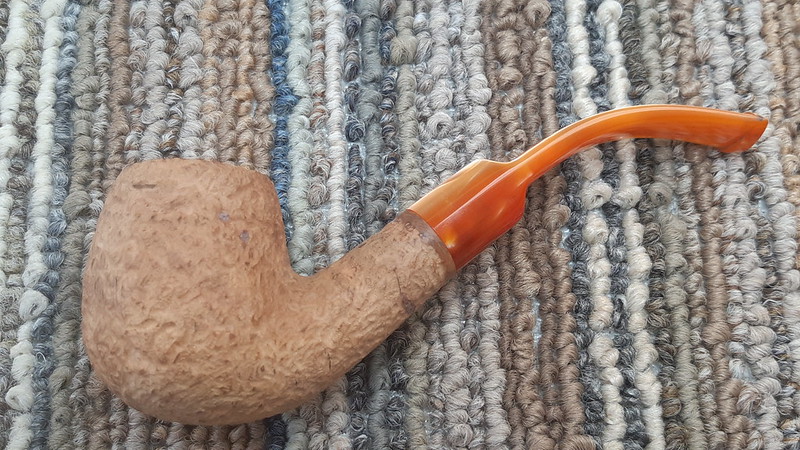
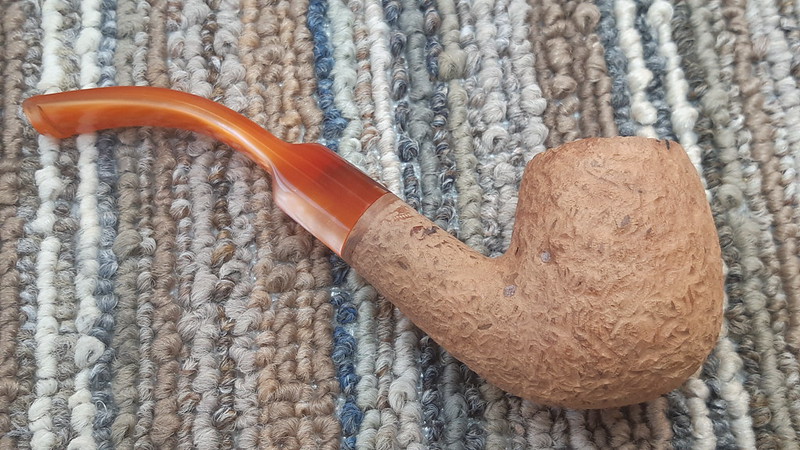
First off, let’s have a look at the stummel. According to Pipedia, Pipes by Lee was a brand distributed by Stewart-Allen Co, Inc out of New York and were graded on an ascending scale of 1 to 5 stars, inset or stamped on the stem. The stummel on the bench today would have surely been graded as a 1-star pipe.
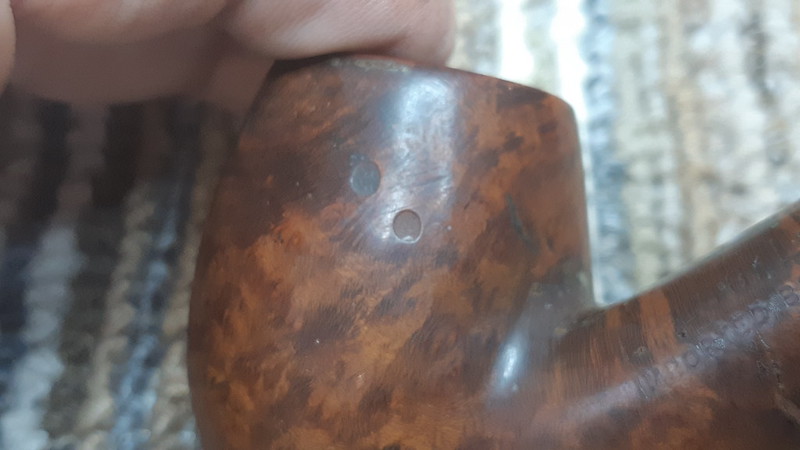
Did I mention it was ugly? Even discounting the uneven cake and lava-covered, dented rim, this stummel was aesthetically challenged as the smooth finish was marred by many putty fills, small and large, and a few extra small flaws that left the factory untreated. This was a real Ugly Duckling, but I was aiming to turn it into a beautiful swan!


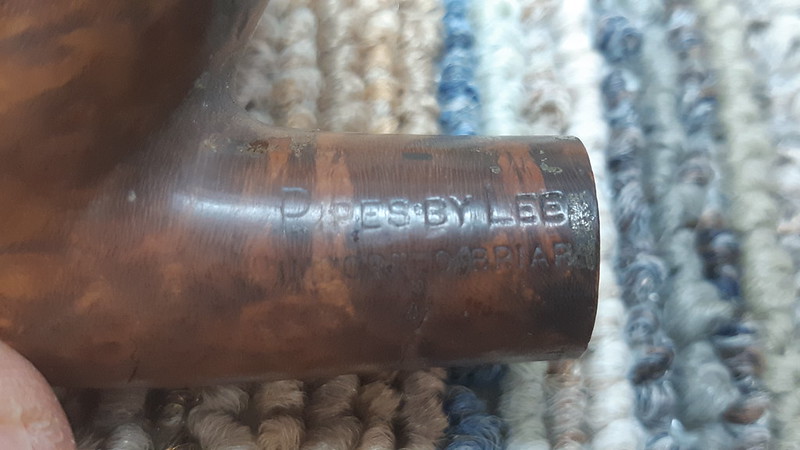
The stummel was stamped on the left shank with “Pipes by Lee” over “Imported Briar”, all in block letters.
I started the cleanup by topping the bowl to remove the lava crust and then, after seeing the briar underneath, to smooth out the rim again. I followed by reaming the old cake form the chamber, where I was happy to find good, clean, solid chamber walls. The chamber floor was slightly dimpled from previous reaming, but not enough to require repair.

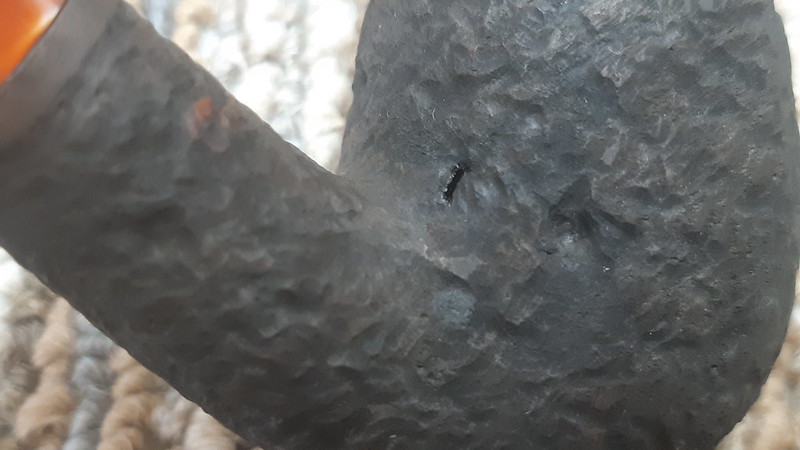
As you can see in the last pic above, the outer rim had been subjected to some good dottle-knocking against hard surfaces. Both the front and rear edges were pockmarked and worn down. I worked on the briar with some 220-grit sandpaper to erase the damage, taking care to sand around the bowl rather than up and down the sides to keep the rim even all the way around the bowl. When I was done, the rim looked much better except for a poorly placed fill that wrapped up the right fron face and up over the rim.


I finished up the initial cleanup by clearing the shank and airway with a few pipe cleaners and cotton swabs dipped in alcohol. A bit surprisingly, the internals were really quite clean.

Now that the briar was clean I could start thinking about fitting a stem. From the Vermont Freehand clearance lot I selected a rather vibrant orange swirl acrylic saddle stem that was just larger in diameter than the stummel’s shank. The stem appears to have been destined for another pipe as some point in its past before being set aside, as it had been set up with a metal tenon and bent already. It had not been polished, however.


It would have been a lot to ask that the metal tenon fit the shank on the old Pipes by Lee stummel, and it did not. I would have to install a new Delrin tenon to achieve a proper fit. The first step here was to heat the metal tenon to break the glue joint holding it into the stem face. The tenon came out cleanly, as I added it to my parts stores. It will doubtless be used on a future project.


This next pic shows the stummel with the stem and a tenon blank I made up in the shop from Delrin rod. Premade Delrin tenons are available to purchase from various pipe supply houses, but it is much less expensive to by rod stock and cut and drill it in house.

I used a countersink bit to funnel the front end of the tenon. When installed, the funnel will help to smooth the flow of smoke through the pipe.

I caught a break here – the Delrin tenon blank only needed a bit of tweaking with sandpaper to fit snugly in the shank.
I scored the stem end of the tenon to improve the grip of the epoxy on the slippery Delrin, then smeared a bit of petroleum jelly onto the stem face to protect it from any errant adhesive. This is a quick step that can save me from gluing the stem to the shank permanently.

I mixed up a small amount of two-part epoxy and applied it to both the exterior of the tenon and the interior of the stem mortise, then carefully slipped the stem into place. I aligned the stem on the shank and held the parts together until the epoxy took hold. Then came the hard part – not fiddling with the pipe until the epoxy had cured. I clamped the pipe, stem upright, in the padded jaws of the vise and left it alone overnight to give the epoxy time to cure.
When I came back to the pipe the next day, I twisted the stem out of the shank and cleaned up the petroleum jelly. I remounted the stem, then spent some time with files and sandpaper sizing the slightly over-large stem to the shank. It was starting to look like a pipe again! I smoothed out the sanding scratches and polished up the new stem with wet sandpaper from 400 to 2000-grit.


You may have noticed that I sanded right over the stamps on the shank during this last operation. Erasing the nomenclature from an estate pipe is not the usual course of events during a restoration. In this case, however, I decided that a smooth finish was out of the question given the number and extent of putty fills in the briar. I had plans for this pipe that would change it drastically from its original design. When I was done, this would no longer be a Pipes by Lee, so the stamps would be removed to avoid any possibility of the work being considered factory-original.
To prepare the stummel for its transformation, I examined the briar closely for flaws. I hit a few on the underside of the shank with CA glue to seal them up and prevent creeping. Because I wasn’t aiming for a smooth finish, I didn’t bother filling the many dents and dings around the bowl.

But speaking of dents and dings, let’s take another look at the stummel. I had originally hoped to execute a mixed finish of both smooth and rusticated briar, but I couldn’t identify any areas of briar large enough to leave smooth. It would all need to be rusticated.


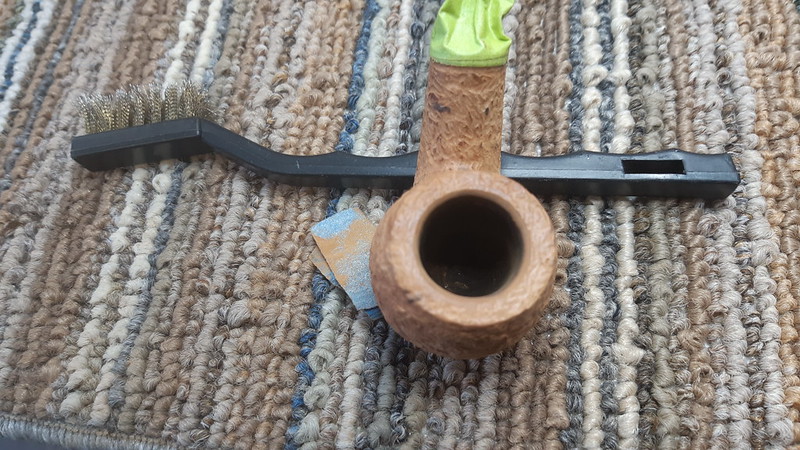
For the rustication, I mounted a small carving burr in my rotary tool and worked my way around the stummel with small, overlapping “C” shaped cuts to produce what I would call a medium texture – heavier than orange peel but not as craggy as some rustication. I highly recommend doing this work on a down-draft table if at all possible to minimize the amount of briar dust launched into the face while carving. The masking tape on the end of the shank gave me a reference line to work to and helped maintain a smooth ring of briar at the shank face.

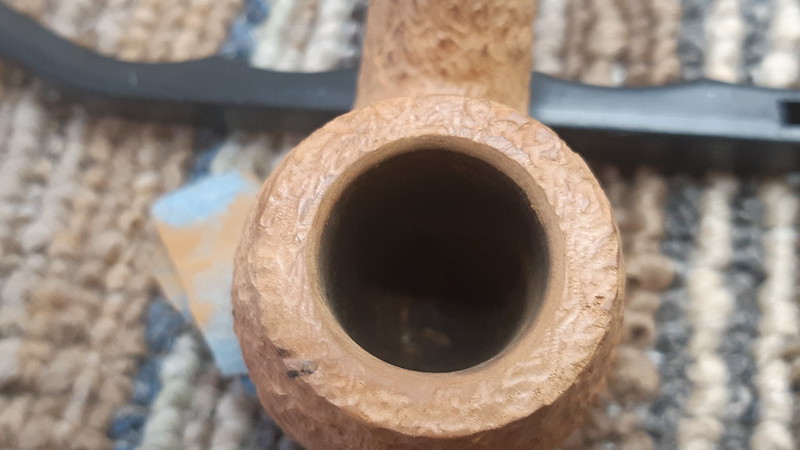
The fresh rustication looked good but felt a little jagged in the hand. I used a brass brush to knock the sharp edges off the briar. A few minutes work with a bit of 220-grit sandpaper produced a smooth bevel on the rim’s inner edge – not strictly necessary but I like the look.
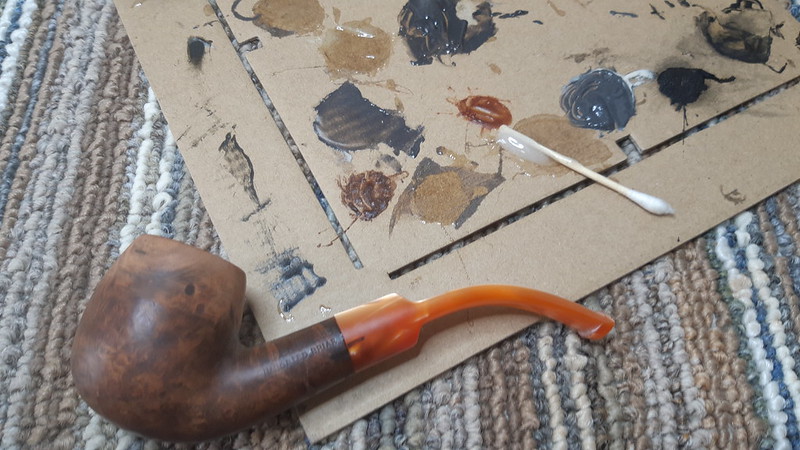
I mounted the stem and took these shots to show the progress to date. The pipe is looking good, but a few of the larger fills were still shining through.
I decided to stain the pipe with a pretty classic black-over-red colour scheme. To push the larger putty fills into the background, I coloured them black with a Sharpie marker before applying a coat of Fiebing’s Saddle Tan leather dye. I let the dye dry, then applied a fairly thick coat of Black leather dye over top.


Examining the pipe after the black stain coat has dried, I discovered a small pit at the rear of the bowl over the shank that had somehow gone unnoticed before. To remedy the flaw, I mixed a small dab of CA glue with activated charcoal powder to make a black filler which I dropped into the pit. I allowed it to cure completely then carefully textured the fill with the same carving burr used for the rustication. A little bit of black leather dye afterwards blended the repair into the new finish.


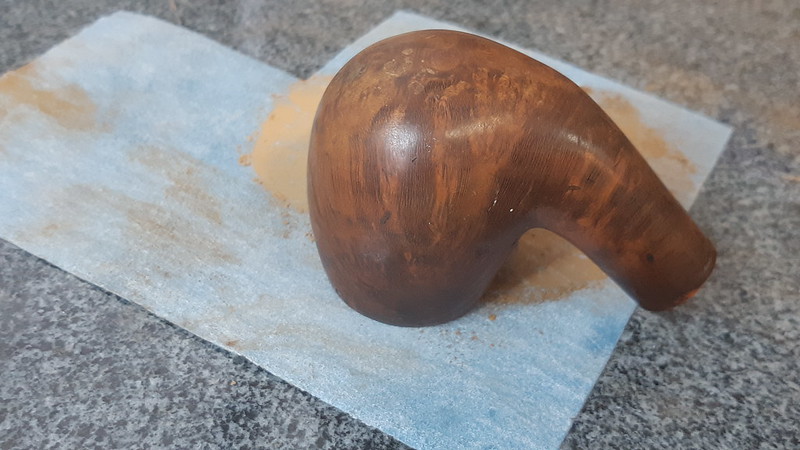
As you can see in the above pic, the black dye can be somewhat matte in appearance when dry. To enliven the finish and add some moisture to this piece of vintage briar, I wiped on some mineral oil and let it sit for a few minutes before hand buffing away the excess.

As I’ve mentioned in previous posts, I have found it beneficial to allow a pipe to rest for at least a few hours or overnight at this point to give the briar time to find its new equilibrium. I did so for this pipe, then came back to it to finish the project. Before taking the pipe to the wheel, I scrubbed the exterior lightly with some 0000 steel wool to remove the black dye from the smooth rim bevel and shank ring as well as the high points of the rustication. This allowed the red undercoat to shine through. Juxtaposed with the orange stem, red took on a decidedly orange tone as well, tying the design scheme together nicely with the black.
At the wheel, I gave the stem a run of both Red Tripoli and White Diamond compounds to erase any stray sanding scratches and bring the surface to a high gloss that accentuated the swirling colours in the acrylic. The stummel got a light run on the White Diamond wheel as well, then the entire pipe was given a few light coats of Carnauba wax to protect the new finish and add some shine.
The finished pipe, which I have dubbed “Tangerine Dream”, looks nothing like the beaten and bedraggled Pipes by Lee stummel with which I started this journey. Gone are the dirt, grime and old cake. Gone too are the many fills and flaws which detracted from the stummel’s appearance, replaced by rustication and a fresh colour scheme. The orange swirl acrylic stem looks like it has always been part of the pipe, and injects a much-needed burst of colour and vibrancy.
I’m really pleased with the finished piece, which has become a birthday gift to myself. I will christen it shortly with a bowl of jealously guarded MacBaren’s Vintage Syrian tobacco.
Thanks for joining me for this fun and rewarding project – more of an estate pipe reinvention than a restoration. I hope you enjoyed following along. Maybe it has even inspired you to try your hand at a similar project of your own.
Until next time, Happy Piping! Here’s the finished pipe.


https://youtu.be/s1Mj2t9RnFg
LikeLiked by 2 people
There’s a flashback to childhood, Todd! Thanks!
LikeLike
Incredible work, Charles. I have a Julius Vesz that is very similar and it feels great in-hand. How long did the rustication process take you? And..is that Vintage Syrian leftover from the partial tin I gave you a couple years ago? I really enjoyed this post, thanks.
LikeLiked by 2 people
Thanks, David. Rustication goes pretty quickly with a dremel – sometimes whether you like it or not! 😄 This one took about 25 minutes or so. And I’m afraid that tour sample of Vintage Syrian was used up long ago so I had to buy a pound or so to cellar when it was discontinued. For science, you understand. 😄
LikeLiked by 2 people
Yes, I understand….after all, I was a science teacher. 😉 As I become a more seasoned pipe smoker, I’ve noticed my tobacco preferences have evolved. I wish I had had the foresight to stock up on some of the Syrian blends. I never got to try the the .frog Morton that contained Syrian…I wish I had.
LikeLiked by 1 person