
My wife took me out for a birthday lunch a week before Christmas. We had a lovely meal and spent the rest of the afternoon wandering a local antique mall looking for pipes. I came home with a few briar goodies to add to the refurb box, one of which I could not wait to start working on.
The pipe was rather less than elegant when I spotted it hiding on a bottom shelf of the glass display cabinet in the shop. (For some reason, antique dealers around my area always seem to hide their pipes in dark corners, lower shelves or underneath other items. It’s sometimes annoying but has led to me developing some decent pipe-hunting habits.)
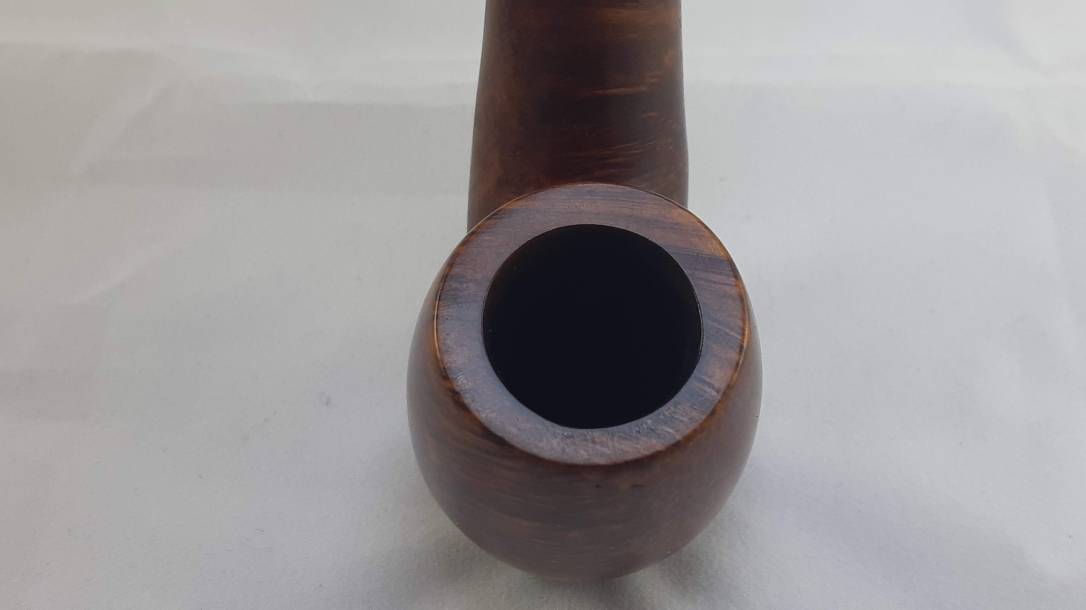
I couldn’t make out the stamping in the store, but I thought the pipe had good bones and the price was right, so I brought it home. Once on the worktable, I took this series of pictures.


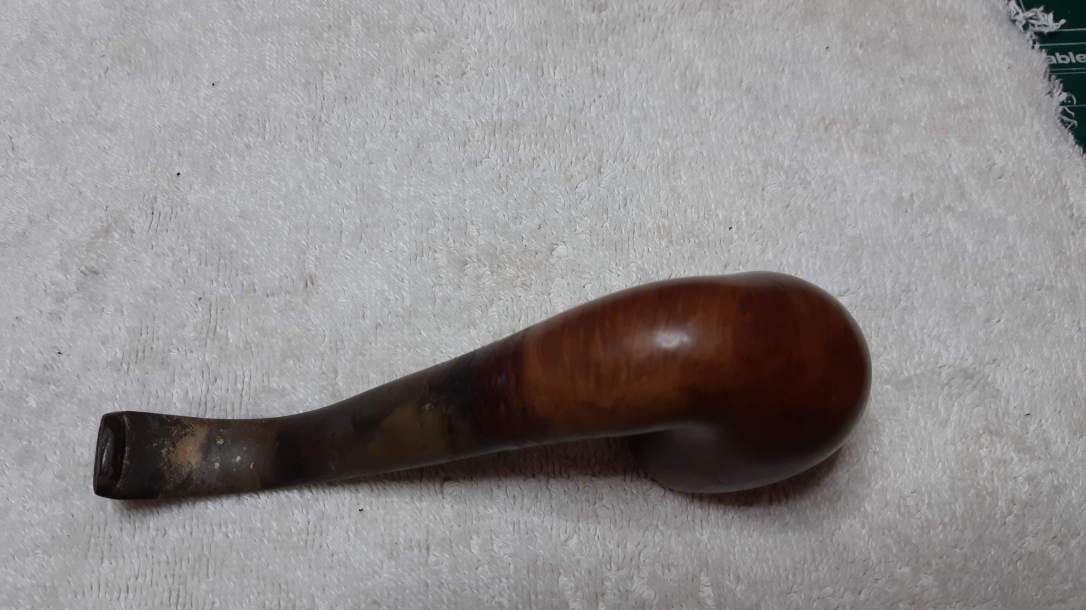


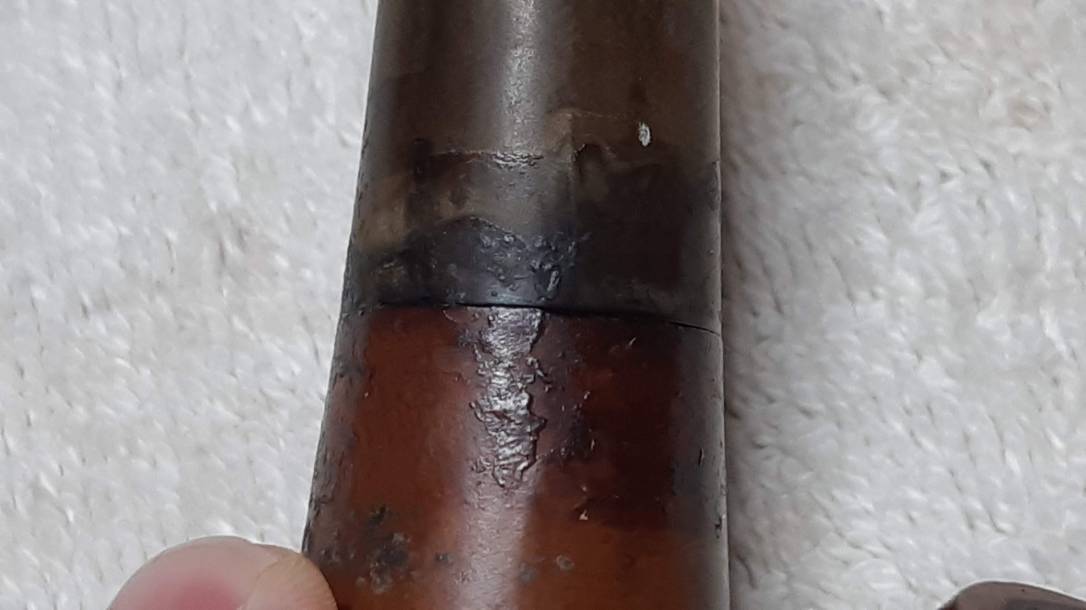


The stem was deeply oxidized, with heavy tooth dents on top and bottom surfaces. The stem/shank junction was covered in sticky tape residue and/or old glue. I was hoping it was only on the surface of the pipe and not actually holding the stem in the shank. One old fill glared out of the Birdseye grain on the left side of the bowl, but otherwise the stummel itself looked OK.
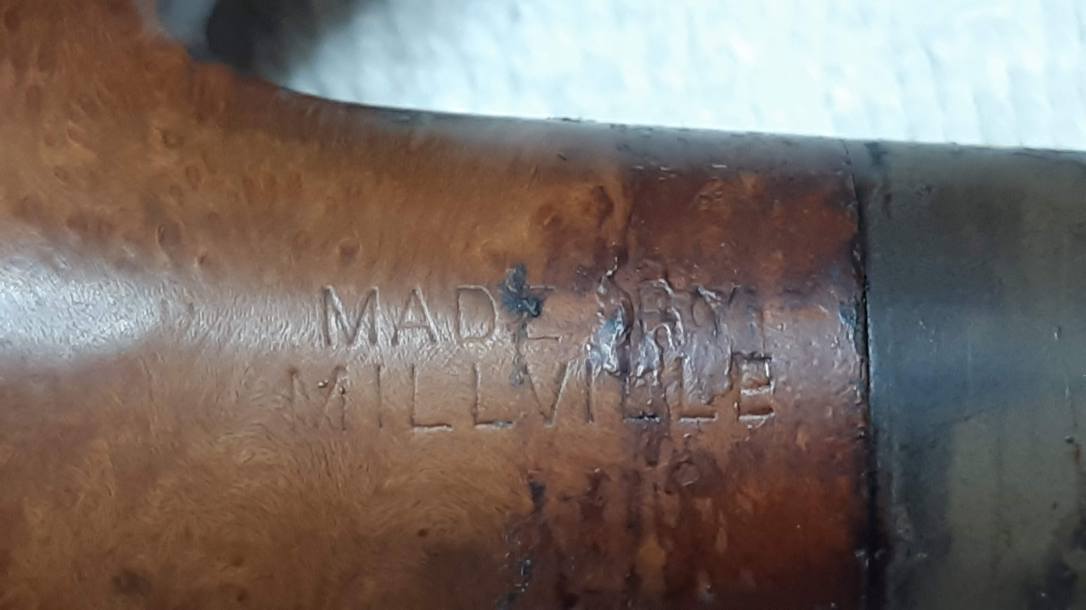
I needed to clean off the old adhesive residue to read the stamp on the left flank of the pipe. I used cotton pads soaked in alcohol to clear away the muck and reveal the marks “MADE BY” over “MILLVILLE”. There are no other stamps on the pipe – no shape number, COM stamp or anything.
According to Pipedia, Millville Pipes was started by father and son team Dennis and John Marshall in 1980. Both had worked for Charatan for years prior to going out on their own, and the fledgling company soon earned a reputation as the “Best value for money in Britain”. John Marshall officially closed down pipe production in 2013.
I couldn’t find any reference to pipes stamped “Made by Millville” like the one I had on the table, but as it doesn’t carry the usual stamps (grade/series name, COM stamp, shape number), my best guess at this point is that my pipe is a second-grade piece. Another, closer look at the stummel revealed that the chamber is bored slightly off-centre. That flaw and the noticeable fill on the side of the bowl give some credence to my supposition.
Second or not, I’m impressed to find a Millville pipe in Canada at all. Production was small and the company’s sales & distribution system was apparently not much more than a booth at St James’s Market in London. I’d love to know how this pipe made it across the Pond!
With my research as complete as I could make it, I started working on the refurbishment proper. As I had already cleaned some of the exterior in order to read the stamps, I carried on with cotton pads, alcohol and where needed, a bit of 0000 steel wool to scrub away the stubborn glue blobs without damaging the briar.
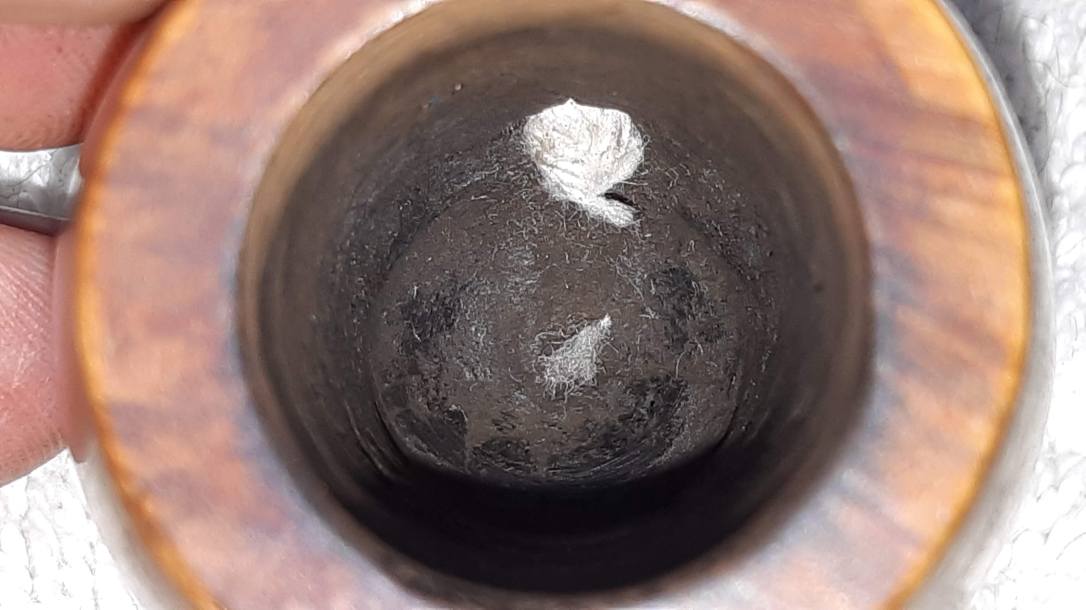
I reamed the chamber, exposing the briar walls enough to inspect for any damage. The walls looked good, but the chamber floor had been dug out by overzealous reaming at some point in the pipe’s past. The second pic below shows where a pipe cleaner pokes out the draft hole in the chamber – well above floor level.

I continued the internal cleaning with pipe cleaners, cotton swabs and more alcohol. Not surprisingly, I found a sizable deposit of tar and gunk in the shank, which thankfully surrendered easily to my flat-ended needle file used as a scraper.
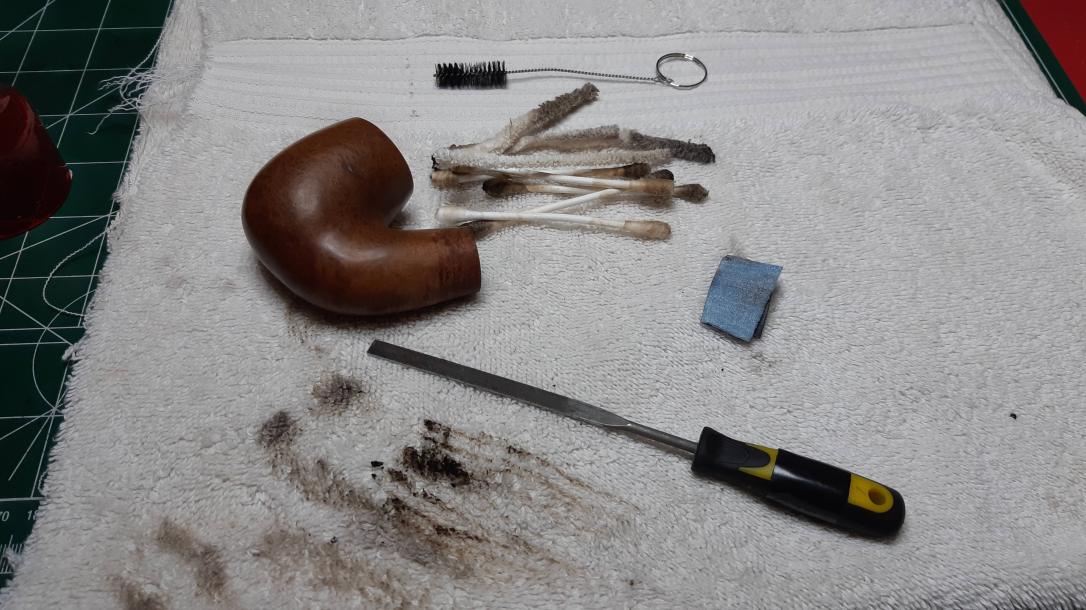
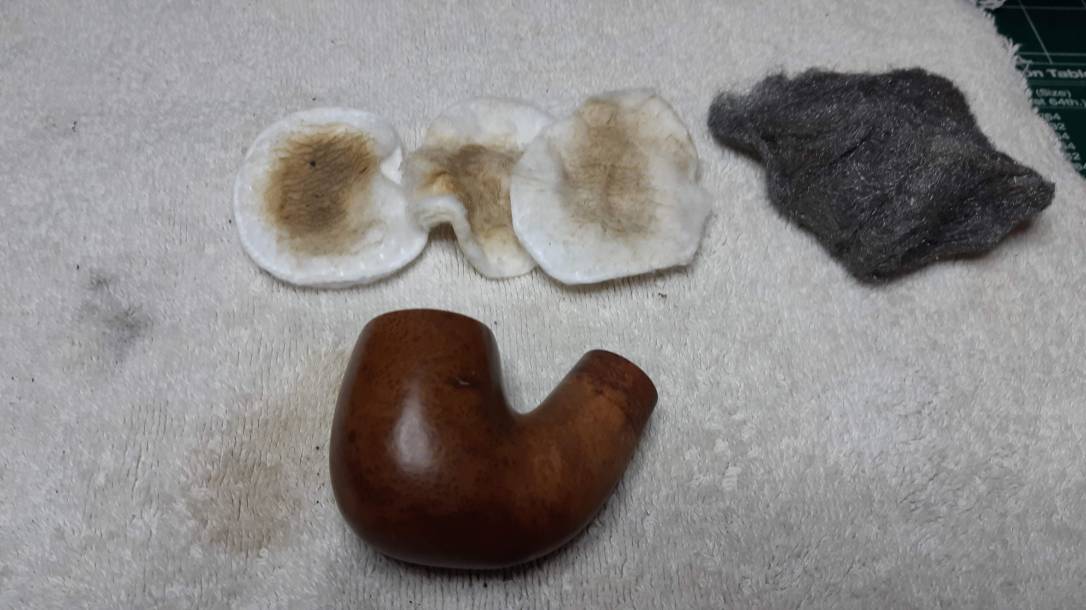
I don’t always use the salt and alcohol treatment on my estate pipes, but this stummel was rather on the smelly side after scraping out all the muck from the internals. I stuffed cotton into the shank and filled the bowl with kosher salt before setting the stummel upright in an egg carton. I added alcohol to the bowl with an eye dropper until the cotton poking out of the shank became damp, and then left things to sit overnight.

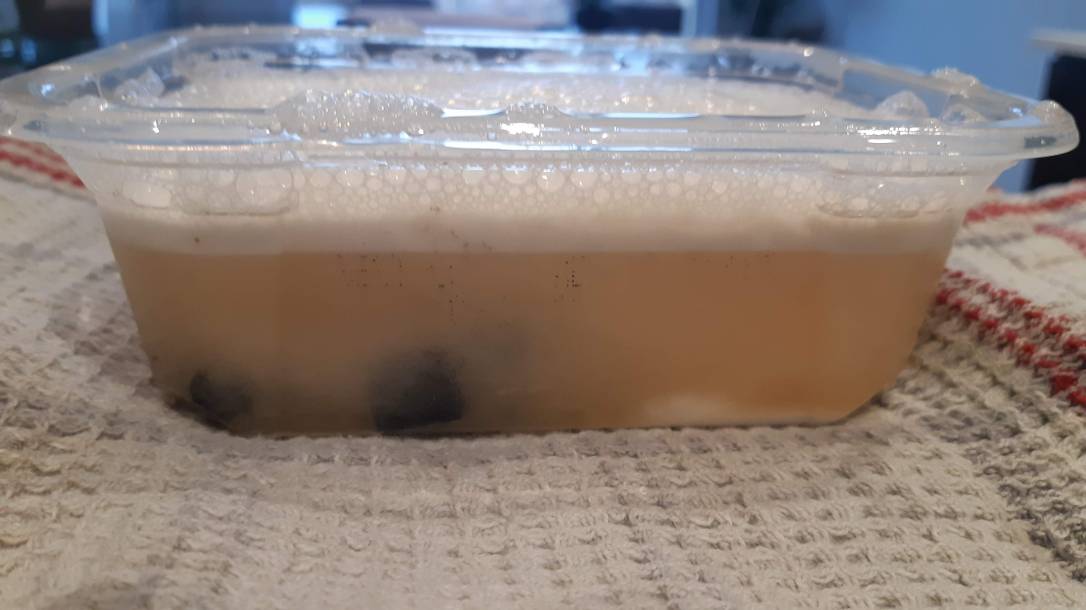
The next morning, both the cotton and the salt had turned a deep brown colour, having absorbed the tars and impurities dissolved by the alcohol. I removed the cotton and dumped out the salt. A quick sniff told me that the treatment had worked – the stummel smelled only of clean briar.
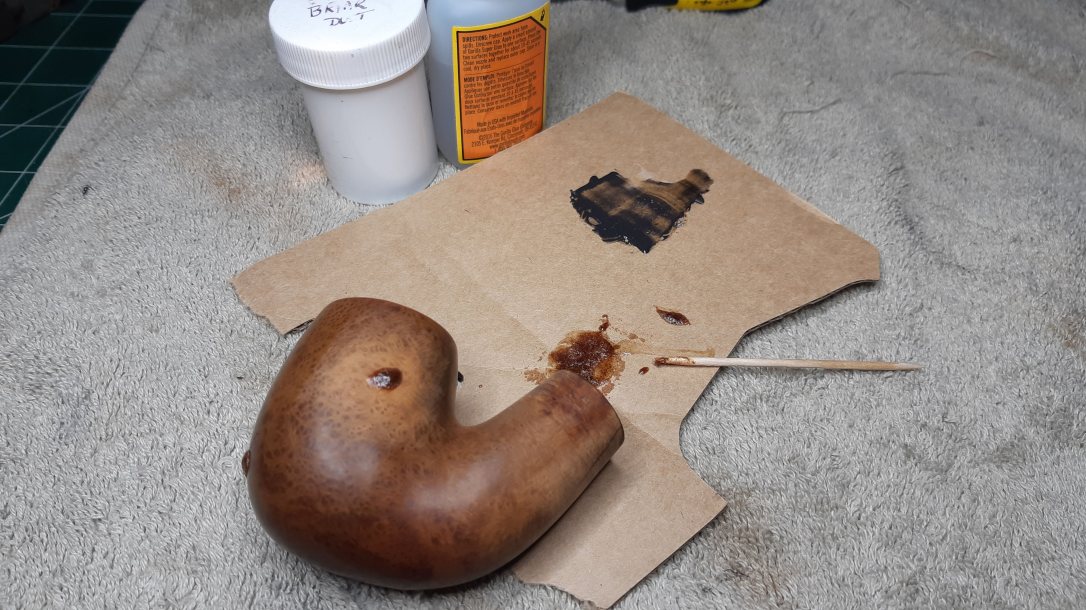
I dropped the stem into a bath of Oxyclean and warm water to raise and soften the oxidation. While it soaked, I worked on tidying up a few old fills in the stummel. I used a dental pick to scrape out the old putty fills and replaced them with a mixture of briar dust and CA glue.

While I waited for the fills to cure, I pulled the stem from its bath and scrubbed away the worst of the oxidation with 0000 steel wool and Magic Eraser. A few pipe cleaners sorted out the stem’s internals.
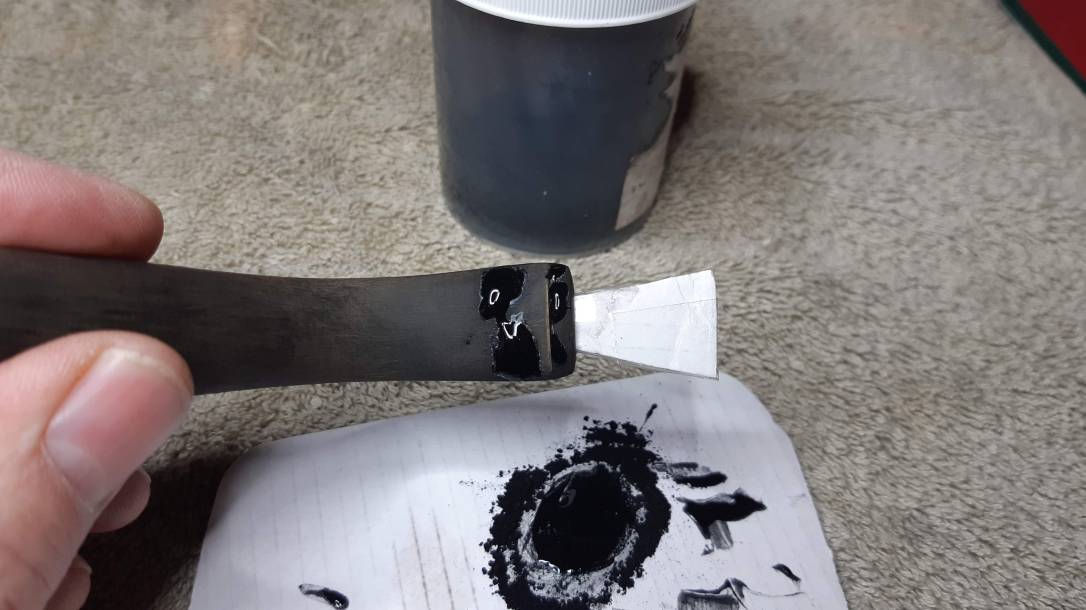
Now that the stem was clean I could tell that the tooth dent on top of the stem actually penetrated the airway. I could poke my dental pick into the slot at the end of the bit and hook it up through the tooth hole. To fix this, I first made up a wedge of cardboard and covered it in clear tape to keep the patch material from flowing through the hole and plugging the airway.
I pushed my wedge firmly into the end of the stem and applied a patch mixture of CA glue and charcoal powder to the damaged areas on top and bottom of the bit. I let the patches cure before removing the wedge and filing the fills smooth.


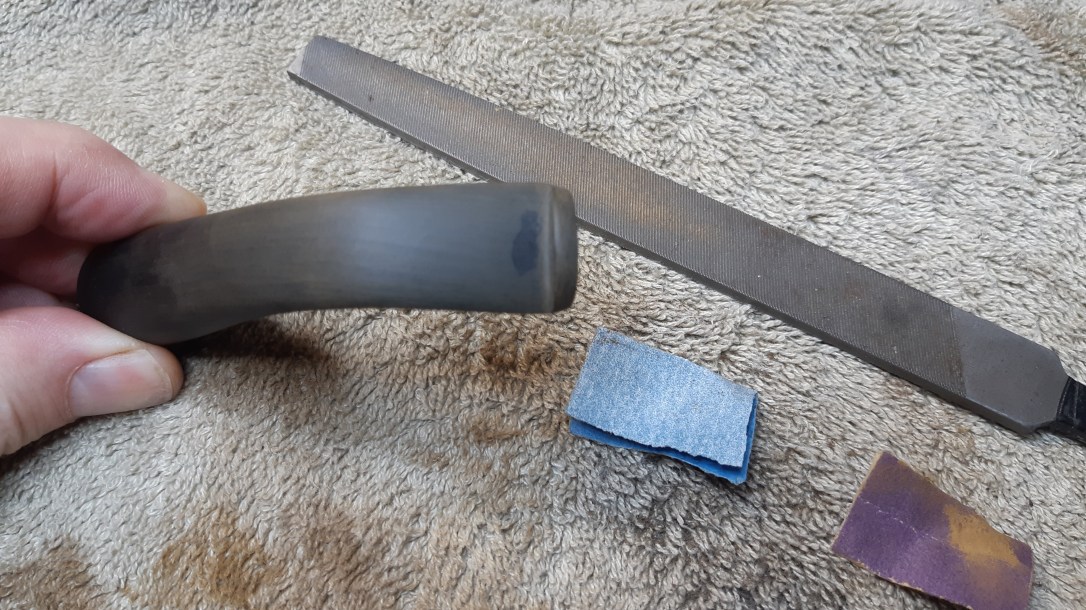
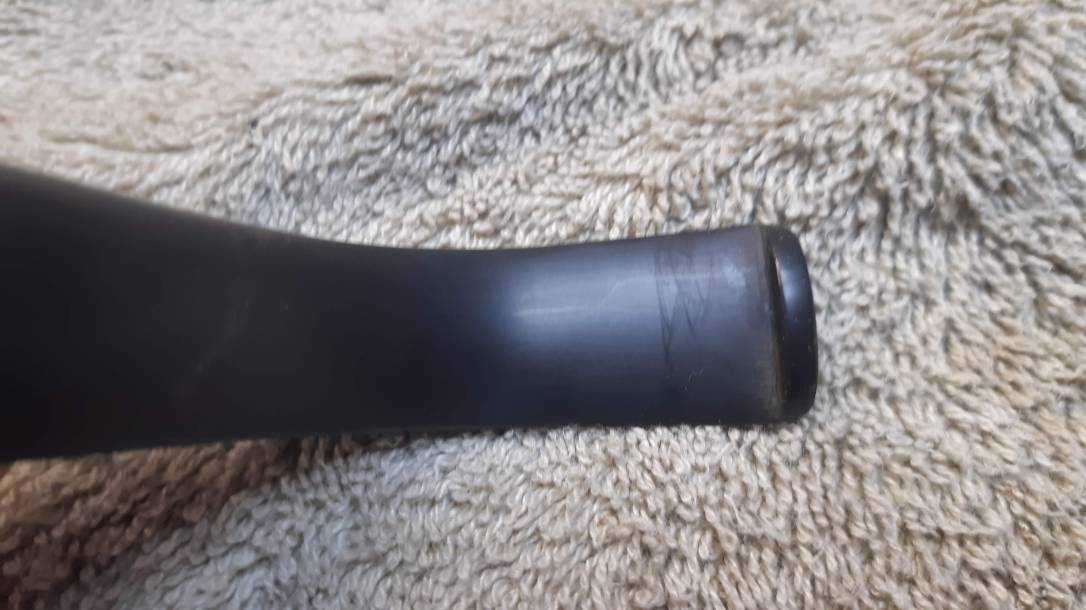
When I was happy with the state of the fills, I sanded the entire stem with 220 and 320 grit sandpapers to integrate the repairs into the surrounding vulcanite and remove the last traces of oxidation. Polishing with 800 and 2000 grit wet sandpapers smoothed out the sanding scratches and prepped the stem for final polishing. I gave the stem a wipe with mineral oil and set it aside to rest while I finished working on the stummel .


I sanded the entire stummel with 320, 800 and 2000 grit papers to even out the finish before applying a fresh contrast finish. A coat of Fiebing’s Dark Brown leather dye was applied, allowed to dry and then scrubbed away with 0000 steel wool and clean water. I use water-based dyes so this washing lifted the colour easily, leaving it only in the softer grain where it penetrates more deeply into the wood.

I wanted to maintain the overall light finish the Marshalls had applied years ago, so instead of a deep top coat I used a diluted wash of Dark Brown dye. This enlivened the briar and provided a natural finish over the dark brown grain. A light wipe of mineral oil rehydrated the briar after all the dye work and gave the new finish depth and pop.


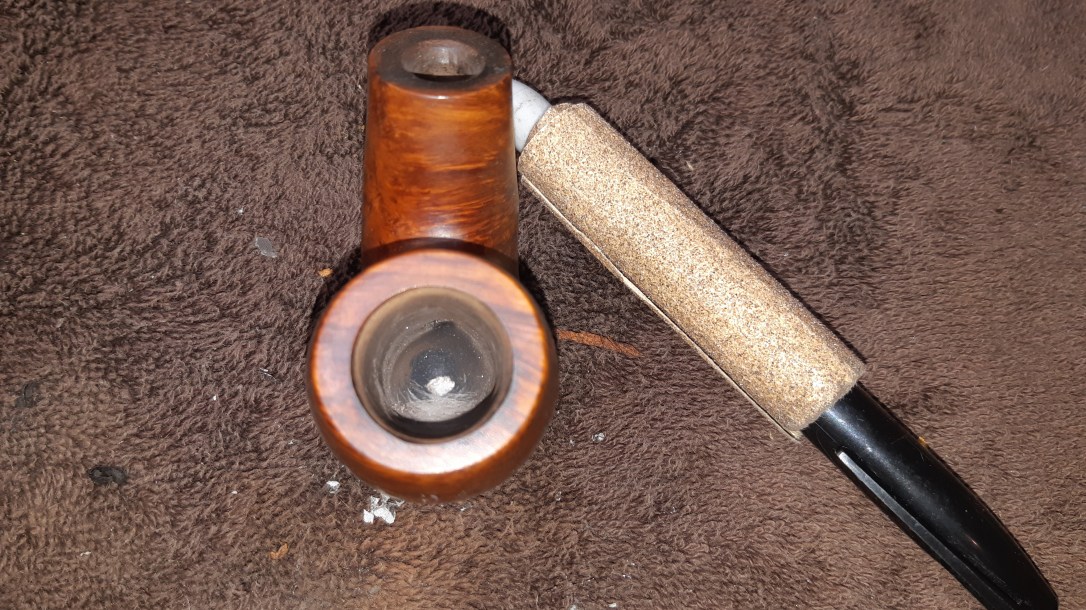
With all the cosmetic work finished and the pipe clean, I addressed the over-reamed chamber floor. A quick “pinky test” (performed by jamming a finger down the bowl to assess the depth of the chamber bore) revealed that there was a scant 1/8″ of briar left at the bottom of the stummel. Smoking the pipe in this condition would be to invite a burn-out.
I filled the bottom of the tobacco chamber with JB Weld epoxy, dropping it into the pipe until the level came up to the bottom of the draft hole. I gently locked the stummel in the padded jaws of my bench vise to sit upright while the epoxy cured.

The next morning I sanded out the excess drips that inevitably collect on the chamber walls and applied a bowl coating of maple syrup and activated charcoal powder.


I let the pipe sit for the rest of the day to give the bowl coating time to harden before reuniting stem and stummel and taking the entire pipe to the buffer for a polish with White Diamond compound and several coats of Carnauba wax.
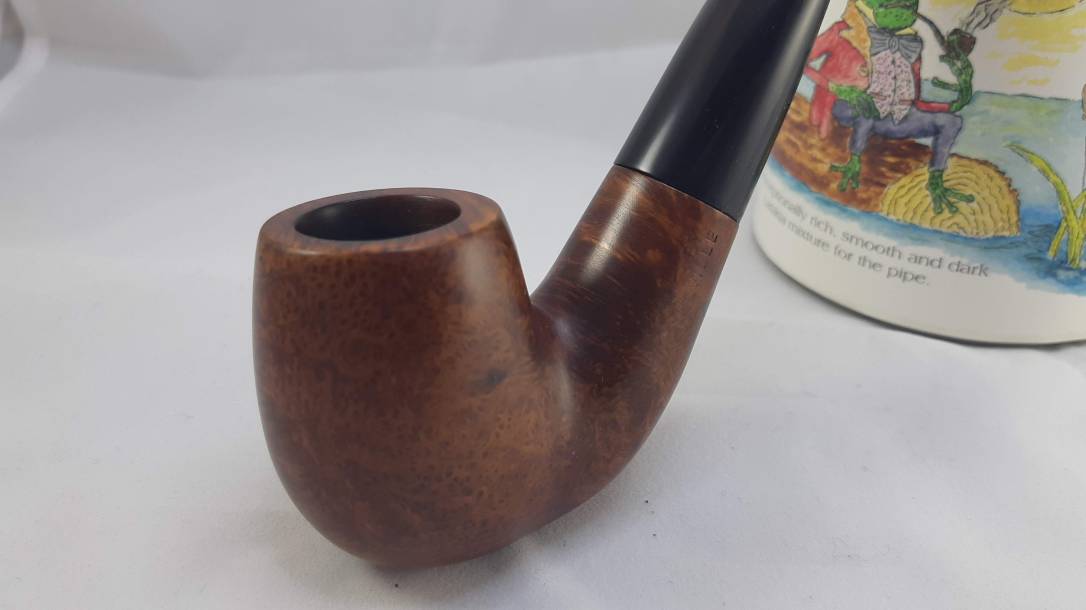
I’m quite pleased with this restoration. Though not a top of the line Millville pipe, this full bent certainly bears other hallmarks of the marque, including a classic shape and some lovely cross and birds-eye grain. The stem repair has blended imperceptibly into the deep black vulcanite, and the pipe as a whole has a definite, yet undefinable, vintage appeal. I’m looking forward to packing the bowl with something tasty soon!
Thanks for following along on this restoration. I enjoyed the entire process – finding an unknown pipe during a hunting expedition, learning about Millville pipes, a previously unknown marque for me, and now adding a freshly restored briar to my rack. I hope you had fun too.
Here’s the finished pipe. Until next time, Happy Piping!


Nice work on a historic beauty. Every pipe has a story. I hope you enjoy writing the next chapter.
LikeLiked by 1 person