I’ve worked on several Stanwell Brazilia series pipes over the years. The series name and inherent character come from the shank extensions made of, in the early days, genuine Brazilian cattle horn or, more recently, of faux horn made of acrylic. Of the two versions, I prefer the look and feel of the genuine horn.
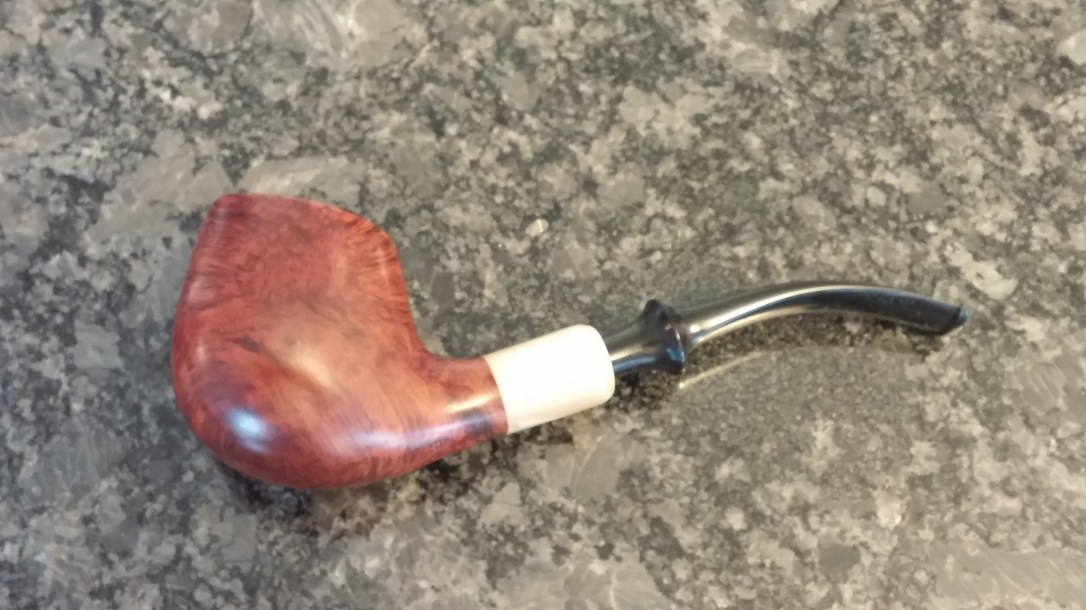
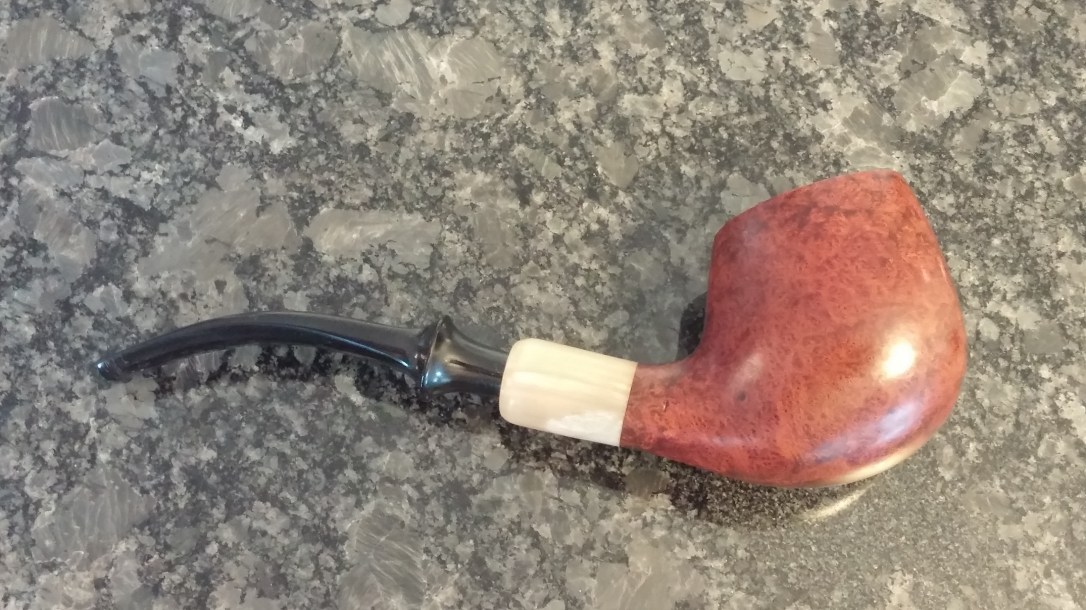
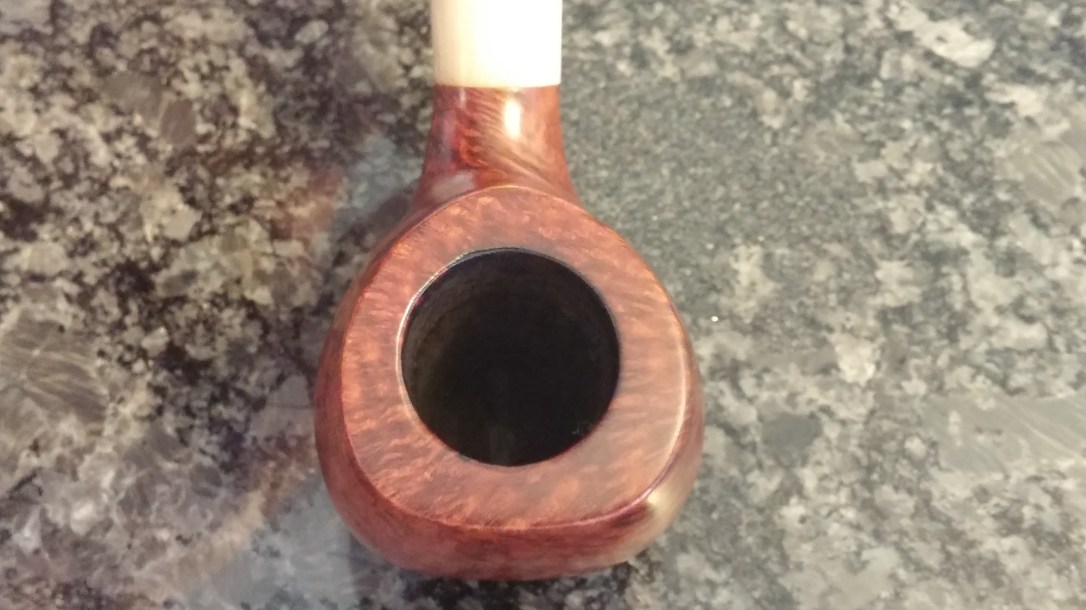
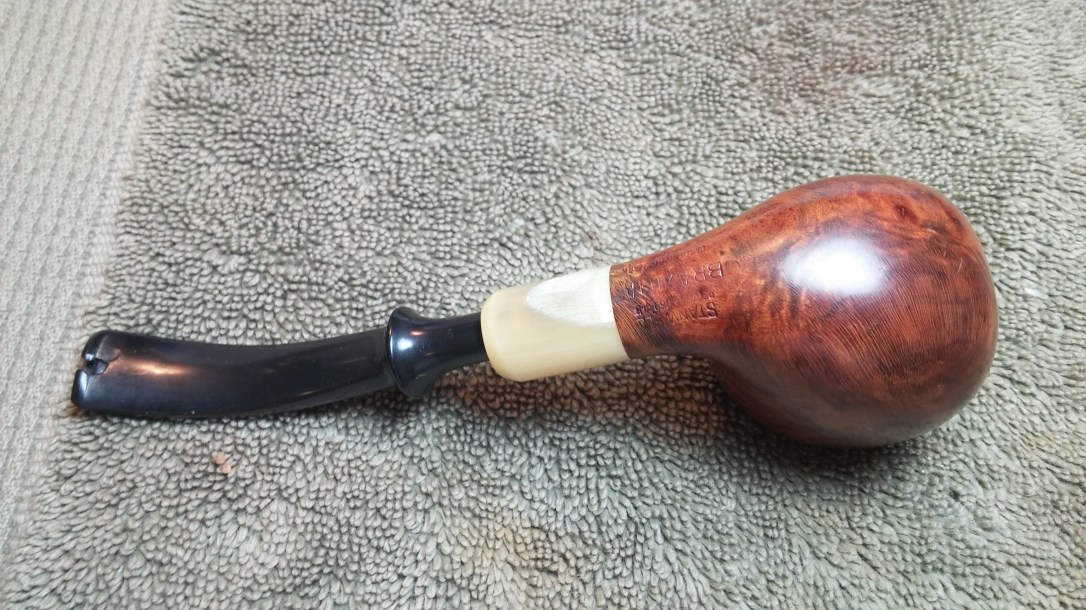
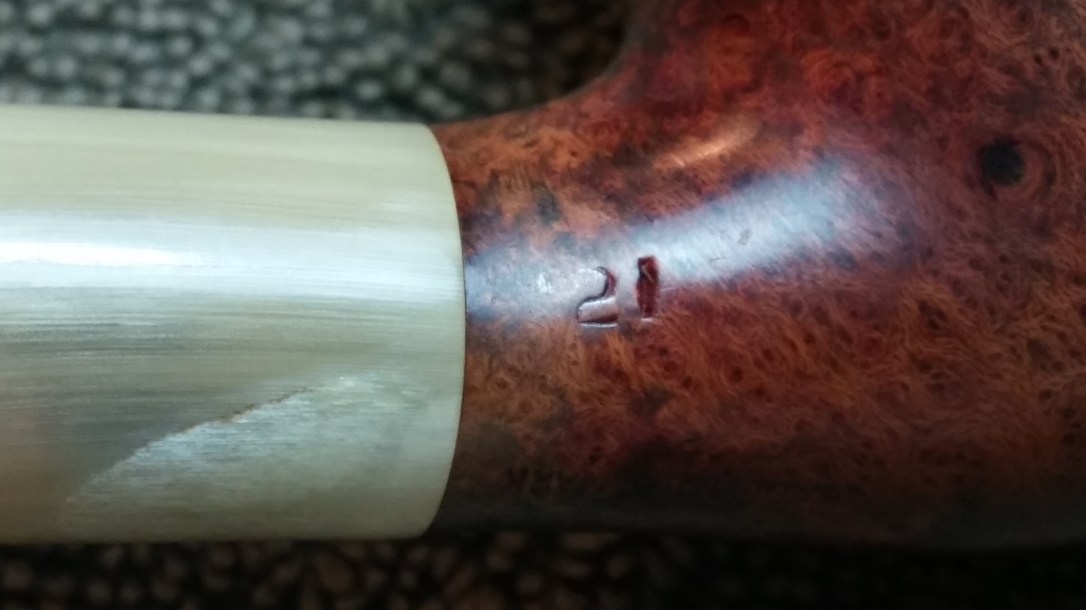
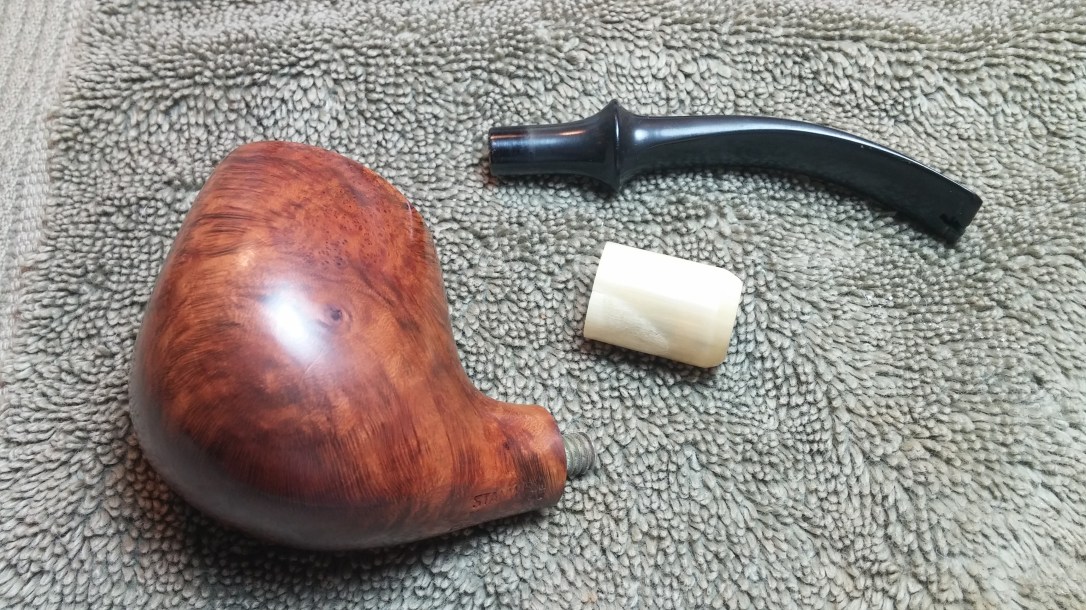
It was just such an early Brazilia pipe that landed on my worktable, this time in a Shape 21, which is described in Basil Stevens’ Stanwell Shape Chart as “Bent, triangular bowl, saddle mouthpiece”. It is an interesting and somewhat unusual shape that I’d describe as a rounded off triangular rim that morphs into a slightly bulbous bent stummel. The shank is surprisingly slender given the exaggerated curves of the bowl, and transitions seamlessly to a nice ivory-coloured horn extension followed by the ubiquitous Stanwell Army-mount saddle stem.
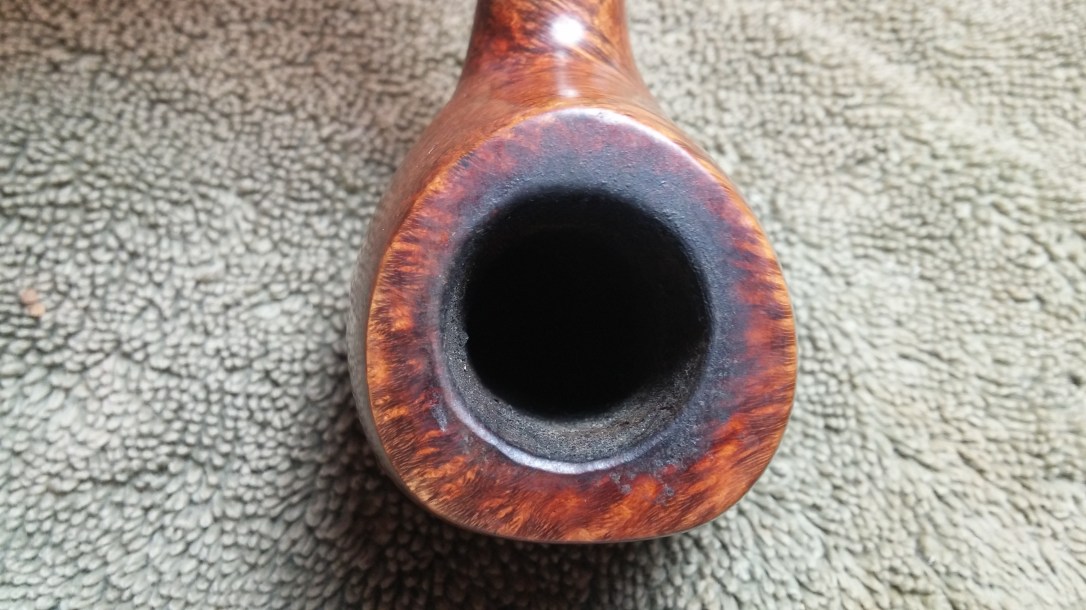
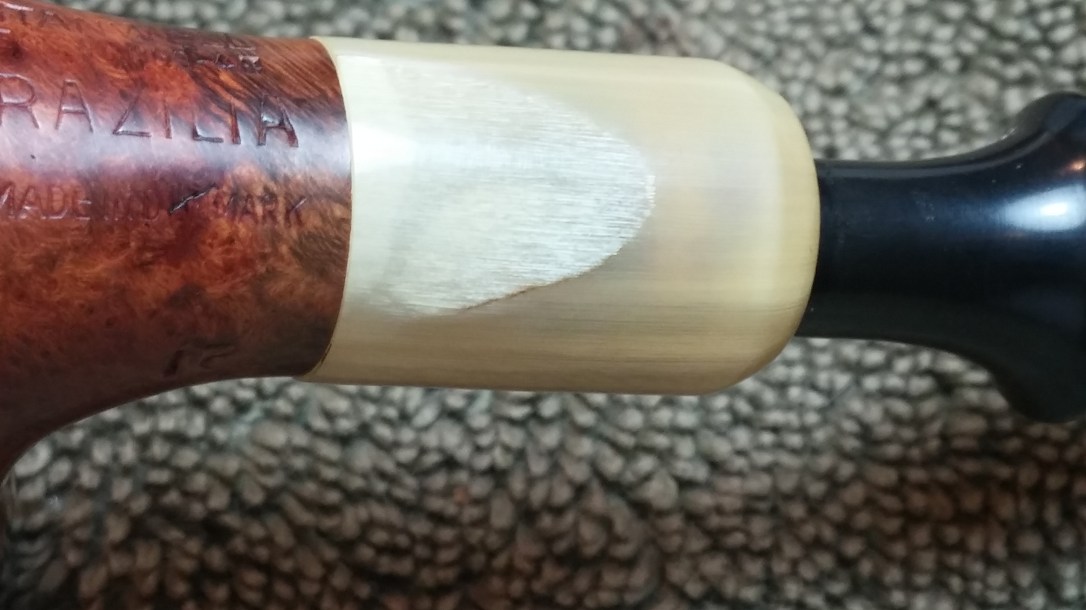
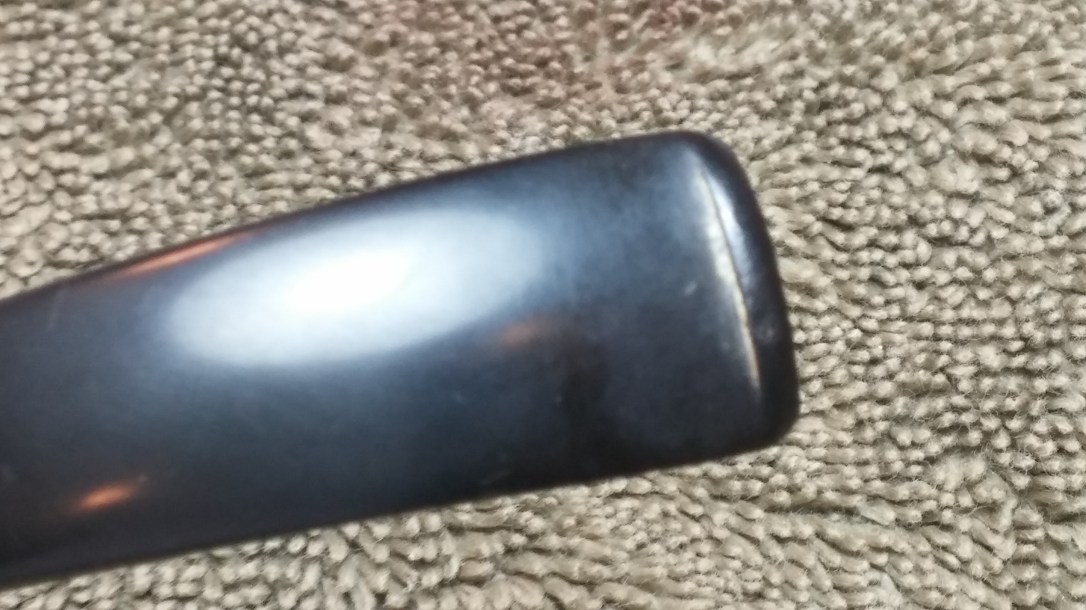
This series of pictures shows the pipe as it was when I started work. The briar was in overall good condition, though the rim was crusty with lava and the inner rim showed signed of wear and tear. The horn shank extension was damaged on the bottom side where the layers of horn had delaminated slightly. It shows in the pics as a ragged oval patch of whiter horn. In person it reminded me of a horizontal split in a fingernail.
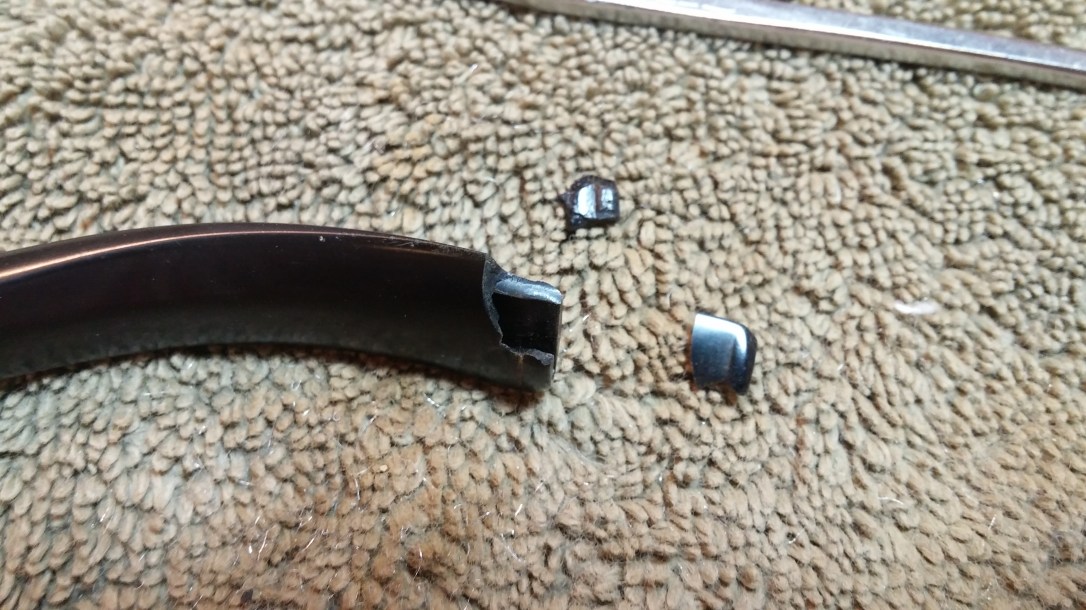
Continuing the inspection, the vulcanite stem was slightly oxidized and a bit greasy in the hand. The main issue with the stem, however, was a chipped button. A small chunk of the button had been bitten off and was lodged in the airway.
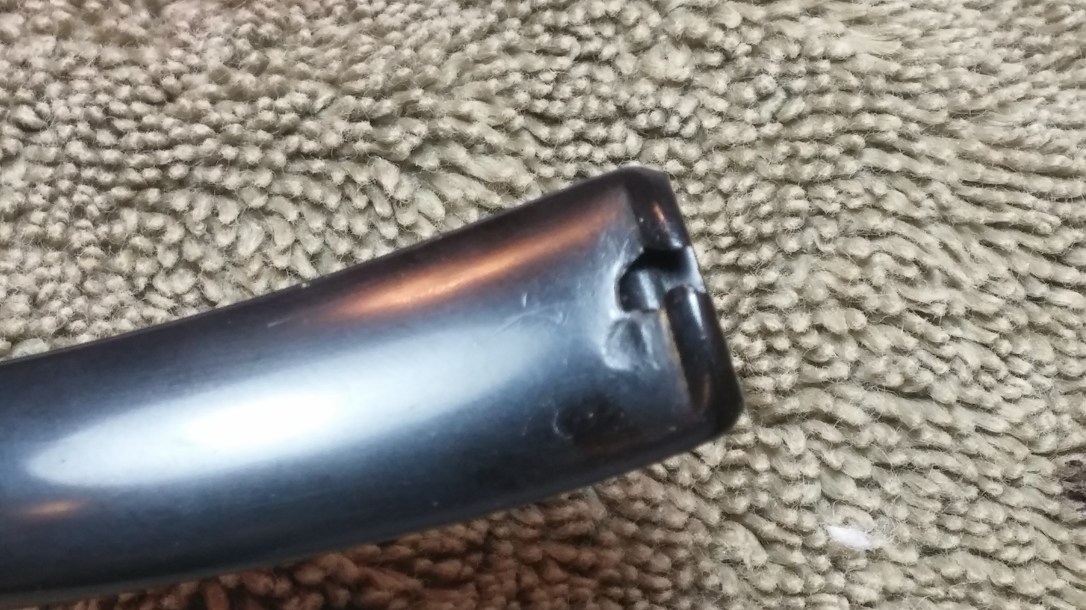
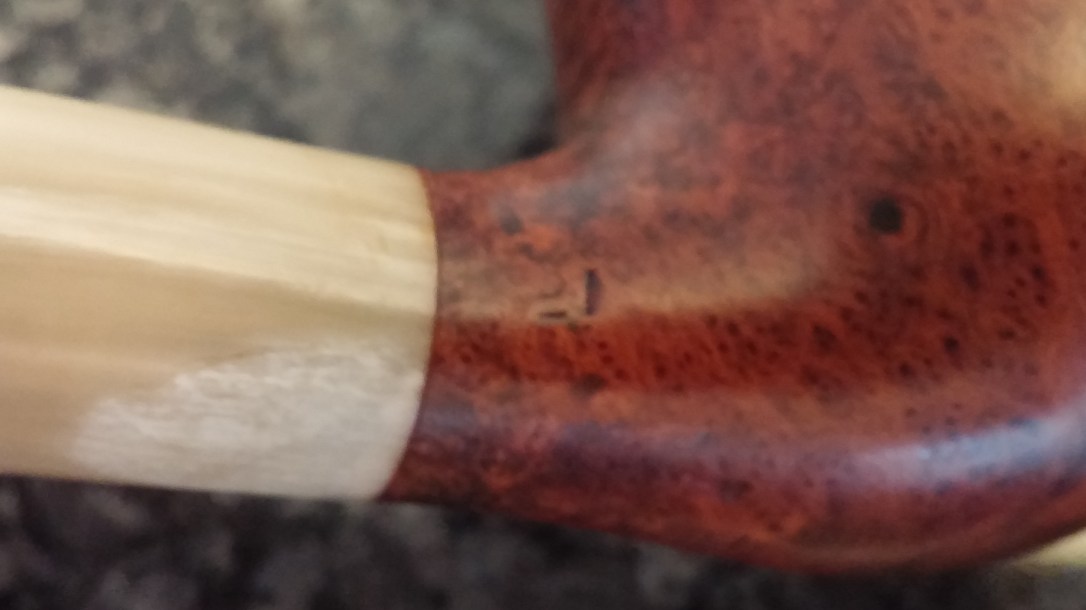
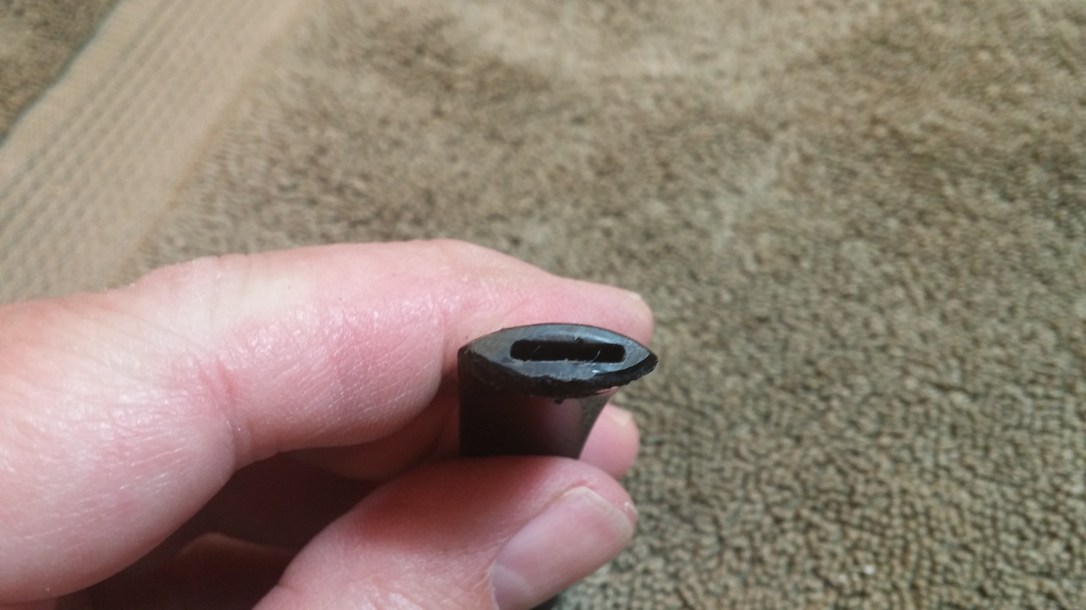
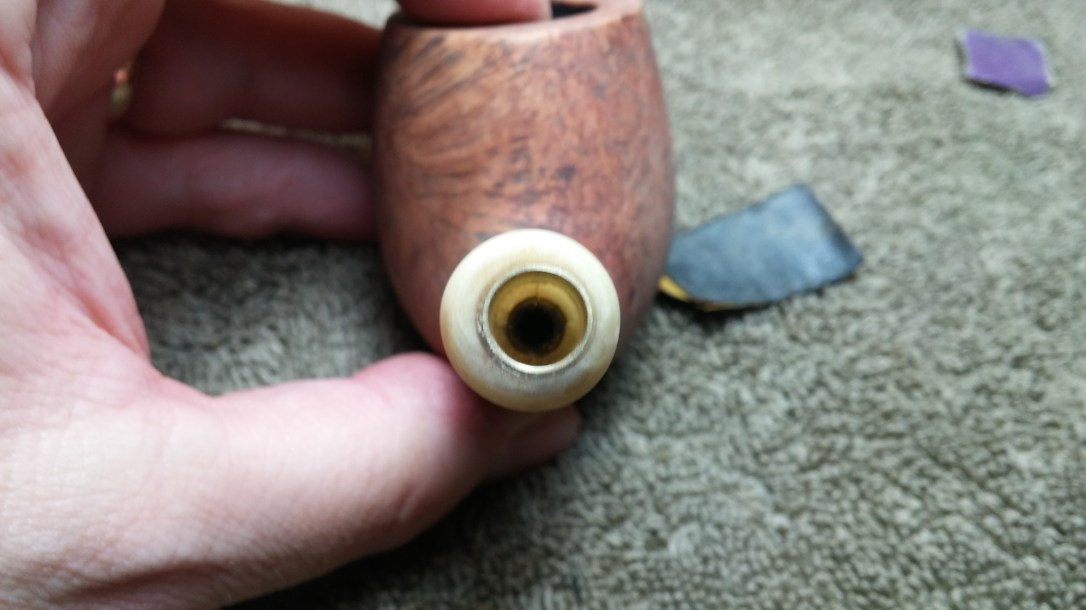
Removing the stem from the pipe uncovered more damage – the mortise in the horn extension was worn, with a ragged, irregular rim. I’ve seen the same damage on other Stanwell pipes with horn and bone shank extensions. Essentially, these pipes were made either without a mortise insert or with an insufficiently strong insert, and the repeated insertion and removal of the stem causes the mortise damage you see in the pic below. In later Stanwell pipes, as far as I can tell, the design of the mortise was changed to avoid this issue.

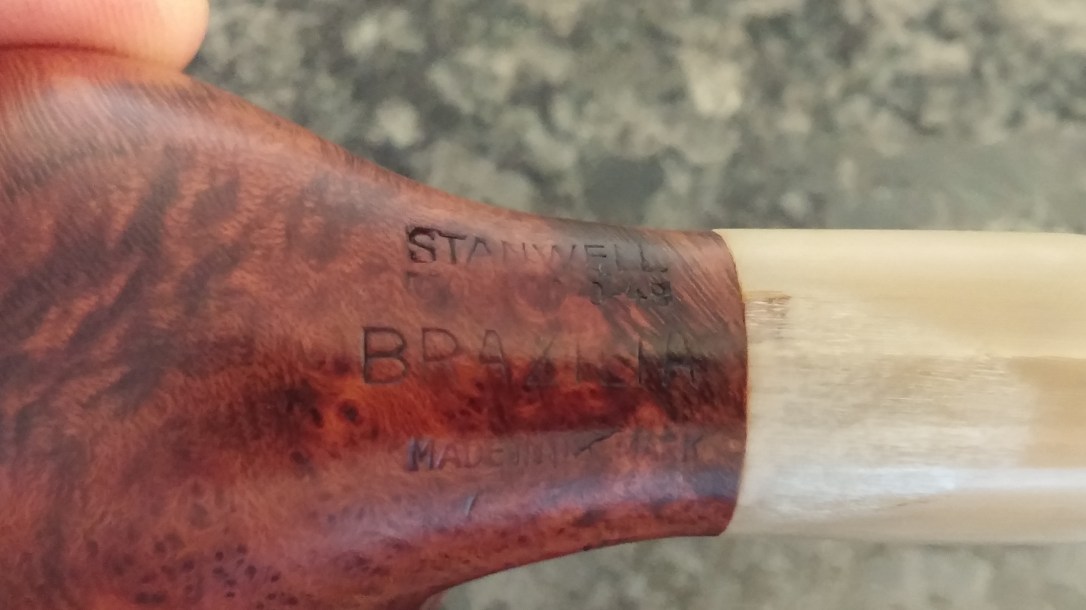
The pipe is stamped on the left flank “STANWELL” over “Reg’d No 969-48” over “BRAZILIA” over “Made in Denmark”. The right flank is marked with the shape number, “21”. The stem carries the Stanwell Crowned S logo.
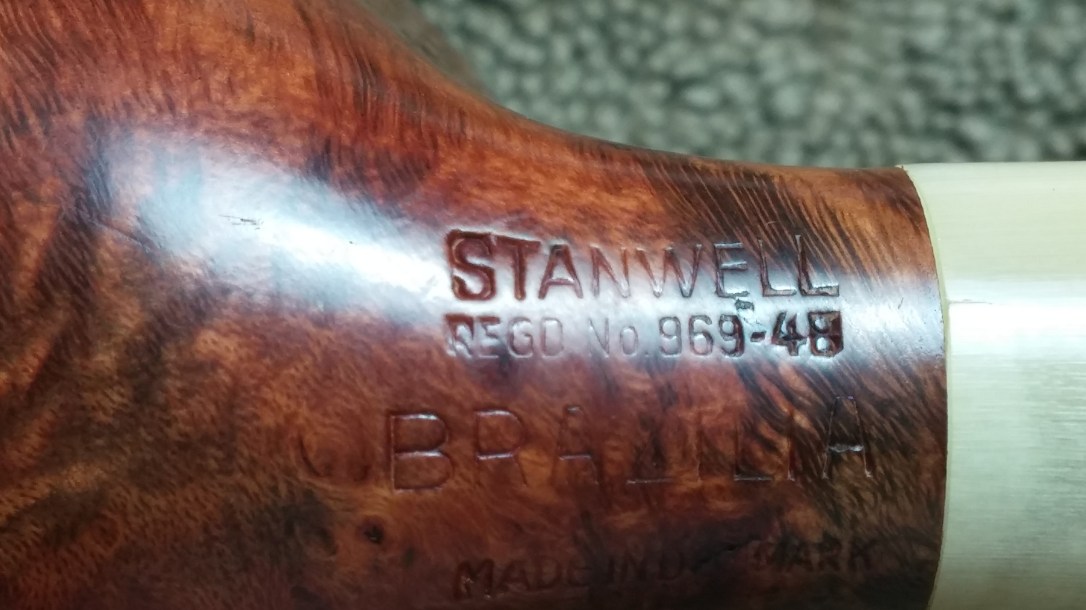

I already knew from the genuine horn shank extension that this was an older Stanwell Brazilia, and the stamps back this up. The Reg’d No stamp was used on Stanwell pipes from 1948 to approximately 1970.
The horn shank extension is attached to the briar stummel with a short section of threaded metal tubing and a touch of glue. I got lucky with this pipe and the horn extension unscrewed easily from the fitting. This would let me work on each piece of the pipe separately before ultimately reassembly.
I started the restoration by attempting to extract the broken piece of the stem from the slot in the bit. I used a dental pick to persuade the piece to move, discovering as I did so that the bit was in worse shape than I had originally thought. The broken chunk came out alright, but another section of bit came off with it. Now I’d have to put the jigsaw back together to repair the stem.
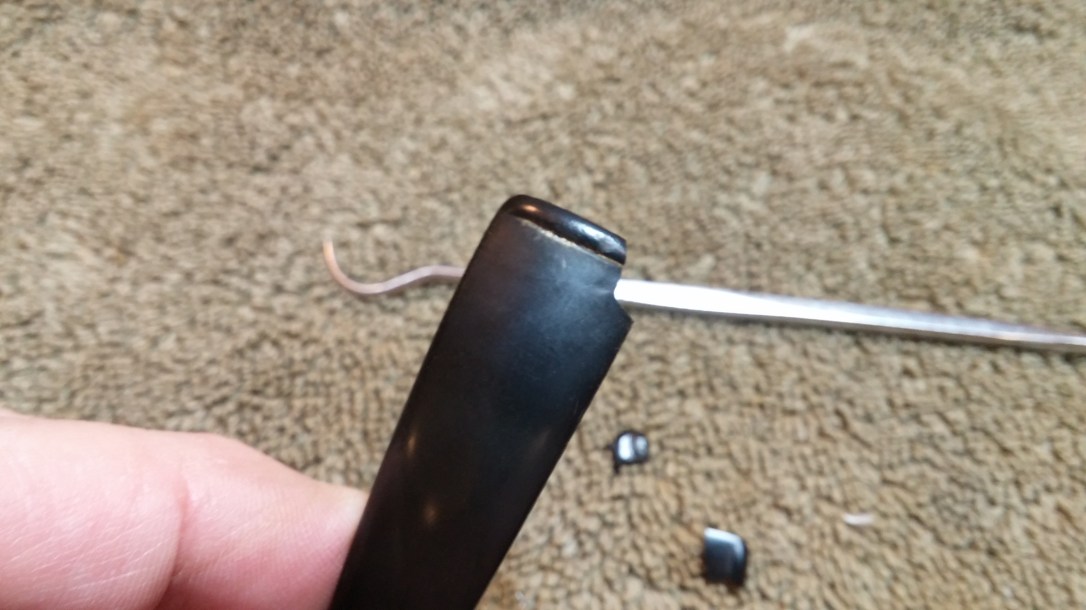
I used clear CA glue to stick the broken piece of the stem back in place before fitting a wedge of cardboard covered with tape into the slot. This protected the square edges of the slot while I coated the damaged areas with a healthy layer of CA glue mixed with activated charcoal powder. When the patch had set, I pulled the wedge out of the slot.

I used needle files and sandpaper to level the patch and shape the new button. Satisfied with the general shape of the repaired bit, I dropped the stem into an Oxyclean bath to raise the oxidation and soften any tars lurking inside the stem’s airway.
While the stem soaked, I topped the bowl lightly on 320-grit sandpaper to remove the lava crust and sharpen the edges of the rim. Subsequent sanding and polishing with 800 and 2000-grit wet sandpaper smoothed out the scratches left from topping and deepened the colour of the briar.
Repairing the split in the horn extension was straightforward. I flowed thin CA glue into and around the crack and then sanded the horn smooth after the glue had cured. Micromesh sanding pads removed the sanding marks and gave the horn a deep lustre. I dabbed a spot of glue on the face of the horn extension and screwed it back into position on the stummel.
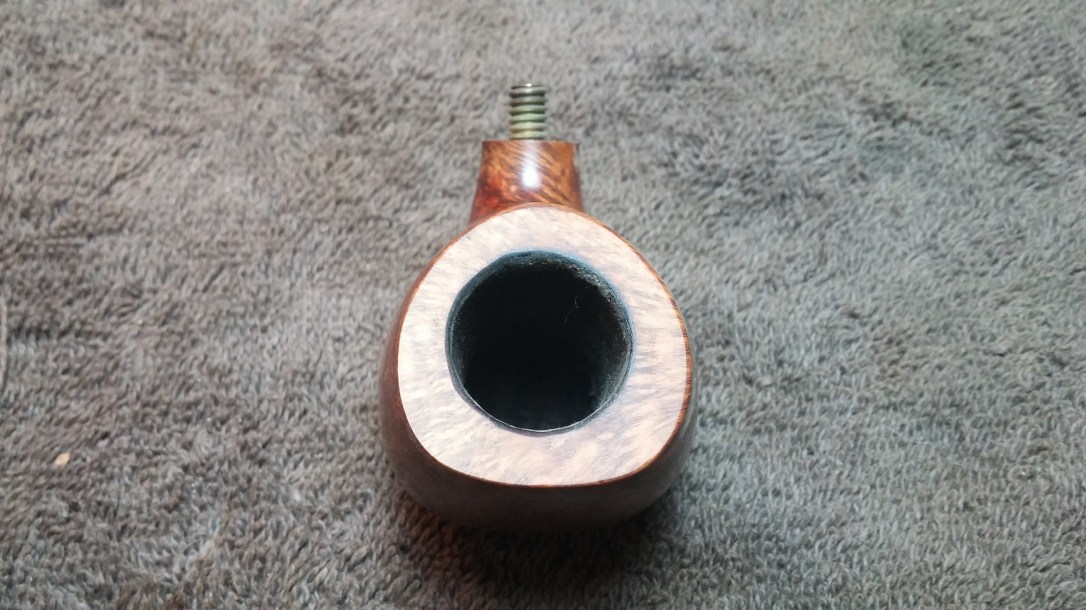
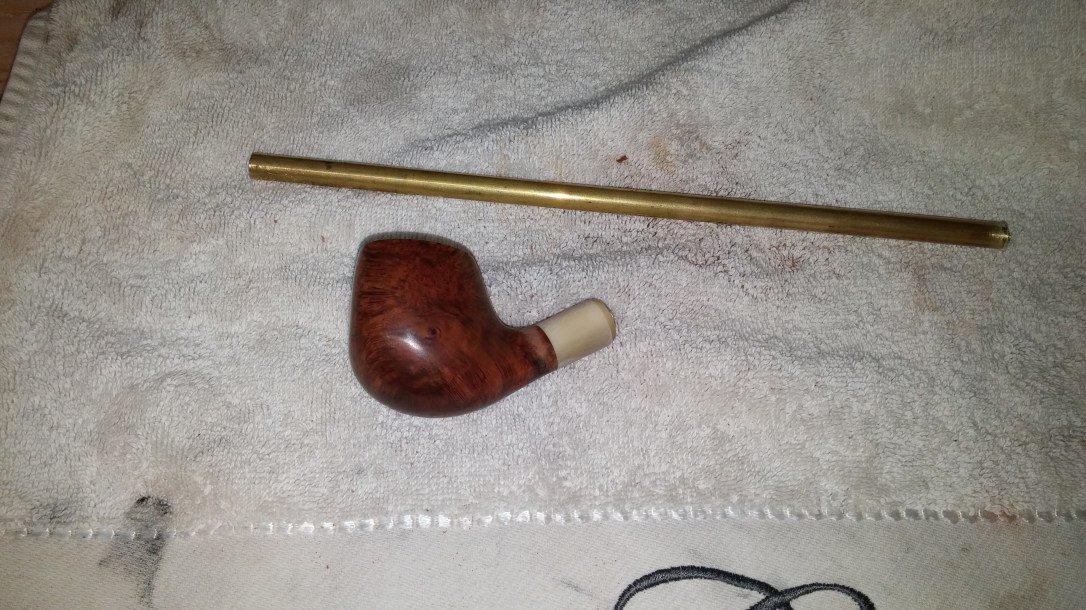
Now it was time to deal with the damaged mortise. To reinforce the relatively soft horn, I first drilled out the existing mortise to slightly enlarge the bore and smooth out the ragged edges in preparation for a brass mortise insert. The pics below show first the stummel and a length of brass tubing from which I would cut the insert.
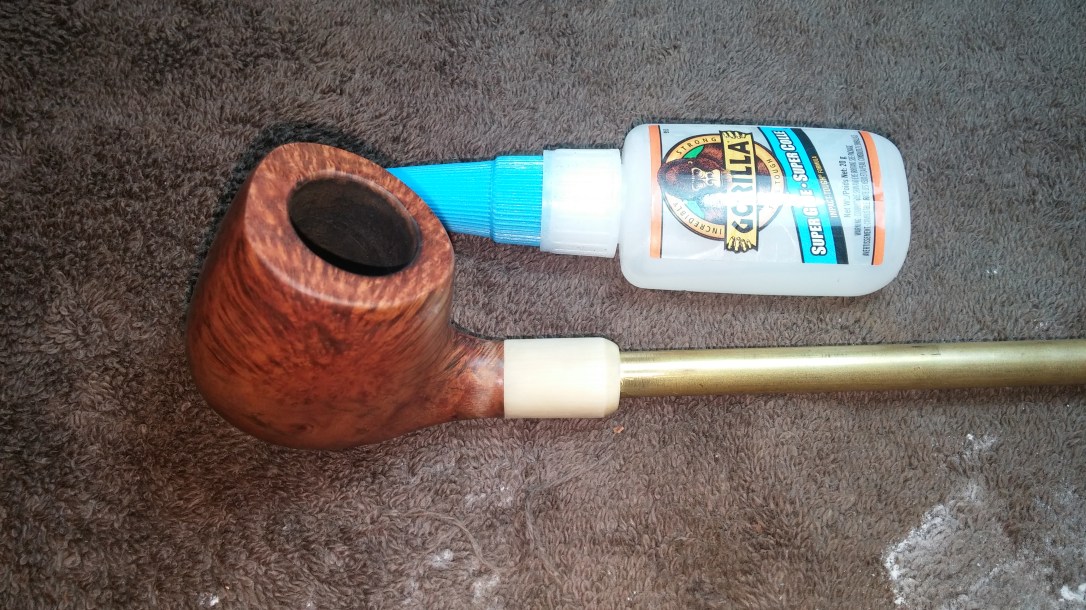
A bit of thick CA glue secured the end of the tubing in the newly drilled horn mortise. I allowed the glue to cure, then cut off the excess tubing. The last pic below shows the finished repair. The brass insert was filed down flush with the end of the horn, and any small gaps in the glue were topped up before the entire thing was sanded and polished smooth.
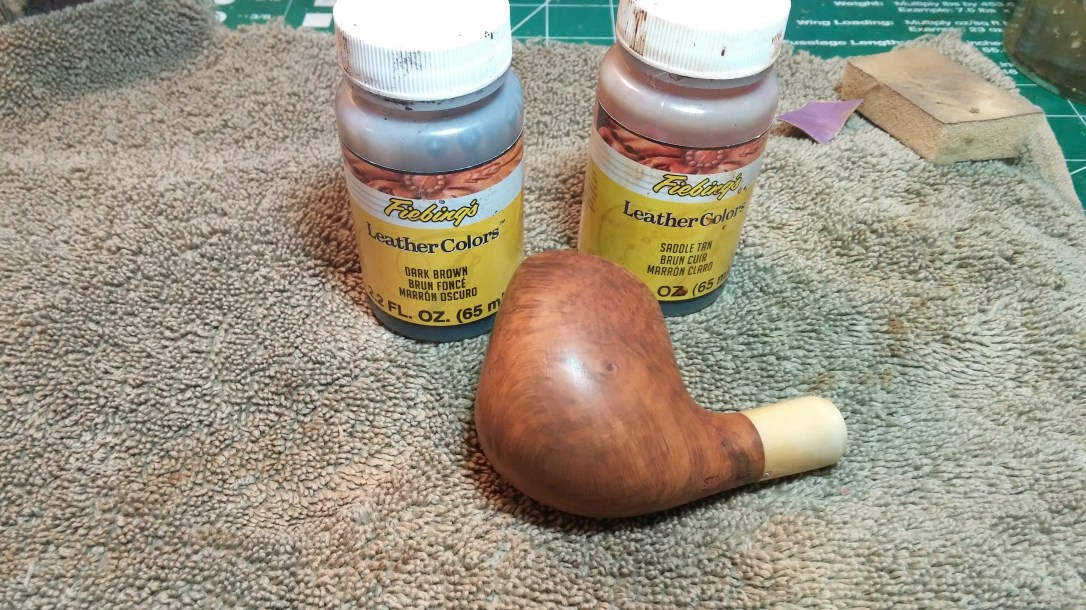
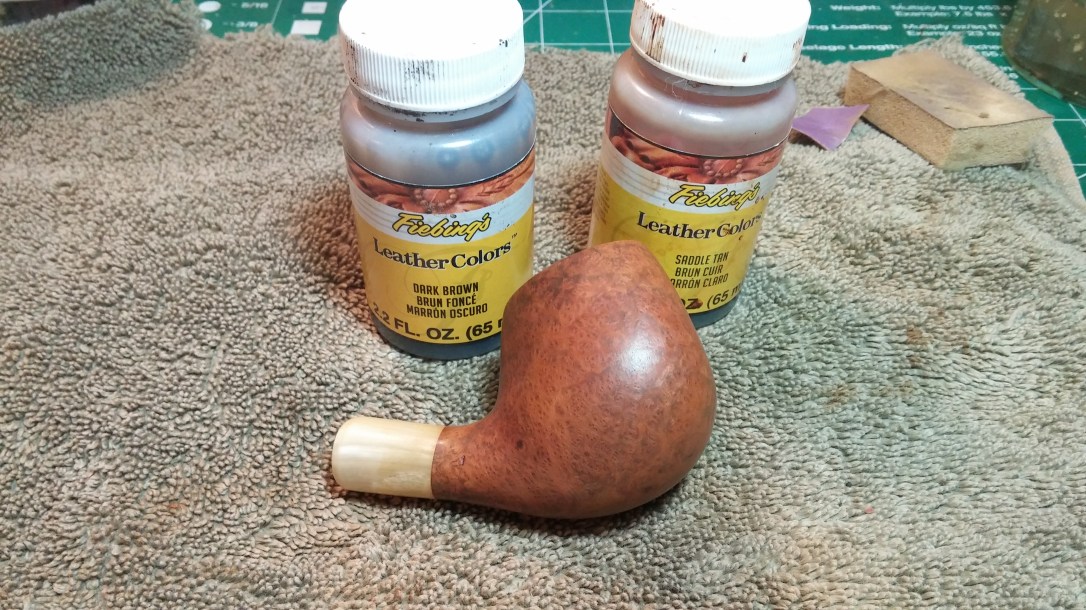
I finished up work on the stummel with a fresh two-part contrast stain of Fiebing’s Saddle Tan leather dye over Dark Brown grain. The Dark Brown is applied first, then most is removed, leaving it only in the softer grain where it absorbs more deeply. Then the Tan stain goes over top, with the end result as pictured here.
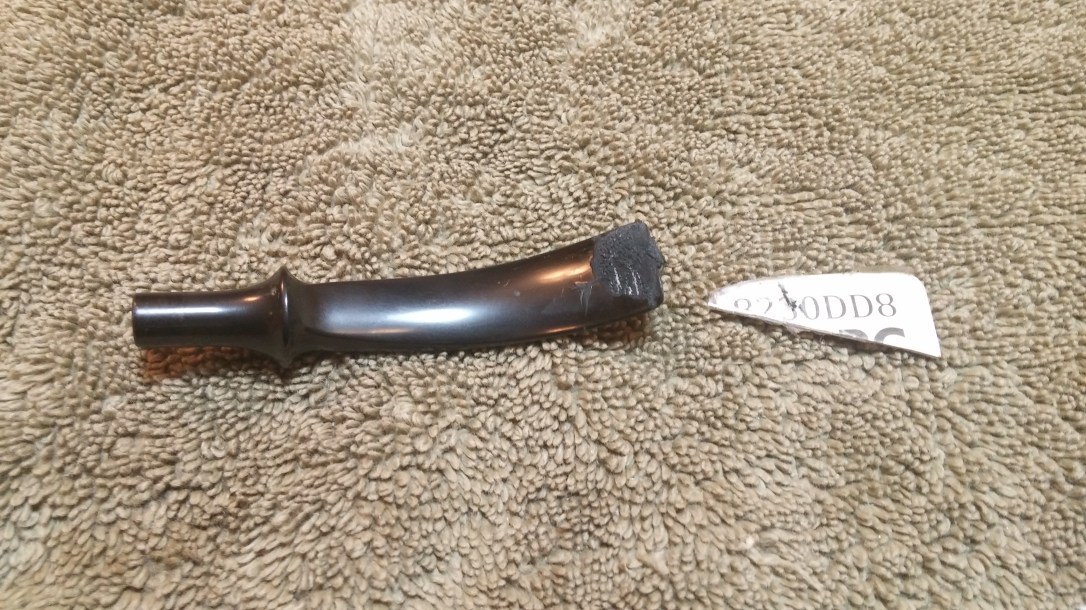
At this point I set the stummel aside and rescued the stem from its Oxyclean soak. A quick scrub with Magic Eraser removed the light oxidation and a few pipe cleaners took care of the now softened tars and other gunk in the airway and slot.
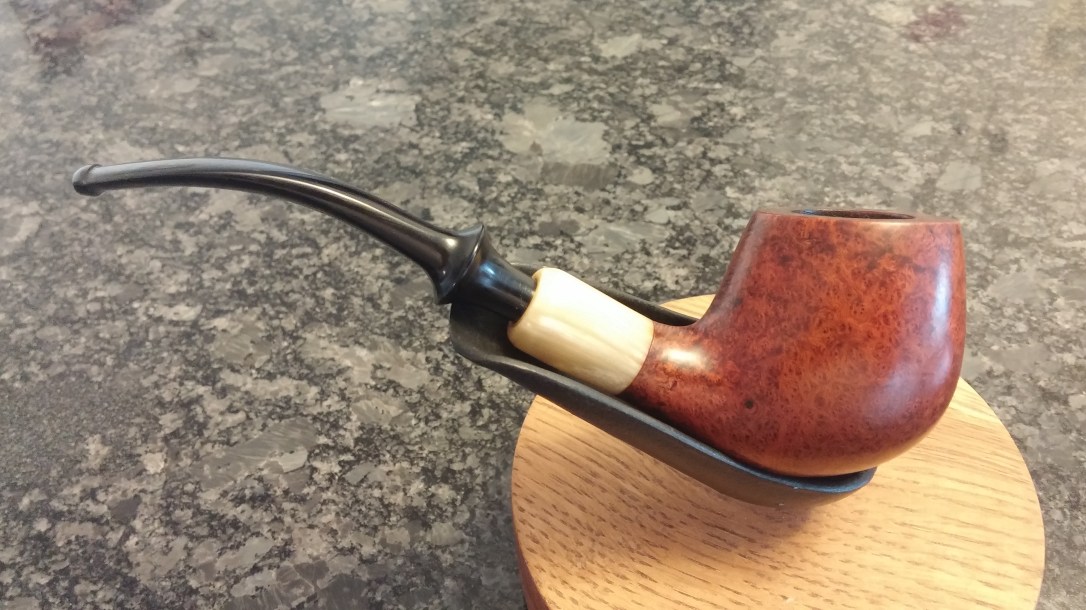
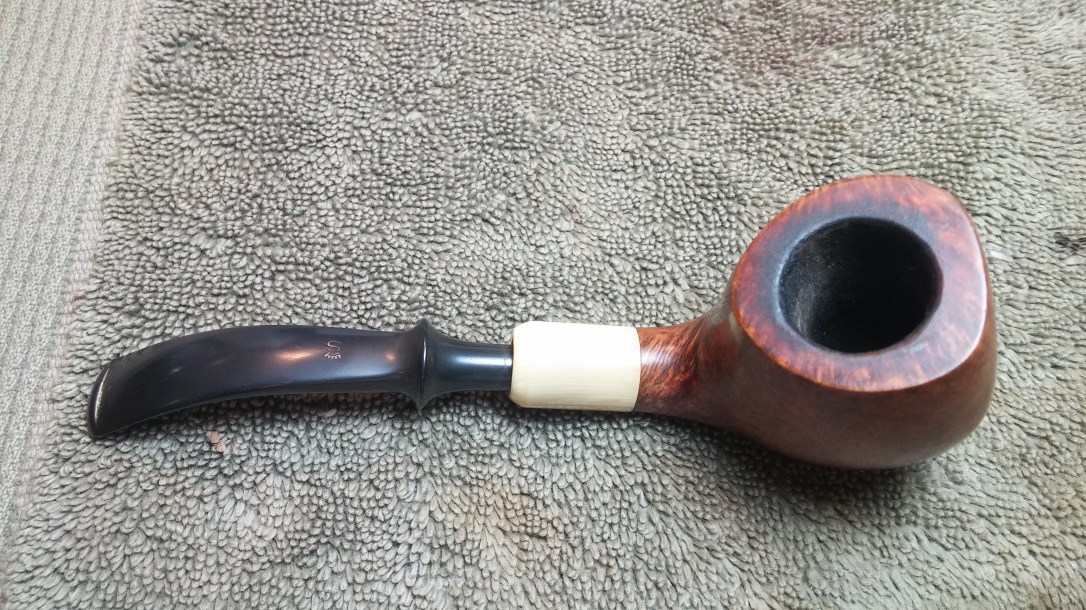
I needed to tweak the stem fit slightly to accommodate the new mortise insert, but the stem was cooperative and soon fit smoothly but snugly in the shank. Then it was time to take stem and stummel to the buffer for a run of White Diamond compound and several coats of Carnauba wax to shine and protect the restored pipe.
All spiffed up from its day on the bench and with the new mortise insert in place, this vintage Stanwell Brazilia is ready to find a new home with an appreciative piper. It is available now on the DadsPipes Store, just in time for Father’s Day.
Thanks for following along on this repair and restoration. Until next time, Happy Piping!
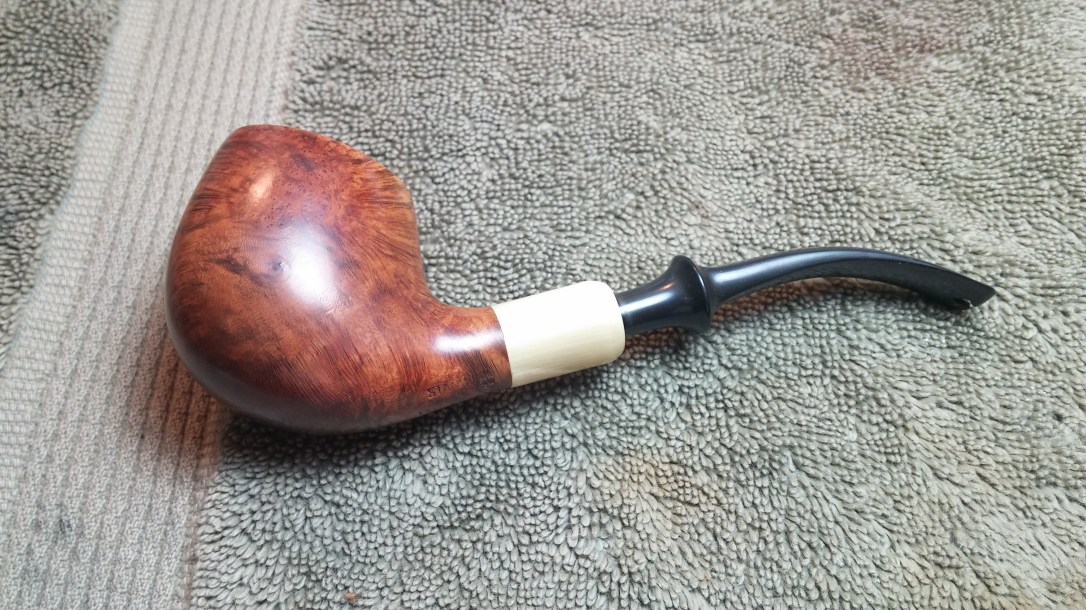
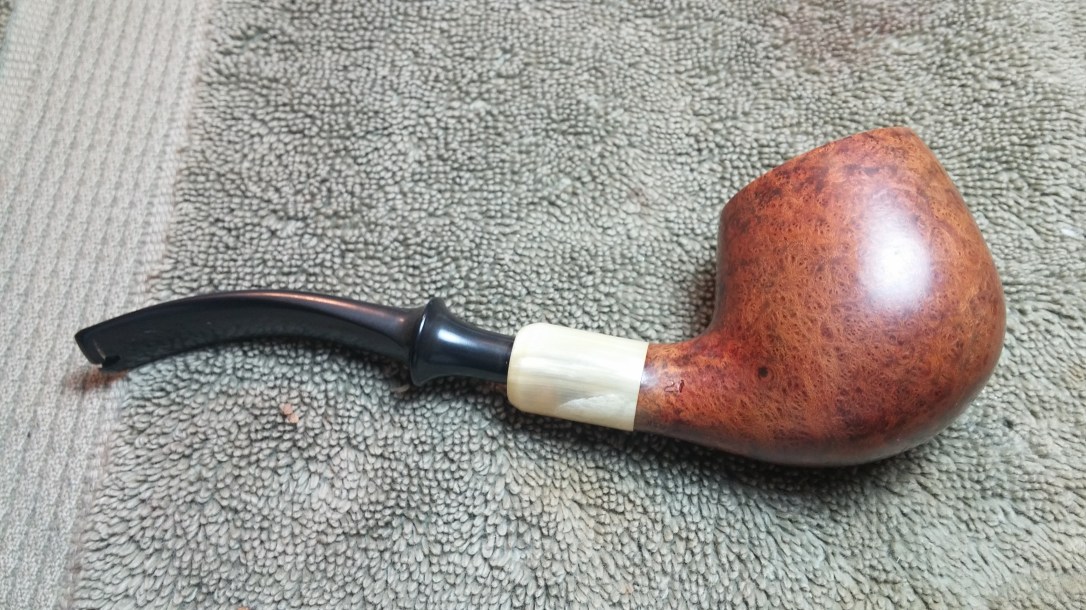
Here’s the finished pipe.