
I found this Peterson meerschaum pipe during a recent visit to an antiques mall about an hour’s drive from my house. I hear stories of antique shops seemingly overflowing with estate pipes, but in my neck of the woods, the pipe hunt is often more of a feast-or-famine game.
Many times I don’t come across a single pipe in a shop, or the pipes that are available are poor quality, poor condition, over-priced or all three! This day’s hunt was fairly successful – I came away with a Brigham in a shape I hadn’t seen before, an old Amphora Xtra pipe, and this Pete, which was the score of the day.
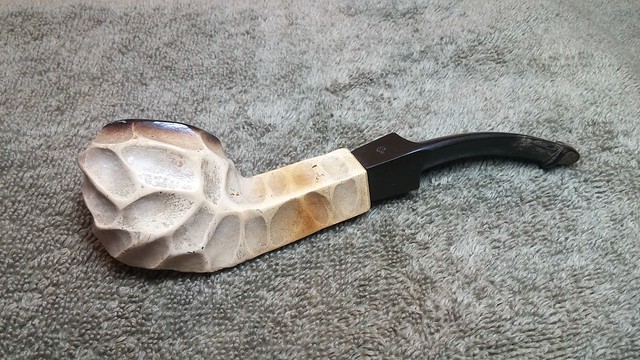
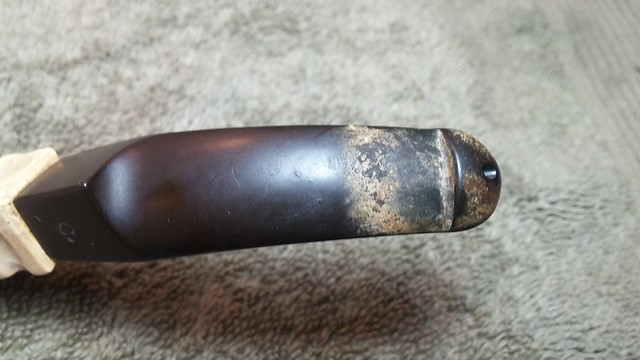
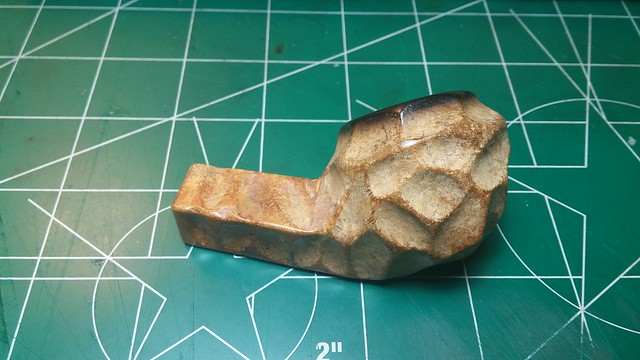
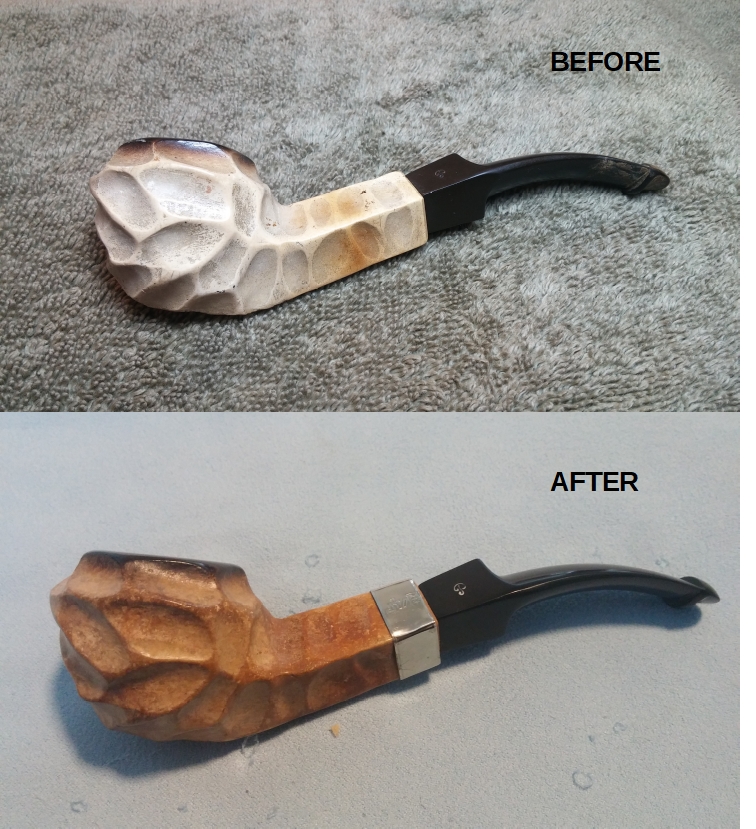
The pipe as found was in pretty good shape. There were no dents or dings other than light handling marks on the meer, though a film of lava covered the factory-blackened rim and a fair amount of cake lined the chamber. The diamond shank showed a bit of colouration from use, but in general the meerschaum was pretty white.

The stem was oxidized and had a good calcium build-up on the top and bottom of the bite area. Thankfully, the only wear to the stem otherwise was a bit of light tooth chatter. The previous owner was clearly not a clencher or he used a rubber softie bit to protect the stem.

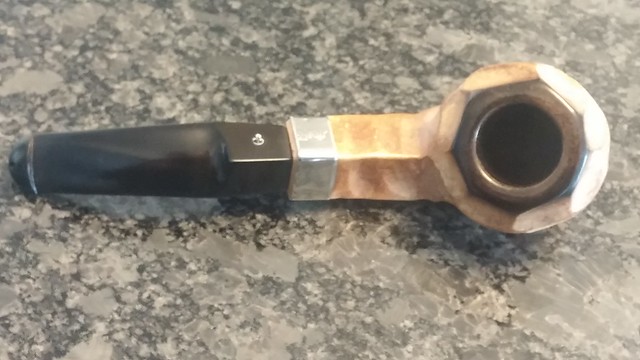
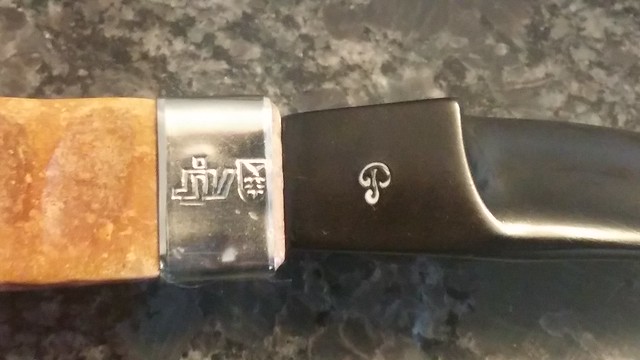
The only stamp on the pipe is the Peterson “P” logo on the left upper facet of the diamond taper stem. Like the rest of the stem the logo was in good condition. There is no shape number stamp anywhere, but as far as I can tell this pipe is an 80S Saddle Bulldog.

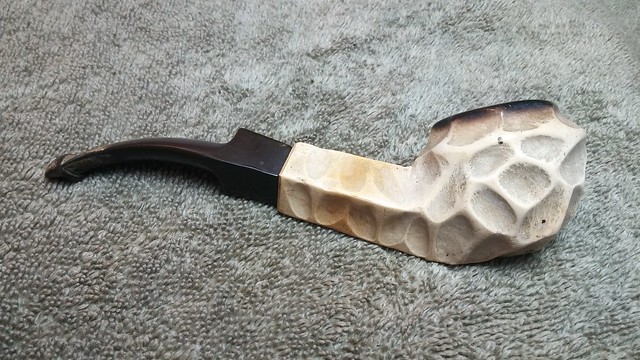
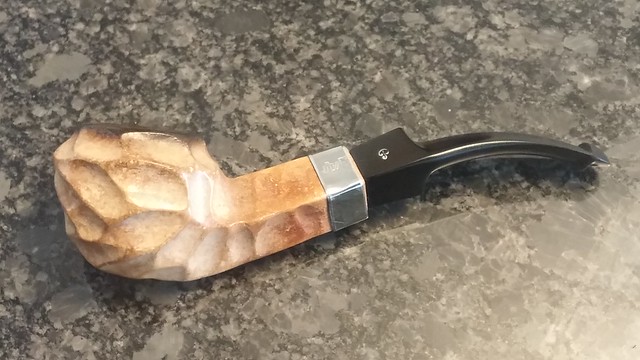
A bit of research online produced a small amount of information on the pipe. The deeply scooped-out rustication on the stummel is what Peterson called the “Aboriginal Finish”, which was available in the 1960s and early 1970s. The pipe was produced on the Isle of Man from Tanzanian meerschaum (which is no longer available) in a factory that turned out meerschaum pipes for several brands, including Peterson, GBD, Manx and Comoy. Peterson moved its meerschaum pipe production back to Ireland in the 1970s.
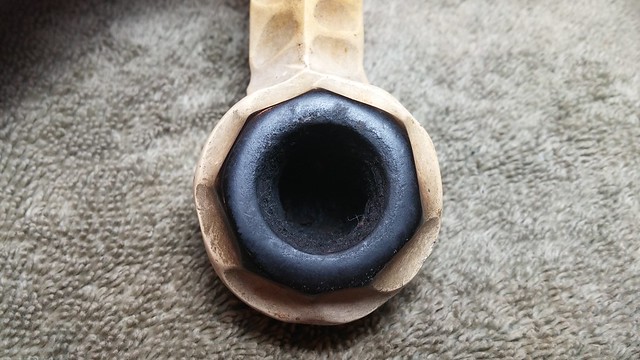
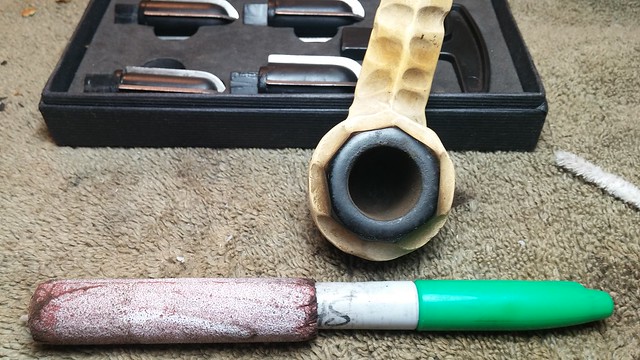
A cake layer is neither needed nor desirable in a meer, so I began this refresh by clearing out the old cake from the chamber. I used sandpaper wrapped around a Sharpie for this instead of my usual reamer as overly-enthusiastic reaming could lead to a cracked bowl. As I worked, I got a nose full of vanilla aromatic scent – perhaps this fellow was a Captain Black fan!
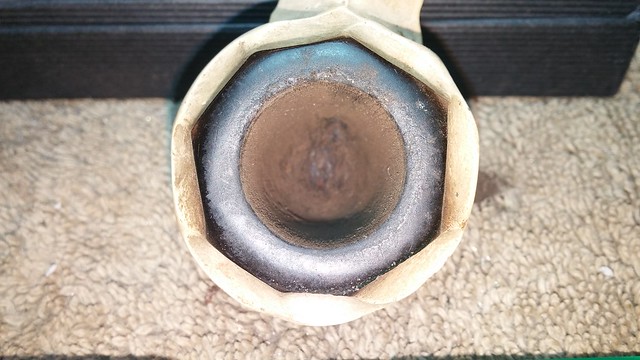
The previous piper must have used a pen knife or a pointy reamer on this pipe. With the cake out of the way, I could see that the floor of the chamber had been dug out somewhat – thus my cautious approach to reaming meerschaum. The damage isn’t horrible, but something to note at this point.
I used pipe cleaners and cotton swabs dipped in alcohol to clean the pipe’s shank and airway. As I was dealing with block meerschaum and not pressed meer, I was fairly liberal with the alcohol, though not to excess. Meerschaum is, essentially, very porous stone, so it absorbs liquids readily; it pays to be conservative in regard to the amount of liquid used during cleanup.

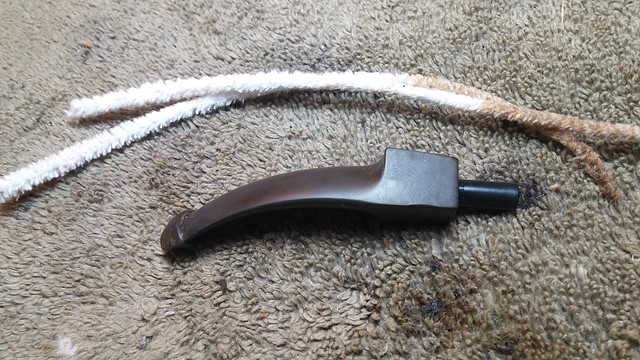
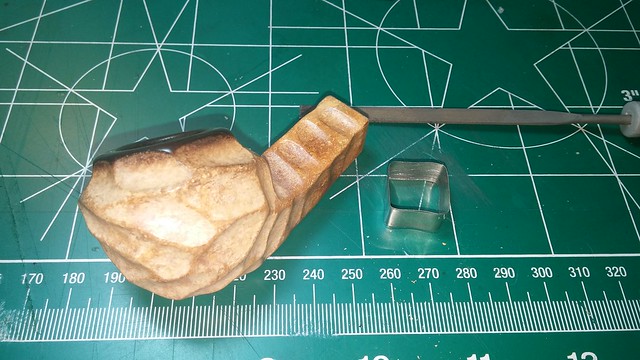
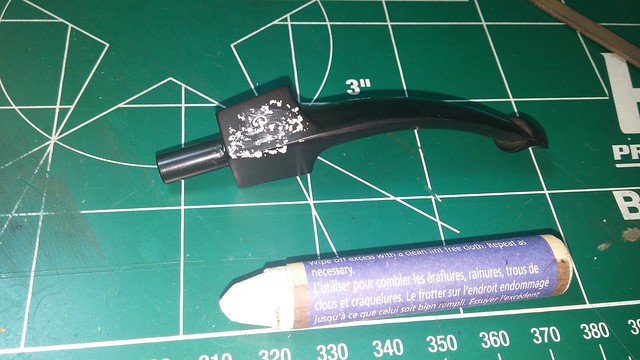
I kept running into a partial blockage of the airway during my cleaning – what turned out to be a hardened blob of tars and debris just inside the draft hole. Using a drill bit the same diameter as the airway, I carefully removed the blockage, turning the drill bit by hand. You can see the culprit below the stummel in the pic below.

Turning to the exterior of the stummel, I used 0000 steel wool and 1500-grit micromesh to scrub the lava from the rim. A cotton pad dipped in alcohol wiped away the surface dirt and grime that had accumulated in the deep depressions in the pipe’s finish.

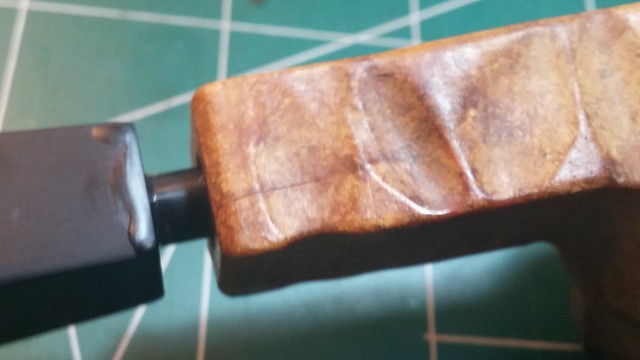
I ran a couple of exploratory pipe cleaners dipped in alcohol through the stem to make sure the airway was open. It was both open and very clean, but here’s when I ran into the first surprise with this pipe. The alcohol softened the vulcanite.
The inevitable spillover from pushing a damp pipe cleaner through the stem made the exterior of the stem sticky, and the edges of the diamond shank where my fingers were holding the stem became slightly distorted. In the second picture you can even see my fingerprint pressed into the softened vulcanite.
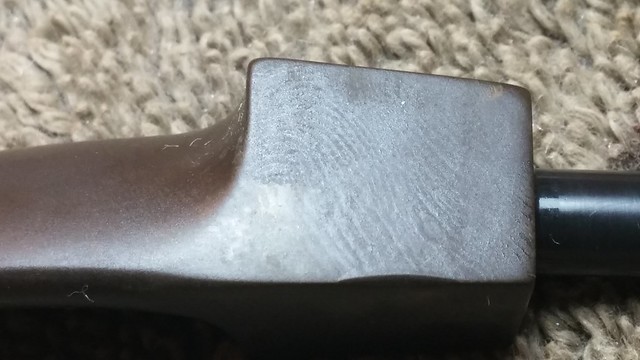
I’ve come across this before, but never on a better quality pipe like a Peterson. I can only assume that at the time of manufacture there was a shortage of good vulcanite. I immediately stopped what I was doing and wiped away as much alcohol as I could from the stem.
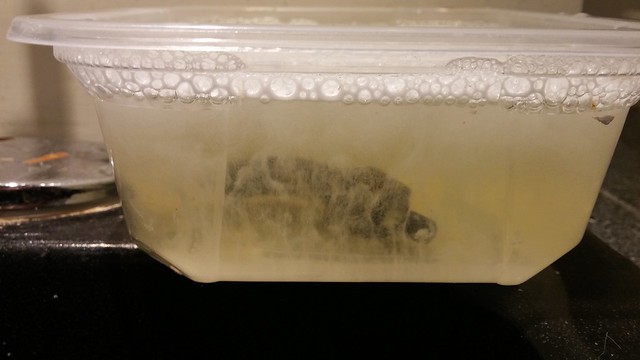
Vinegar is a good substitute cleaning agent when working on stems that react negatively to alcohol, but since this stem was already clean, I simply moved on with the rest of the cleanup. I dropped the stem into some Oxyclean for a soak and left it there for several hours.
I somehow neglected to take photos of the stem when it came out of its bath, but the Oxyclean seemed to have improved things. The vulcanite was hard again, and after scrubbing away the raised oxidation and grime, the stem looked almost new.
I smoothed out the distorted edges of the stem with a file and sandpaper, and then polished out the sanding marks. While I was at it, I smoothed out the tooth chatter at the bit and sharpened the edge of the P-lip button as well.
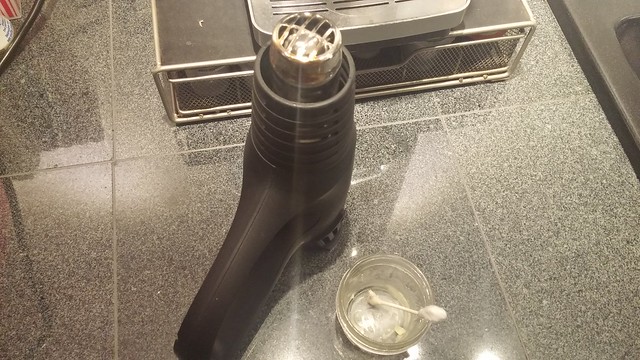
With stummel and stem clean and ready to go, the last step of this meerschaum overhaul was to wax the stummel. This involved “painting” melted beeswax onto the stummel and warming it over a heat gun or hair dryer; the wax gets absorbed into the meer, and draws the colour to the surface of the stummel to build patina.
I had a feeling that this pipe had not been waxed in a very long time, and possibly not since it left the factory. That being the case, there could be a fair amount of colouration hiding under the surface.
I was not disappointed. This meerschaum stummel was thirsty, and absorbed as much wax as I could throw at it. In return, the wax brought out the patina, which ranged in colour from honey to dark amber. The pipe appears lighter in these pics than it is in person, although you can see the darker amber patina in the ridges of the rustication.

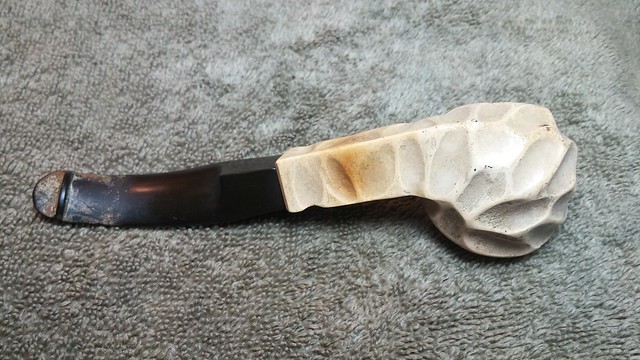
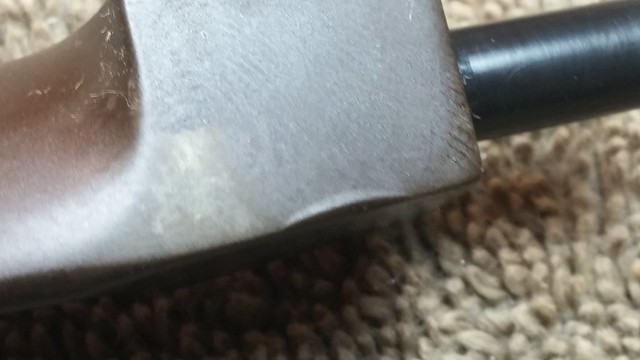
The new patina was a lovely surprise, but the waxing also revealed something else – a tight, thin crack running about three-quarters of and inch down the shank from the mortise. You can see it in this pic; and don’t worry – the blob on the end of the stem is beeswax. I didn’t melt the stem!
The crack needed to be glued and the shank banded to make a permanent repair. Glue is the easy part of this job – I flowed a small amount of thin CA glue into the crack and let it cure after wiping away the excess. Banding a diamond shank, however, is a bit trickier.
It isn’t possible to order a square shank band; bands are only available round. For the pipe repairman this means you must make a square peg fit in a round hole, and do it neatly, without unsightly gaps.
People like to joke that you’ll never use math outside of the classroom, but this is one instance in which middle school geometry pays off. I needed to select a round band that had sufficient circumference to form four sides of my square shank.
First I measured the length of the sides of the square shank (15mm) and then dusted off the formula for calculating the circumference of a circle (C=2πr). Dropping in my known variables, the math looks like this:
C=2πr
15 x 4 = 2πr
60 = 2πr
60/2π = r
r = 9.549
The diameter of a circle is twice the radius, so I was looking for a round shank band with a diameter of 19mm.
Lo and behold, I had a 19mm band in my supply box, so I brought it to the worktable and began the process of making a round band square.
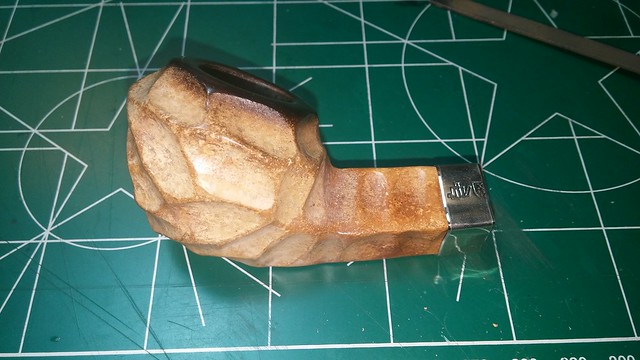
The band has some faux hallmarks; these became my anchor point for fitting the band. I centered the hallmarks on the upper left face of the diamond shank, and carefully bent the band to form corners. I used the flat edge of a needle file to sharpen the edges after I had them roughed in.
When I was happy with the fit and placement of the band, I applied a bit of CA glue to the shank and slid the band into position.
With the repairs finished, I took a quick minute to refresh the Peterson “P” logo on the stem with a white filler stick before taking the pipe to the wheel.

I buffed the stem with White Diamond compound and applied several coats of Carnauba wax, and gave the stummel a light buff on a clean wheel to bring up the shine.
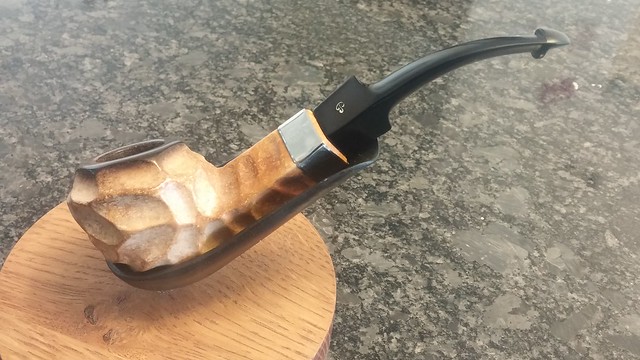
This Peterson meer is almost unrecognizable as the pale, greasy antique I brought home. Its revitalized, jet black stem and warm honey-amber stummel create what is for me an almost magnetic attraction. This pipe is practically begging to be smoked!
I had full intentions of selling this old Pete after restoring it, but I’m not sure I could let it go now. The chunky Aboriginal Finish feels good in the hand, and the pipe, at 45 grams, is relatively light and very well balanced in the jaw. It promises years of great smokes, and I’m keen to see how the patina develops with use. I am told that meerschaums colour faster with aromatic tobaccos than with English blends. I may have to dig through my cellar for some MacBaren Vanilla and give it a try!
Thanks for following along with this estate refurbishment. This pipe was a lot of fun to work on, and illustrates a number of techniques peculiar to working with meerschaum. I hope you find them useful when working on your own meerschaum pipe.
Until next time, Happy Piping! Here’s the finished pipe.
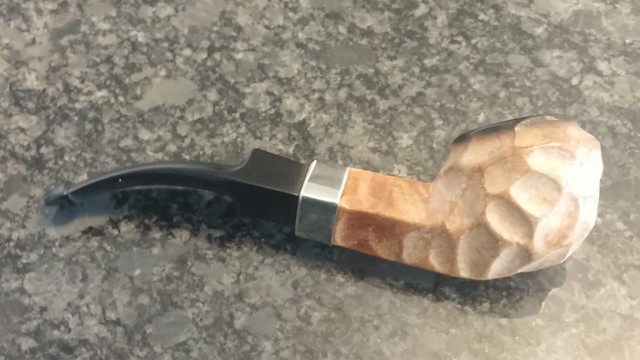


EDIT: I realized after this posted that the camera flash bleached out the colour from the meer a fair bit. Here is a pic that indicates the pipe’s true colour after waxing – reminds me of cinnamon toast!

Great job on that one, including the math on the band repair – it looks perfect!
LikeLiked by 1 person
Thanks Al. Had to brush the cobwebs out of the ol’ noggin for a minute there!
LikeLike
Good job on this meerschaum. I have one like this that I got from eBay. Mine just required the stem to be refurbished.
I would like to send you pictures of mine, but it cannot be added here. Kind regards.
LikeLike
Brilliant work mate! I adore African meer. The band you put on looks incredible.
LikeLiked by 1 person
Thanks, David. This is the only meer in my regular rotation. Iy’s a smaller bowl than I usually like but it smokes nice and dry. 🙂
LikeLike
I was comparing the P on your pipe to a Pioneer meet I have and many Petersons I own. Your pipe is actually a Pioneer meerchaum instead of a Peterson.
LikeLike
Thanks for reaching out, Charles. The Peterson and Pioneer P logos are frustratingly similar and easily confused. I am not a Peterson expert, so I passed your comment on to Mark Irwin of PetersonPipeNotes. His response:
“Your pipe is a [Peterson Shape] 80s, from the Aboriginal meerschaum line made first by Manxman for Peterson on the Isle of Mann, then for a bit by Peterson themselves after they bought the Manxman factory & moved the machinery over to Sallynoggin. The Aboriginal was made as early as 1971 for Iwan Reis, then went into general production from 1973-78. The P-Lip, BTW, is the real giveaway. Pioneer never, ever released any variant of the P-Lip.”
LikeLike