
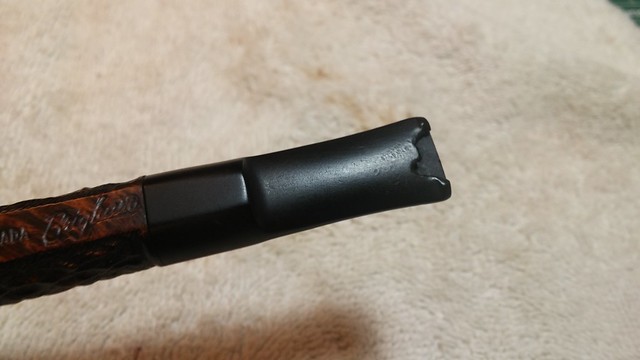
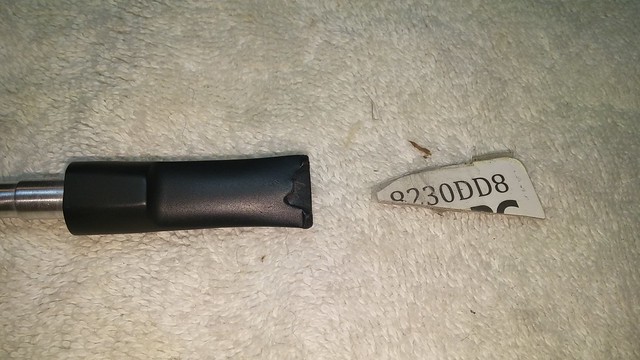
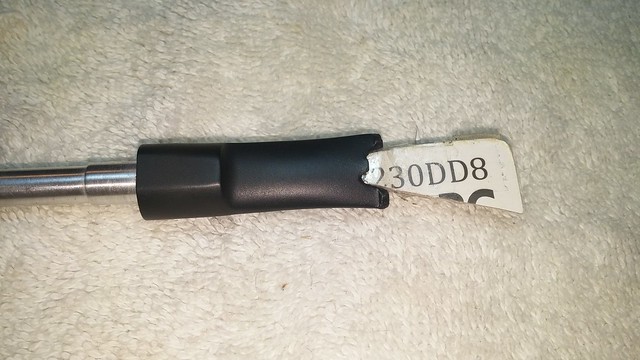
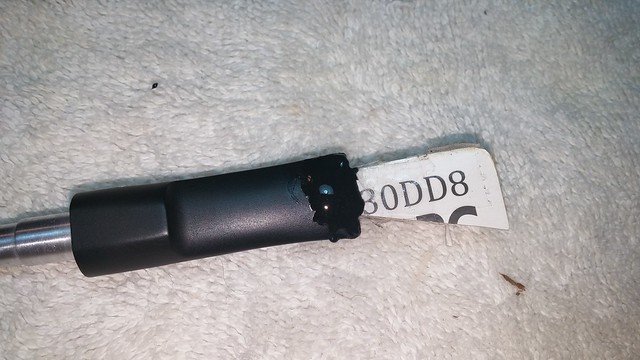
I’ve wanted to add a Brigham Club pipe to my collection for some time, so when I spotted this 4 Dot version on eBay recently, I knew I’d be bidding, despite the pipe’s obvious shortcomings. The auction listing clearly showed one major problem – the lower portion of the stem’s bite/button area was missing a large chunk of material.
It’s times like this that being both a collector and a restorer comes in handy; as it turned out, the damage, which I knew I could repair, was sufficient to make other potential buyers a bit gun-shy and I ended up winning the pipe for a very reasonable price.
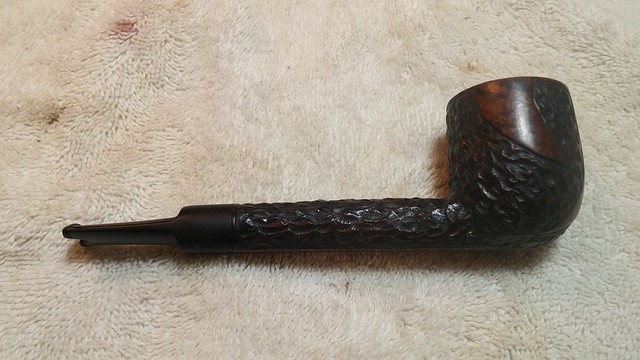
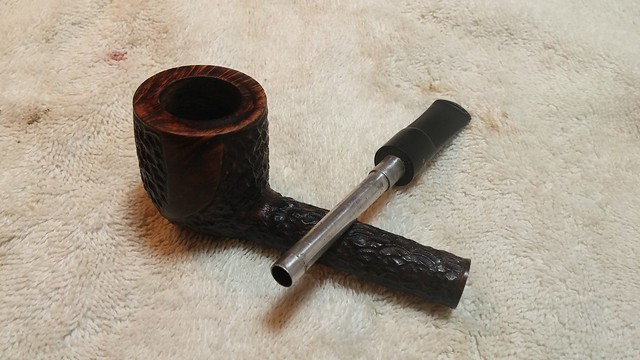
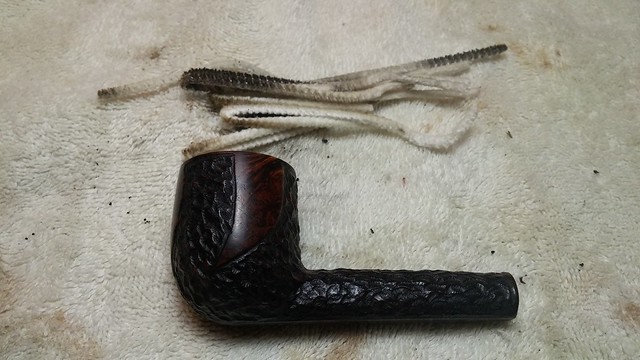
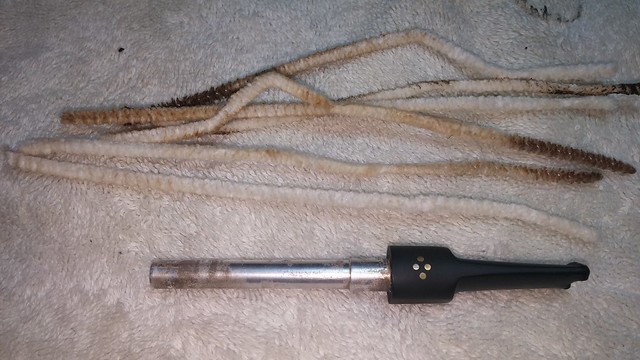
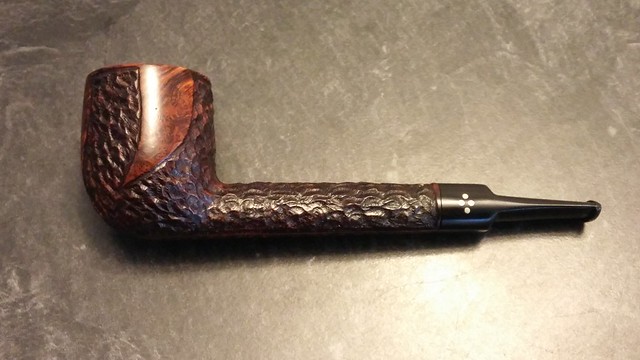
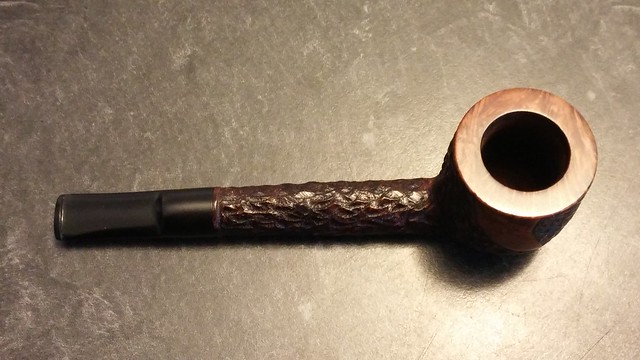
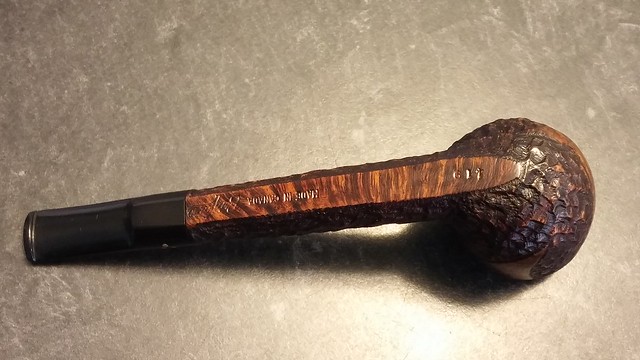
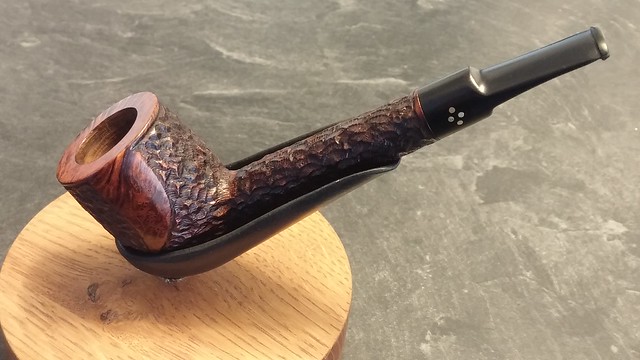
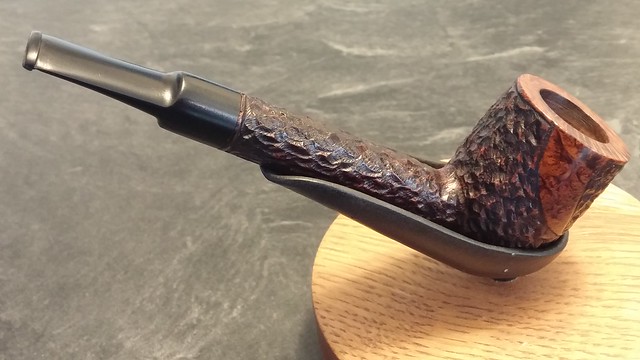
I took this series of pictures when the pipe arrived on my worktable. As you can see, a Club pipe to Brigham is a Lovat to just about everyone else, the saddle-stemmed, round-shanked cousin to the Canadian pipe shape. Apart from the aforementioned stem bite-through and chip, the pipe was in fairly good estate condition. The rustication was dirty, and the rim was a bit less than flat (a previous attempt at topping the bowl, perhaps?), but the stamps were crisp and clear.


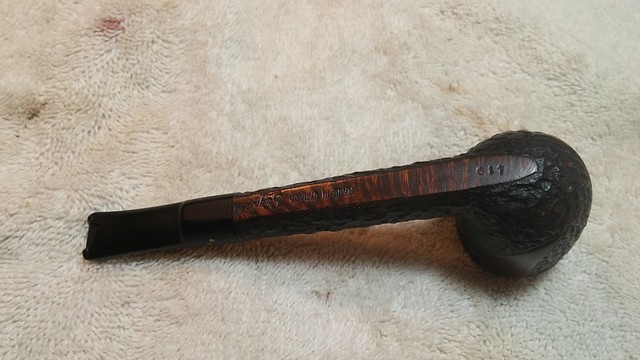

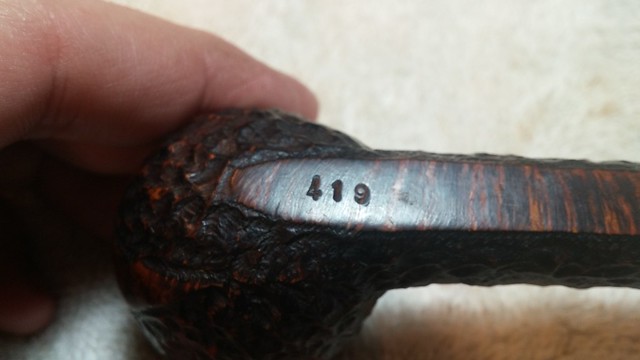
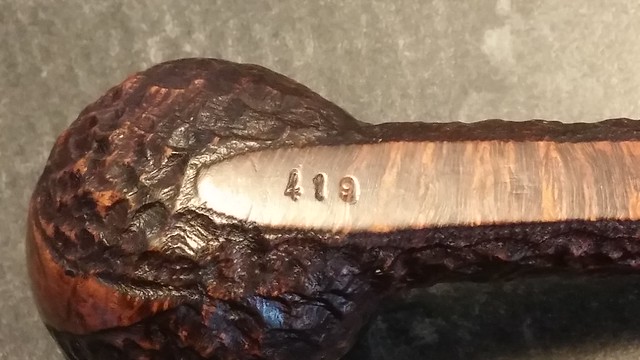
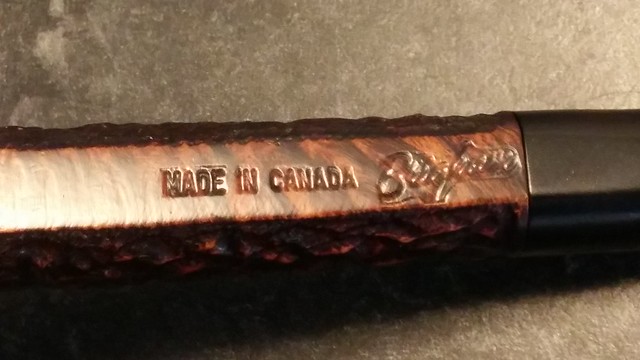
The pipe is stamped “419” under the bowl, followed by “Made in Canada” in block letters followed by “Brigham” further down the shank’s flat underside.
Brigham started stamping their pipes with the Made in Canada mark after the patent ran out on the Brigham system in the mid-1950s. The lettering style used for this pipe’s COM stamp puts its production date somewhere in the late 1960s or early 1970s. (Earlier pipes were marked Made in Canada in a thinner font, while later pipes carry the newer style “Brigham” over “Made in Canada” combination stamp.)

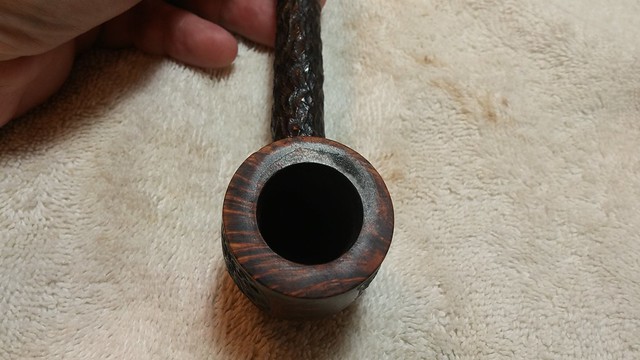
There really wasn’t much cake in the tobacco chamber, so I left the reamer in the drawer and cleaned up the chamber with a bit of sandpaper wrapped around a Sharpie.
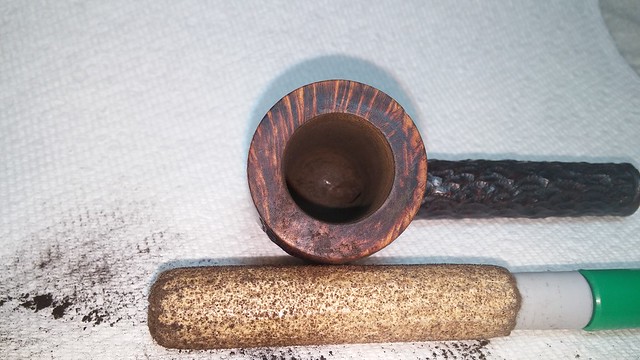
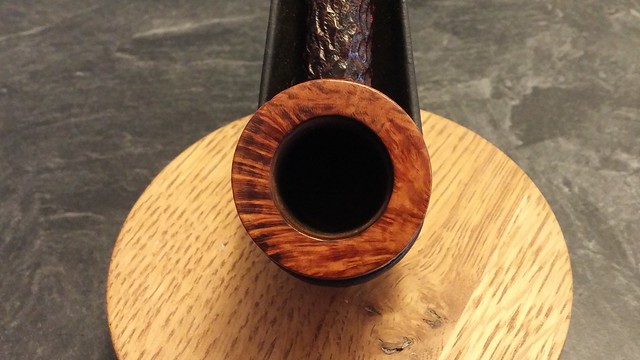
I topped the bowl gently on a piece of 320-grit sandpaper to achieve a flat rim surface while removing the least amount of briar. As you can see in the side-on shots, the bowl has a thin ribbon of smooth briar running around the bowl just under the rim. I wanted to save as much of that smooth strip as I could.

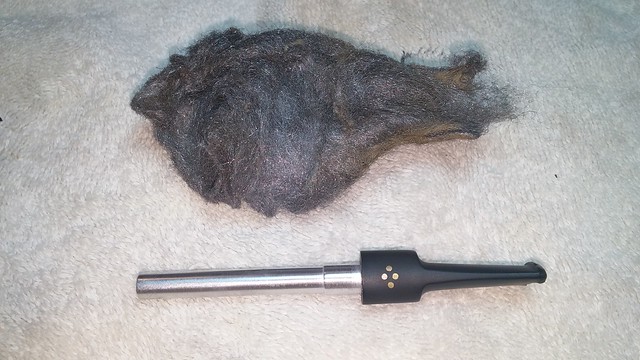
Like most estate pipes, this Brigham Club wasn’t cleaned before it was put away. I went through a small pile of pipe cleaners dipped in alcohol before the mortise and airway were clean.
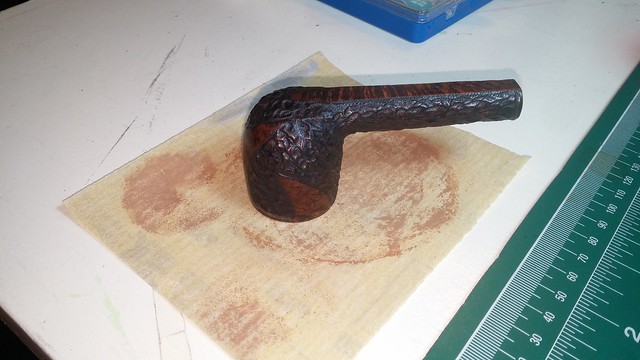
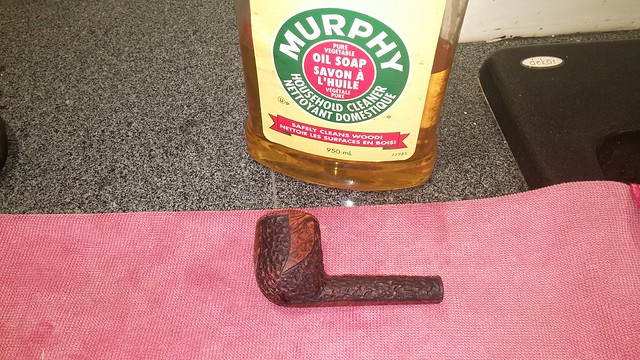
A scrub with Murphy’s Oil Soap cleaned the dirt, wax and other accumulated debris from the stummel’s rusticated finish. I dried the briar before giving it a coat of stain to blend the new rim into the existing finish. I mix this stain myself to approximate the vintage red-brown “Royal” stain Brigham used for so many years.
I set the stummel aside to rest while I repaired the stem, starting with a good cleaning of the internals with pipe cleaners and alcohol. Not surprisingly, I had to use a lighter to soften the vulcanite enough to push the first pipe cleaner through in order to open the pinched airway.
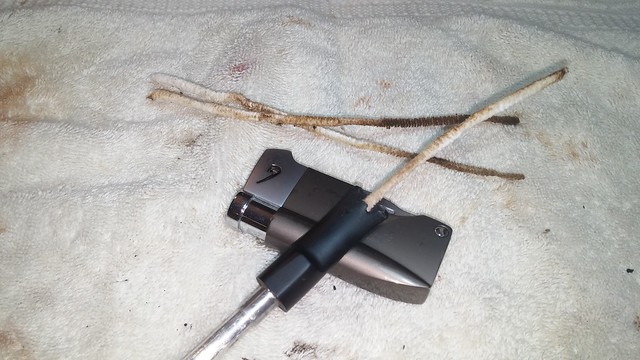
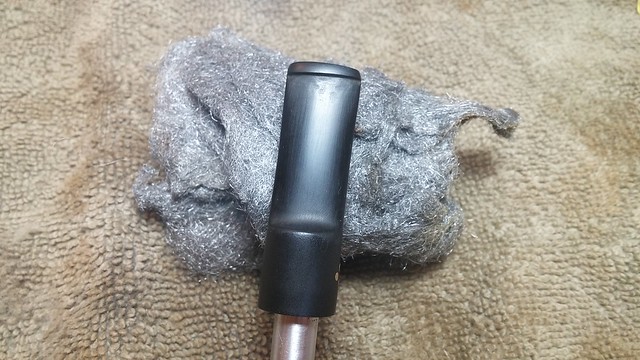
A quick scrub with steel wool removed the stains on the aluminum filter holder/tenon and brought back the shine as well.
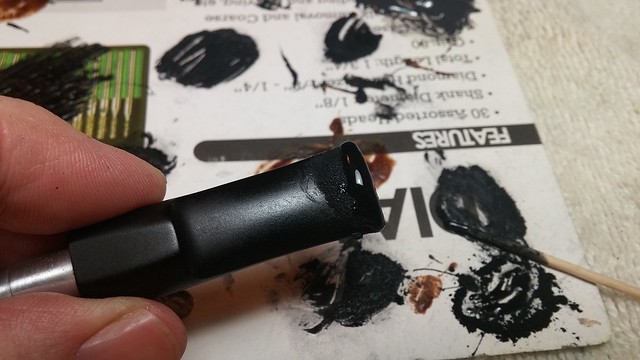
Now it was time to get to the meat of this repair – filling in the missing chunk of stem and rebuilding the button. I started this process by cutting a small triangle of cardboard to fit the stem slot, building up the thickness with layers of clear tape until the wedge fit snuggly in the end of the stem.
I mixed activated charcoal powder with thick CA glue to form a patch and applied it to the damaged area, completely filling the missing section and overlapping the solid vulcanite. I then set the stem aside to let the patch cured completely.
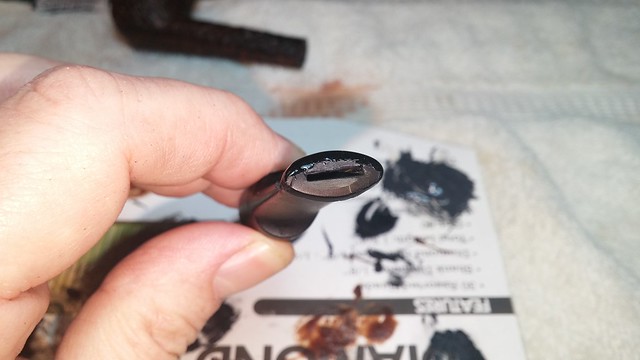
“Haven’t you just glued a cardboard wedge into the stem?”, you ask. Surprisingly, no. CA glue doesn’t bond to the tape covering the wedge. When the CA and charcoal patch had cured fully, I simply wiggled the wedge out of the end of the stem.

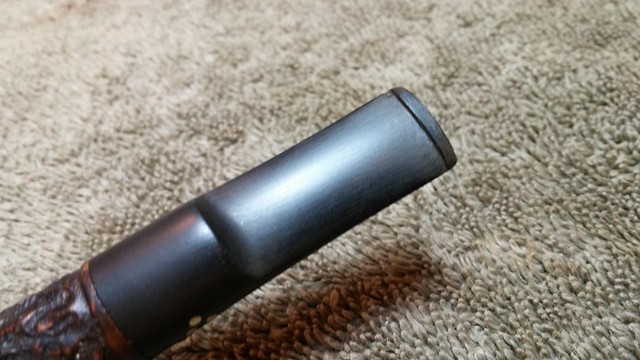
I needed to build up the button area with a few more applications of CA and charcoal to get enough material from which to carve the new button. This pic shows the last layer of patch material. You can also see the new slot formed when the cardboard wedge came out.
Then it was a case of file and sand, file and sand as I first roughed in and then refined the shape and size of the new button. This can be a tedious and repetitive process, but the ultimate reward is a repaired vintage stem instead of a modern replacement on a pipe that, in this case, is likely pushing 50 years old.
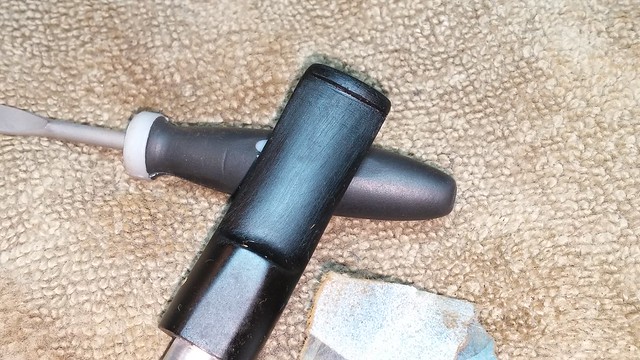
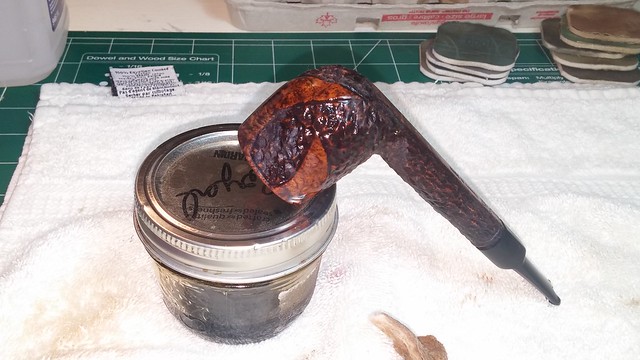
I finished the stem repair by sanding and polishing with micromesh pads to erase the sanding scratches from the coarser papers and bring up the shine. Then it was off to the buffer for a run of White Diamond compound and several coats of Carnauba wax for stem and stummel. The rustication on this pipe isn’t too deep, so I didn’t really worry about wedging wax into the deeper parts of the finish; I simply tread a bit lighter on those areas than I did on the smooth rim and stem.
I’m looking forward to packing and lighting this 60’s-vintage Brigham Club as I add it to my rack and rotation. The smooth decorative swoops on the sides of the bowl display some nice birdseye grain that makes me wish this pipe had been ordered in a smooth finish, but the fashion of the era was rustication, so I’ll have to make do with what’s on offer. Either way, I’m happy to have finally filled a hole in my Brigham collection!
Thanks for joining me for this little piping adventure. I hope it inspires you to give a second look to the next estate pipe you come across that needs just a bit more work to restore than others might want to invest.
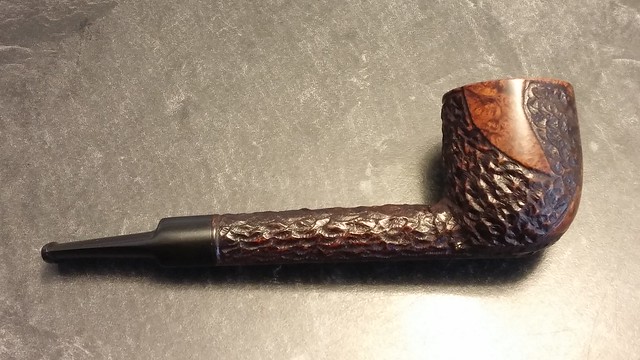
Here’s the finished pipe. Until next time, Happy Piping!


Nice work Charles, as usual. Don’t see too many clubs, nice addition.
LikeLiked by 1 person
Thanks Steve. I was pleased to be able to add it to the collection. 😃
LikeLike
Reblogged this on rebornpipes and commented:
Well done rebuild on a damaged button. Worth a read. Charles makes this look simple – but it’s not.
LikeLiked by 1 person
Very nice stem work, Charles. Interesting looking pipe.
LikeLiked by 1 person
Really excellent repair! I have a Brigham pipe and the metal stem is loose fitting. Is that a common problem and is there a solution?
LikeLiked by 1 person
A loose stem is a fairly common issue. Has the pipe been smoked recently? If not, it’s possible that the briar has dried out, opening the mortise in the process. One of my Brigs was like this. I smoked a bowl through it and the stem fit tightened right up as the briar absorbed moisture from the smoke.
Otherwise, you can apply a thin coat of CA glue (Krazy Glue) to the tenon to fatten things up. Be careful doing this, as an oversized tenon can crack the pipe’s shank if you try to force things.
LikeLike
Nice job on the stem repair, Charles. Very nice looking pipe.
LikeLiked by 1 person