
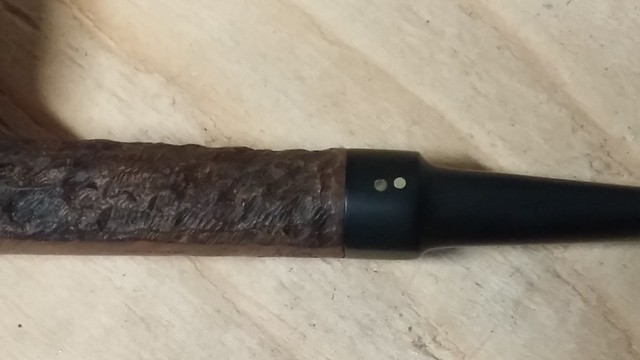
A little while back, I wrote up a blog entry on fixing two stem fit problems that crop up regularly – a too-loose stem, and a too-tight stem. Today I’d like to spotlight another common, and completely avoidable, stem problem that I deal with regularly when restoring estate pipes, namely the issue of a stem that won’t seat flush against the end of the pipe’s shank.
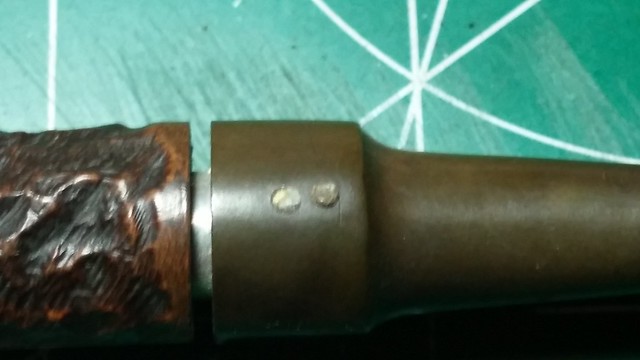
This picture illustrates the problem. No matter how much twisting, pushing, pleading or threatening, the stem simply will not insert any further into the mortise.
Presumably, the stem fit just fine on this pipe when it was new, so what has changed? The simple answer is that the pipe has been used and although a pipe cleaner may pass easily through the airway, tars and oils from the smoke have condensed inside the shank and built up a nice little plug in front of the tenon, preventing the full insertion of the stem. The remedy, of course, is to clean the shank and mortise to restore its original interior dimensions.
I try to start with the least invasive (and usually least labour-intensive) approach, and work my way up the cleaning scale as far as necessary to get the job done. In this case the work began with a good scrubbing with bristle pipe cleaners and isopropyl alcohol. The alcohol works to dissolve the tars while the metal bristles in the pipe cleaners provide some much-needed mechanical encouragement to scrub the dirt and debris from the inner walls of the airway. A set of shank brushes available through most good pipe retailers would also be very helpful here, followed up with pipe cleaners to mop up the mess.
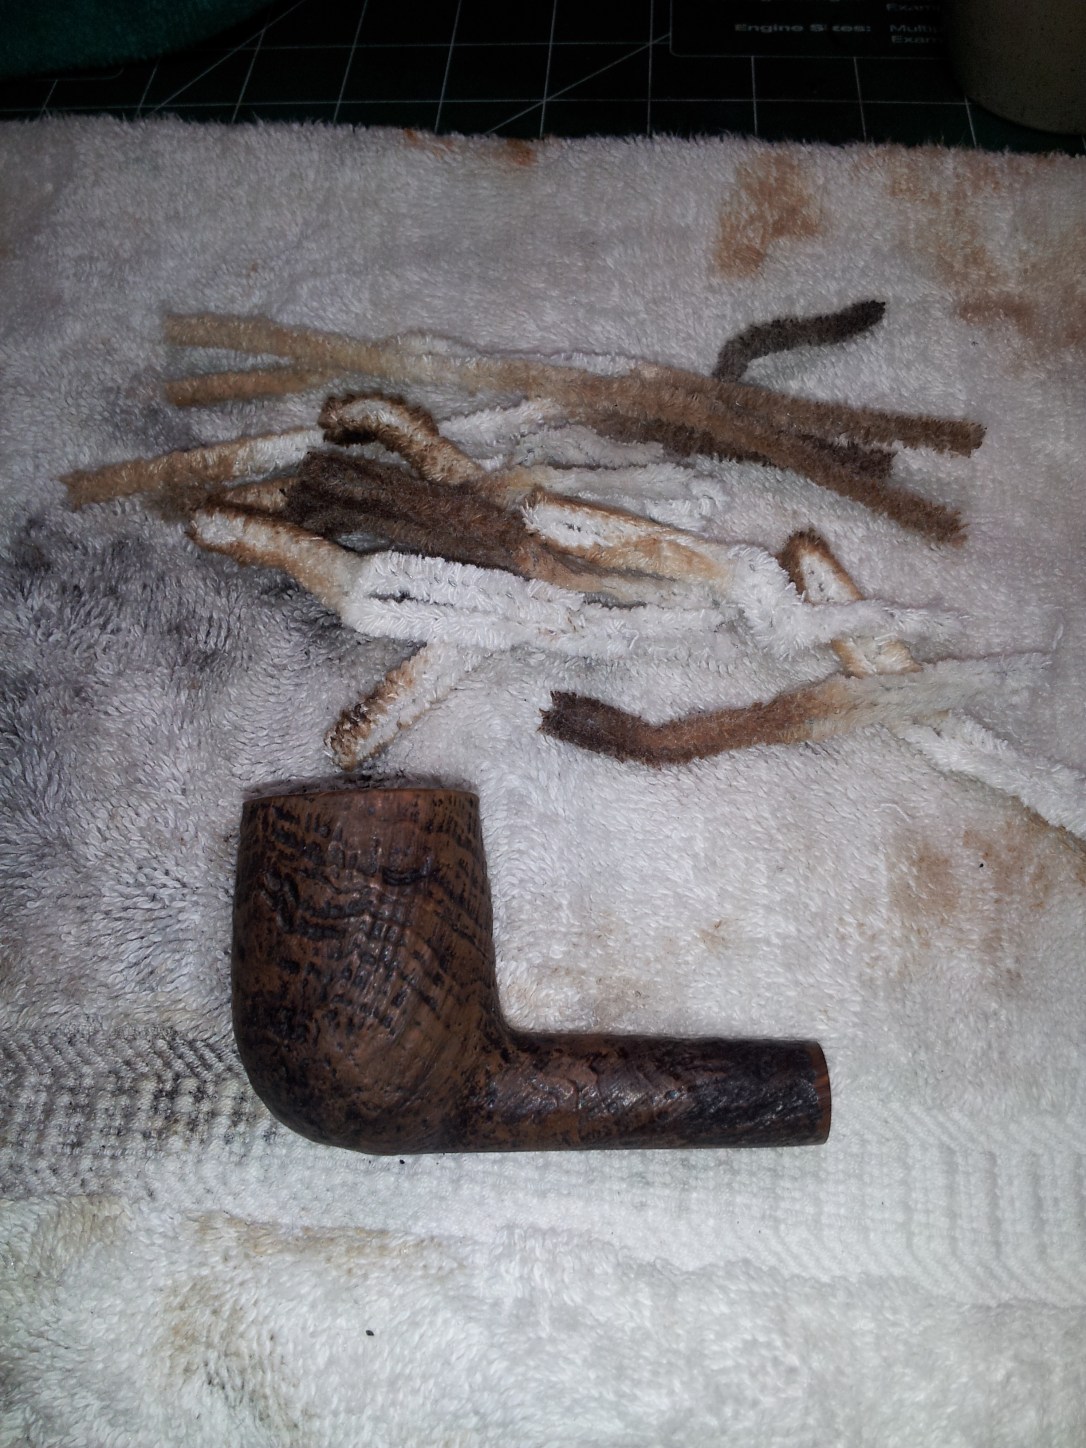
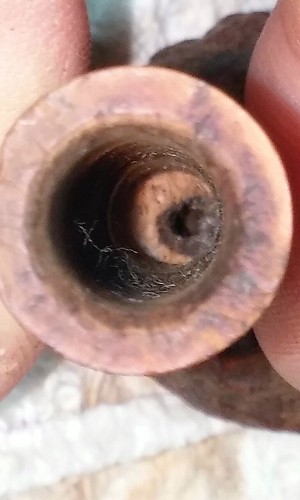
This pic is a different pipe, but it illustrates just how much grime can accumulate in the shank.
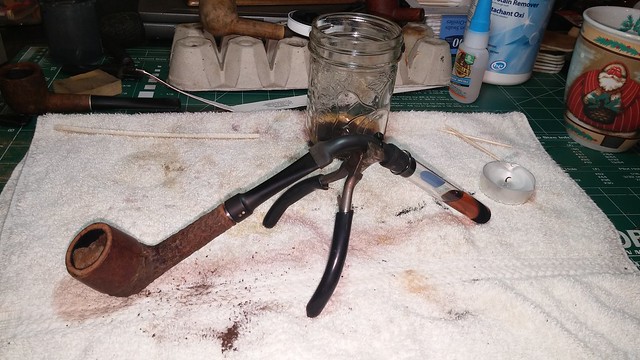
While the alcohol and pipe cleaners removed a fair amount of old tars, the stem still wouldn’t seat properly in the shank, so I amped up the interior cleaning with the retort. A pipe retort is simply a test tube of alcohol connected to the pipe stem by a bit of heat-resistant rubber tubing. The alcohol is boiled over a candle and flushed through the pipe, melting away the accumulated tars. Sometimes several test tubes of alcohol are needed, so be patient and work carefully. When you think you’ve got all or most of the grime out of the pipe, a few pipe cleaners can quickly take care of the remaining cleanup.
A word of caution – make sure that air (and therefore alcohol) can pass easily through the pipe before using the retort. A clogged airway can lead to a buildup of pressure inside the retort which can push the cork out of the test tube. Boiling alcohol raining down on an burning candle can cause serious injury!
I know not every pipe smoker has, or is comfortable using, an alcohol retort. The device does have an element of risk – alcohol is flammable, and we’re boiling it over an open flame here. If you don’t have a retort, don’t despair. There are other, less potentially explosive, ways to get your pipe back in action. I generally use the retort as my second line of attack on internal cleanings because it works quickly and, when used correctly, there is little risk of damaging the pipe.
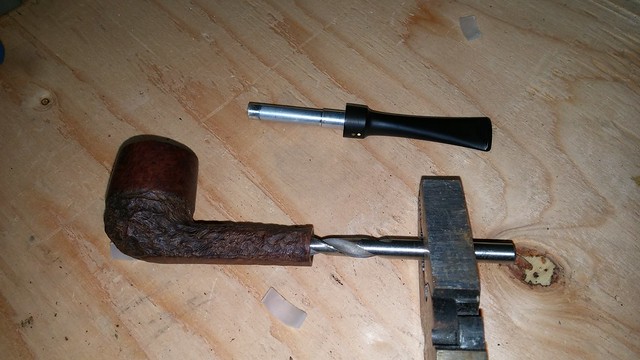
If you’re working without a retort or the retort didn’t remove all the tars from the shank, it’s time to pull out the drill bits and bore out the airway. A few things to keep in mind here. First, select your drill bits carefully – you want to auger out the tars and debris but leave the briar intact. Using over-sized drill bits or drilling too aggressively could compromise the structural integrity or smoking characteristics of the pipe. Check your progress often and stop when you see the first bit of wood dust! Also, ignore the temptation to use power tools, as the risk of over-drilling is essentially eliminated when you turn the drill bits by hand.
These pictures show the interior of this pipe shank before and after I used the drill bits to restore the original interior dimensions. Notice how the tars lined the inside walls of the airway in the before shot. I could have easily gone through an entire pack of pipe cleaners trying to remove that hard-baked layer. You’ll want a good range of drill bit sizes available to you so you can match the step-down of the bore diameter from the end of the shank to the draft hole.

With the accumulated tars, oils and bits of tobacco finally out of the airway, the pipe stem once again fits tightly against the end of the shank. Now go ahead and clean the rest of the pipe before packing a bowl of your favourite blend. Your pipe will smoke and taste much better!
I hope you find this information helpful. Maintaining a pipe in good working order is really not difficult. A regular cleaning schedule will allow you to enjoy your pipes and avoid a lot of problems down the road.
Until nest time, Happy Piping!

Great post Charles. The three methods you describe all work to remedy the problem. I have added a fourth which in combo with the others works well. I use a dental spatula that I was gifted that is the same diameter as most mortises. It has flat edges and a rounded end and it works well to scrape out the “crud” before using the other methods – it makes the retort simpler, saves pipe cleaners and keeps the drill bit from getting gummed up.
Thanks for posting this.
LikeLike
Great idea! I’ll have to find a spatula to add to my arsenal. 👍
LikeLike
here is a pic of the spatula http://i515.photobucket.com/albums/t352/SteveLaug/IMG_4095.jpg
LikeLiked by 1 person
Thanks for that Steve!
LikeLike
Reblogged this on rebornpipes and commented:
I wanted to bring this post to the attention of the rebornpipes readers as it addresses a common issue that most of us have or will face in our restoration/refurbishing work. thanks Charles.
LikeLiked by 1 person
Here is a pic of the spatula
[URL=http://s515.photobucket.com/user/SteveLaug/media/IMG_4095.jpg.html][IMG]http://i515.photobucket.com/albums/t352/SteveLaug/IMG_4095.jpg[/IMG][/URL]
LikeLike
LikeLike
Charles, this is a great article. I once again learned something new with using the drill bits to clear out the mortise.
LikeLiked by 1 person
Thanks Al. It’s all about sharing the tips & techniques!
LikeLiked by 1 person
I find that cleaning the shank, immediately following the alcohol/salt treatment often remedies this situation. I also use a small diameter, heavier bristle brush to thoroughly clean the interior of the shank. This brush is a bit heavier than a typical shank brush from a pipe store.
LikeLiked by 1 person