
This pipe has been on and off my work table since last August, believe it or not. It was just one of those projects that went in fits and starts, in this case due to the stubborn refusal of an old repair to submit to my ministrations.
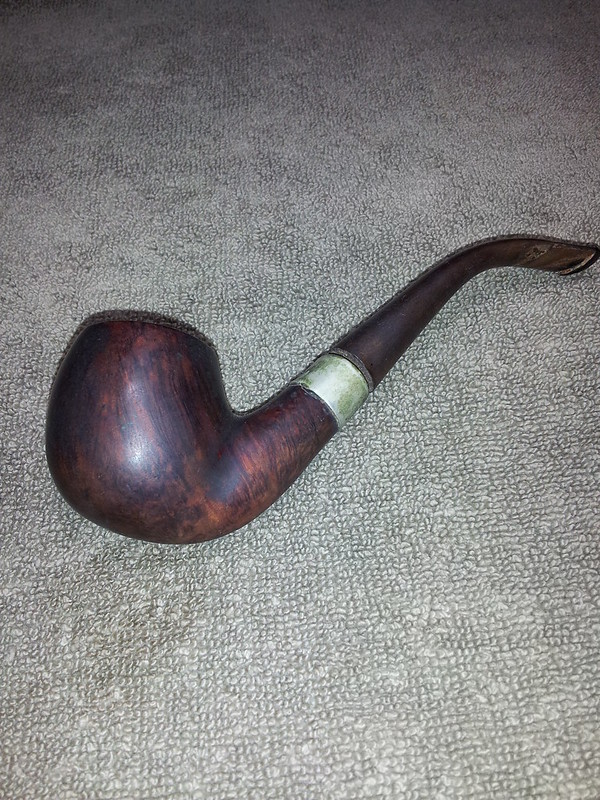
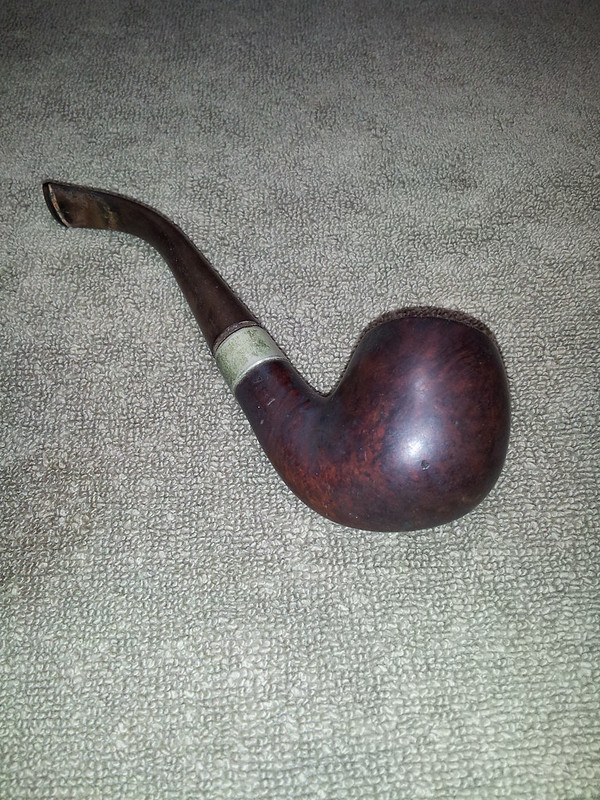
The pipe is a nicely shape full bent stamped “Jeantet” over “Neuilly” on the left shank, and, more faintly, “17-1” on the right shank. According to Pipedia, the Jeantet family was involved in the production of pipes in France as early as 1807. Production has now ceased, though the rights to the Jeantet name and logo are still held by a member of the family.
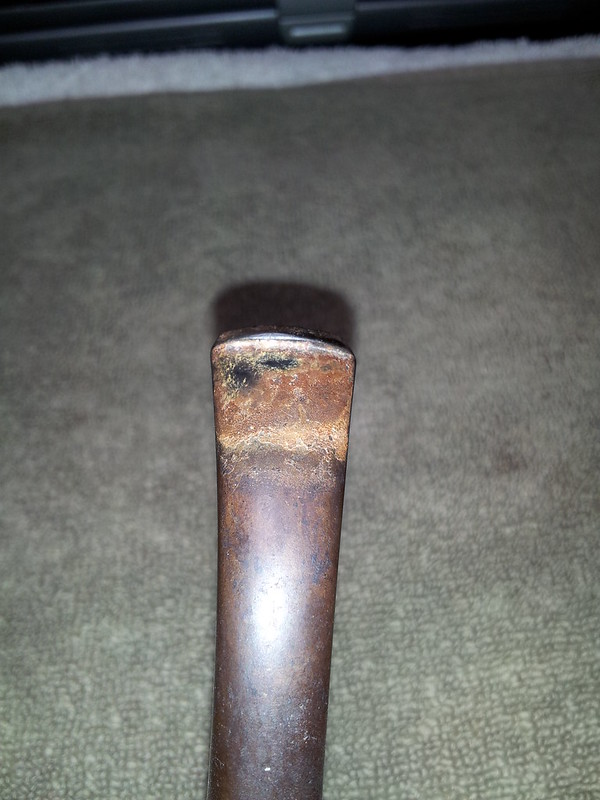
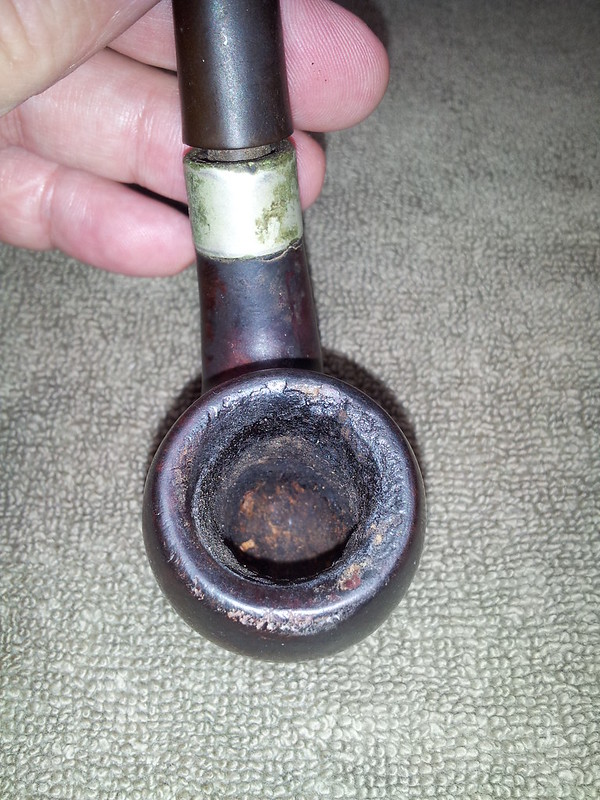
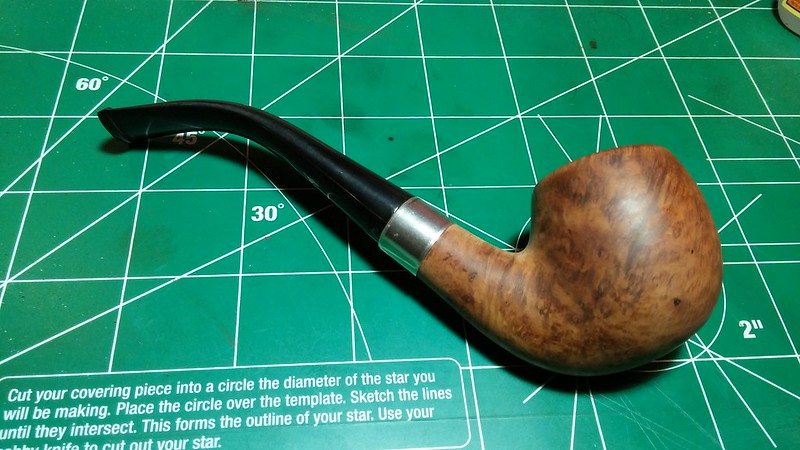
I bought quite a few pipes in this estate lot but this Jeantet was by far the dirtiest (indicating a favourite pipe, perhaps?). It was greasy and grimy from bowl to button, with heavy, uneven cake and a lava-like tar flow over most of the rim. The shank was so gunked up that the stem couldn’t be fully seated in the mortise and the stem itself was oxidized and the last inch or so at the button was crusted with calcium and salt buildup. The pipe had been banded at some point in its past, but there was no telling why or even what the band was made of until I got it clean.
As is my habit, I first reamed the bowl back to bare wood, or just about, to remove years of cake, gunk and whatever else may have taken up residence in this old pipe. Then the stummel spent the night in a bath of 99% isopropyl alcohol to loosen up the remaining crud inside and out. The stem spent the same time in an Oxyclean bath.
The real cleaning began the next day. The stummel came out of the alcohol bath and, following a quick scrub with the Magic Eraser, I started in on the shank and mortise with more pipe cleaners than I had ever had to use on any estate pipe so far. I dipped one end of the cleaner in isopropyl alcohol, scrub it through the shank until I felt it could hold no more tars and gunk, then spun the cleaner around and repeated the process with the dry end. It took about 30 minutes of this before the pipe cleaners came out white.
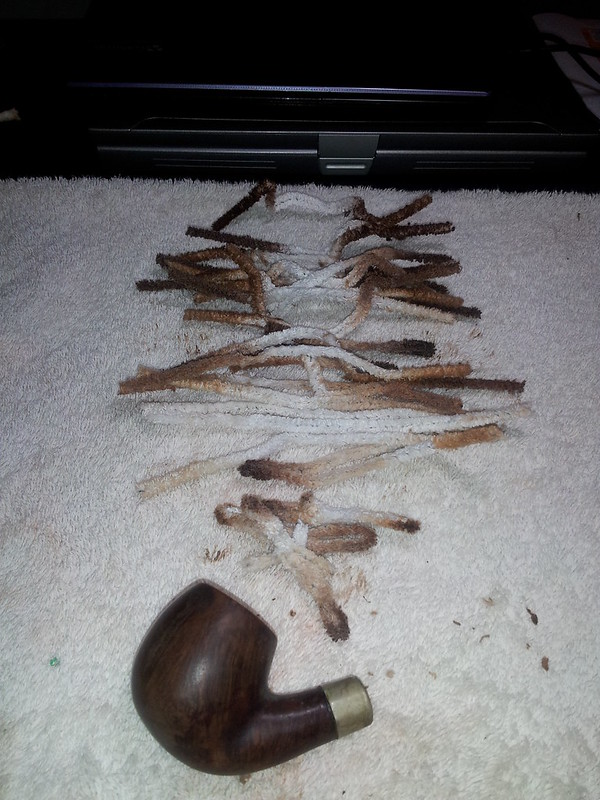
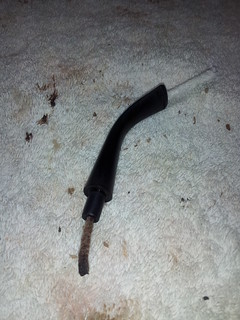
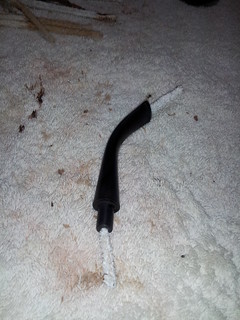
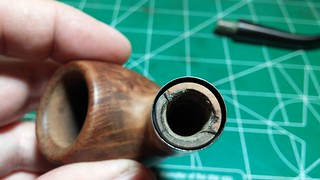
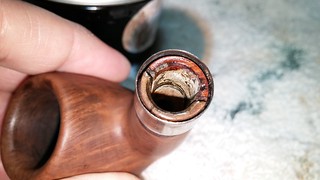
I then repeated the process with the stem. Pulling it from the Oxyclean bath, I scrubbed the outside of the stem with 0000 steel wool and a Magic Eraser to remove the built-up oxidation, then used alcohol and pipe cleaners to sort out the internals. These pics show the first and last pipe cleaner through the stem.
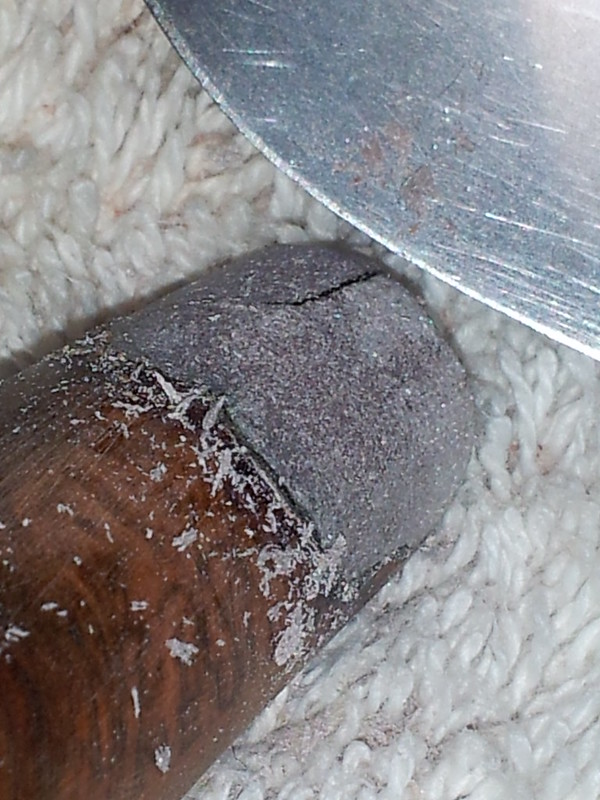
The stem, once clean, proved to be in relatively good shape, needing only a quick smoothing & polishing with 600 – 2000 grit wet/dry sandpaper to bring it into shape. The stummel received the same sanding regimen, and was shaping up nicely. One thing stood out, however, as odd. The band was bulged out over the front of the shank, and closer inspection revealed the uneven edges of a past repair peeking out from under the lower edge of the band. I decided it was probably best to remove the band and have a look at whatever was hiding underneath. If all was well, I figured I could put the band back on and get on with the refurb. This part of the restoration happened before I got a heat gun, so off to the bathroom I went in search of a hair dryer. Set to its highest temperature setting, the hair dryer heated the band up in just a few minutes, allowing me to gently slide it off the shank. This is what I found:
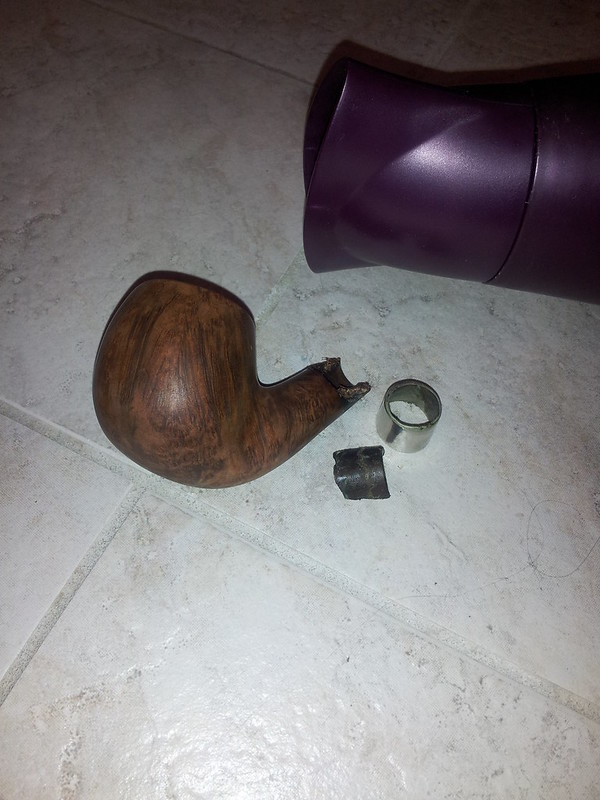
This old repair had evidently been executed with some type of PVA glue (Elmers or wood glue perhaps). The soak in the alcohol had softened the old glue, and the result was failure of the joint. The bulge in the band that had originally tipped me off was a blob of excess glue that had, for unknown reasons, been left in place when the band was put on. Weird, but first things first. Let’s get the chip glued in properly.
I cleaned up both surfaces of the break and used CA glue to set the chip back in place. I noticed while doing this that the surface of the chip was slightly sticky, so after the CA glue set up, I attempted to remove this residue with a few wipes of nail polish remover on a cotton pad. Perhaps I didn’t let the CA glue cure sufficiently, or perhaps there were still some contaminants in the joints when I set them together, but whatever the reason, my wipe-down led to a frustrating setback – the chip came loose again, and this time it separated into two smaller chips, both of which still had a layer of unknown sticky residue on the outer surface. Grrr.
After venting a few choice words about old briar and crappy repair jobs, I got back down to business. I carefully cleaned both pieces of broken shank wall and the shank itself with both acetone and alcohol to make sure that the next glue job would hold. Then I reassembled the briar jigsaw one piece at a time, again using CA glue to put Humpty Dumpty back together again. While the CA glue was still wet, I added a topping of briar dust to help disguise the repair. I knew most of it would never show once the shank was rebanded, but I figured it couldn’t hurt! This pic clearly shows the segments of shank wall after the CA and briar dust.

I let the repair dry thoroughly before sanding the repair smooth with 320-grit paper. The briar dust and CA glue sanded down as expected, but that odd sticky residue had now dried to a flaky, whitish colour which I now suspect was some kind of adhesive used to hold the band in place over the repair. Both because it was impeding my progress and because I didn’t want to leave Mystery Glue in my repair, I decided to scrape off as much as I could using the blade of a pocket knife held perpendicularly to the pipe shank. The whatever-it-was came off in neat little curls and a very fine dust.
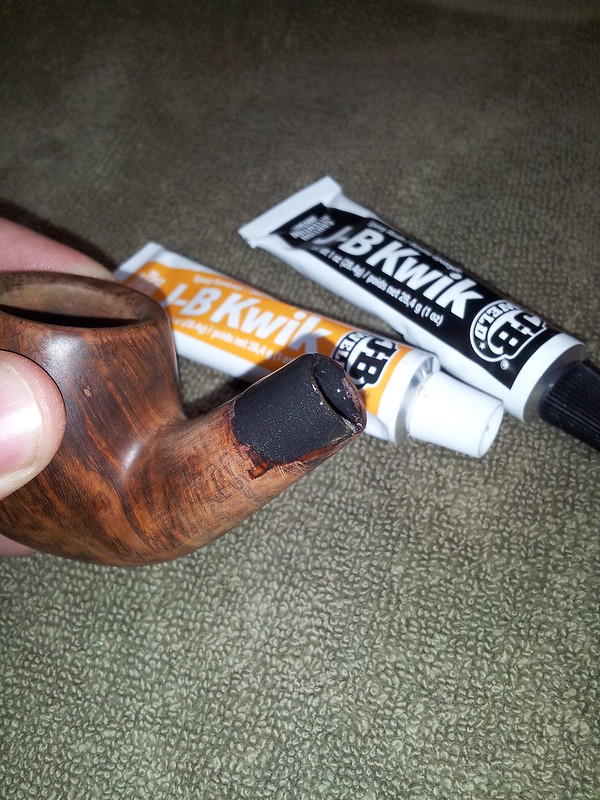
The old mystery adhesive turned out to be quite thick, so its removal left me with 2 problems: a very thin area of shank wall in the mortise area (a recipe for another failure) and a mismatch in surface levels. A bit fed up with this string of setbacks, I decided to pull out the big guns and get this shank stable for good. I mixed up a small amount of JB-Kwik (JB Weld’s fast-setting cousin) and flowed it into the depressed area, overlapping the sound briar of the shank slightly. I also wiped a thin layer of JB Kwik around the inside of the mortise. In this situation, I figured two layers of steel-reinforced epoxy were better than one, though it meant I’d have a lot more filing and sanding to do afterwards to refit the tenon. If I had it to do over again, I would probably elect to do an “interior banding” by gluing a brass or aluminum tube inside the mortise, but at the time I didn’t have materials available, and I knew I’d have to band it on the outside for cosmetic reasons anyway so I used what was on hand.
I left the JB Kwik to cure overnight, then sanded the exterior patch flush with the surrounding briar. I did the same on the inside of the mortise using rolled up sandpaper and a needle file to knock down the roughest bits of the epoxy repair. More interior work will need to be done to complete the fitting of the stem, but this can wait until after the shank has been rebanded. The old band was quickly ruled out as an option – it was too big, and probably was all along.
The diameter of the repaired shank measured out at 13.46mm, increasing to 15.35mm at the bottom of the repair area. The band, on the other hand, started at 14.02mm, and wasn’t long enough to cover the entire repair area anyway. I was unable to source a tapered repair band, so split the difference in diameters and used a bit of sandpaper to flatten the taper in the shank to make it more cylindrical. Then I placed the new band on the end of the shank, heated it over the heat gun and then pressed it home. I left the band slightly proud of the end of the shank to provide a small fudge factor when refitting the stem.

There was still a noticeable gap between the inner edge of the band and the outer end of the shank I flowed CA glue into the crack to hold the band in place and prevent the band from crushing out of shape over time.
The new band had narrowed the mortise opening slightly, but a quick sanding with 220-grit paper soon had the tenon fitting smoothly. There is a slight bit of wobble to the joint, which is hardly surprising given the trauma to the mortise, but the stem holds firmly and doesn’t leak air. Perhaps somewhere down the road I’ll revisit this pipe as I have other past refurbs, but it will do for now.
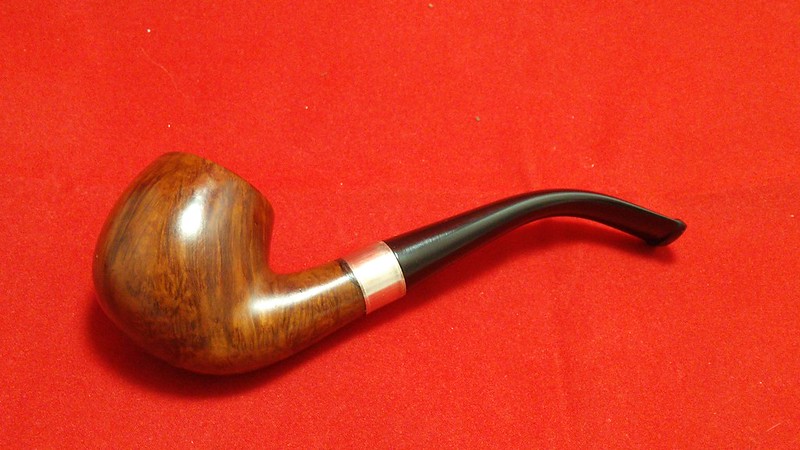
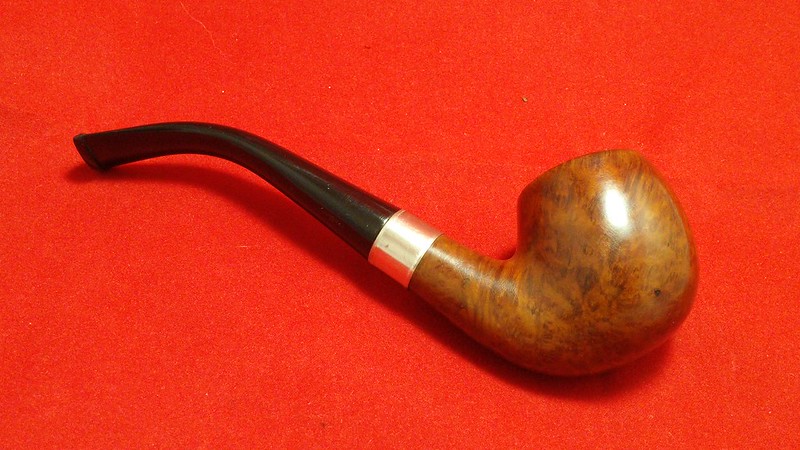
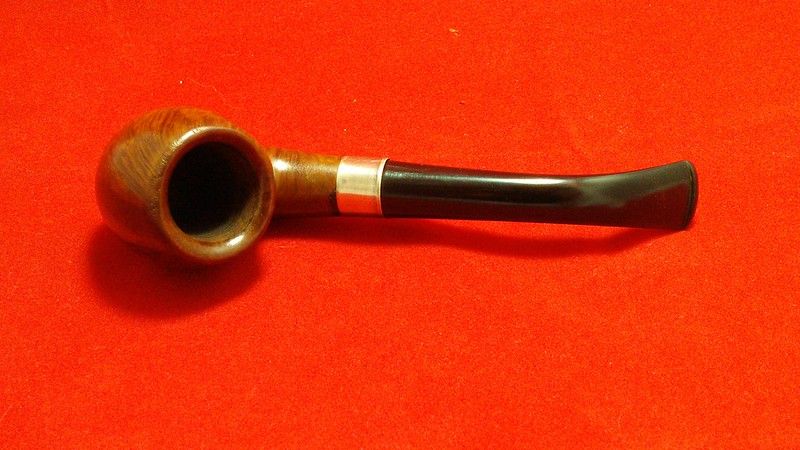
I used a Sharpie marker to colour over the sliver of grey JB Weld that is visible peeking out from under the band, and then stained the briar with a blend of Fiebing’s Dark Brown and Black leather dyes. The JB is reasonable camouflaged and the grain is nicely highlighted. I finished off the restoration with a quick buff with White Diamond compound and a few light coats of Carnauba wax. For all the headaches this pipe gave me during the refurb, I think it’s come out looking just fine. Time will tell if the shank repair holds up; if not, the pipe will be back on the worktable for the aforementioned internal banding.
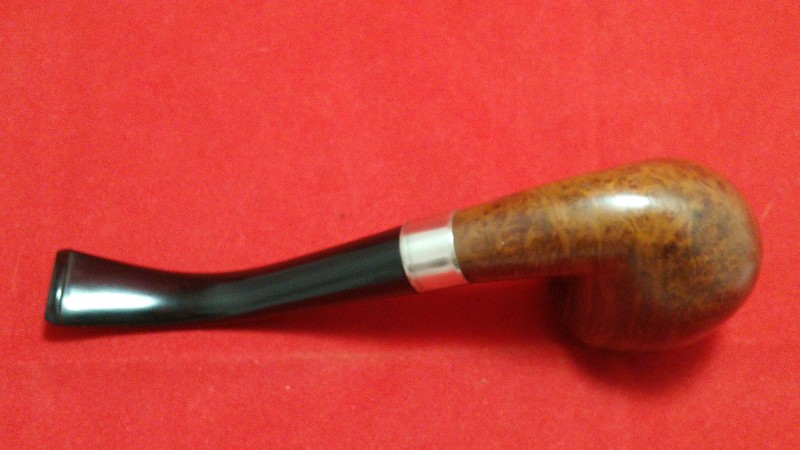
Here’s the finished pipe. Until next time, thanks for looking and Happy Piping!

Charles, I dutifully follow your posts. “No pipe left behind!” should be your motto.
LikeLiked by 1 person
Great motto, Todd! Thanks for supporting DadsPipes with your readership.
LikeLike
I like Todd’s motto for you. Once again, you’ve saved one from the trash.
LikeLike
Thanks Al. This one was odd in that it took so long to complete. I got to a certain point, stepped away “briefly” and forgot about it until I pulled it out again recently. If I was to start fresh on it now, I would do a few things differently, but I’m still fairly satisfied with the outcome.
LikeLike