
Peterson’s 999 shape is a classic of the marque, a stocky Rhodesian available in many finishes and across many Peterson product lines with both P-Lip and Fishtail stems. It is a pipe shape that has stood the test of time, but like many pipes with trim rings cut into the bowl, it is susceptible to damage from mishandling or abuse.
This image, borrowed from the Peterson website, shows the 999 shape in the Aran line in a Smooth finish and sporting a Fishtail stem.
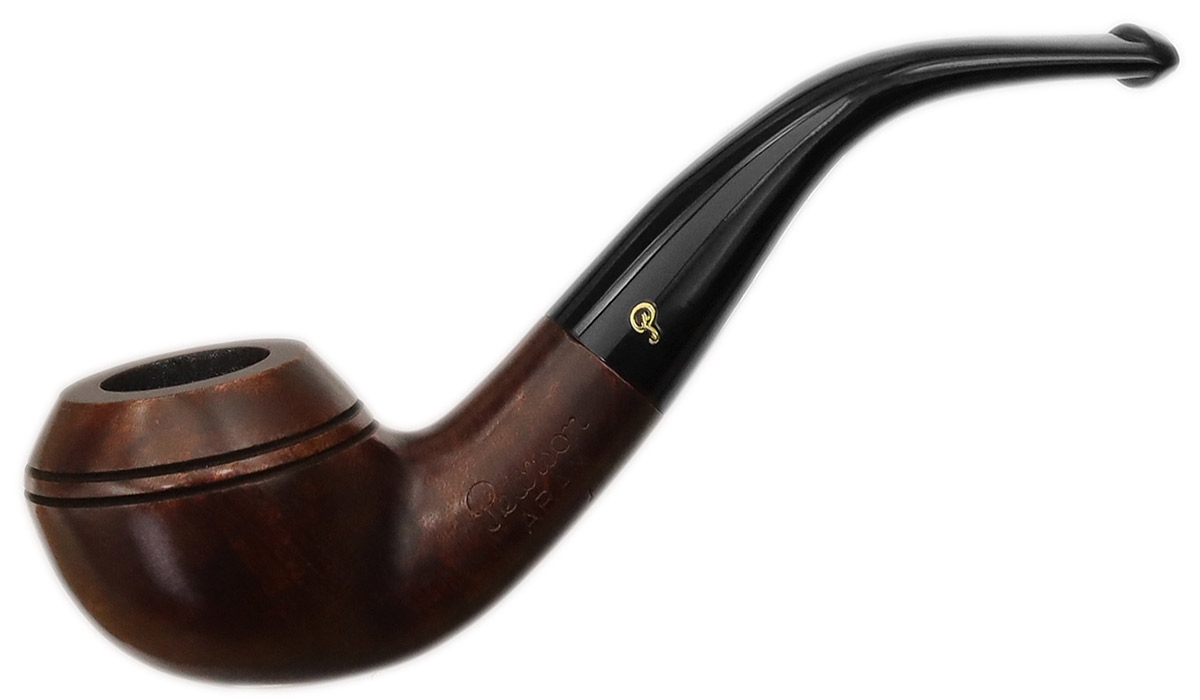
As you can see, the twin trim rings circumnavigating the bowl create a fairly thin “fin” or band of briar in between the rings. This fin, and both the inner and outer edges of the rings, is a common place to find small chips, dings and patches of missing briar. I’ve filled and re-cut trim rings on a number of pipes over the years, but the Peterson 999 on the bench today would prove a particular challenge.
This series of images shows the state of the pipe when it arrived on the bench. As you can see, the band of briar between the trim rings is completely absent, broken away in rough chunks that extend both above and below the rings. Apart from that obvious (and startling) damage, the rest of the pipe was in pretty good shape, free of cracks or breaks, though the P-lip stem was oxidized and didn’t fit flush against the shank face.


The left shank is stamped “Peterson” over “Aran”. The right shank carries the shape number, “999”, and the shank band is marked “Peterson of Dublin” in a cirlce with the Peterson “P” in the centre.


Now let’s take a closer look at the damaged stummel. It’s really not a pretty sight.


To get the ball rolling on this restoration, I started y giving the stummel a really good cleaning, inside and out. As you can see from the image below, I needed to clean quite a bit of tarry gunk from the shank, compliments of the Peterson System. The sump built into the shank is designed to collect tars and moisture during use, but it only works if it’s kept clean.

A scrub with Murphy’s Oil Soap cleared years of handling grease, dirt and old wax from the surface of the briar.

It’s not unusual for shank bands to come loose during the cleaning process, especially those installed with glue rather than by compression. This Aran stummel was no exception.

A quick bit of scraping and a scrub with 0000 steel wool removed the remains of the PVA glue used to install the shank band.

Then it was time to get to the meat of this job – filling the trench of missing briar. I’ve tested many different filler materials over the last decade or so of doing pipe restorations, and somehow I always come back to a roughly 50/50 mixture of briar dust and thick CA glue.
I applied the mixed filler in small batches, partly for additional control over where the filler goes and partly to avoid a larger amount of filler suddenly solidifying on the bench. The working time of CA glue gets quite a bit shorter when mixed with briar dust, so timing and patience is required.

This pic as taken after completing the first round of filler application. As you can see, there are dips and hollows remaining, which I’d come back and fill after the first layer cured.


When I was happy with the coverage from the filler, I allowed it to cure completely overnight. When I cam back to the pipe the following day, I filed the filler flush with the surrounding briar and also took a bit of time to tidy up the rim of the bowl.


The sharp-eyed among you may have noticed the starfield of small holes in the filler medium in the images above. This is characteristic of CA glue, which cures rather than dries. The exothermic reaction creates tiny bubbles in the glue, which show as these signature small holes after sanding.
To smooth out as many of the tiny bubbles as possible, I first coloured the filler with a Walnut stain pen, then covered the stain with a layer of thin CA glue. The thinner glue flows into and over the bubbles, providing a smoother finish.

When the skim coat of thin CA glue was cured, I again sanded the stummel smooth.

Some of the dots visible in this image are flecks of briar dust while others are remaining open bubbles.

Before putting more work into achieving a perfectly smooth finish, I decided to conduct a stain test. As you can see below, the band of filler is still pretty obvious, shining through a few layers of Dark Brown leather dye. While I was hoping for better results, I was not surprised. Tiny fills might disappear into the stain, but this huge band of filler would be difficult to blend in.


And so, the decision was made to rusticate the smooth stummel, which I accomplished using my rotary tool and a small round carving burr. After taping off the stamps to protect them from the burr, I carefully rusticated the entire stummel, leaving only the rim smooth.

When I was happy with the overall look of the rustication, I applied a few coats of Dark Brown leather dye, flaming the dye to burn off the alcohol and help set the colour.

The Dark Brown dye was followed by a few coats of Black dye, which was also flamed.

A wipe of mineral oil helped to push the dye further into the briar while giving the finish depth and injecting some moisture into the wood.

I allowed the oil to sit for a minute or so on the briar, then hand buffed the excess away using a soft towel. With the work on the stummel now all but complete, I took the opportunity to glue the shank band back in place with a few drops of CA glue.

Meanwhile, the Vulcanite stem had been soaking in an Oxyclean bath to soften the oxidation and make it easier to get the stem back to black.

I pulled the stem from the soak and scrubbed the exterior first with 0000 steel wool, then a bit of Magic Eraser to remove the worst of the oxidation. Returning to the bench, I ran pipe cleaners dipped in 99% isopropyl alcohol through the stem, removing quite a bit of tar and debris from the tapered airway.

Wet sanding the stem with 600 and 2000-grit sandpapers smoothed out any scratches and prepared the stem for final buffing.

Finally it was time to reunite stem and stummel and take the finished pipe to the buffers for a run on both the red Tripoli and White Diamond wheels. I took care to avoid packing buffing compound into the nooks and crannies of the new rusticated finish. A few light coats of Carnauba wax completed with rather involved pipe rescue project.
The finished pipe looks great, in my opinion. The rustication pushes the filled area into the background visually, and the buffing allows the Dark Brown undercoat to shine through the Black stain here and there, giving the pipe a classic, natural appearance. The restored P-Lip stem shines smartly, set off by the bright silvery sheen of the shank band.
I hope you enjoyed following along on this project. Many people would have resigned this Peterson Aran 999 to the scrap heap, but the pipe’s steward saw its potential and now so have you! I’m very pleased to have returned this classic Rhodesian to active service. May it provide its steward with many years of smoking companionship.
Until next time, Happy Piping! Here’s the finished pipe.


Wow, great save!
LikeLiked by 1 person
Thanks! I will admit to being slightly daunted by this one initially! That was a LOT of filler. 😄
LikeLike
That pipe looks lovely in its new rusticated presentation.
Do you foresee any potential of movement in the fill due to differential response to heat in the bowl?
LikeLiked by 1 person
Thanks! I think the pipe came out quite well, especially considering the extent of the damage.
I’ve used the same filler for years without issue, so while I’m not anticipating any issues with it, I’m also aware that I’ve never used this much filler on a pipe before. Time will tell, though, and any problems that arise can be dealt with using the same techniques. 👍
LikeLike
Charles…. Always amazed at you handy work… Thank you for sharing. Blessings, Rick
>
LikeLiked by 1 person
Thanks, Rick. I try to pick the most interesting projects to post to give readers a goodnight of what’s possible and what may be more of a challenge. Glad you enjoyed this one!
LikeLike