
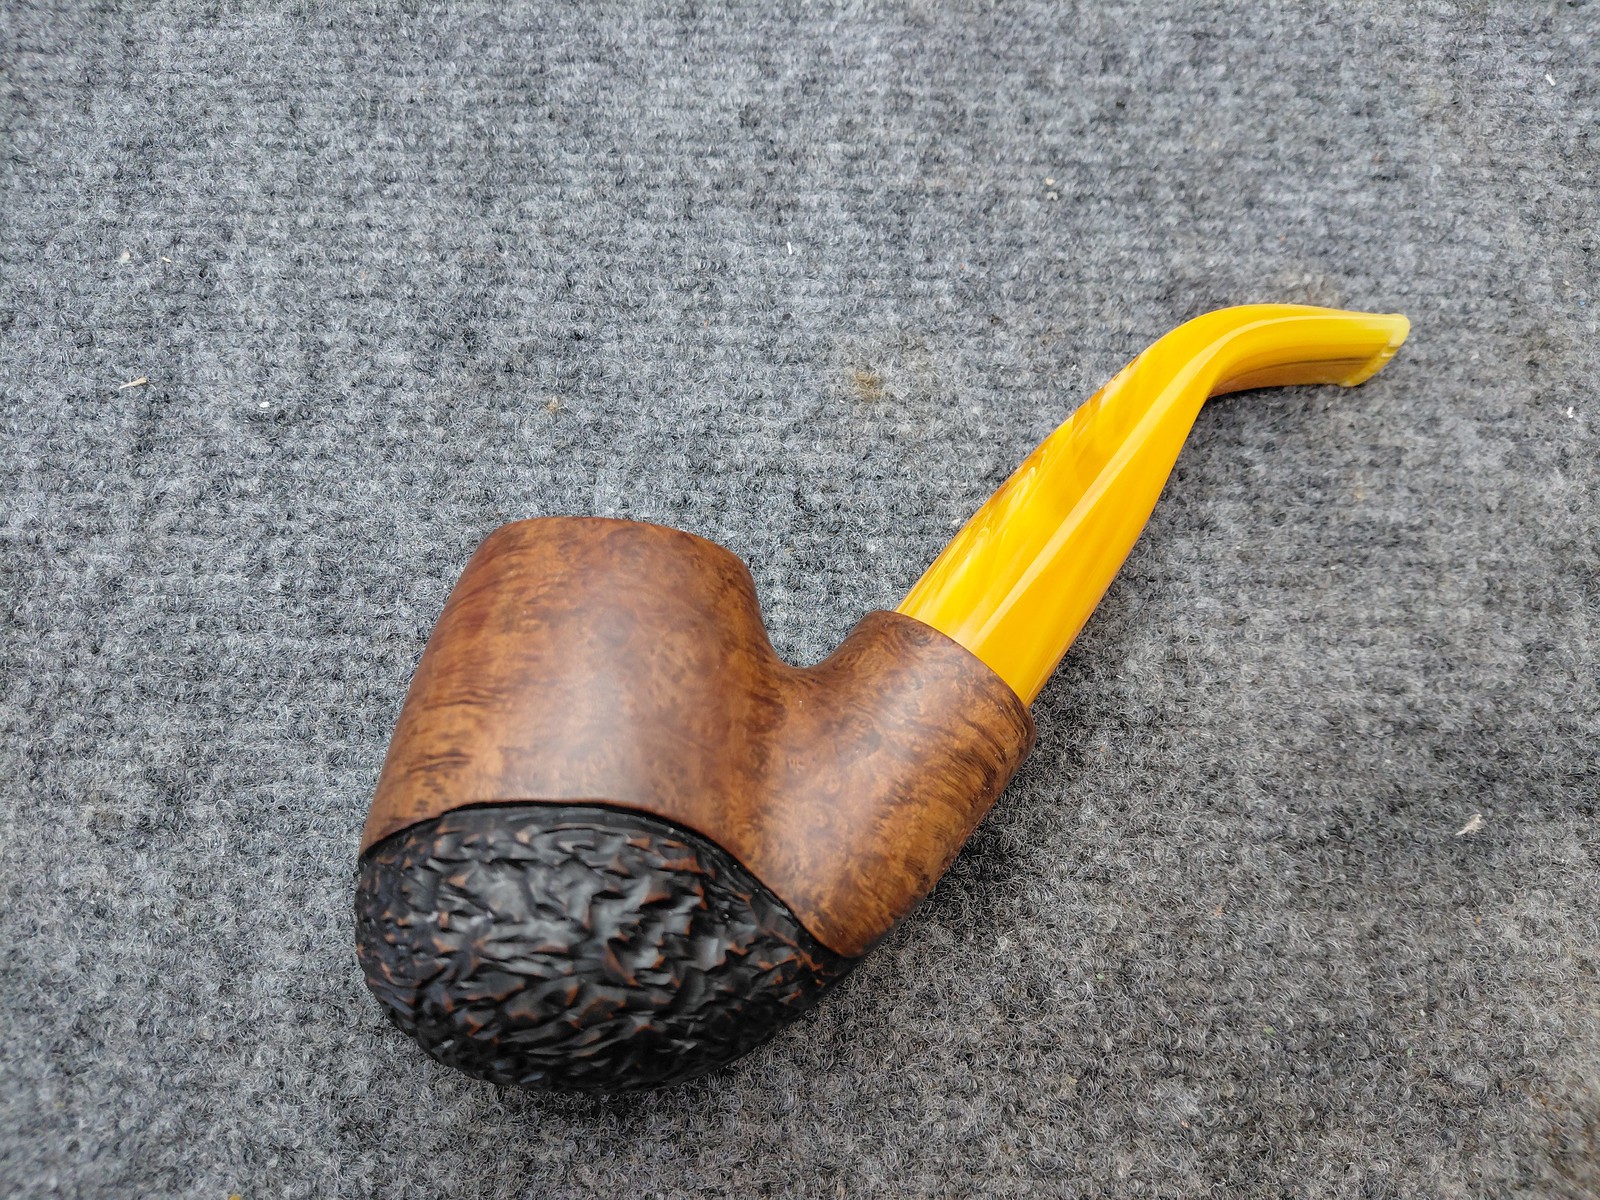
A client from the Greater Toronto Area sent me a few pipes for work not too long ago. Among them was a very large JM Boswell Jumbo Bent pipe that the client really enjoyed smoking but was a rather imposing pipe visually.
As this first series of images illustrates, Jim Boswell wasn’t kidding when he labelled this one a Jumbo. Photographed on its own, it’s difficult to understand the scale of the pipe, but the stummel is carved from a block of briar about the size of a man’s fist. The stem is just a hair under 150mm (6 inches) long and a whopping 25mm in diameter at the shank, which is still smaller than the 32mm diameter of the shank face. Boswell’s must have a stockpile of Acrylic as that diameter of rod hasn’t been available in North America for at least 6 years.


The smooth underside of the shank is engraved with “J.M. Boswell” over “2025 USA” over “Jumbo”.

The pipe’s steward was unhappy with the general bulkiness of the pipe’s appearance. By all accounts, the pipe smokes well but it’s big and heavy. My task was to come up with a game plan for lightening the look of the pipe somehow. While I pondered my options, I cleaned the pipe. As you can see, it really only needed a lick and a promise to tidy things up.


After some back and forth with the pipe’s steward, it was decided that I would modify the stem to reduce the overall chunkiness of the pipe’s appearance, converting the existing Round Taper stem to a Round Saddle stem and adding some decorative work to the shoulder portion of the saddle.
In order to do that, I first needed to straighten the bent stem so it could be mounted in the lathe. This task is accomplished in the same manner as bending a straight stem. After slipping a pipe cleaner through the stem’s airway to prevent kinking or collapse, I warmed the Acrylic over the heat gun until in became pliable.

Patience and some gentle tension on each end of the pipe cleaner gradually reduced the bend until the stem was straight. A quick run under cold water cooled the warm Acrylic and set the shape.

Now I could mount the stem in the lathe and start getting into the meat and potatoes of this job. This series of images shows the stem mounted in the lathe and marked out for the decorative lines on the shoulder.


The lines were then cut into the stem using a triangular cutting bit. This was made slightly more difficult as the stem had a slight taper. I had to eyeball the depth and width of the cuts, though a depth gauge helped keep me from going too far with the cutter.


With the lathe work complete, I moved to cutting the saddle stem profile out of the large Round Taper stem. As with my Hand Cut stem projects, I first marked out the position of the airway down each side of the stem with a thin strip of masking tape. These tape guides really help avoid accidentally cutting a twist into the stem.
I used my belt sander to quickly hog off the majority of the excess Acrylic. As you can see in the pic below, it is a dusty job! Acrylic dust is very very fine and gets airborne quickly. While I always connect my dust collection system to the belt sander when in use, I also wear an N95 mask while sanding to avoid inhaling the inevitable dust.

When the bulk of the excess material was gone, I switched to hand tools to smooth and refine the new Saddle stem shape. These pics show the progress, starting with coarse files followed by finer, smaller files for the detail work.


When I was happy with the size and shape of the s=new Saddle stem, I hand sanded the acrylic with 220-2000 grit sandpapers to remove the file marks and prep the stem for final buffing and polishing. Then it was back to the heat gun to reintroduce the bend I had removed from the stem earlier on.

To finish off this project, I took the pipe to the buffing wheels for a run on both the Red Tripoli and White Diamond buffs to smooth out any stray sanding scratches and bring up the shine on both stem and stummel. A few light coats of Carnauba wax added some UV protection and more shine.
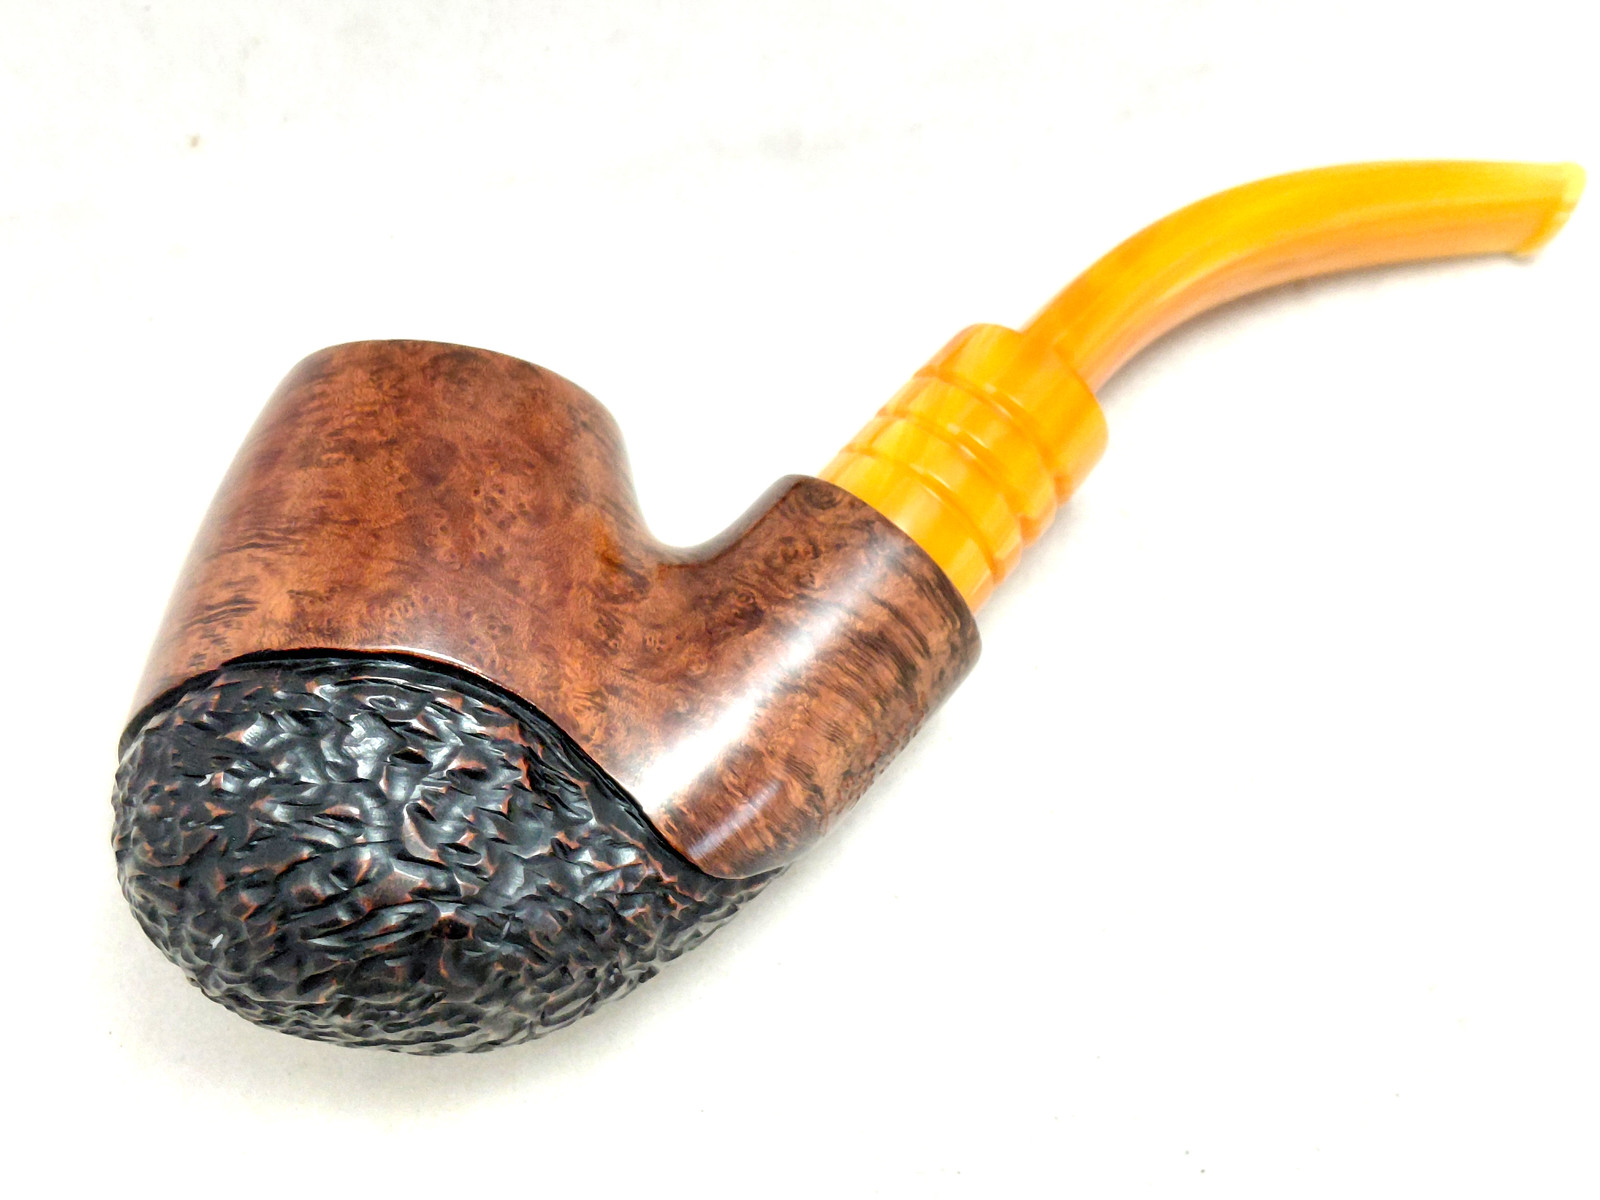
The finished pipe is still recognizable as the JM Boswell Jumbo Bent Billiard that arrived on the bench a few days earlier, but the changes made to the stem turn it into a very different pipe, at least visually. It’s still a beast of a stummel with a similarly proportioned stem, but the Saddle stem, in my opinion at least, gives the pipe a touch of lightness and elegance that the original Round Taper stem was perhaps lacking.
This handsome JM Boswell Jumbo has been returned to its steward’s rack and rotation and I am told he is enjoying the new look and feel of the pipe. That’s job done for me!
I hope you enjoyed following along on this pipe reboot project. If you have a pipe in your rack that never quite worked for you for some reason, perhaps it’s time to consider a few modifications to make it more appealing. A few cosmetic tweaks could turn a shelf-sitter into a go-to smoking companion!
Until next time, Happy Piping! Here’s the finished pipe.


Wow. that was a tall task! JM does indeed have a big stockpile of rod stock and briar, he bought from SM Frank when they closed.
Boswell pipes are pretty chunky, your stem work added some needed character to the overall appearance, that bend now looks organic. The rings also look worthy of the effort.
LikeLiked by 1 person
Thanks very much! I think the saddle stem works on both aesthetic and practical levels. It should be more comfortable for the pipe’s steward to smoke now.
LikeLike
Did it ever pass a cleaner? Most of his bents do not. I used to live about 15 minutes from Boswells. When I asked him about this once, he said that was internet BS, just twist the stem off and clean it.
LikeLike
Not 100% sure on this one, to be honest. While I cleaned the stummel, I spent most of my time working on the stem.
LikeLike
What an interesting and beautiful pipe, Charles. Great job on the refurbishing … looks good as when it was new.
LikeLiked by 1 person
Thanks, Dennis! I hope the modifications turn this lovely Boswell pipe from a shelf sitter to a go-to pipe for its steward.
LikeLike
Thank you for these post Mr.Lemon I always learn so much from you and appreciate your work. R.Compton
LikeLiked by 1 person
Thanks very much! I try to post the repairs and restorations that are interesting to me in the hope that they are interesting to everyone else too. Glad to know I’m on the right track, and thanks for your continued support!
LikeLike