
Pipe storage is a perennial issue for every pipe smoker with more than one pipe in the rotation. Simply put, those briars, cobs and meers need to go somewhere when they’re not in use. Pipe shops and specialty retailers offer a wide range of pipe stands, racks and cabinets in all shapes and sizes to suit just about any piper’s needs, but most commercial offerings have one thing in common – a hefty price tag!
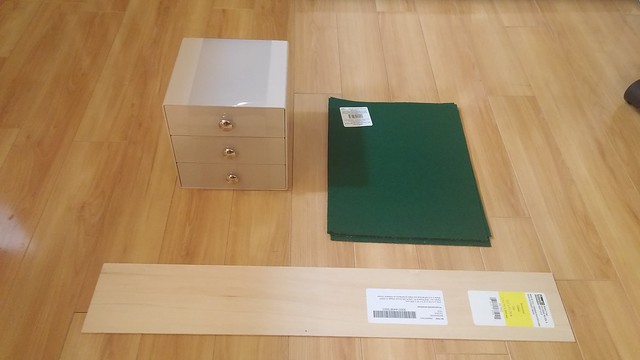
Today I’d like to share a recent project of mine. I have several open style pipe racks, but I wanted some enclosed storage to keep the dust off a few special pipes in my collection. I’d rather spend my money on pipes than pipe racks, so I came up with this little project, which cost me a grand total of $25CAD.
To make your own pipe cabinet, you will need to hit up your local Walmart and craft store for a few supplies:
- 1 – Mainstays 3-Drawer Vanity Organizer – $13
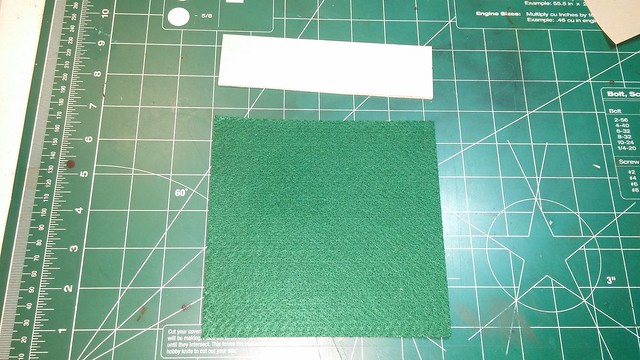
- 4 – Sheets (9.5 x 11) Self-Adhesive Felt – $8
- 1 – 4” x 24” x 1/16” Basswood craft plank – $4
You might be able to save a bit of cash if you buy regular felt and use a spray adhesive to apply it to the interior of the drawers, but only if you have one or the other on hand already. The cost of a can of spray adhesive will pretty much cancel out the savings on the felt.
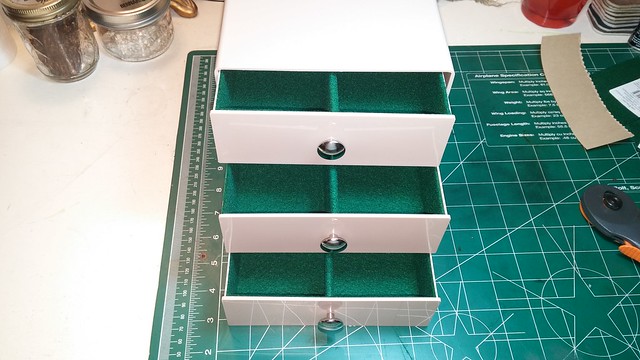
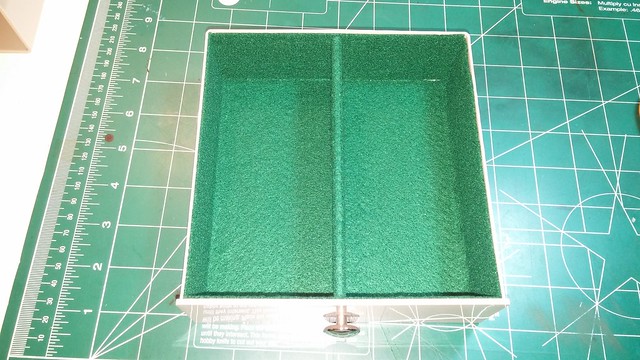
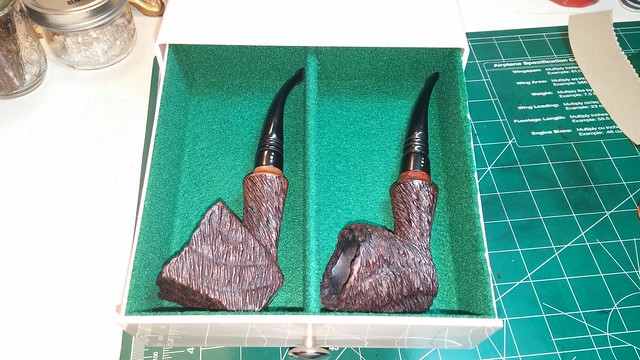
The interior dimensions of these organizer drawers are just about perfect for pipes – 6” wide, 6.25” deep and 2” high. The final dimensions will be slightly smaller, as the felt lining will take up about 3/32” when installed, but functionally the difference is negligible.
As I used peel-and-stick felt sheets, the hardest part of this project was cutting the felt to fit the inside surfaces of the drawer. For each drawer you will need to cut the following:
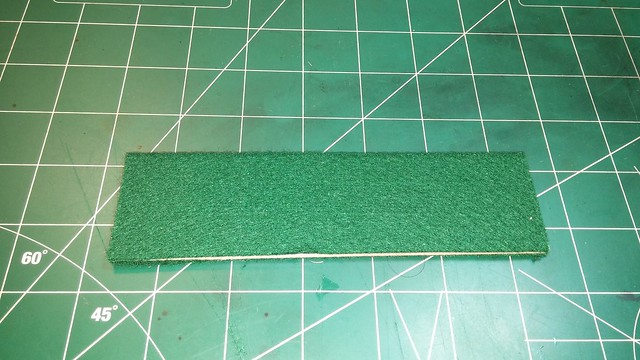
- Basswood divider – 1-5/8” x 6-3/16”
- Felt for dividers – 3-3/4” x 6-3/16”
- Felt for left/right/bottom – 9-1/2” x 6-1/4”
- Felt for rear wall – 1-3/4” x 5-7/8”
- Felt for front wall – 1-7/8” x 5-7/8”
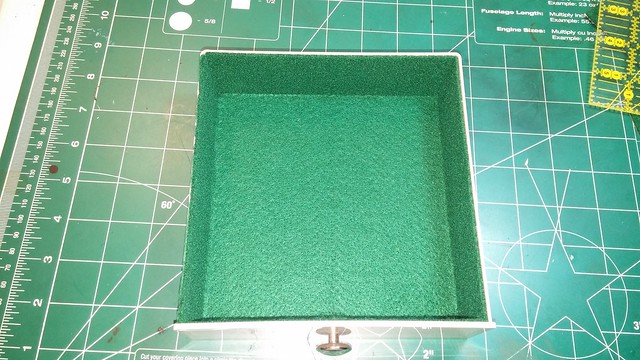
You can apply the felt in any order that works for you, but I started with the left/right/bottom piece as it’s the largest. I lined up the left end of the felt with the upper edge of the drawer side, peeling the backing off the felt as I pressed it down the side toward the drawer bottom. Make sure to tuck the felt tightly into the corner for a nice clean transition to the drawer bottom. Carry on across the bottom and back up the other side wall. Easy Peasey!
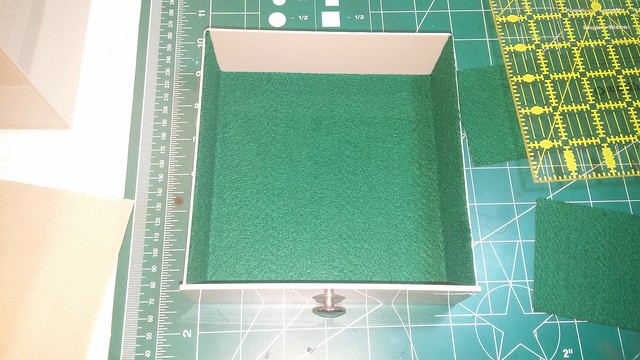
Next are the front and rear walls. Again, the peel-and-stick felt makes this almost idiot proof. I also found the adhesive fairly forgiving. If the felt was going on cock-eyed, I could peel it off and re-position easily enough.
Things are looking good – now it’s time to make the divider. With the basswood and felt cut to size, it’s just a matter of wrapping the felt up and over one long edge of the basswood. Then you can position the divider in the drawer.
I chose to use only one divider per drawer, making two interior compartments at three inches wide. I had originally planned to glue the dividers in place, but found they stayed put just fine when pressed into place.
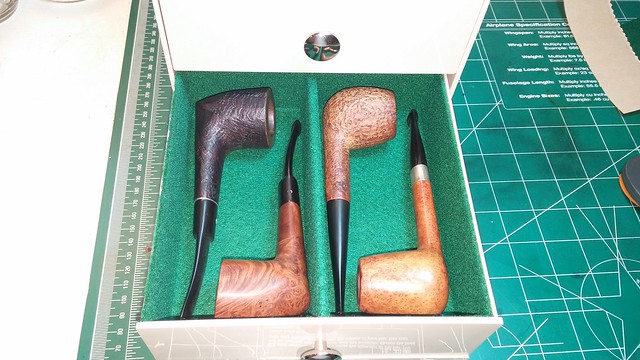
And that’s it! Now have fun populating your new pipe cabinet! Each compartment will fit two average straight or bent pipes, for a total of up to twelve pipes. Larger freehands may need a compartment to themselves, or pull out the divider and fit three per drawer.
Not enough space? Make a second cabinet! At $25 each, you can afford it!
Hope you enjoyed this Pipe Life Hack. Now you can have that enclosed pipe storage you’ve been wanting, at a fraction of the price of buying a purpose-built unit. And Walmart sells them in six different colours; one of them is bound to fit your decor!
Until next time, Happy Piping!

Perfect, very creative!
LikeLiked by 1 person
Thanks Al. The little box fits well on my shelf and would work equally well on a desk or table. Who knew 12 pipes could take up so little room?
LikeLike
What a nifty Pipe Hack..! The perfect solution for my two low bookcases. Unfortunately we do not have a Walmart where I live but it must be possible to find a similar cabinet here.
LikeLiked by 1 person
Thanks, Jesper. This was a quick and easy project that can be adapted to any cabinet. I was considering using a mechanic’s tool box but these little organizer boxes are much less expensive. 😀
LikeLike