
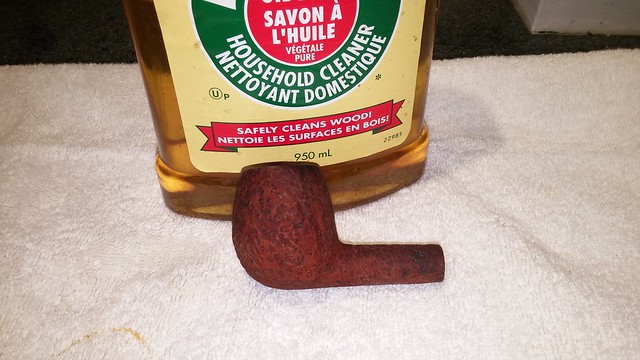
I stumbled across this Dunhill Tanshell on eBay near the end of the auction period. The (relatively) low bid price told me that there was probably something significantly wrong with the pipe, the auction listing, or both. Curious, I read through the auction description, which was almost ridiculously brief, but accurate as far as it went:
“Dunhill Tanshell Estate Pipe of the Apple “K” model with a date code for 1969.
The pipe is estate fresh and never been touched. The white dot is a miss and the stem tip has marks, the bowl is pretty good, looks like it was held in the hand a lot. Wear to the Dunhill lettering though still visible on the right angle.”
The pictures included with the listing were not of the best quality, but were clear enough for me to see that the bowl wasn’t cracked and that the stem looked original though in really rough shape, which probably accounted for the low bids. I thought I could likely do something with the pipe, so I put in a bid and won.
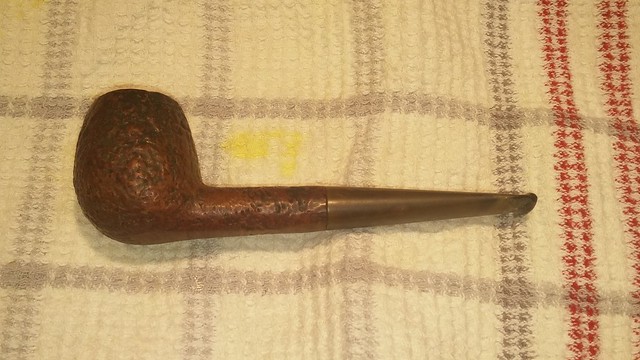
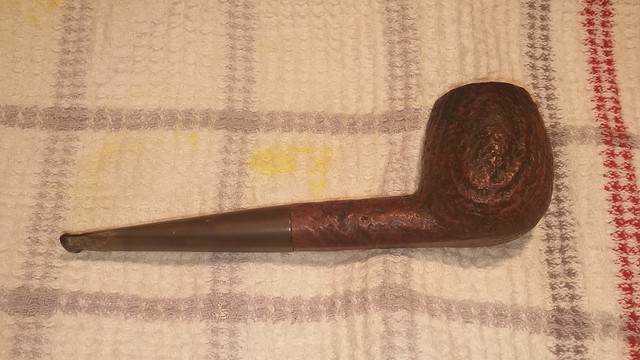
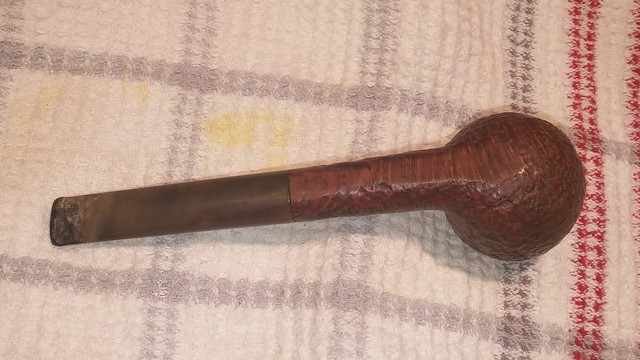
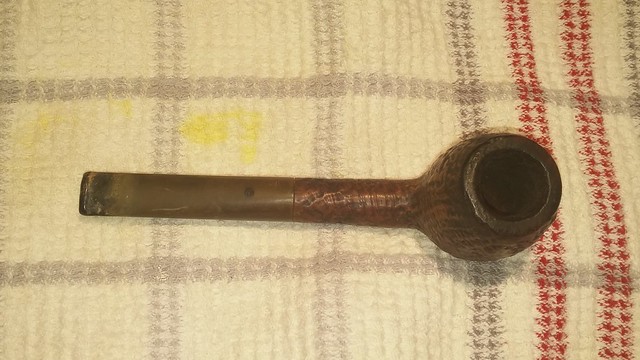
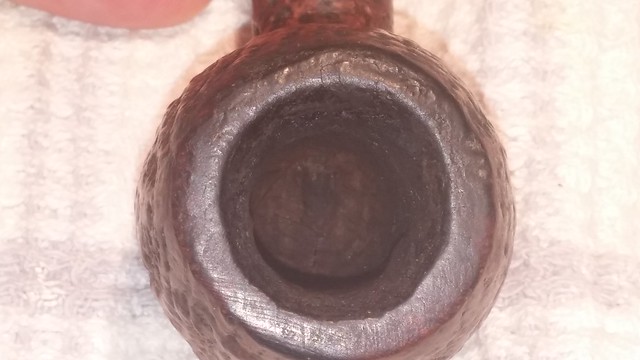
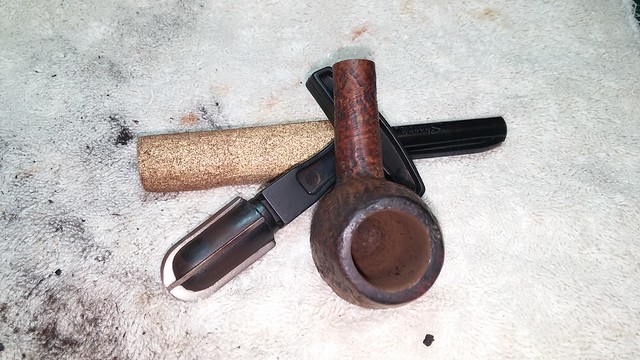
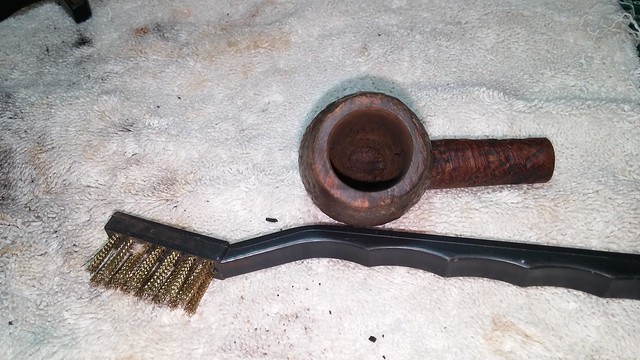
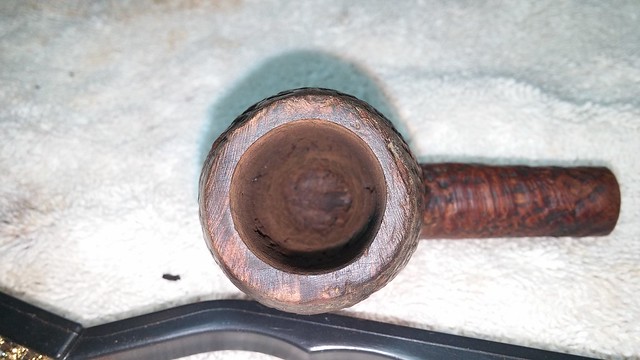
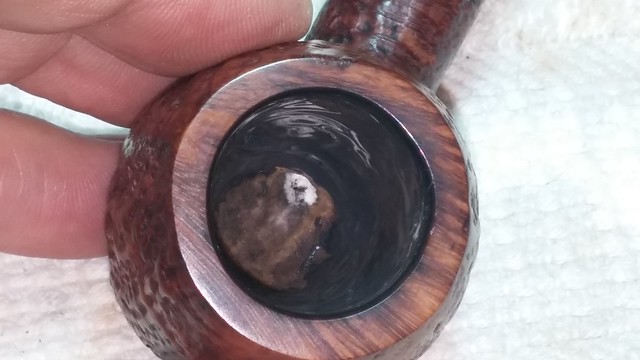
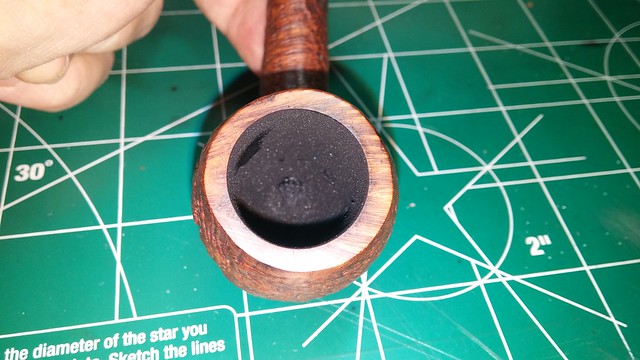
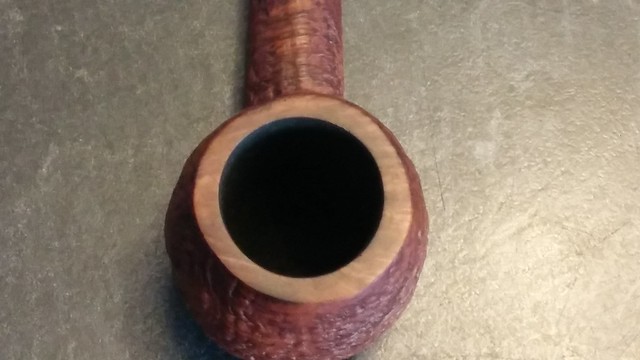
I took these pics when the pipe arrived. As you can see, the pipe was definitely enjoyed by its previous owner but not particularly well cared for. The stummel was dirty, with a crust of lava covering the bowl rim. Despite its cloak of cake, I could see that the inner rim had been gouged with a knife and was out of round. A thick cake hid the walls of the chamber; I’d have to wait til after reaming to judge the state of the briar in there.
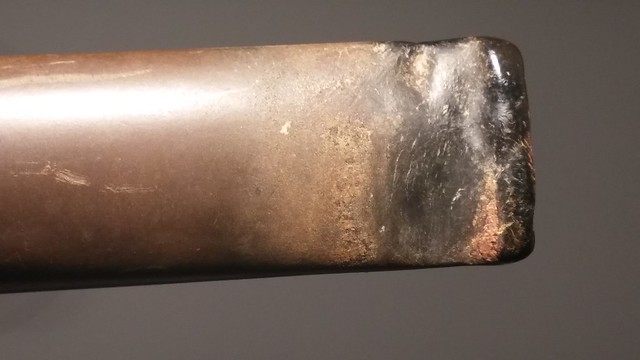
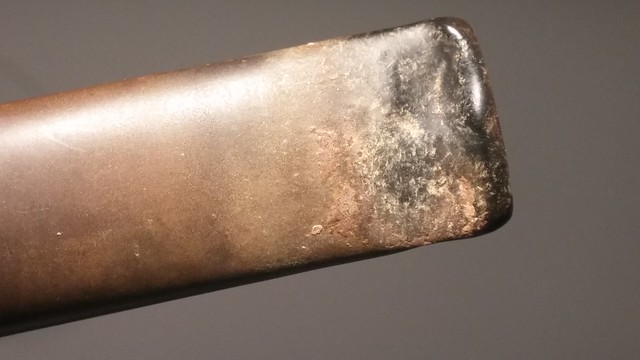
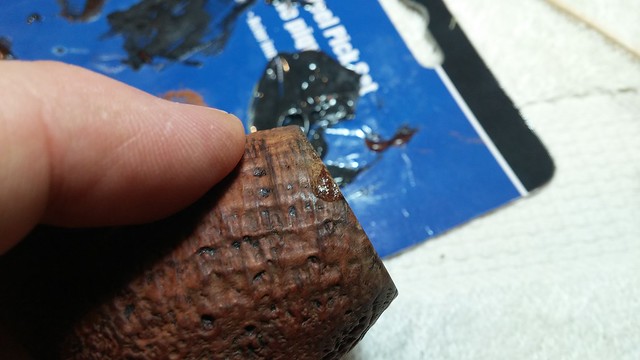
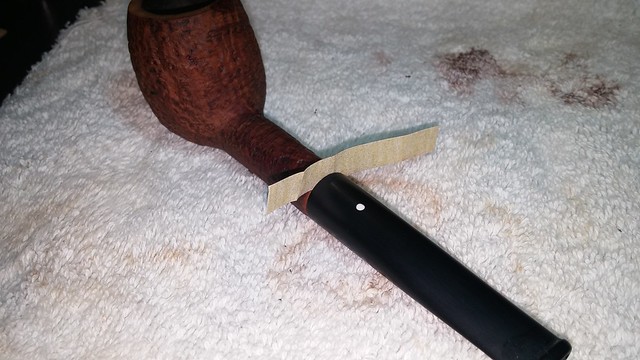
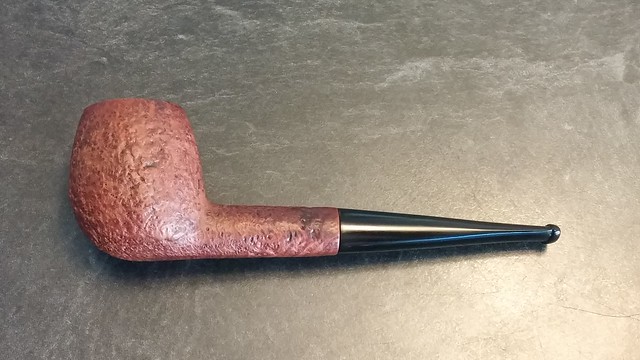
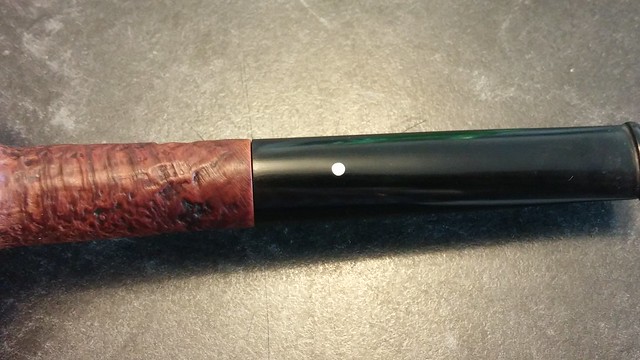
The stem was heavily oxidized and the bit looked like someone’s terrier had gotten at it, with perhaps the deepest tooth marks I’ve seen on both top and bottom of the bit. The dents covered the last three-quarter inch of the stem and extended across the button. It was a real mess.
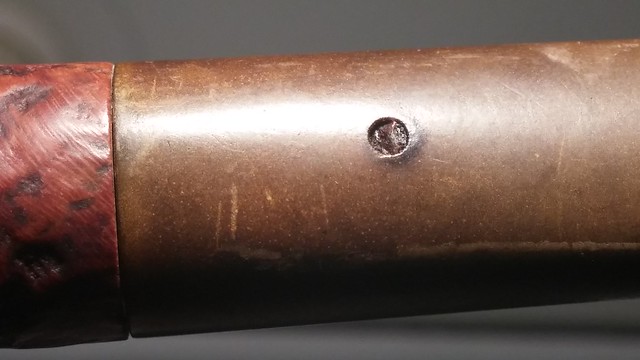
As indicated in the eBay listing, the Dunhill White Spot was missing from the stem. It had fallen out at some point, but the piper had continued to smoke the pipe. The hole where the dot should have been was clogged with tars and debris.
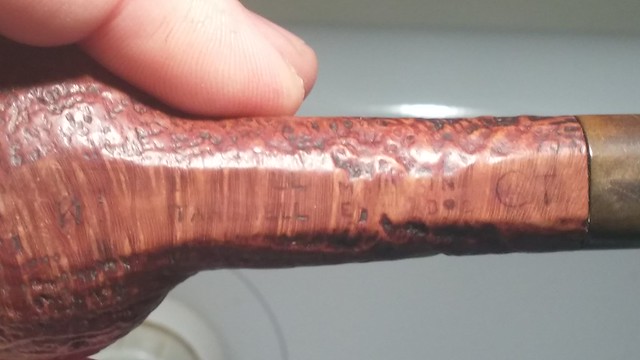
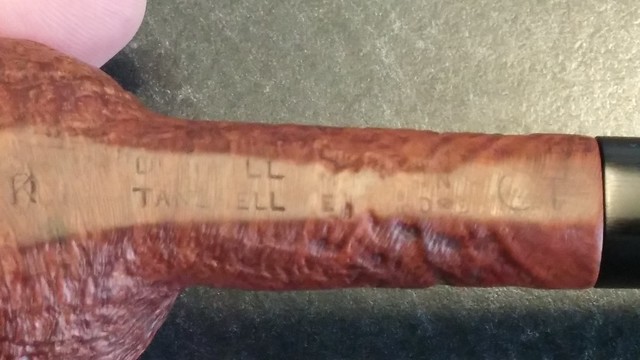
The stamps on the flat underside of the stem were worn, but still readable. The pipe is stamped “K”, the Dunhill shape code for an “Quaint Shape” Round Apple pipe, followed by “Dunhill” over “Tanshell”, then “Made In” over “England9”. Finally, near the end of the shank, the stummel was stamped with a “4” in a circle (indicating a Group 4 bowl size) followed by the letter “T” for Tanshell. The superscript underlined “9” at the end of “England” is the date code for 1969.
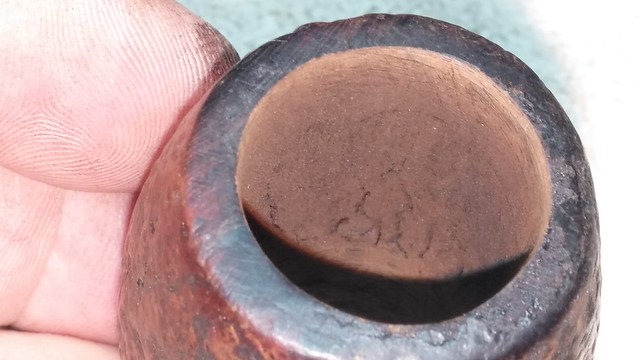
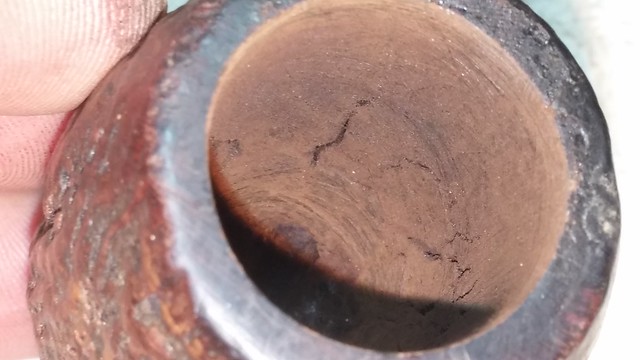
I reamed the bowl back to briar, revealing a network of heat fissures in the chamber walls that wrapped all the way around the bowl at about the midway point between rim and draft hole. These fissures are evidence of heat stress – our careless piper was not only a ferocious clencher but also puffed his pipe like a steam locomotive!
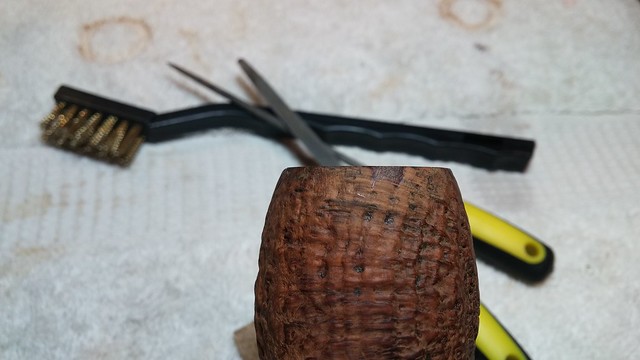
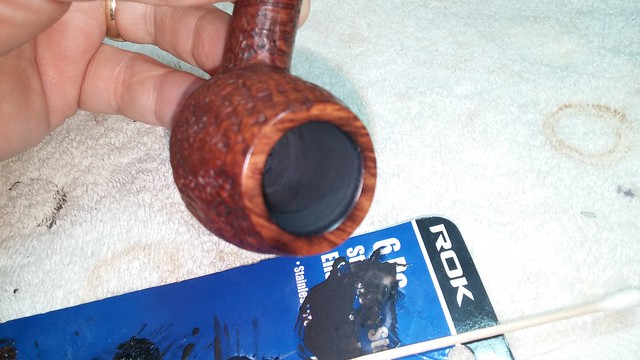
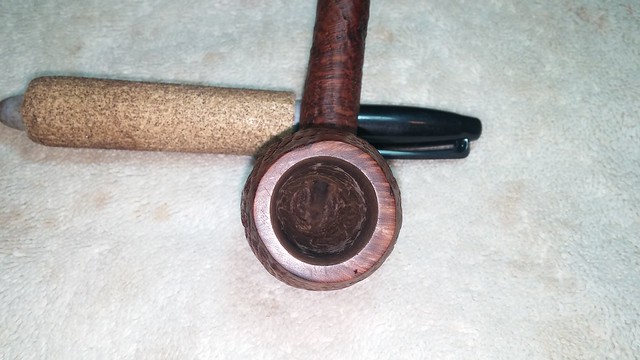
I used a brass bristled brush to clean the tars and lava from the sandblasted rim. When I got the rim clean, I found a largish chip of briar missing from the rear right of the bowl. The rim itself showed the scars of vigorous dottle-knocking and signs that it had been topped smooth (poorly) at some point in the pipe’s history.
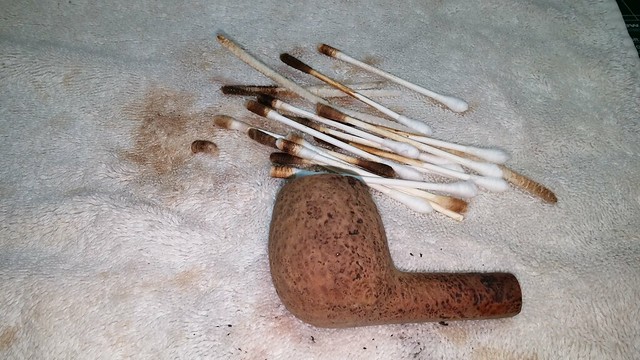
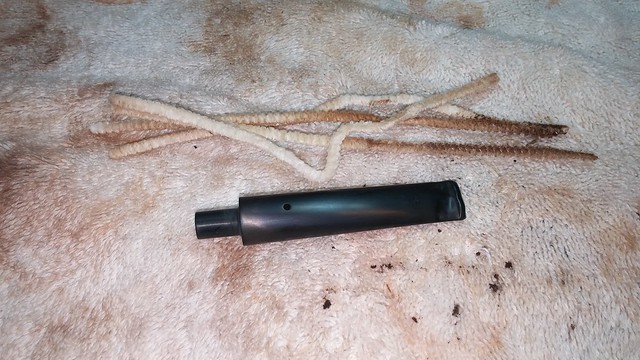
The shank and airway, surprisingly, were not in bad shape. I used a few pipe cleaners and cotton swabs dipped in alcohol to clear the mortise and airway of tars and dirt.
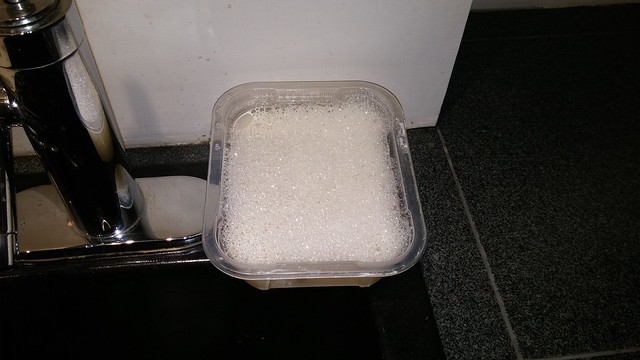
I dropped the stem into a bath of Oxyclean and warm water and scrubbed the exterior of the stummel with Murphy’s Oil Soap and a toothbrush. This lifted a lot of dirt and soot from the briar.
A wipe with mineral oil refreshed the briar and showed me where a bit more cleaning was necessary. You can see in this pic that there is a darker band around the rim of the bowl.
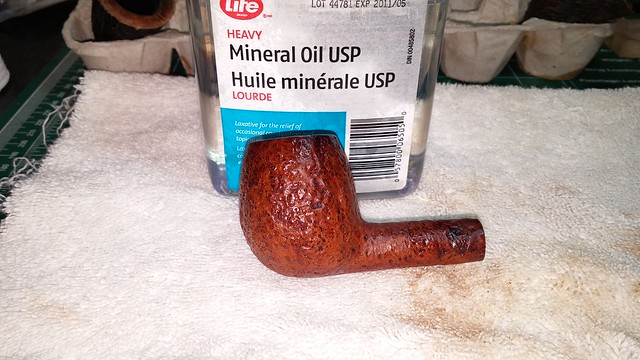
I scrubbed the darker briar with a wire brush and 0000 steel wool and managed to remove most of the discolouration. The stummel is starting to look better!
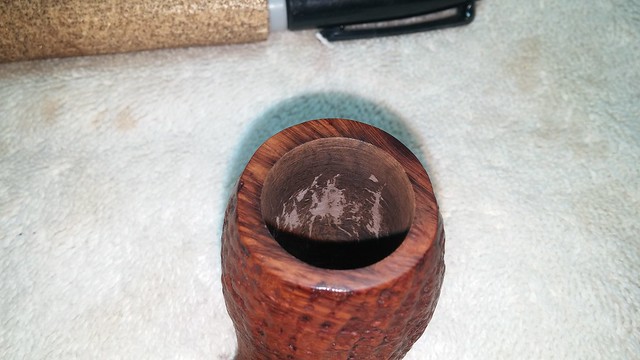
As the original sandblasted rim was already mostly gone, I decided to top the bowl to clean up the lines of the pipe and minimize the damage before filling the chipped area.

I mixed up some briar dust with thick CA glue and dropped the fill material into the large dent at the rear of the bowl and also a smaller chipped area on the right side. After the glue had cured, I sanded the patches flat on the topping board and used needle files and sandpaper to blend the fills into the sandblasted finish.
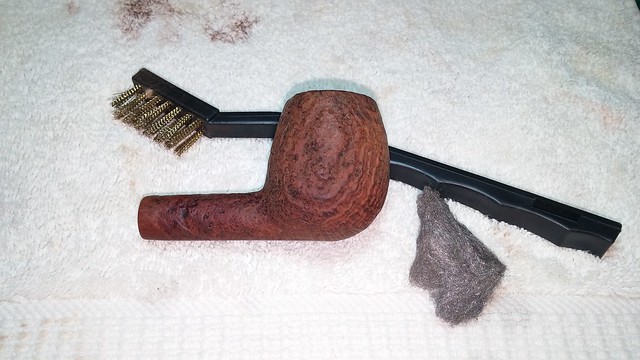
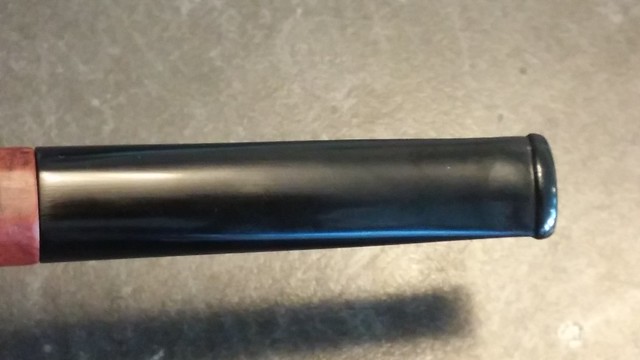
Setting the stummel aside for a bit, I pulled the stem from the Oxyclean and scrubbed it down with Magic Eraser. The softened oxidation came off easily, leaving the stem black once again.
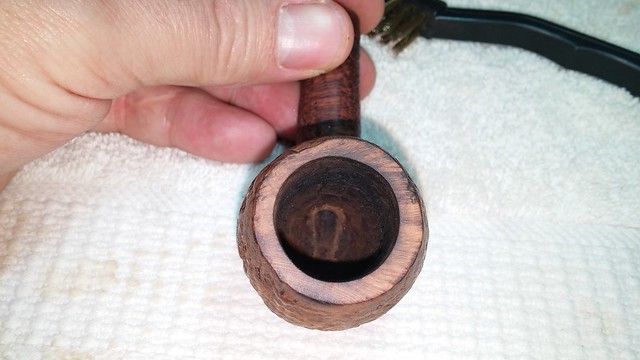
Now that it’s clean, the damage to the stem’s bit area really stands out. It’s a mess. Our piper’s bionic jaw had actually crushed the stem’s airway. I got the air flowing again by heating the stem over a lighter flame until soft and then sliding a pipe cleaner through. I left the cleaner in place until the stem cooled and the new shape set.
I began the stem reconstruction by roughing up the bit with 220-grit sandpaper and then applying a liberal amount of thick CA glue mixed with charcoal powder. I over-filled the dents to ensure I had enough material from which to create the new bite area and button.
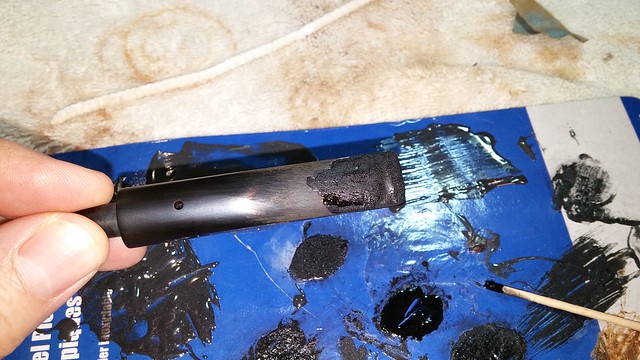
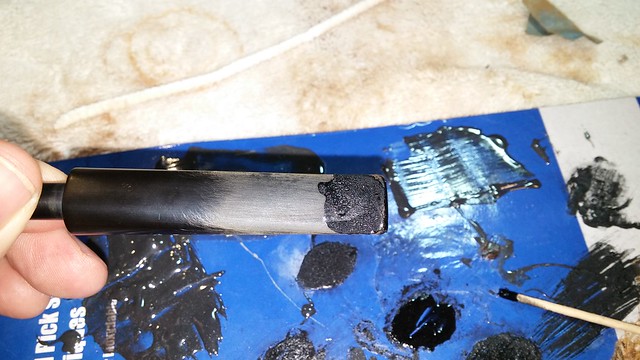
I let the stem fills cure for 24 hours before filing and sanding the repairs. Unfortunately my pictures of this process have gone AWOL, so you’ll have to take my word on it that I spent a LOT of time shaping, sanding, filling and re-sanding before I was happy with the new stem. There a few slight imperfections in the finished product, but I’m probably the only one who will notice them.
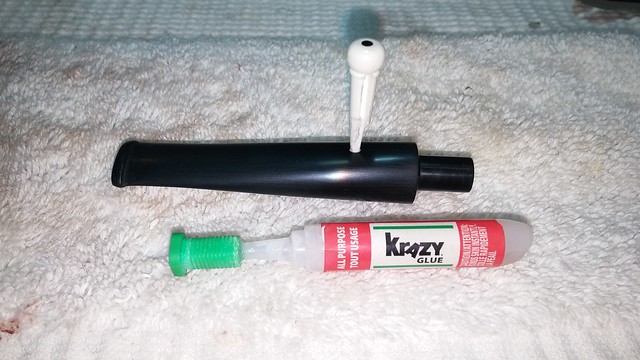
Before I started polishing the newly restored stem, I had to do something about the missing White Spot. I find a lot of my repair supplies at local hobby shops, but apparently 1/16” white rod stock is not a commonly requested item around here. I would have to improvise.
Inspiration struck while I was visiting my local music shop for a few sets of guitar strings. On the drive home, I idly ran through the process of changing the strings on my acoustic guitar – loosening the strings, pulling the bridge pins, etc. In that moment, guitars and pipes came together for a brief instant. I realized the bridge pins I’d be pulling to replace the guitar strings were made of white plastic. Hmm. I have a few spare pins rattling around somewhere…..
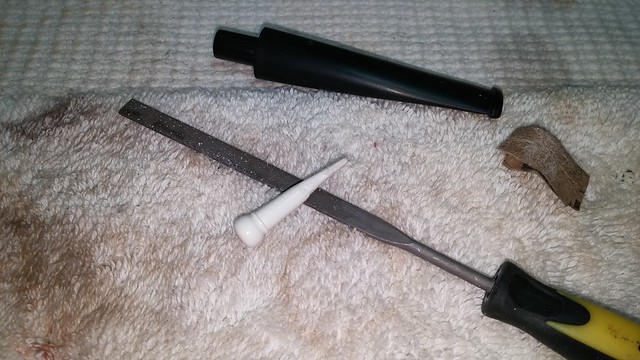
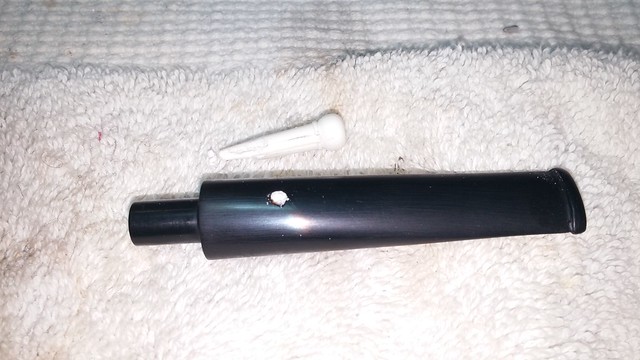
A few minutes after arriving back home, I was at the worktable staring at a guitar bridge pin. It is slotted up one side, but there should be just enough solid material left in the shaft to carve a 1/16” rod.
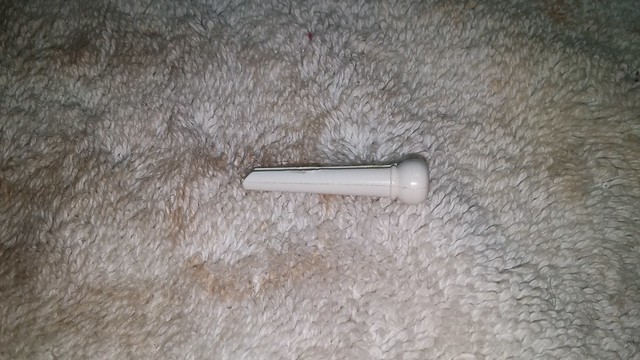
I used needle file and sandpaper to cut away the excess material and shape the pin shaft into a round dowel. After a few test fittings and slight modifications, I was ready to install the dot.
I ran CA glue around the shaft of the plastic pin and twisted it into the hole on the top of the pipe stem. The glue set very quickly and when everything was firmly in place I cut off the extra material. A bit of filing and sanding revealed the reborn White Spot.

I reassembled the pipe and assessed things at this point. There was a slight uneven gap between the shank and the stem face I wanted to address.
I used a combination of techniques to improve the fit here. I used a needle file to widen the countersink at the end of the mortise. This usually does the trick, as often these little gaps at the shank are caused by the slight flaring of the stem tenon where it meets the body of the stem. A wider countersink accommodates the flare and lets the two pieces fit more closely together.
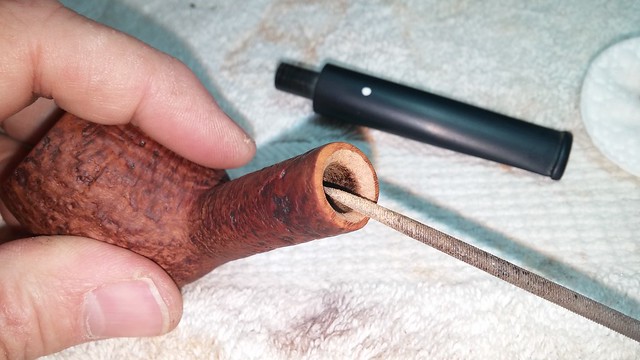
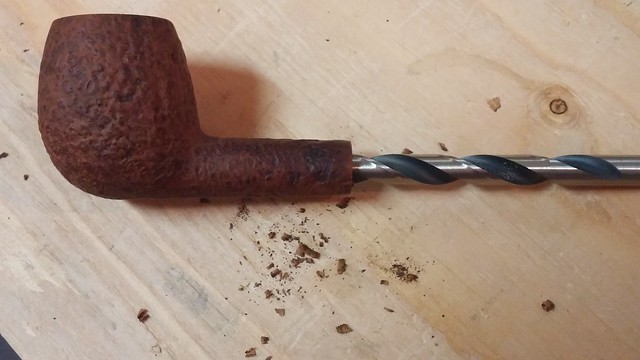
The gap was smaller but not gone. To make sure that the mortise was cut to full depth and not clogged with tars I may have missed during the initial cleaning, I hand-reamed the mortise with an appropriately-sized drill bit. This too improved the stem/shank fit.
I put the finishing touches on the fit by drawing strips of 320-grit sandpaper between the stem and shank. Clamped by the stem face, the paper removes a small amount of vulcanite from the “high points” of the stem (where it fits tightly against the shank). This allows the entire stem to snug into the shank face evenly.
There remain a few tiny flaws in the stem/shank fit even after all this fiddling. I could probably go on tweaking things for quite a while, and I may even achieve a perfect fit eventually, but I know myself well enough to quit while I’m ahead. To carry on would risk becoming frustrated and potentially undoing all the work accomplished at this point.
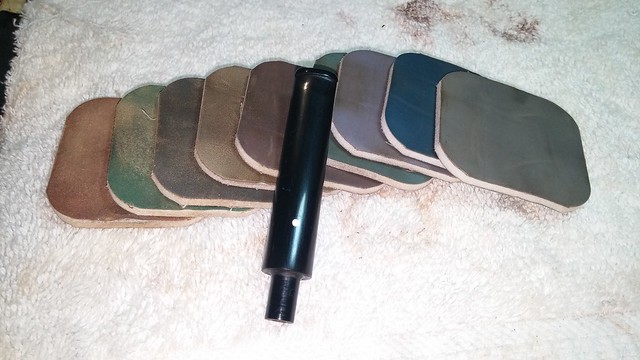
So, satisfied with my 98% perfect stem fit, I moved on to polishing. A complete once-over with micromesh pads in 1500 – 12000 grits cleaned up my sanding marks and really put the shine onto this revived stem .
Before heading to the buffer for a final polish and a good waxing, I dealt with the multitude of heat fissures in the tobacco chamber walls.
For this task, I mixed up a small amount of JB Weld and smeared it across the chamber walls with a gloved finger, pushing the epoxy into the fissures. I set the stummel aside to let the JB cure and then sanded out the excess epoxy, leaving it only in the fissures.
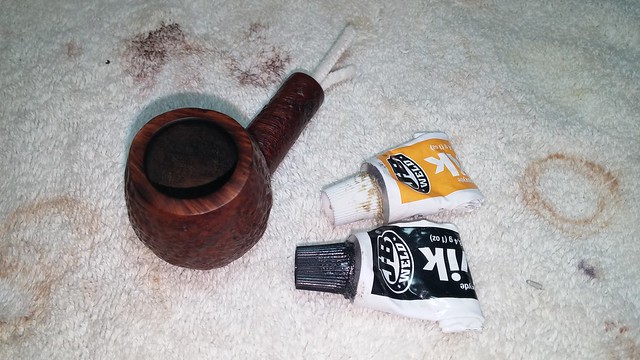
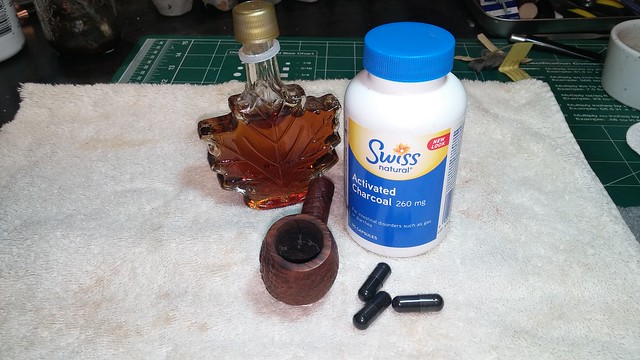
I’ve used JB Weld on many other chamber repairs, and it has performed admirably in all cases. It is, however, not that attractive to look at. To improve the cosmetics and provide a good base for a new layer of cake, I gave the bowl a coating of maple syrup and activated charcoal powder.
I plugged the draft hole with a pipe cleaner and then wiped a small amount of maple syrup around the interior of the tobacco chamber. I often get asked how much syrup to use; my answer is “enough”. Too thin a layer won’t cover properly or give the charcoal somewhere to stick; too much syrup will result in a bowl coating that slides down the bowl and collects at the bottom. The right amount of syrup covers the bowl evenly and does not run.
With the syrup in place, I emptied two capsules of charcoal into the bowl – about a teaspoon’s worth. I covered the bowl with a bit of cardboard and then gave the stummel a good shake to distribute the charcoal evenly around the bowl. I dumped out the excess charcoal and set the pipe aside to let the coating dry.
I finished off the work on this Tanshell with a quick buff with White Diamond compound and several thin layers of Carnauba wax.
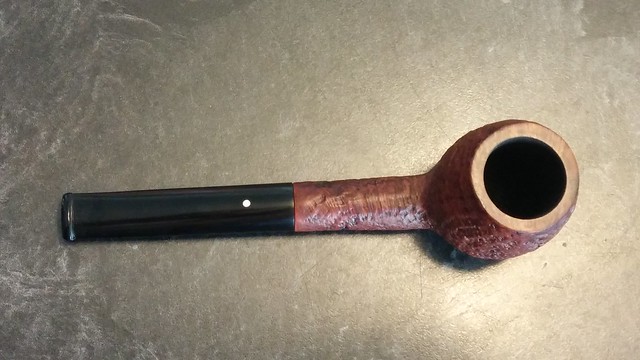
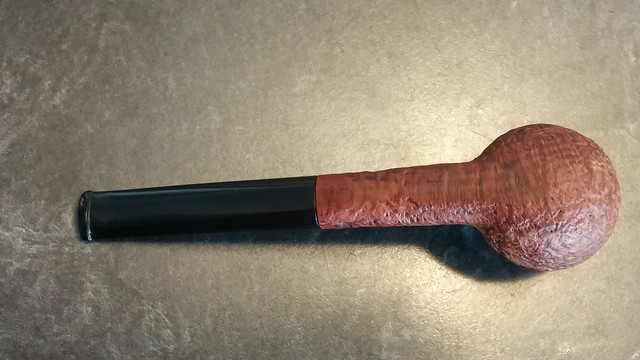
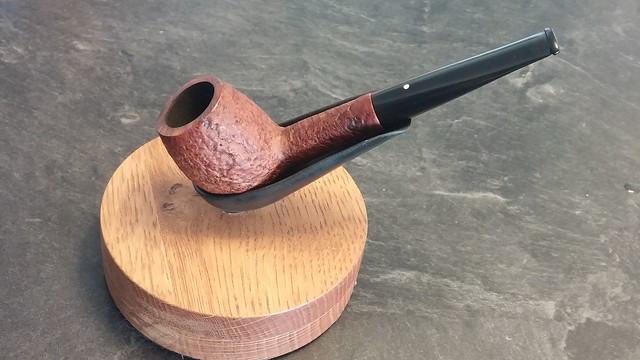
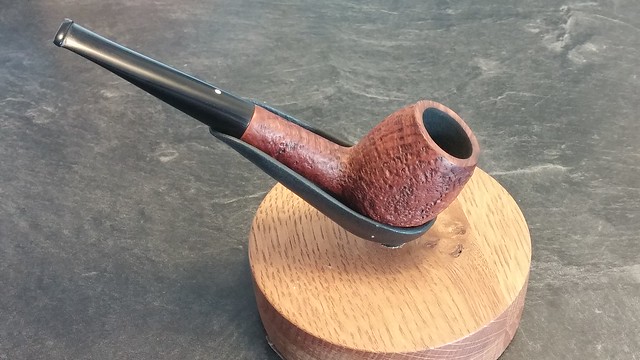
It’s hard to believe that this sharply dressed Dunhill is the same pipe that hit the worktable a few days ago. I’m quite happy with the transformation. The briar glows with life, the original tan finish revived by the cleaning and oiling. The dents are gone from the rim and you really have to look to find the briar patches. Best of all, the stem is a Dunhill Stem again, the destroyed bit and missing White Spot nought but a distant memory, replaced now by gleaming black Vulcanite.
I had intended to put this pipe up for sale after restoring it, but after investing so much time and effort into the process, I find I’ve become somewhat attached to it. This 1969 Tanshell K is a few years off being a Birth Year Pipe for me, but it’s the closest I’ve come to one so far. And my birthday is only a few weeks away – surely I could find room in my rack for just one more pipe?
Here’s the finished pipe. Thanks for joining my for this restoration, and until next time, Happy Piping!


Dear “Dad”
I have been reading your posts for some time now and you need to know that because of your endeavours, I have taken to the recovery of old pipes. My first success I am smoking as I type. It’s a Peterson Dublin 2 101. From the stamp markings it seems it’s a 70’s pipe. She was quite battered when I found her, but she is as good as new now and provides a gentle smoking experience.
At the moment I am honing my skills on both a Parker Jockey Club 831 with a cracked bowl and a Spitfire with a worn out mortise. The latter is in an especially poor condition; worse than the Dunhill described above. It appears as if someone has taken shoe polish and synthetic varnish to briar.
Thank you for inspiring me to take the plunge and emerge myself into this hugely gratifying hobby.
Johan
p.s. I started out three weeks ago.
LikeLiked by 2 people
Marvelous story Johan! Thanks so much for sharing it with us and congratulations on your successful restorations. Sounds like you’ve taken on some challenging projects. I’d love to see pictures!
Charles
LikeLiked by 1 person
Charles unfortunately I was to excited at he time and forgot to take photos of the process as you do. I normally do when I recover vintage furniture. Kind of uncommon for me to forget, because as a rule I keep a visual studio log. But I will send you a photo of the Peterson soon with a description of what I did and the materials I used. I had to improvise a lot, because I was unable to find the materials you list in your posts. Maybe I could not find it because I do not speak Portuguese or simply because they do not sell it here. Even so, I managed pretty well using natural extracts.
Johan
LikeLiked by 2 people
You really managed to bring this one back from the dead, Charles. The Brigham 3 dot I scored in Keady had what appeared to be “worm trails” inside the bowl, shallow channels. I thought they were scrapes, but after reading this, I’m suspecting heat fissures, I’ll have to bring it to the next meeting and get a professional opinion. I’m happy to read you’re keeping it after seeing how much you put into it.
LikeLiked by 1 person
Thanks David. Your worm trails do sound like heat fissures. Unless they’re really deep they don’t pose an immediate threat to the pipe bowl. If JB Weld doesn’t appeal, the fissures can be filled/protected by a nice layer of pipe mud.
LikeLike
Mortar cement makes a nice bowl coating, it is readily available from Walmart, Lowes, etc.
Nice work on the stem and fitment. Looks like a keeper to my eye!
LikeLiked by 2 people
Reblogged this on rebornpipes and commented:
Charles has done a masterful job of bringing this old Dunnie back into shape. I thought I would share it as there are some great ideas that can be gleaned from his methods.
LikeLiked by 1 person
Cheers, Steve!
LikeLike
Brilliant move on the dot restore! Kudos!
LikeLiked by 1 person
Improvisation is often at the heart of a restoration! That’s a poetic way to say that I scrounge a lot of material! 😀
LikeLiked by 1 person
Charles, a truly transformative job. Excellent stem repair.
LikeLiked by 1 person
Thanks Al. I’m sure a lot of folks would have replaced the stem instead of trying to rehabilitate the old one – I considered it, but I’m a stubborn sort sometimes!
LikeLiked by 1 person
Charles, this may be of some help when replacing a Dunhill stem white spot. It is also a guitar related item. I use these and find they work very well. Glue it in with CA glue, let it dry and then snip off with a wire cutter. It’s easy to sand down. They are very slightly oversized so you may want to sand them before inserting. Hope this helps.
http://www.stewmac.com/Materials_and_Supplies/Binding_and_Trim/Side_Dots/Plastic_Side_Dot_Material.html
LikeLike
Side dot rod – of course! How did I miss that? Clearly I should spend more time chatting with my guitar repairman about pipes! Thanks for sharing that great tip, Al.
LikeLiked by 1 person
Charles, it took me a day of Internet searching for a solution to make it easy to replace a white spot on an old Dunny stem. I eventually H appened to stumble upon the side dot rod. I wanted to post it yesterday, but I forgot (getting old) where I had purchased the rods. I still am not sure of where I had gotten them, but I did find a link for you.
LikeLiked by 1 person
Charles, great restoration and happy birthday! This restore was a tutorial for me in several areas. Identifying the bowl cracks as heat fissures and the maple syrup repair was good. The stem repair was mammoth and opening the airway was helpful. I’m glad you’re treating yourself to this Dunhill. Question: Are you able to play your acoustic while enjoying your pipe and favorite blend? Thanks!
LikeLike
Charles – forgot one question! Since maple syrup is not available in Bulgaria :-(, would honey be a viable standby for the chamber coating with charcoal technique?
LikeLike
Honey should work just fine.
LikeLiked by 1 person
Impressive work and beautifully documented. Just found a Tanshell from 1969. The markings read: 252 F/T, Dunhill Tanshell, Made in England 9, 4 T. It also has the letter C stamped on it (which I understand stands for ‘complimentary’, indicating it was originally not sold but given). This pipe needs some love as well but is not as badly treated as yours was. Happy with it.
LikeLiked by 1 person
Thanks very much! I don’t smoke my Tanshell as often as I probably should but I sure do like seeing it in the pipe rack 😁 Sounds like you are enjoying yours too. If you decide you’d like to send it out for refurbishment I’d be happy to take care of it for you. 👍
LikeLike
Dear DadsPipes,
Hope you are safe and well. It’s been nearly a year since I wrote the above post and received your kind response. In the meantime I enjoyed smoking my Dunhill and it has become part of my regular rotation. Unfortunately, I recently caused a crack in the tige due to a rather stupendous attempt to create a better fit for the slightly loose stem. Considering your comments above, could you and I connect to discuss the possibilities for you to refurbish my beloved pipe?
Kind regards,
Jesse
LikeLike
Hi Jesse. Please email.me at dadspipesrestorations@gmail.com to discuss your repairs. 👍
LikeLike