
As I’ve mentioned before, a broken tenon is by far the most common pipe repair, and for good reason. The stem tenon is the smallest structural part of a pipe and is subjected to a disproportionate amount of stressors as the pipe smoker removes and reinserts the stem in the shank. An overly-enthusiastic twist with a bit of sideways torque can snap the tenon in two, possibly inflicting damage to the shank in the process. A fall off a counter or table onto a hard floor can also be enough to snap a tenon.
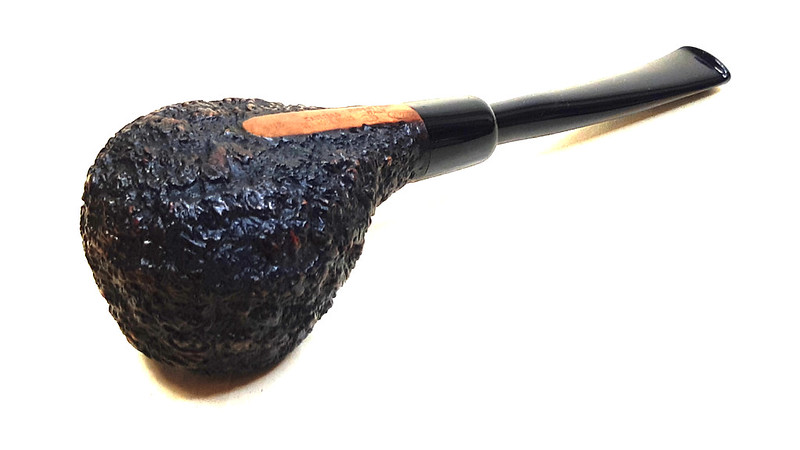
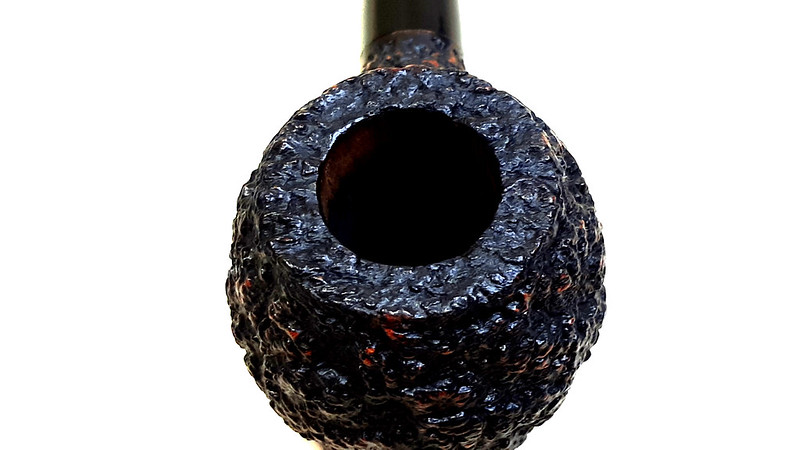
Thankfully, replacing a tenon on most pipes is a straightforward process; where it gets a bit tricky, however, is when there is no clear demarcation between tenon and stem. Such is the case with today’s repair patient, a rather nice Castello Sea Rock KK with a faux Army mount stem. I suspect an accidental fall caused the end of the acrylic stem to snap off, leaving the broken end firmly wedged inside the acrylic shank extension. This series of pictures show how the pipe looked when I brought it to the workable.


As the pics illustrate, the pipe was in excellent condition except for the broken stem. It wouldn’t take much work to get the stummel into fighting form.
The stummel is stamped on the flat underside with “US” then “Castello” over “Sea Rock Briar”, then “KK” and “Made in Cantu” over “Italy”. Finally, the shank is stamped “Kino” in an oval. The underside of the stem is stamped “Hand Made” over “Castello”.


Job One was to extract the broken end of the stem for the shank. The success or failure of this step was key to the entire restoration as without the broken piece I would need to fit a replacement stem.
You can see my setup in the pic below – a bit of 99% isopropyl alcohol in a shot glass, an eye dropper to get the alcohol where it needed to go, a short wood screw and a pair of pliers. I dripped some alcohol into the shank from both the mortise and the chamber and let the stummel sit for a few minutes to let the alcohol work on whatever was holding the broken stem in the shank. Usually this “glue” is simply tobacco tars which give way to alcohol quickly. Other times there is actually glue in there, but thankfully not in this case.
To get a grip on the broken piece, I threaded the wood screw into the airway of the stem section and used the pliers to apply a bit of (careful) pressure – both rotational and linear – to twist and pull the stem section out. Patience is key here! I had to reapply the alcohol several times over the space of about an hour before the stem end started to move. When it did come loose, the stem end came out quickly. Pop!


With that out of the way, I set the pieces of the stem aside for a bit while I cleaned up the stummel. I reamed the old cake from the chamber and tidied up with a bit of sandpaper wrapped around a dowel. The chamber walls and floor were in great shape underneath it all.

It only took a few cotton swabs and pipe cleaners dipped in alcohol to clean the shank and airway.

I also cleaned the stem’s airway – both parts of it.

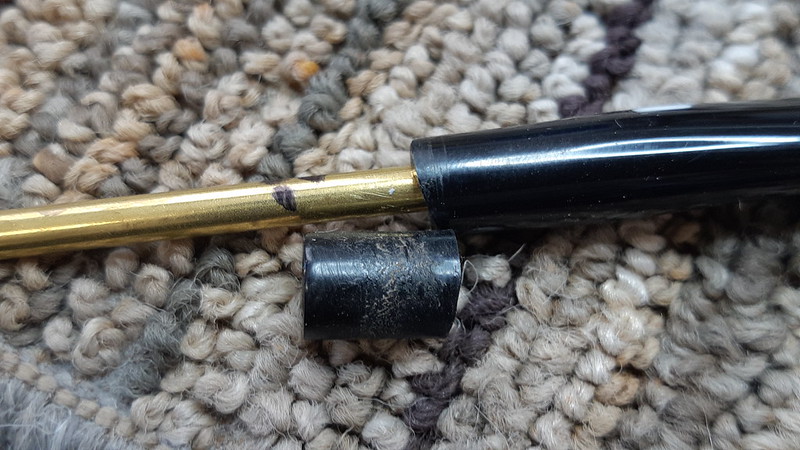
Then it was time to get into the meat of this repair, putting the stem back together. I dug around in my supplies for minute and came out with a length of brass tubing with which to splint the break. Normally I would aim for a size up and drill out a bit on both sides of the break in order to maintain the original diameter of the airway. Here, however, the broken end of the stem was so short that I feared drilling it out would tear it apart, so I went with tubing with the same outside diameter as the stem’s airway. The difference in inner diameter is very small (in the thousandths of inches); functionally it should not be noticeable by the smoker.
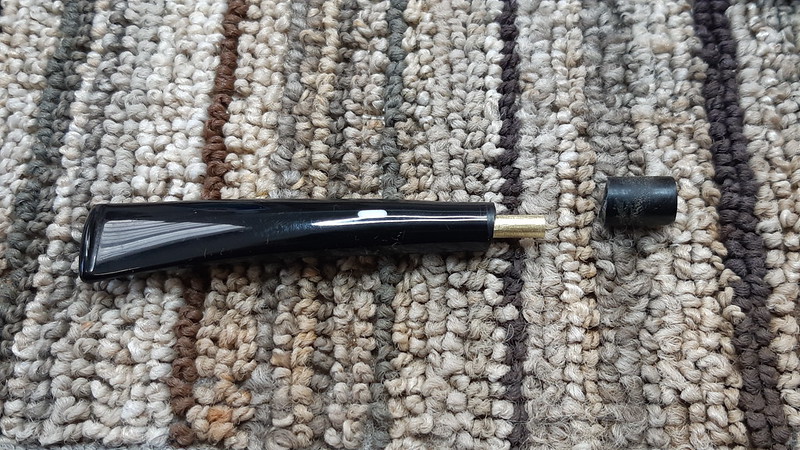
I slid the tubing into the stem and marked a cut line which would allow the end of the tubing to sit slightly inside the funneled end of the stem. After cutting the tubing, I dry-fit everything together. Not bad!


A bit of thick CA glue on the tubing and face of the break put it all together. I held the pieces in place until the glue grabbed hold, the set the stem carefully aside to let the repair cure.

The project became a waiting game at this point. When the first application of CA glue had cured, I sanded things smooth then top-dressed the repair with regular CA glue and let that cure. Lather, rinse and repeat a few more times and I had the cracks and divots full of glue and the tenon slightly oversized.

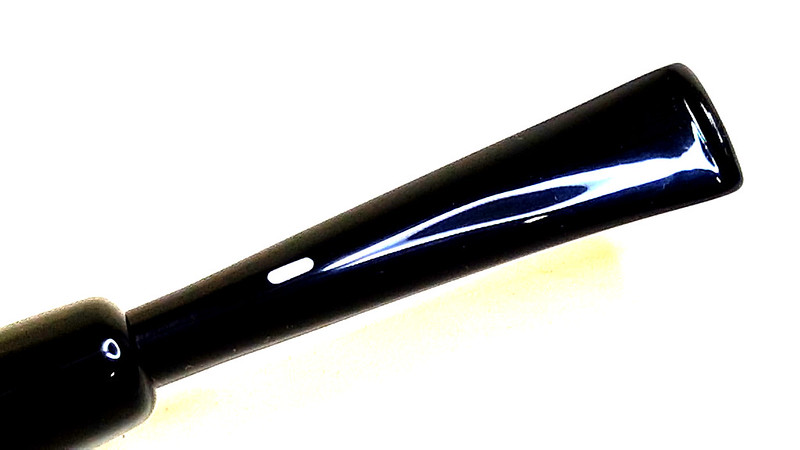
A final sanding with 400 through 2000 grit wet papers removed the last of the excess glue and began the polishing process. The repair is a faint, slightly lighter line across the deep black acrylic stem.


Then it was time to bring the complete pipe to the wheel for final polishing. The stummel was buffed lightly with White Diamond compound to bring up a bit of lustre, while the stem received a run on both the Red Tripoli and White Diamond wheels to erase the last sanding scratches and give the stem a glass-like shine.
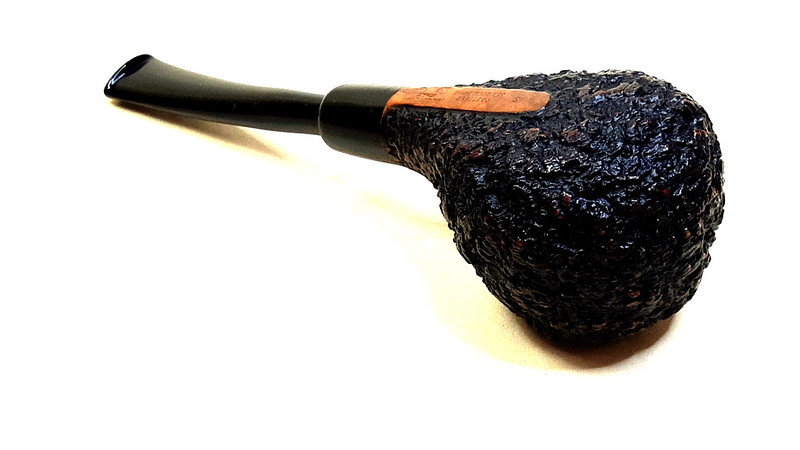
I’m quite pleased with the end result of this repair project. This Castello Sea Rock came to me in very good condition, barring the broken stem. That damage has now been repaired almost invisibly, and a pipe cleaner passes easily through the stem’s airway with no interference from the brass splint. Even better, the repair is completely hidden when the stem is mounted to the shank.
I hope you enjoyed following along on this pipe repair project. No one enjoys damaging a favourite pipe, but in almost all cases a broken tenon can be repaired and the pipe put back in service quickly. If you’ve had a broken pipe languishing in a drawer or box, it may be worth a second look and a quick trip to your local pipe repair shop.
Until next time, Happy Piping! Here’s the finished pipe.


Very nicely done, Charles and that pipe’s a beauty. My birthday is next week if it needs a new home. 😉😀
LikeLiked by 1 person
Sadly it has already moved on, but I applaud your enthusiasm! 😁
LikeLike
Reblogged this on rebornpipes and commented:
I have often done replacement tenons on breaks like this one but here Charles does an inner tube repair. Give the blog a read. Well done.
LikeLiked by 1 person
You did a beautiful job repairing that Charles.
Most in that style that I’ve seen were the older models that all had the Faux Diamond,
so that makes Me think this is a newer model, and I’ve never seen one stamped US before.
LikeLiked by 1 person
Great save, Charles. I love it when an original stem can be saved. Thank you for the fine write up and photos, and to Steve for re-posting it. Well done.
LikeLiked by 1 person
Hi Charles,
That was a fantastic save while maintaining the structural and aesthetic integrity of the pipe in general and stem in particular. I have one query though; what is the external diameter of the brass tubings that you frequently use and ones which you keep at hand?
Hope to hear from you soon….
Praying for you and your loved ones
Regards, Paresh
LikeLiked by 1 person
Hi Paresh. I keep several sizes of tubing on hand to match the interior diameter of the pipes airways. A 5/32″ interior diameter is quite common for shanks, while stem airways can vary from 5/32″ to as small as 1/16″ ID.
Hope that helps! Stay safe.
LikeLike