
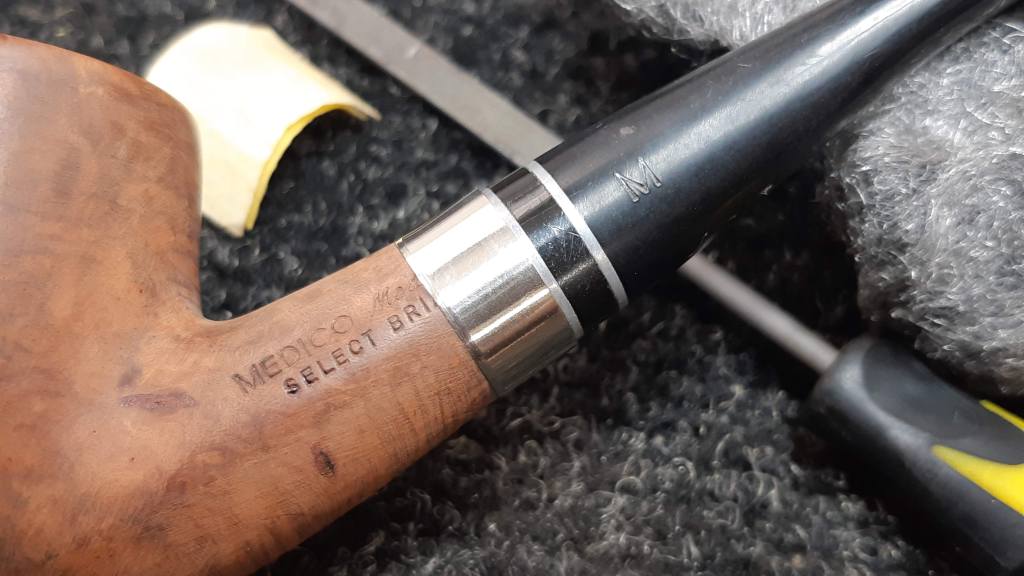
This pipe has been a project for a while, one that I have worked on in between other repairs over the last few months. The pipe in question, a Medico Medalist, had been knocking around the bottom of my refurb box for some time when I finally decided it was due some attention.
It was in less than glamourous shape when I brought it to the worktable – the finish was cracked and flaking off, the stem had deep tooth dents and the rim was covered with lava and looked to be out of round underneath. Further, it was quite dirty inside – it had obviously been smoked without a filter in place so there was lot of tar and other goodies built up in the stem.


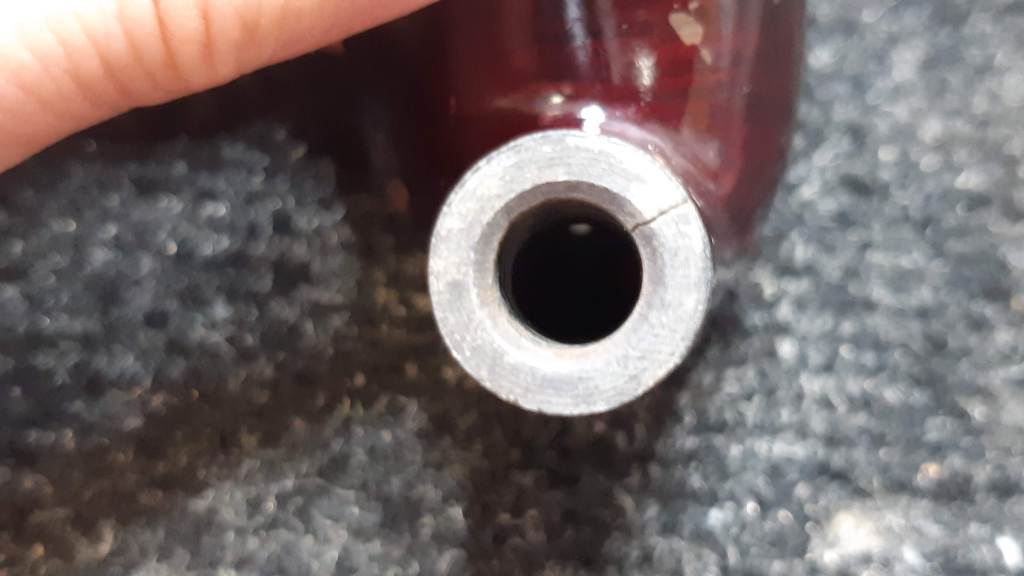
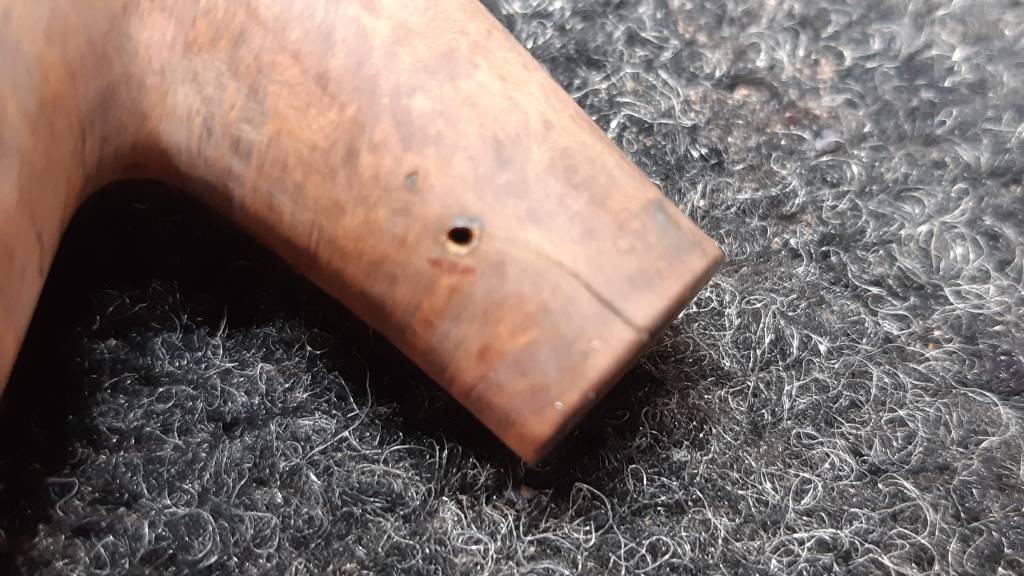
When I removed the stem to check the airway I also discovered a crack in the shank about a centimeter long running down the top right flank. The crack was easily visible once I picked some of the finish away with my thumb nail.

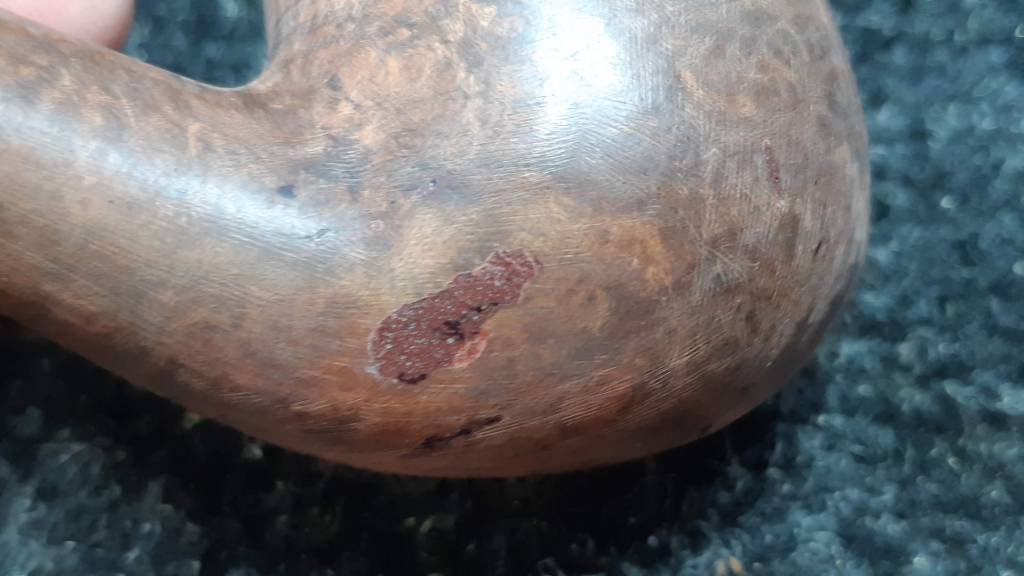
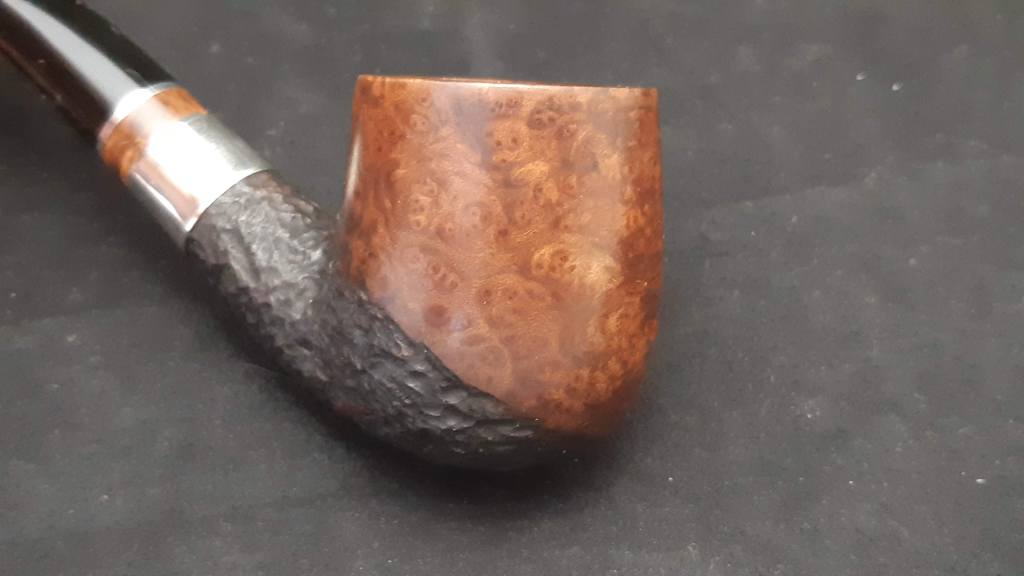
As the coloured lacquer topcoat was coming away so easily, I finished the job that time and disuse had started. The briar underneath had some nice cross-grain on the front of the bowl, but there were also a number of fills, including one large one, that would need to be dealt with during the course of this project.


Now that I could see what I was working with, I topped the rim of the bowl gently to remove the lava crust and expose a fresh rim surface. I also sorted out the out-of-round inner rim by cutting a bevel into the briar. A polishing with micromesh pads brought up the shine.


Moving on to the shank repair, I drilled a small hole at the end of the crack to stop it from creeping further up the shank, then dripped in a bit of CA glue and clamped the crack shut. After the glue had cured, I removed the clamp and sanded away the excess glue.


To keep the crack from reopening during the rest of the restoration I fitted a sacrificial shank band from my supplies. The sacrificial nature of the band will become clear later on in this story.

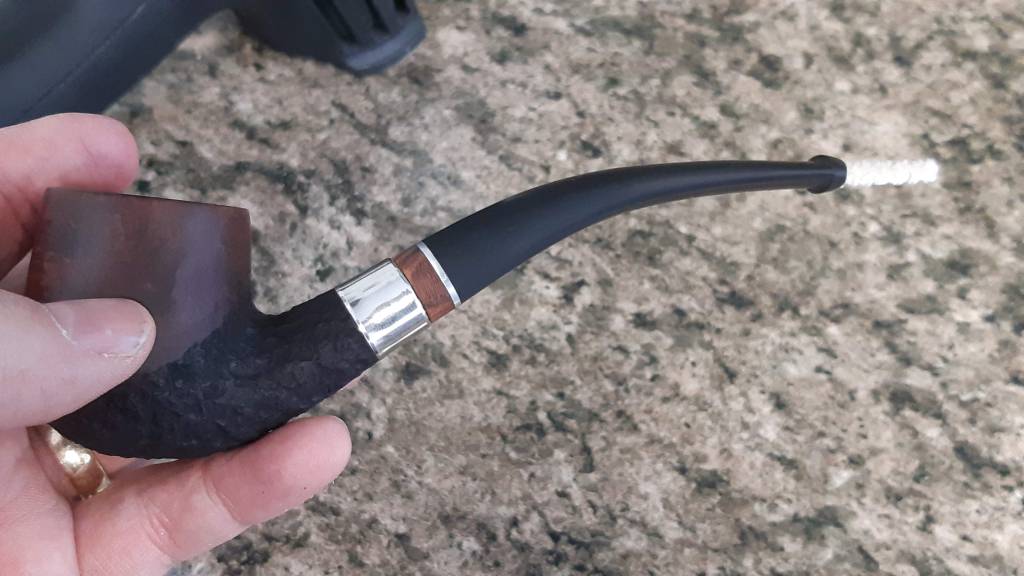
The last pic above shows the stummel with the original stem mounted. Not bad at all! I thought this might be as far as I would go on this old Medico – re-stain the briar, polish the stem and leave it at that – but sometimes the pipe calls the shots and this pipe had more in store for me.
The original stem was made from nylon, a material that once was considered ultra-modern and desirable but has since fallen from favour among pipe manufacturers. On the plus side, nylon is nice and soft in the teeth. On the down side, nylon is nice and soft in the teeth – and thus prone to deep tooth dents that cannot easily be repaired.
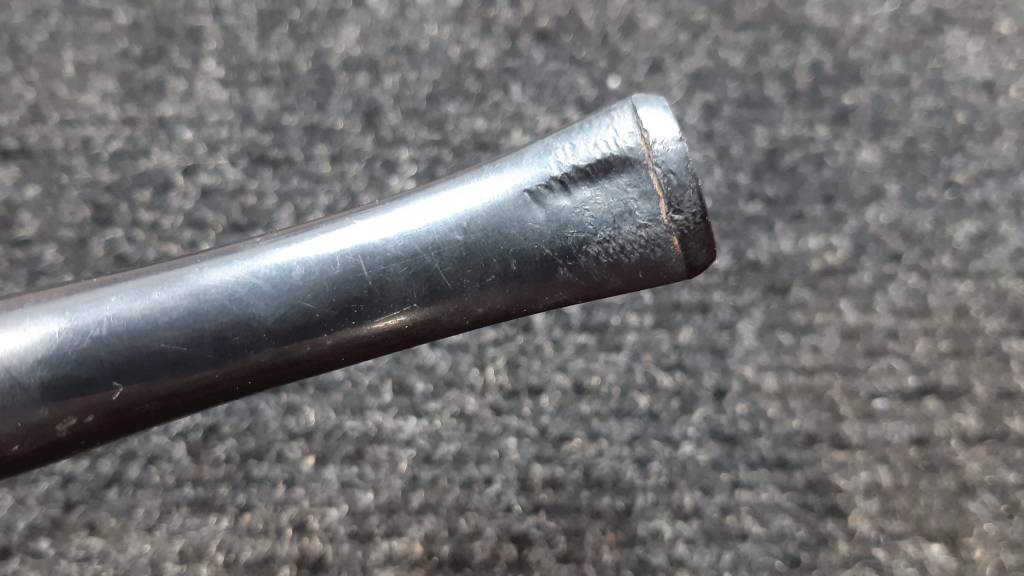
I gave it my best effort – filing and sanding and filling – but despite it all, this stem refused to cooperate. Heat didn’t raise the dents, and CA glue based fillers stood out like a sore thumb against the nylon. Eventually I gave up and tried to transplant the aluminum fitting into a replacement vulcanite stem, but when I attempted to extract the fitting with some heat, this happened:

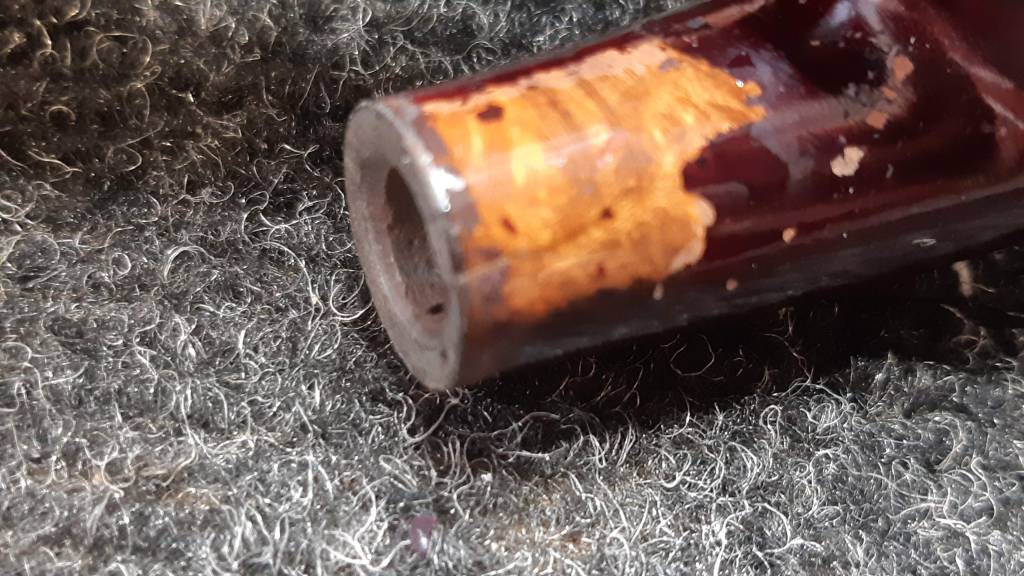
Yep – the nylon stem melted and bubbled, but refused to let go of the aluminum fitting! It really wasn’t much of a loss – the stem would never look new again anyway – so I tossed it in the bin and wished it a hearty good riddance. But what to do now?
Perhaps I was inspired by the Peterson St Patrick’s Day pipe I wrote about recently, or maybe I was thinking of food, but either way I ended up making a replacement stem sandwich of sorts. The most appropriate stem blank in my stores was slightly too short for the pipe, but I rummaged around a bit and found a slice of briar, a washer, and a Delrin tenon….

Slipping the briar and washer onto the tenon, I came up with a stem extension that would both maintain the original length of the pipe and add a bit of bling to the affair.


I glued up the briar and steel sandwich on the tenon then epoxied the new stem into place and let the whole construction cure.


Then came a LOT of tedious work with files and sandpapers to reduce the diameter of my new stem to match the pipe shank. (A belt sander is definitely on my wish list!) For the record, a steel washer is very hard and takes a lot of persuasion to get it to cooperate. Next time I will cut a piece of aluminum sheet instead….


The last close-up pic above shows why the shank band was a sacrificial piece. It got mauled by the files but did its job of holding the shank repair in place during all the commotion. As you can see, I removed the band to get the final stem sizing right. This could also perhaps have been done without banding the shank, but I think the cost of a band was much lower than the risk of enlarging that shank crack.
While I had been working on the stem sizing, I had also been thinking about how best to deal with the many fills in the stummel. The more I thought about it, the more I realized that this Medico Medalist wasn’t really a Medico Medalist anymore. The filter system was completely gone and about half of the nomenclature was covered by the shank band. That being the case, I decided “In for a Penny, In for a Pound”. I would complete the re-visioning of this pipe by rusticating the areas with the fills.
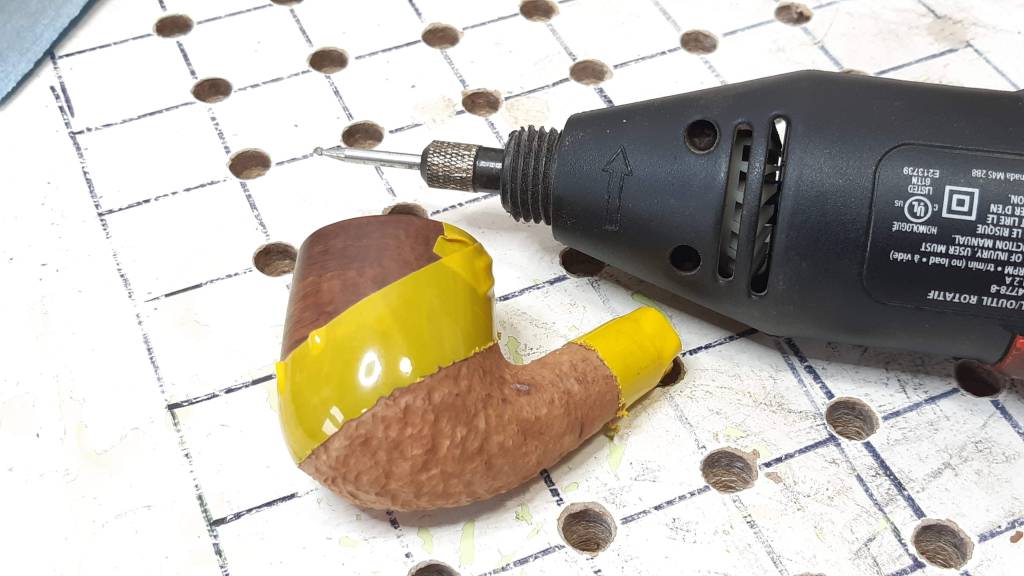
I started this process by sketching out the area to be rusticated using a pencil directly on the stummel. I also marked off the end of the shank where I would be installing a new shank band. Then I traced the pencil lines with a layer of electrical tape to act as both a guide and a (tiny) bit of protection for the briar next to the rustication.
To carve the rustication, I mounted a small round burr in my rotary tool and worked carefully over the briar until I was satisfied with the appearance. It’s not the deepest or chunkiest rustication but roughly equates to a decent sandblasting. I think rustication is a great way to lift the look of “spotty” briar with a lot of fills or occlusions. The fills get blended into the texture and essentially disappear once the pipe is stained.
As an aside, I have turned a section of my worktable into a downdraft table specifically to handle rustication and other dusty jobs. The grid of holes visible in the second pic below is essentially the top of a box which is attached to my shop dust collection system. With the vacuum tuned on, most of the dust generated by carving the briar gets sucked down into the system instead of being thrown up into my face. – a very valuable addition to my small shop.


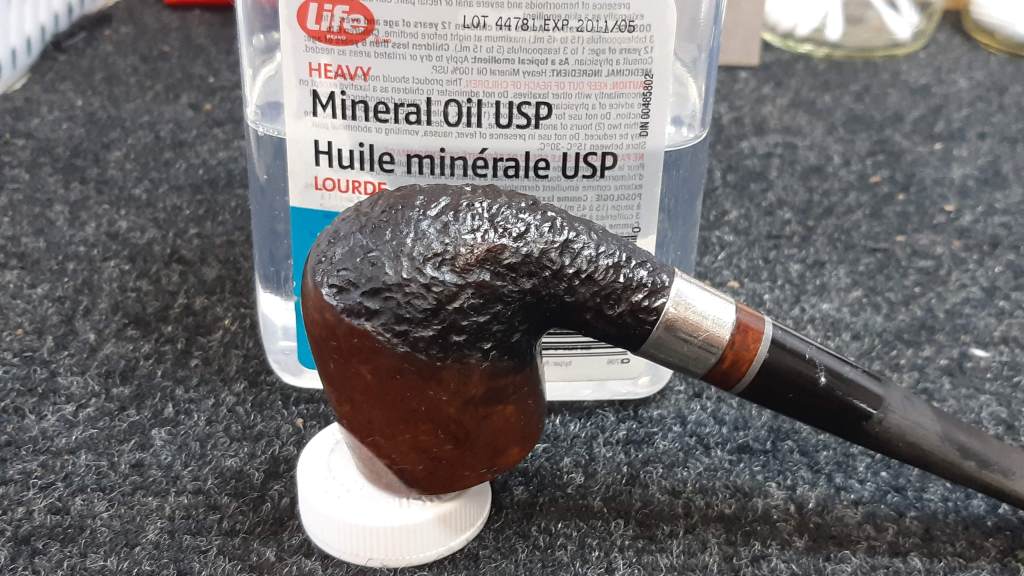
The last pic shows the new shank band pressed into place over the smooth end of the shank. With that done, I moved on to staining and hit the stummel with a fairly heavy coat of Fiebing’s Black leather dye, pushing it into the rustication to ensure even coverage in all the nooks and crannies.
I let the stain dry then removed as much colour as possible from the smooth areas of the stummel, leaving the black only in the grain. When I was happy with the stain coat, I applied mineral oil to the entire stummel to help set the stain and inject a bit of moisture into the old briar.


The last thing to do before final buffing was to bend the stem to match the original shape. I slipped a pipe cleaner through the stem to hold the airway open then heated the vulcanite over the heat gun until it became soft and pliable. To bend it, I simply turned the pipe upside down on the counter and pressed downwards. I held the stem in place until it cooled enough to retain the bend.

Finally, I took the overhauled pipe to the buffer where I polished the smooth portion of the bowl and the stem with Red Tripoli and White Diamond compounds before adding a few light coats of Carnauba wax to shine and protect the finished pipe.
The end product of this rather long adventure is a pipe unrecognizable as the Medico Medalist with which I started. I don’t do this sort of thing very often as I much prefer to preserve old pipes rather than change them completely like this one. This pipe, however, seemed to lead me from one stage of the work to the next, and practically cried out to be transformed. That is perhaps an odd thought about an inanimate object, but I stand by it nonetheless. Some pipes just want to go their own way.
The finished pipe looks great, in my opinion. The lovely cross-grain that was once hidden under a thick lacquer coat is now displayed with pride across the face of the bowl and bits of birds-eye grain pop out here and there on the sides. Gone are the large, unsightly fills, hidden among the hills and valleys of the rustication, and the new stem, complete with briar extension, is a real showstopper.
With all the time and labour invested in this pipe I think I’ll hold onto it for a bit and see how it performs, though it may end up on the Pipe Inventory page eventually.
Thanks for following along on with me on this estate pipe journey. I hope you enjoyed it as much as I did.
Until next time, Happy Piping. Here’s the finished pipe.


Wow Charles! I enjoyed that read. I laughed out loud when I scrolled to the photo of the original nylon stem, now melted! Sorry but that struck as quite funny – not sure if that was your reaction! Beautiful transformation!
LikeLiked by 1 person
Yeah, I may not have laughed quite so much in the moment, but definitely did later 😁
It’s fun to see what can be done with a pipe that otherwise would likely never be used again. I have a few more like this one in the box. Hopefully they turn out as nicely!
LikeLike
Lovely journey of recovery for a battered pipe – again a wonderful job – I loved the carving along the bottom of the bowl and shank.
Thank you for sharing the “sacrificial band” tip – that will definitely inform my efforts going forward.
LikeLiked by 1 person
Thanks, Lee!
LikeLike