
Here’s a bonus Monday post to show what I got up to this weekend. Enjoy! — Charles![]() If you work on estate pipes long enough, sooner or later you will inevitably be faced with what has to be the most common pipe repair – replacing a broken tenon.
If you work on estate pipes long enough, sooner or later you will inevitably be faced with what has to be the most common pipe repair – replacing a broken tenon.
The first several times I dealt with a tenon replacement, I relied on pre-made tenons purchased from a pipe supply house and a steady hand on the cordless drill. This worked well enough for doing the occasional tenon replacement.
After working on a half dozen tenon replacements at the same time for a local estate pipe re-seller, I looked for ways to streamline my process and reduce costs. I figured out that I was paying the equivalent of $1.86CAD plus shipping for each pre-fab tenon I used. By comparison, I could order 3/8″ Delrin rod for $1.35CAD per linear foot, or roughly $0.13CAD per tenon – clearly a better way to go!
My challenge was now to devise a way to quickly and easily drill out sections of rod stock to create my own tenons. I don’t own a lathe, so I rely heavily on my drill press for this sort of thing. Here’s the simple jig I made up to let me churn out an entire rod’s worth of tenons in only a few minutes.
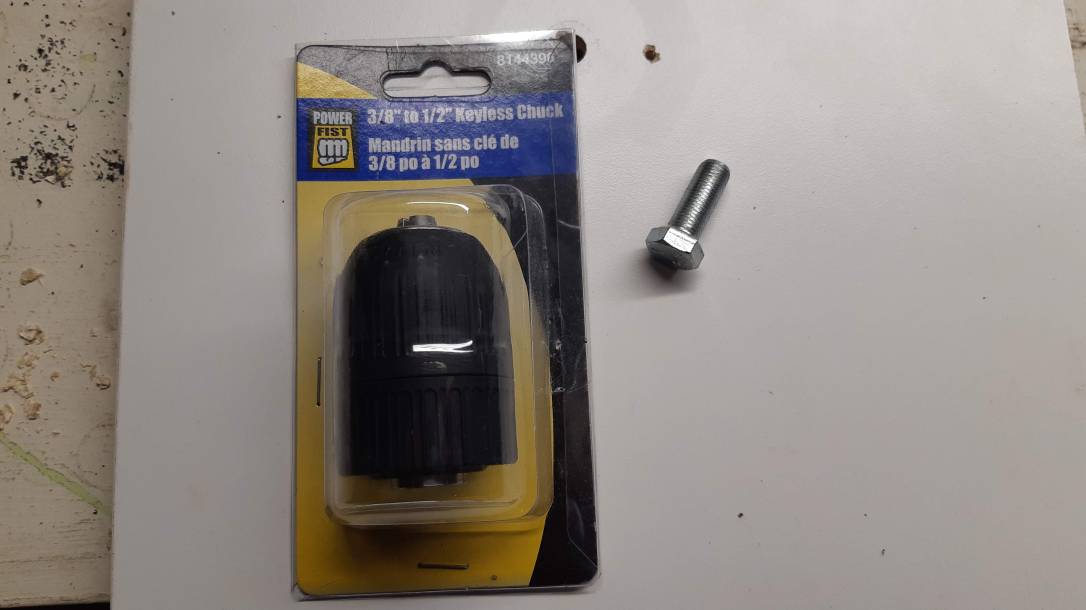
It doesn’t look like much, mainly because my jig is made from only three or four components – a square piece of 5/8″ Masonite I had left over from installing some shelving, a keyless drill chuck, a 3/8″ bolt and two scraps of pine 1×2 (although you really only need one to recreate what I’ve got here).
First I cut the 1×2 to fit across the top and one side of the board. The top piece (as seen in the above pic) was screwed into place on top of the board to create a fence of sorts at the post of the drill press. The second 1×2 was screwed to the underside of the right edge of the board to act as a stop to keep the board aligned with the edge of the drill press table.
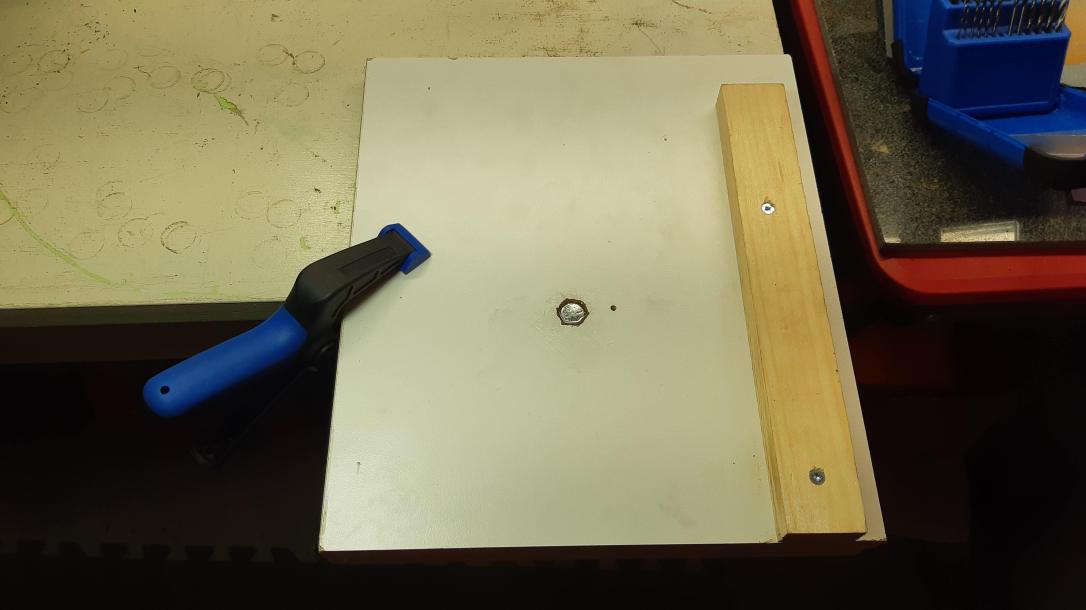
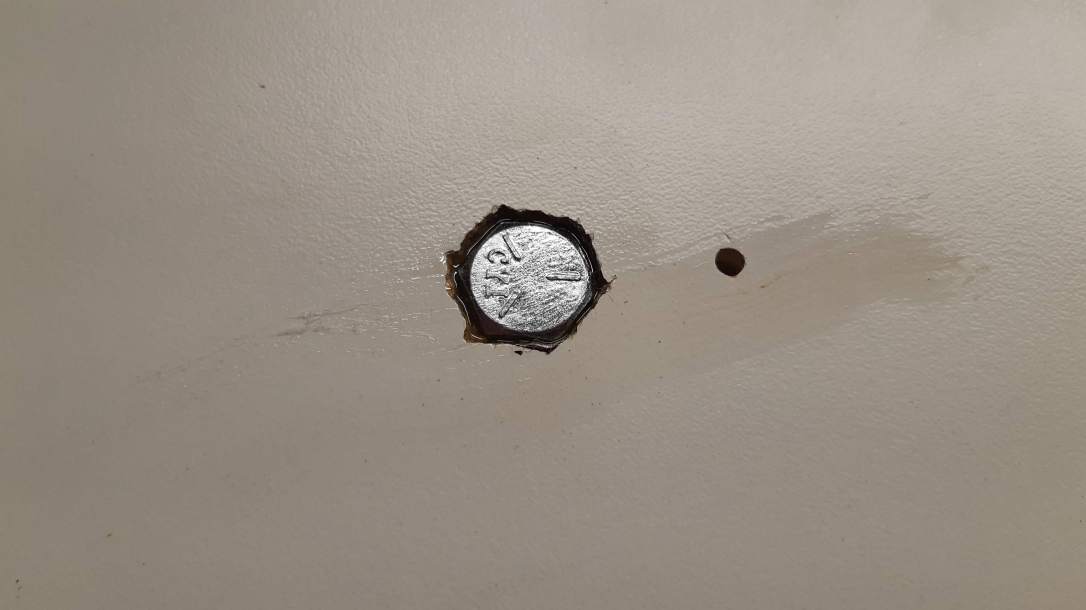
Holding the board in position on the drill press, I drilled a pilot hole down through the board, then enlarged the hole with a 3/8″ bit to accept the bolt. I pushed the one inch long bolt through the board from the underside, then traced the hex head, removed the bolt, and chiseled out a mortise deep enough to allow the head of the bolt to sit below the surface of the board. A bit of two-part epoxy fixed the bolt in position. (The second hole in the pic below is a leftover from the last project this board was used for and is not necessary for this project.)
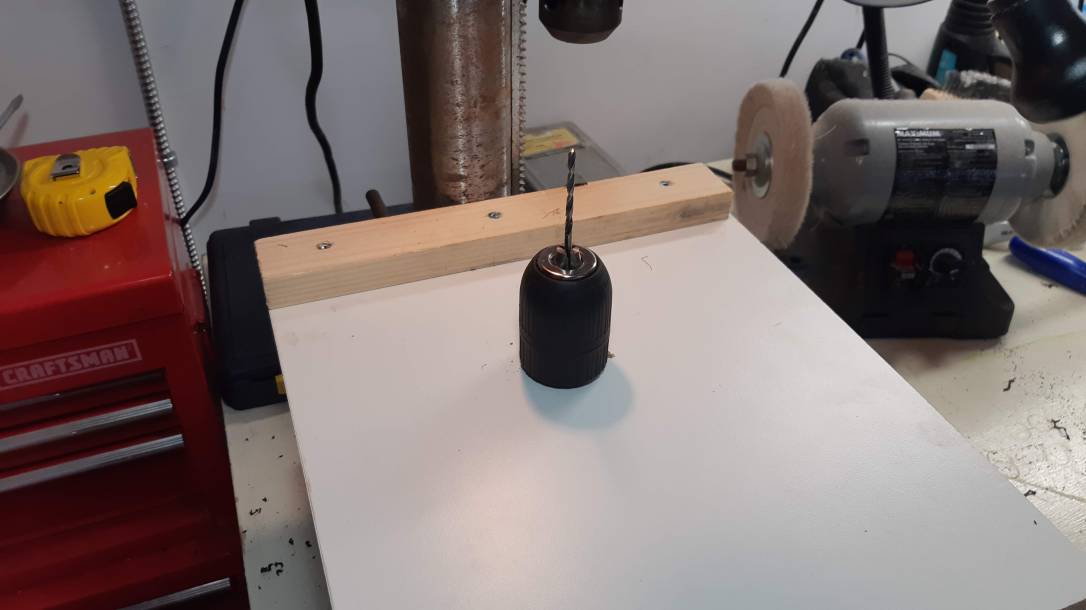
Flipping the board over, I screwed the keyless chuck onto the bolt and tightened it down firmly. To test the alignment I fit a drill bit onto the drill press chuck and lowered the press until the drill bit fed smoothly into the centre of the keyless chuck on the board. Bingo! If you don’t get a perfect alignment on the first try, tweak the drill press table position and angle settings, then lock it all down tight.
The hard work was done at this point. Time to test the jig with a bit of Delrin rod.
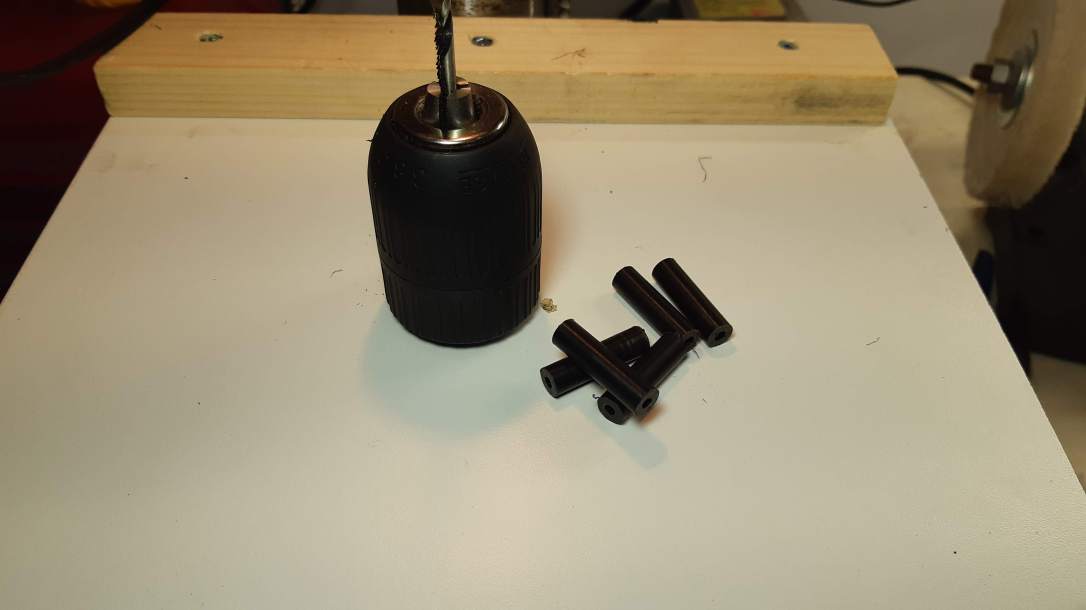
To drill out the rod, I mounted a 5/32″ drill bit in the keyless chuck on the board, and mounted a section of Delrin rod stock in the drill press chuck. Both chucks are automatically self-centering, so when I switched on the drill and lowered the press, the drill bit bored a perfectly centered airway through the rod. Success!
This short video shows the jig in action. It’s not the best quality vid – I shot it on my smartphone while operating the drill press – but it gets the point across.
All in, this cost me about $30CAD and less than ten minutes to throw together, and the best part is that I can churn out any number of identical tenons in any diameter up to the capacity of the drill chuck – 1/2″ in my case. Here’s a small pile of tenons I ran through the jig in about 3 minutes.
I’m quite pleased with this little shop project, though I’m sure there are other, possibly better, ways to accomplish the same task. This was quick, easy and inexpensive and the results speak for themselves.
I’m sure this jig will get lots of use in my shop as estate pipes continue to arrive with broken tenons. I may add a few bolts and wingnuts to attach the jig to the drill press table, but for now a good clamp works just as well.
Thanks for joining me for this short tenon drilling jig tutorial. Perhaps you will make one for your own shop, or perhaps you already have something similar that works for you. I’d love to hear from other restorers about how they handle the mundane tasks like tenon making, so please comment below!
Until next time, Happy Piping!

Very good idea. Simple and easy. I will be recreating this myself or something similar when needed. I haven’t had to replace a tenon yet, I am still experimenting and learning the basics.
LikeLiked by 1 person
Thanks, Sean. Simple and easy seems to work best in any shop, and I’ll take all the help I can get 😁
LikeLike