
This attractive freehand pipe was sent to me by a client near Kingston, Ontario with the request to clean it up and, if possible, install a 9mm filter system. When it arrived at DadsPipes Central, I brought it to the worktable and made a full inspection.
A good-sized freehand, the pipe was in obviously used but fairly good estate condition. The chamber needed reaming, and the plateau rim was clogged with carbon and dirt, but apart from a few small handling marks, the stummel looked to be in good shape under a layer of oily dust. The stem was oxidized and greasy-feeling, but it was free of both tooth dents and chatter.
![20180530_092039[1]](https://dadspipes.com/wp-content/uploads/2018/06/20180530_0920391.jpg?w=1086)


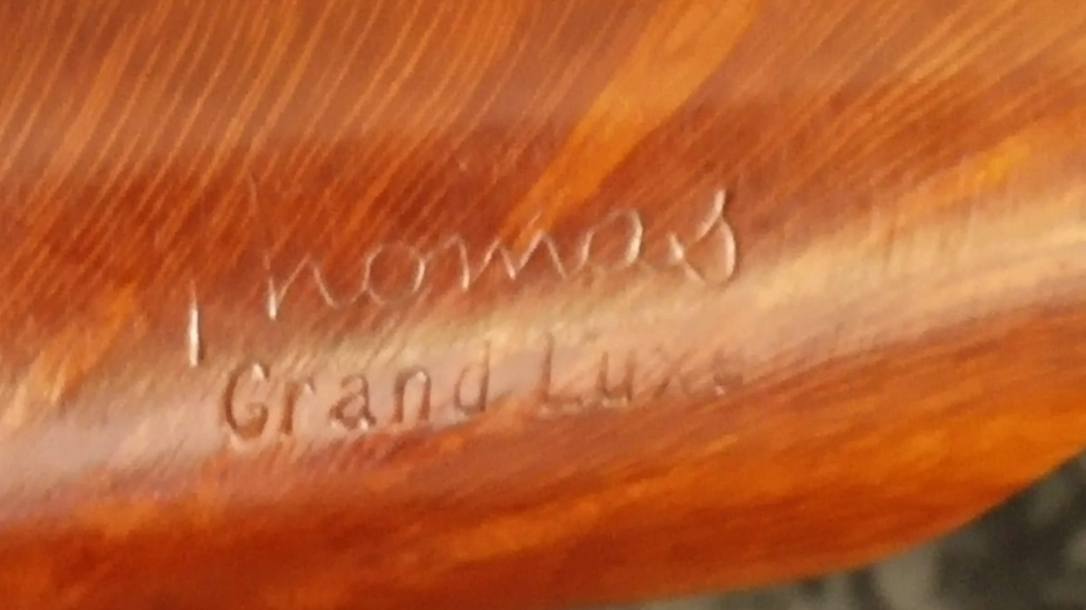
The stummel is marked on the left flank with “Thomas” in script over “Grand Luxe”, while the stem bears the faint remains of a cursive-style “T”. According to Pipephil.eu, the brand hails from St Claude, France, but the website provides little other information. I was unable to turn up anything else concrete about the maker, so if anyone has anything to offer to this discussion, please comment below!


I began the clean-up phase of this project by reaming the chamber back to briar. The chamber bore was smaller than average, and I could only use the smallest two heads of my Castleford reamer set, so I finished the job with a scrap of sandpaper wrapped around a Sharpie marker.
Once cleared of old cake, the chamber proved to be in good shape although slightly over-reamed, which left the chamber floor below the draft hole. The small difference in height didn’t require repair, but it’s something the pipe’s owner will need to keep an eye on down the road.

Next up was the rim. I used a brass-bristled brush to scrub the dirt and carbon out of the nooks and crannies of the plateau.

A good wipe-down with isopropyl alcohol on cotton pads took years of dirt, oil and old wax off the exterior surface of the stummel. Pipe cleaners and more alcohol cleared a modest amount of dirt and soot from the pipe’s airway and mortise.


With the stummel clean, I focused my efforts on the requested 9mm filter. After digging though my own supplies as well as those of several online suppliers, I was unable to find a pre-cast 9mm freehand style stem, with the exception of an eBay order from China that would take 6-8 weeks to arrive.
All was not lost, however; after a quick parley with the pipe’s owner, the decision was taken to use the Grabow style 6mm paper filter system instead. These filters are readily available in North America and I had several suitable stems on hand with enough girth to safely drill out to accept them.
Here is a pic of the stummel laid out with a 6mm filter and the stem I selected for the project. Notice the large tenon area on this stem blank – lots of room there to drill out a roughly 7mm pocket without compromising the integrity of the tenon.

Laying the filter against the stem, you can see that there isn’t enough room for the filter to fit entirely within the stem. The mortise will need to be drilled to accommodate both the excess length of the filtar and the wider tenon.

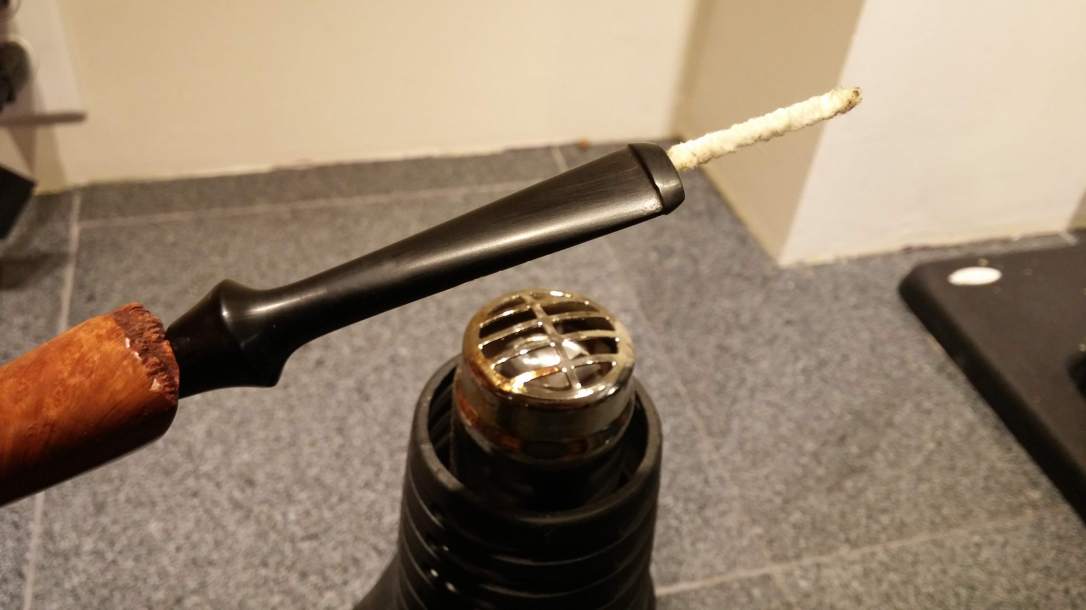
My course set, I prepared my work space for drilling out the filter pocket in the stem. This pic shows the stem and the series of drill bits required. The smallest drill bit was only slightly larger than the stem’s airway, the next bit only slightly larger than the first, and so on. Experience has taught me the hard lesson that attempting to drill a filter pocket in one go almost guarantees a cracked stem.

It was important during the drilling not to over-drill the stem with any one drill bit. I wanted a smooth, even filter pocket to minimize air turbulence during smoking, and, obviously, drilling through the narrow shoulders of the stem wouldn’t get me very far either. To keep the drilling depth consistent, I marked each bit with a scrap of masking tape, which tended to fall off the bit when it made contact with the stem face. This explains the lack of tape on the drill bit in this picture.

I worked through each drill bit in succession and eventually had a freehand stem that would accept a 6mm filter.

The next step was to decide on a mortise diameter and tweak the stem tenon to fit. The raw diameter of the stem tenon was quite large – approximately 9/16”. To drill out the mortise to this size would have left me with very little briar in the shank, so I would have to go with a narrower mortise/tenon. The stem blank was also slightly lopsided, as this pic of the tenon face shows. There was quite a bit of extra vulcanite on one side.
![20180530_100031[1]](https://dadspipes.com/wp-content/uploads/2018/06/20180530_1000311.jpg?w=1086)
To make the tenon round and decrease its overall diameter, I set to work with a series of files and sandpapers, first cutting a straight line across the flare of the tenon reaching all the way around the stem, and then removing the excess vulcanite below this line to create a straight, cylindrical tenon of just over 3/8” diameter with an even wall thickness. Frequent checks with my digital calipers helped me keep the tenon round and even.

To create the matching mortise in the pipe’s shank, I again used a series of successively larger drill bits to bore out a 3/8” mortise. This was complicated somewhat by both the plateau on the shank face and the undercut, smooth section of shank on the underside of the mortise. A steady hand and a fair bit of patience pulled me through this delicate operation, and with just a bit of hand sanding, the new stem slid home snugly into the fresh-cut mortise.

You can see in the above picture that the stem couldn’t insert fully into the mortise due to interference from the plateau on the upper shank face. Though it looks like a solid join, at this point there was a mere quarter of an inch of tenon in the lower edge of the mortise where the shank is cut away.
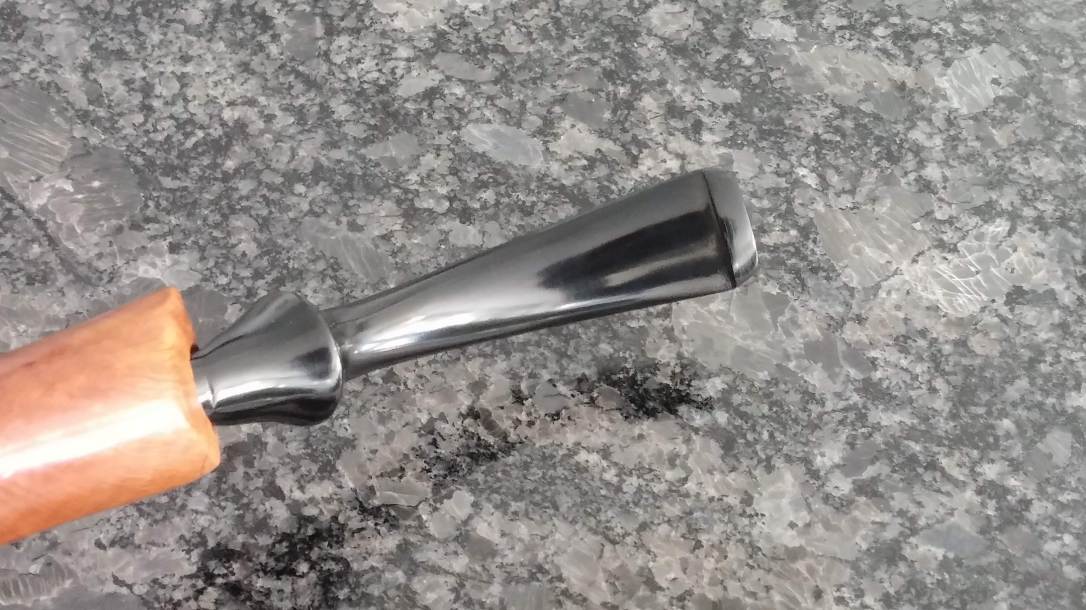
To allow the stem to insert fully in the mortise and strengthen the joint, I cut away more of the vulcanite on the top side of the stem, keeping as much as possible to the contours of the shank end. After much filing, sanding and polishing, the stem fit was much better, with a full 5/8” of tenon sitting firmly in the mortise. The contours of the stem looked like this:


Bringing the rest of the stem up to par was relatively straightforward but again required a fair amount of hand labour. I used a few different needle files to remove the excess material at the seams of the precast stem and then sanded with 220 and 320 grit sandpapers to smooth the rough vulcanite. 0000 steel wool followed, as did 800 and 2000 grit wet sandpaper.
I decided to try Red Tripoli buffing compound on the wheel instead of micromesh pads to erase the sanding scratches and bring up the shine on the stem. As regular readers will know, I don’t usually buff with anything coarser than White Diamond compound, but I thought I’d experiment a little here.
The Tripoli did a fairly good job, but I ended up with red wax jammed into some of the larger scratches (larger being relative, of course, as the stem was already hand sanded to 2000 grit). A bit of alcohol on a cotton pad removed the wax and I was able to touch up the scratches by hand before returning to the buffer for a second and much lighter run with the Tripoli compound.
Just before assembling the pipe and taking it for final buffing and waxing I bent the stem to match the curvature of the original. After inserting a pipe cleaner into the airway to keep it open, I warmed the vulcanite over my heat gun until it softened enough to bend. A quick run under the cold water tap set the bend.

Now complete, the finished pipe went to the buffer for a final polishing with White Diamond compound and several coats of Carnauba wax.
Though lacking the maker’s logo, the new 6mm filter stem looks and fits this Thomas Grand Luxe like a factory original. The pipe itself, after a good cleaning, looks great, and the refreshed vulcanite is several shades lighter than when it arrived covered with dirt and dust. All in, I’m quite pleased with the finished pipe, and it was with just a small sigh of regret that I packed it up for the return trip to its owner. I’m sure he will enjoy this pipe for many years to come.
Thanks for joining me for another estate pipe restoration. Until next time, Happy Piping!
Here’s the finished pipe.


As always, Charles, a great effort and wonderfully detailed explanation.
LikeLiked by 1 person
Thanks Todd. This pipe was an interesting challenge that required me to carefully think through each step. No sleeping on this job! 😃
LikeLike
Charles, I always learn much from your technical repairs and this stem project was no exception. It goes to the file drawer for future reference. I’m boning up for my first endeavor with the tenon sizing tool via your input as I create a couple new churchwardens. Thanks!
LikeLiked by 1 person
Thanks very much, Dal. Good luck with your wardens!
LikeLiked by 1 person