
Just before Christmas I received a very generous gift from my pipe friend in Iqaluit who has been sending me his Blatter pipes for refurbishment. Along with a tin of pipe tobacco and an assortment of cigars, the box contained two Blatter pipes – one whole but in poor shape, and one stummel missing its stem. The note enclosed wondered if I could do anything to salvage the pipes. Challenge accepted!
I decided to start with the easier of the two project pipes and fit a replacement stem to the freehand Blatter stummel. As you can see in these pics, the stummel had been well used before coming to me. There was a fair amount of hard cake built up in the chamber, and a thick coat of lava covered most of the plateau rim, completely filling the nooks and crannies. It would take a concerted effort just to get this old briar cleaned.


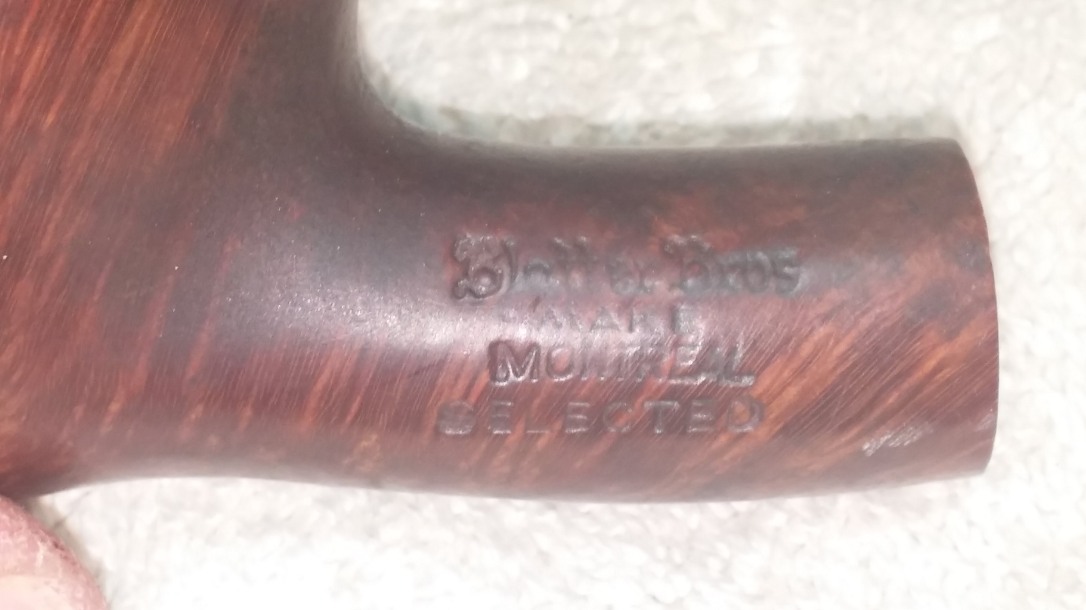
The pipe is stamped on the left flank “Blatter Bros” over “Make” over “Montreal” over “Selected”. The underside of the shank is marked “150-76”, though it’s a bit hard to read. If I’m deciphering the stamps correctly, this pipe was the 150th to come out of the Blatter workshop in 1976.

I began the cleanup process on the stummel by attacking the lava crust on the rim with dental pick and brass tire brush. I found the dental pick particularly helpful in digging the crud out of the low spots in the plateau surface.

With the inner rim now visible, I reamed the old cake from the bowl and cleared years of buildup from the mortise and airway using pipe cleaners, cotton swabs and isopropyl alcohol. The flat end of my needle file came in handy to scrape the worst of the tars and debris from the shank without using up my supply of cleaners.

I completed the stummel cleaning by wiping the exterior clean with cotton pads dipped in more alcohol. This removed the dirt, grime, grease and waxes accumulated over time and exposed the lovely vertical grain of the briar for the first time in years.

Now that the briar was clean I could go about selecting and fitting a replacement stem. I had no idea what the original pipe looked like, and without a model number to go by, trying to find a picture online was unlikely to prove fruitful. I’d just have to dig through my box of stems and see what spoke to me.
In the end, I selected a used vulcanite stem with approximately the right dimensions. The stem face was a bit larger than the shank, so there would be a fair amount of shaping and sizing to do; the stem also had too much of a bend in it, but that is easily corrected.
I forgot to take a picture of the stem before I started working on it, but here’s a shot of the “new” stem after a quick fitting of the tenon.

After staring at the fitted stem for a bit, I decided I didn’t care for the overall look – the flared saddle disrupted the flow of the rather curvy shank, especially on the bottom side, where the flare made the line double back on itself awkwardly.
So I took the pipe out to the workbench, loaded a sanding drum onto my rotary tool and slowly reshaped the stem and smoothed the transition from shank to stem. Here again I forgot to take pictures, but in my defense, I was a little preoccupied with not fouling things up – a moment of inattention with a rotary tool can be disastrous.
In the end, I came back to the worktable with a half-saddle stem with a much more fluid shape than the fancy flared stem I started with. Here you can see the pipe after I had sanded with 220 and 320-grit dry sandpapers and polished with 800 and 2000-grit wet papers.
This stage took a lot longer than I’m implying here – the coarse sanding drum on the rotary tool left rough sanding scratches and a few “oops” marks as well that all had to be smoothed and in some cases filled with CA glue and then smoothed again to get to what you see in the pic. You can also see that I straightened the curvature of the stem somewhat here, bringing the bit in line with the top of the bowl.
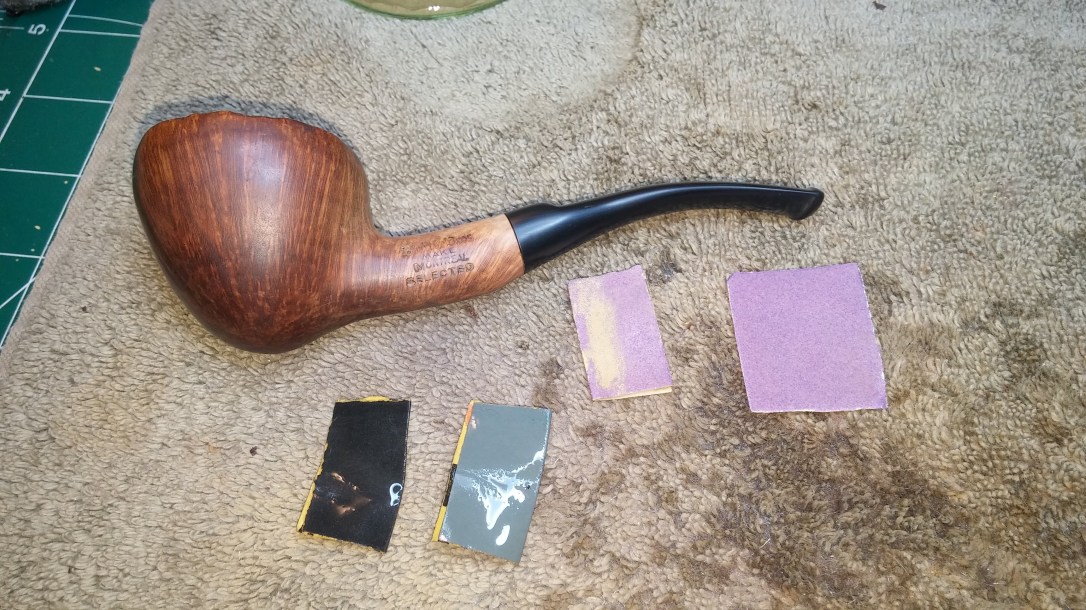
Leaving the stem for a bit, I sanded out a small constellation of handling marks and small dents from the stummel, carefully avoiding the stamps as I went. When I was happy with the results, I wet-sanded the briar with 800 and 2000-grit sandpapers to bring up the shine.

A coat of Fiebing’s Saddle Tan leather dye evened out the old finish while keeping the overall look more transparent than a dark stain would have. I wanted to show off the grain to best advantage.

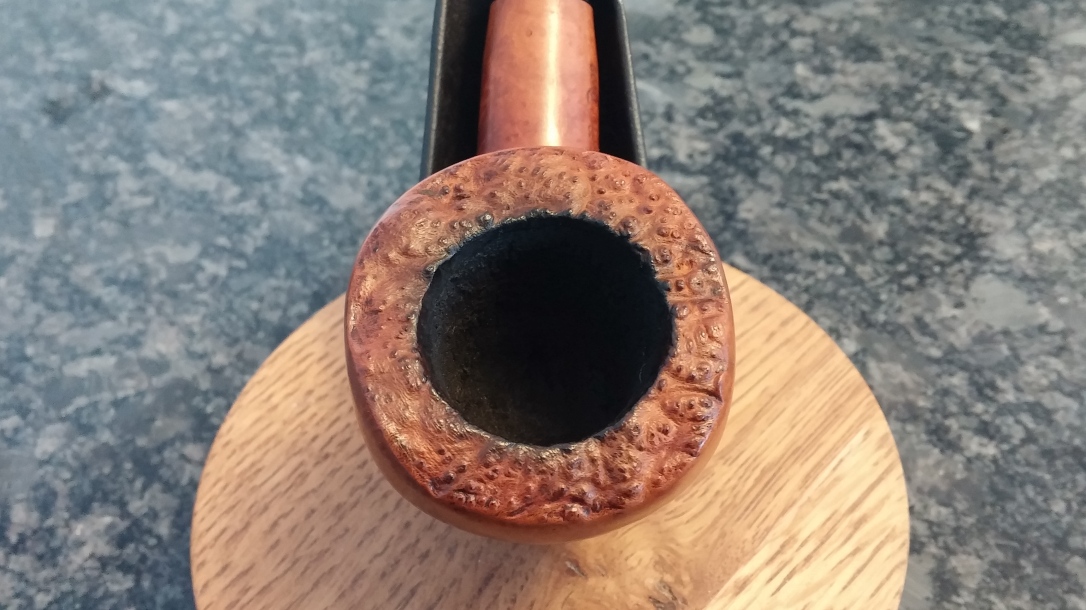
The walls of the tobacco chamber were a bit dinged up from a combination of hot smoking and years of scraping with a pen knife instead of a proper reamer – not bad enough to require serious repair, but enough to warrant a good bowl coating.
I went for a thicker coating on this bowl, first wiping some maple syrup around the interior walls and floor of the chamber, then filling the bowl completely with activated charcoal powder. I let the bowl sit for several hours, during which time the syrup absorbed as much charcoal as it could. Then I dumped out the excess charcoal and let the coating air dry overnight.
The bowl coating has filled in the small scratches and other marks in the briar walls and is now a smooth, hard lining with a slightly grippy texture that encourages the development of a new carbon cake. It will continue to dry and get even harder over the next week, after which the pipe will be ready for an inaugurable smoke.

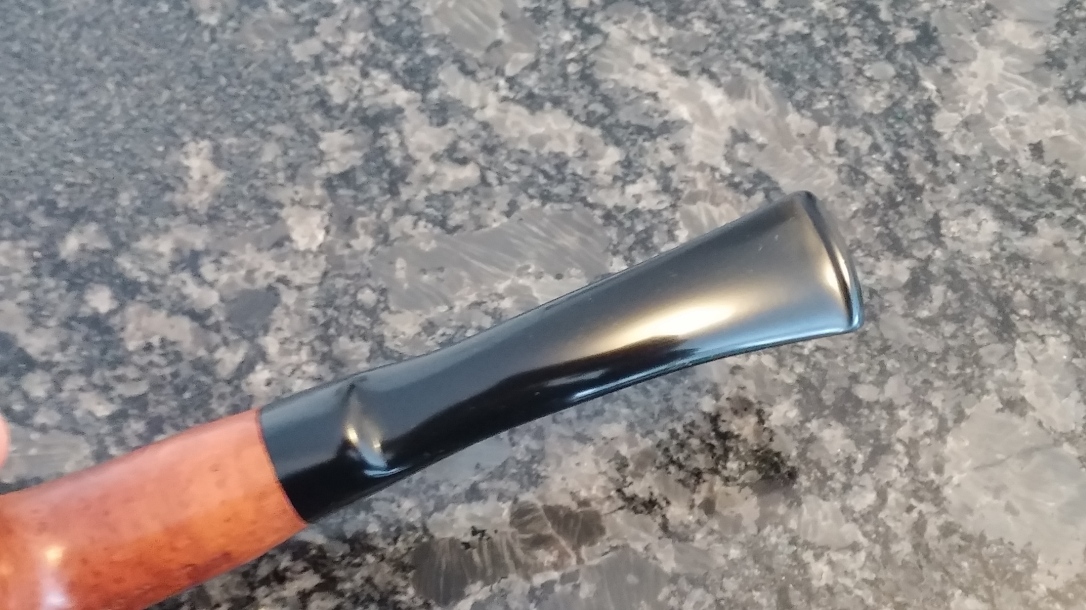
Then it was time to give the pipe a final buff and polish on the wheel, first with White Diamond compound followed by several coats of Carnauba wax to shine and protect.
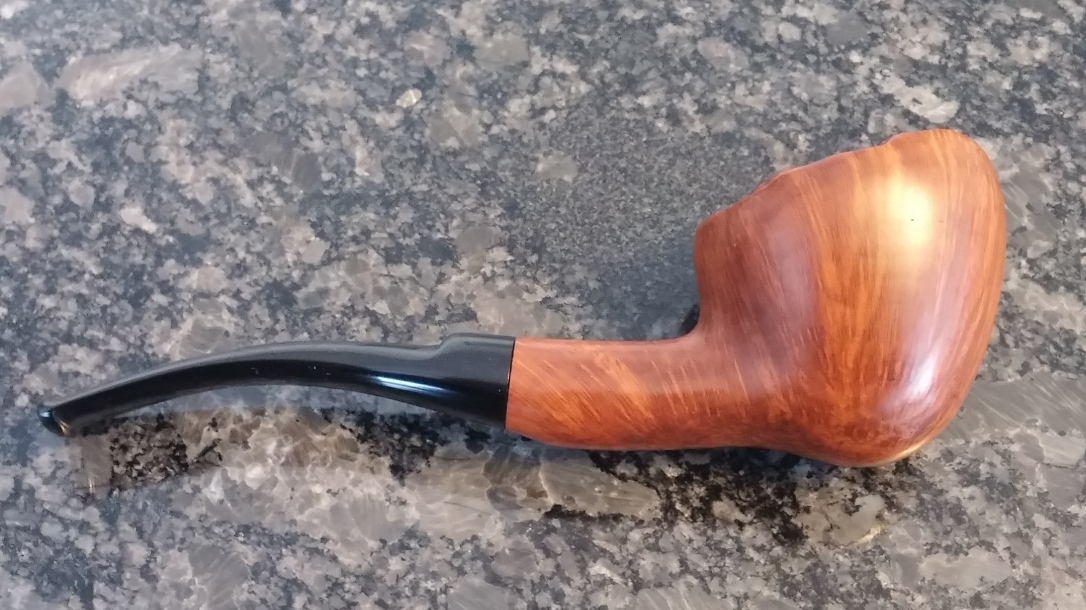
I’m pleased with the final outcome of this restoration process. The old Blatter Bros bowl is beautifully grained and glows with health and vitality, while the slender half-saddle replacement stem, apart from making the stummel useful again, gracefully extends the curvy lines of the pipe from bowl to button. The pipe is also reasonably well balanced in the teeth, which will make it comfortable for the long smokes promised by its copious 1″ diameter chamber bore.
I’m looking forward to packing a bit of something tasty into this pipe soon. It will take its place in my rack as a uniquely thrice-blessed pipe – a gift from a pipe friend, an interesting restoration and my first Blatter pipe.
Thanks for joining me for another restoration adventure. Until next time, Happy Piping!
Here’s the finished pipe.


It looks like that honey/carbon bowl coating took well.
LikeLike
Thanks, Al. I’m always a bit surprised at just how hard the coating is when dry.
LikeLike
Besides, being a beautiful pipe (excellently restored), I’d think it quite collectible given its year, 1976; Montreal Olympics. Do you know about how many pipes the Blatter Brothers produced per year?
LikeLiked by 1 person
Thanks David. I hadn’t made the Olympic connection.
I’m not sure how many pipes Blatter produces in a year, but with only a few craftsmen the number can’t be very high.
LikeLiked by 1 person
Nice Save!
LikeLiked by 1 person
Thank you!
LikeLike