
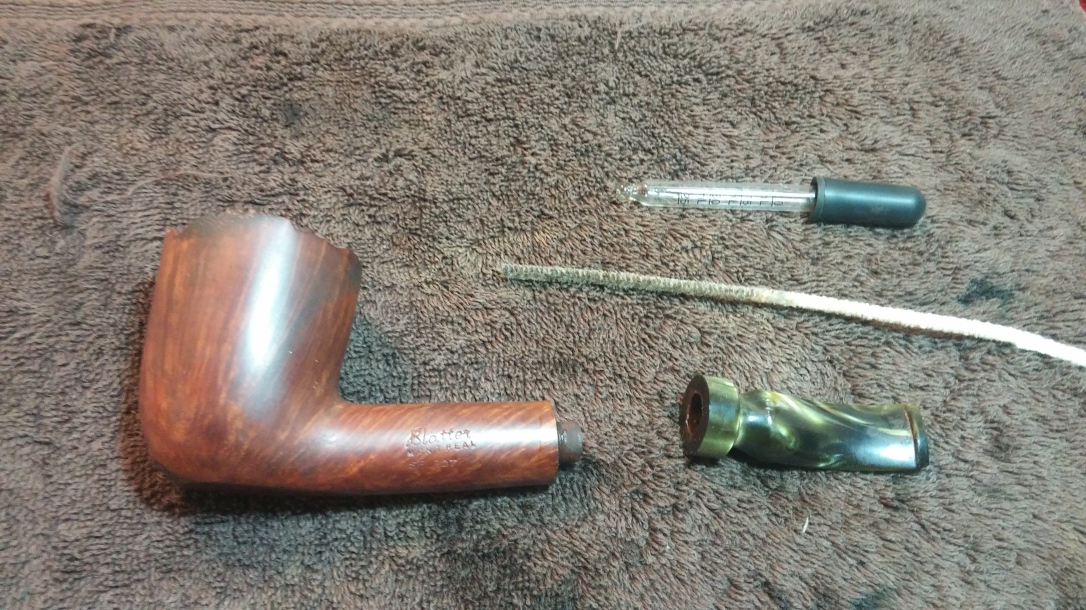
This large pipe came to me for refurbishment in the latest lot from a fellow piper living in Iqaluit, Nunavut. I’ve worked on quite a few pipes for him over the last year, and this particular Blatter proved to be quite a challenge.
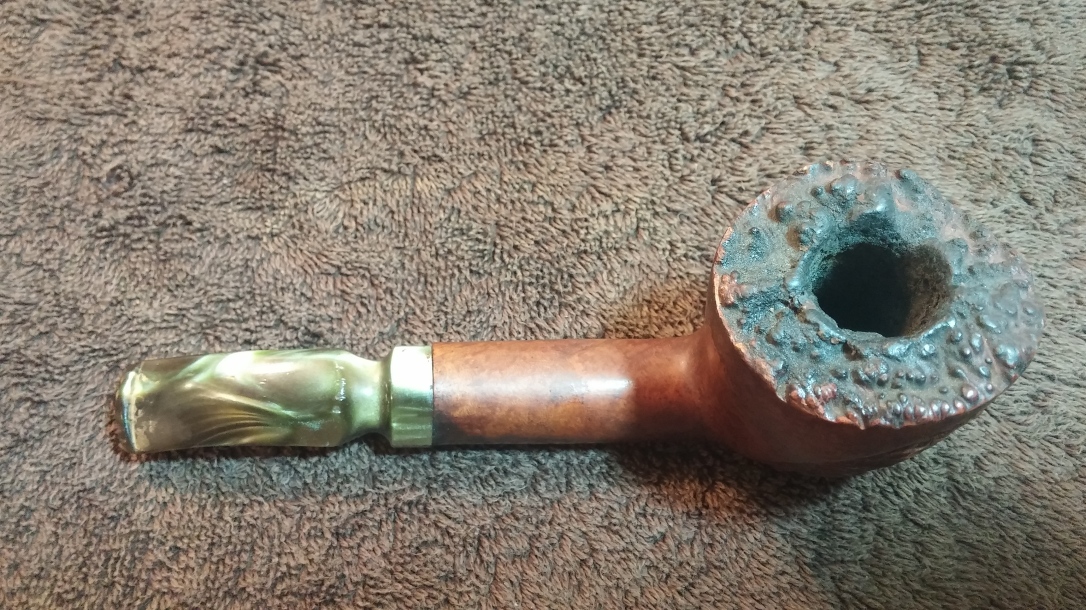
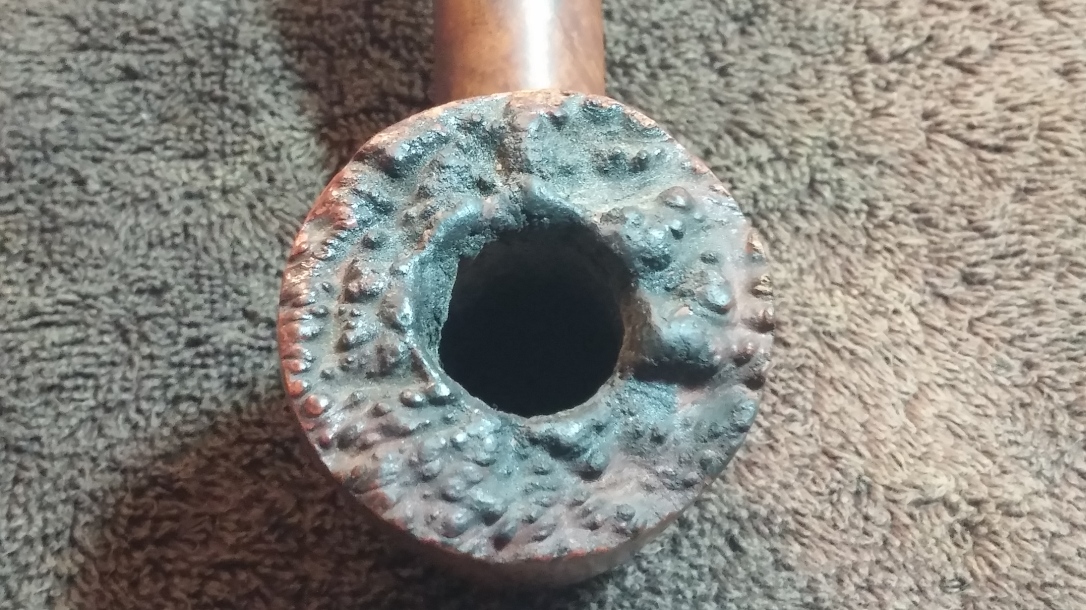
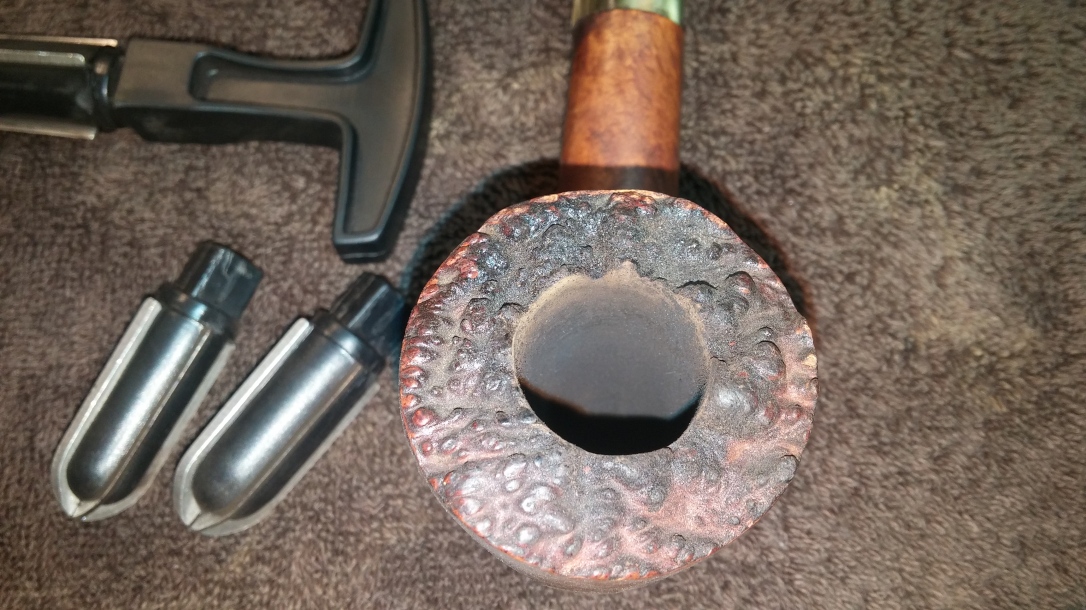
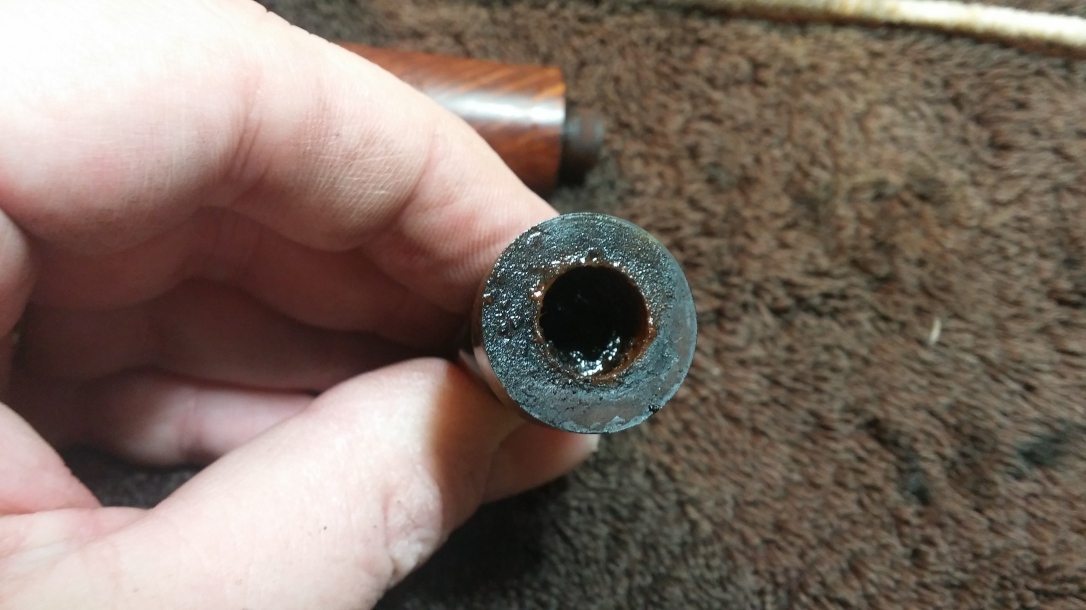
To begin with, as you can see in the pics below, the pipe was in dire need of a good cleaning when it arrived on my worktable. The plateau rim was completely filled in with hard, crusty lava, and it looked like the bowl had never been reamed. The cake in the chamber was so thick I couldn’t identify the inner edge of the rim or the depth of the chamber.
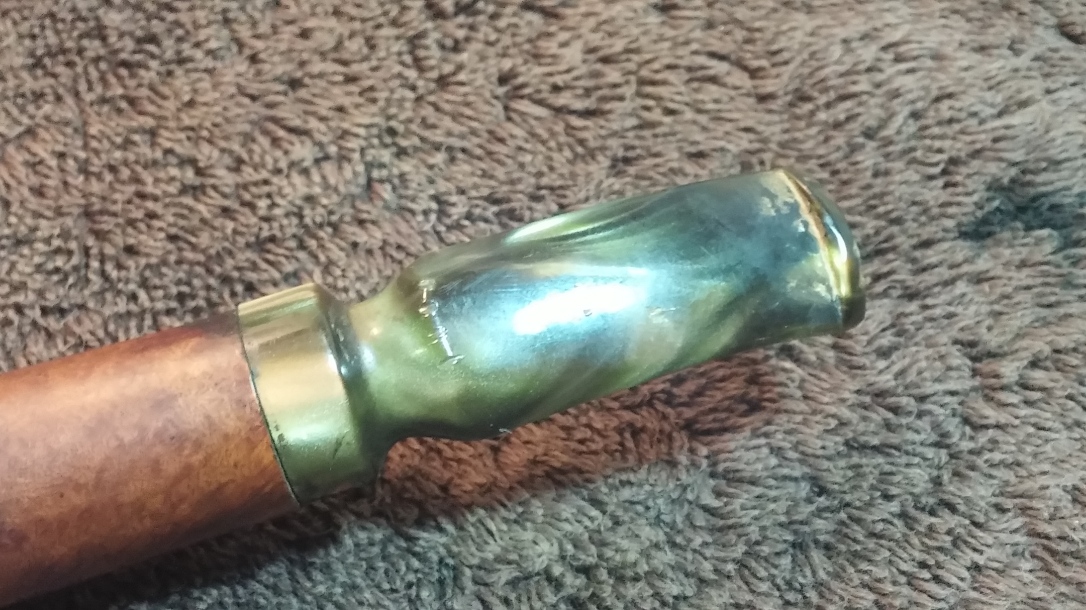
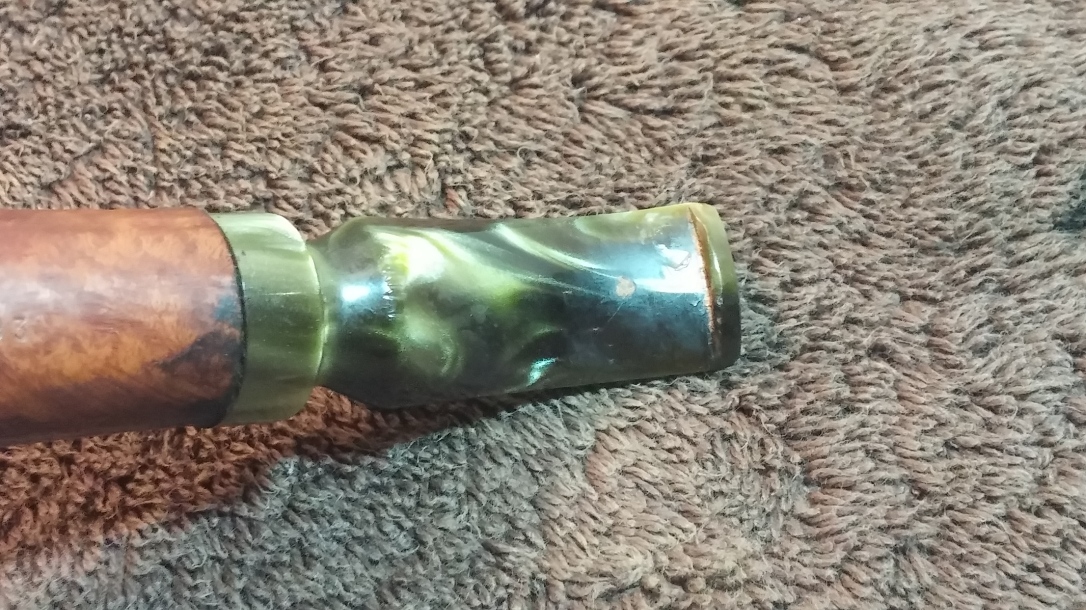
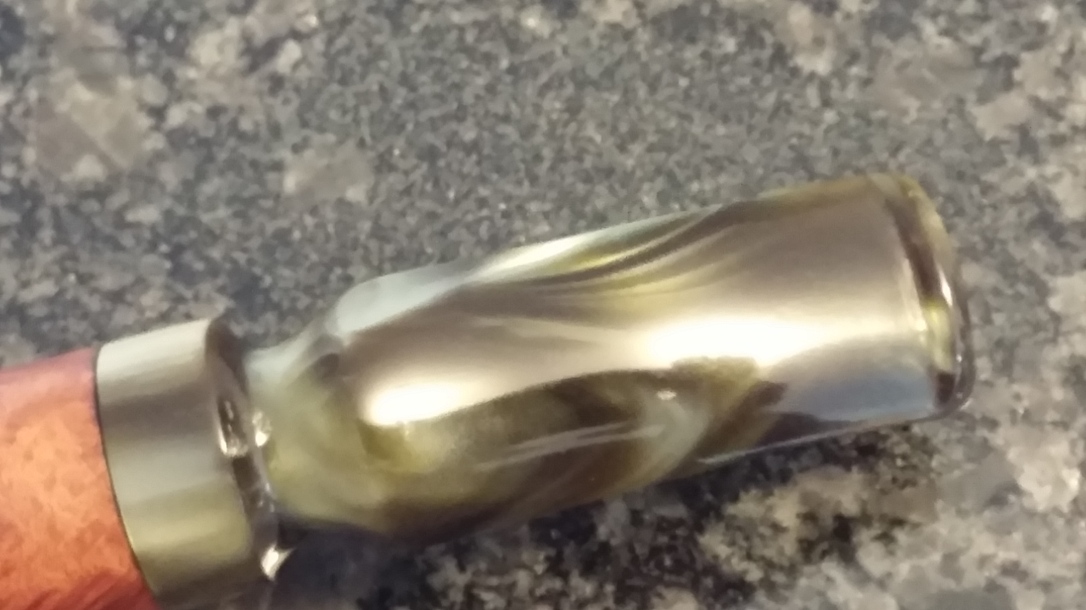
In addition, there was something funky going on at the stem/shank junction. The stem was obviously out on alignment with the shank, hanging over the briar on one side and stopping short on the other. The briar at the end of the shank also showed some dark patches of discolouration I was sure hoping weren’t glue. The stem itself, a nice swirled green acrylic, was scarred with tool marks on top and bottom, evidence that someone at some point used pliers to remove the stem from the shank.
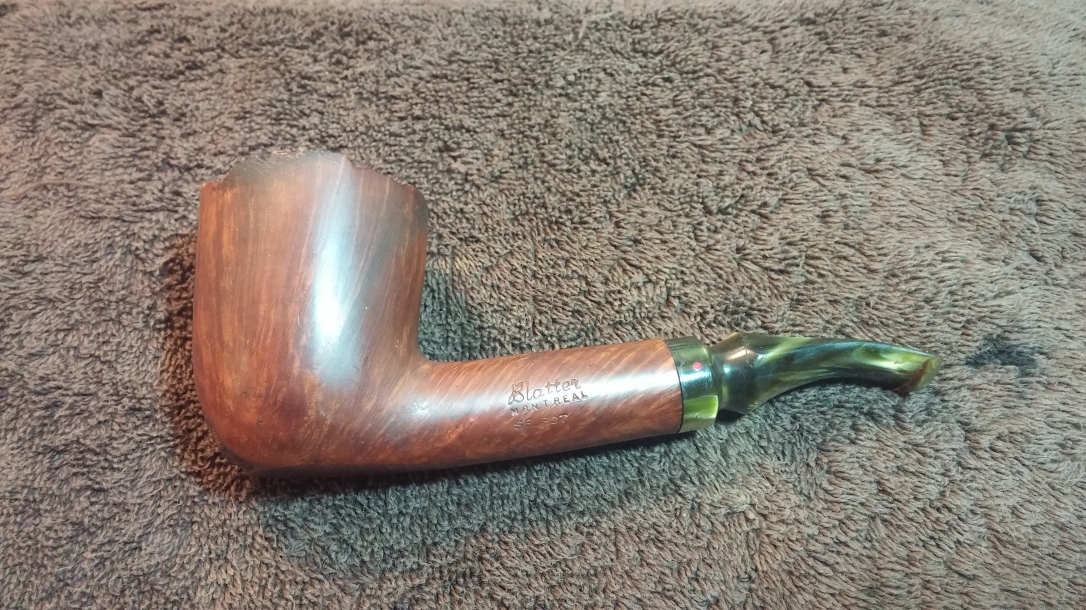
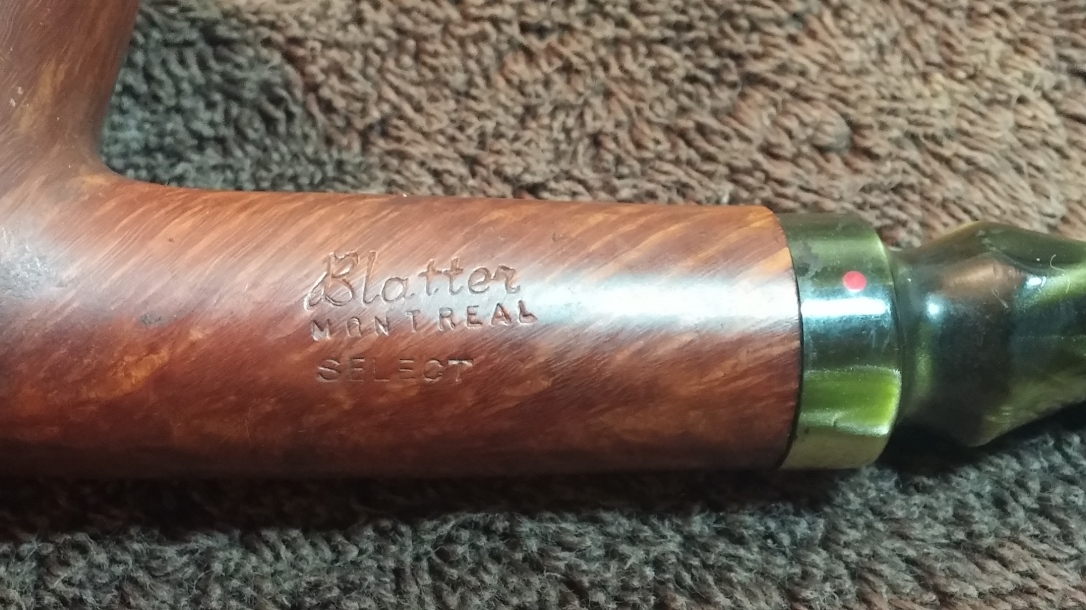
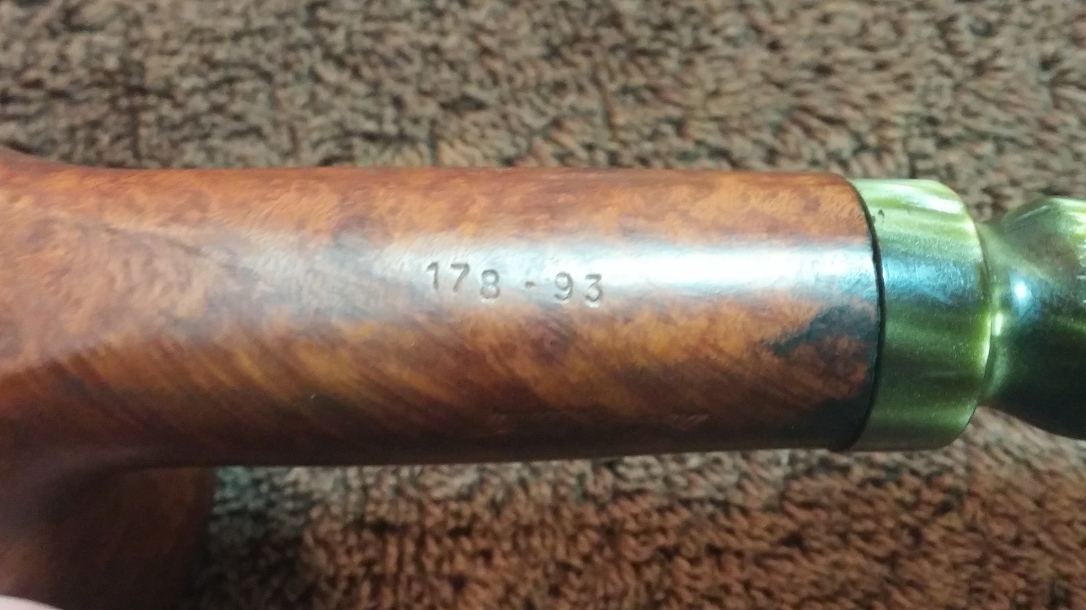
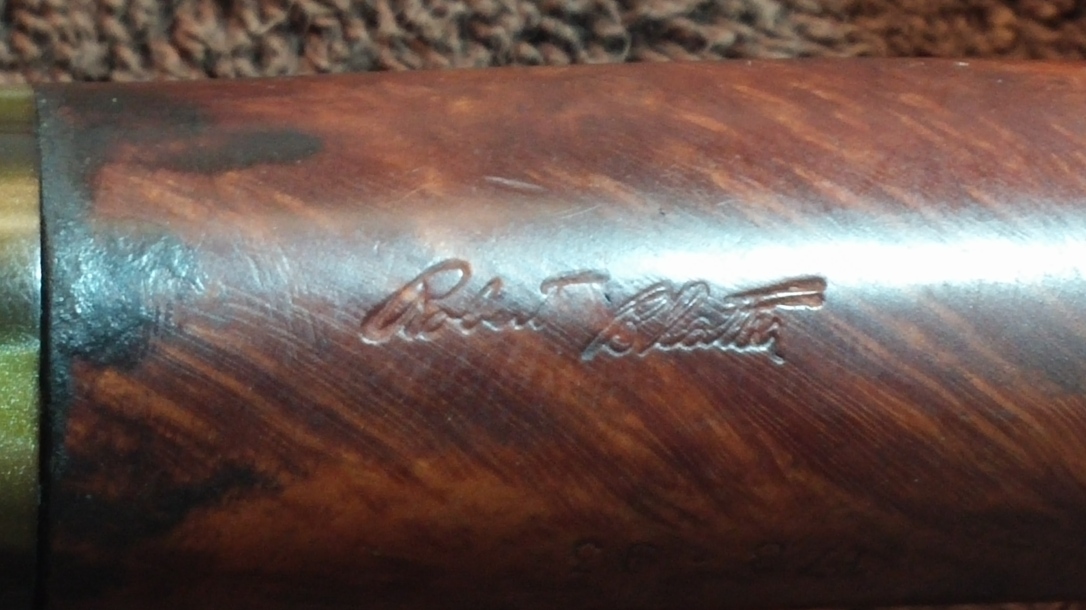
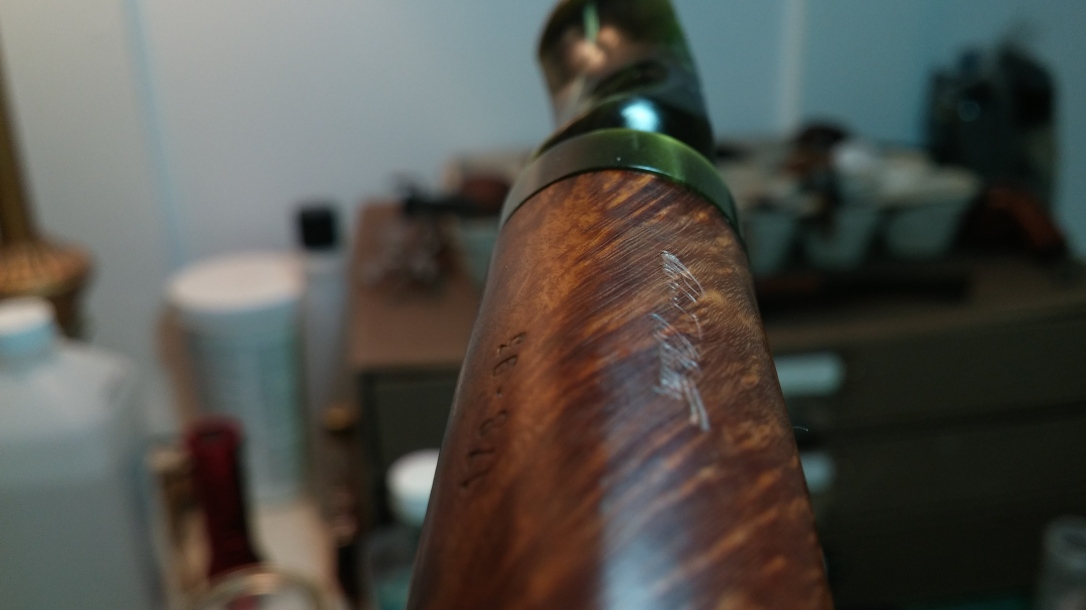
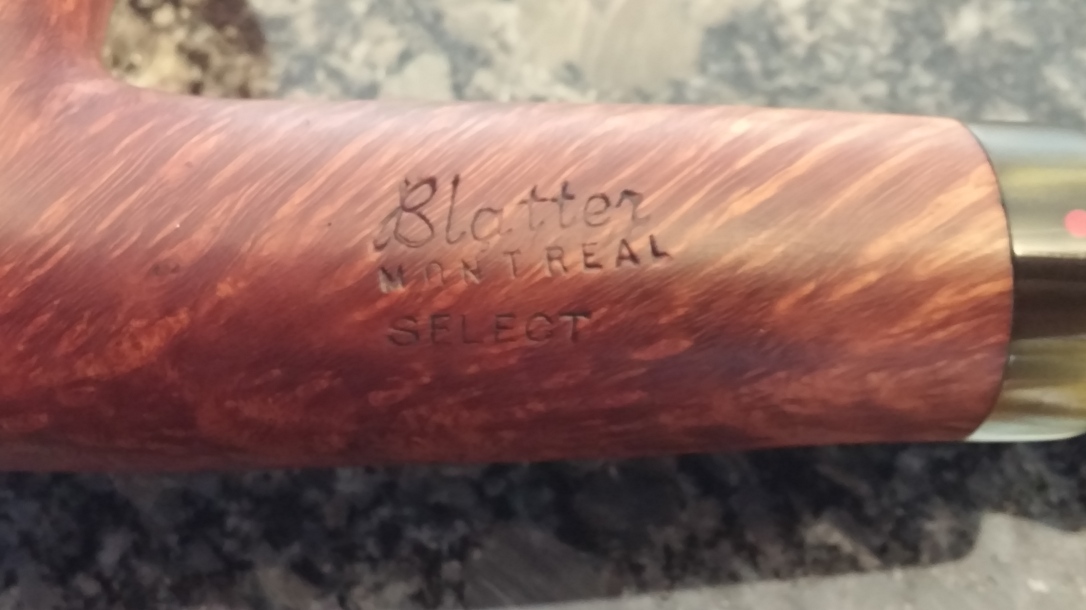
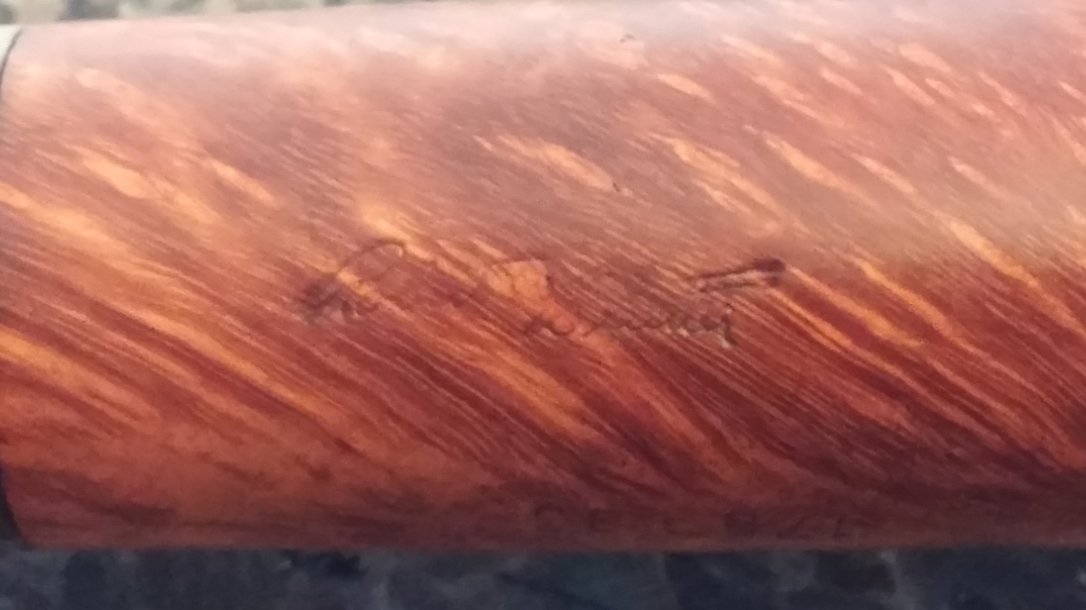
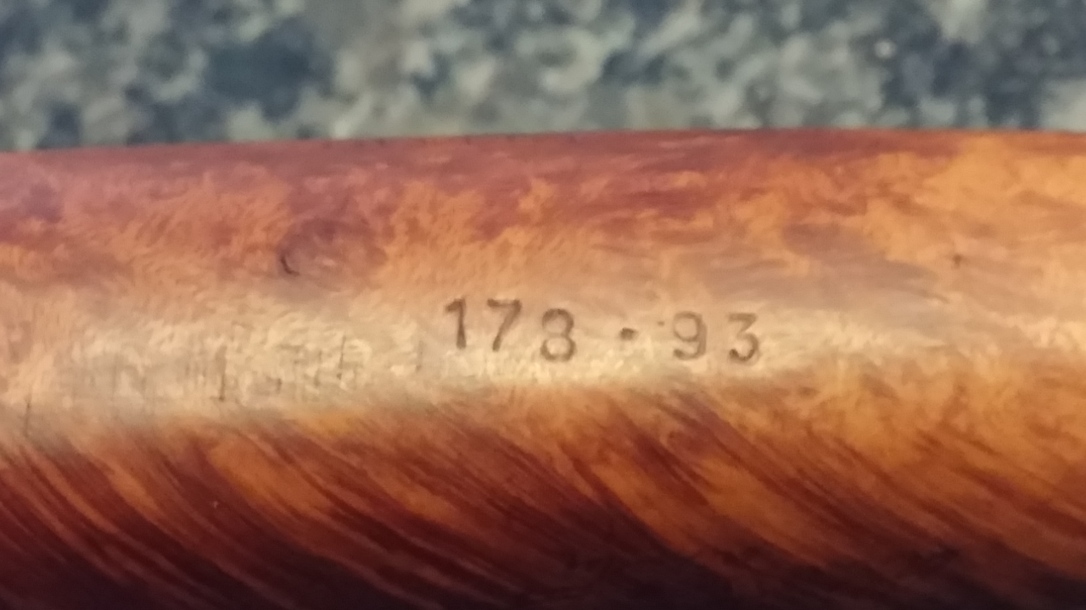
The pipe is stamped “Blatter” over “Montreal” over “Select” on the left shank, and “178-93” on the underside of the shank. The right shank carries Robert Blatter’s signature stamp, and the stem is marked with the Blatter Red Dot. The Select grade is a step up the Blatter briar quality scale from their standard pipes; the other stamps indicate that this pipe was made by Robert Blatter himself as the 178th pipe of 1993.
I started what turned out to be a rather labour-intensive cleaning of this pipe by reaming the worst of the rock-hard cake from the chamber using my Castleford reamer set. I started with the smallest cutting head and gradually worked up through the larger heads until I found the briar walls.
This was easily some of the hardest, densest cake I’ve come across. I keep the reamer blades reasonably sharp and still this felt like coring an oak tree with a butter knife! While most of the cake eventually came out, I knew I hadn’t found briar all the way around the chamber. More work would be required to purge the last of it from this pipe.
In order to clean the shank and airway I needed to remove the stem. I had a hunch that this would be just about as difficult as the initial reaming had been, and I was right. At first the stem refused to budge at all, so I dripped a bit of isopropyl alcohol down the stem/shank joint in an attempt to loosen things up.
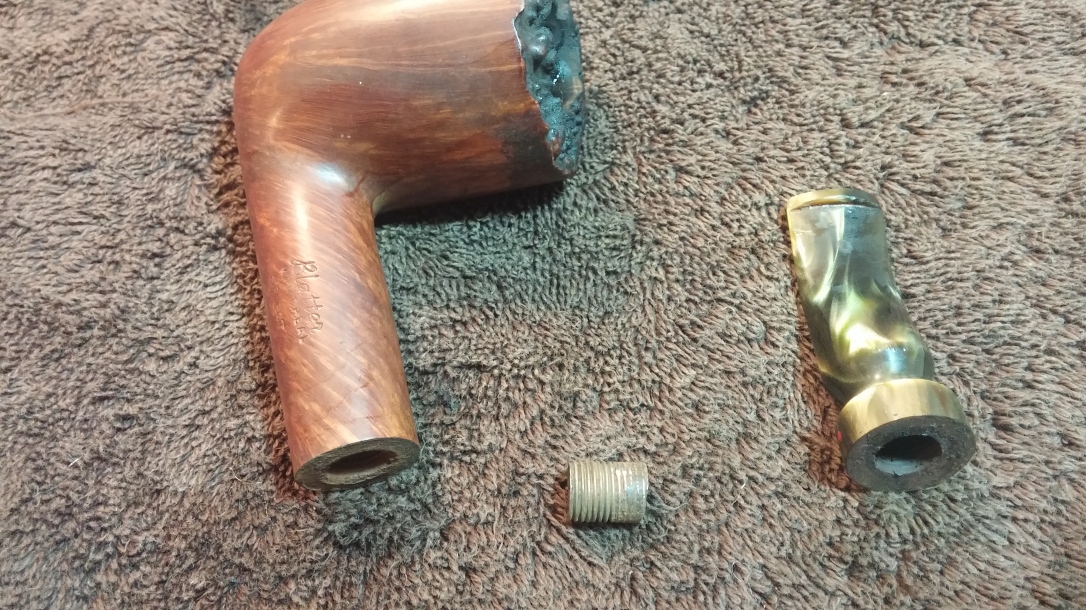
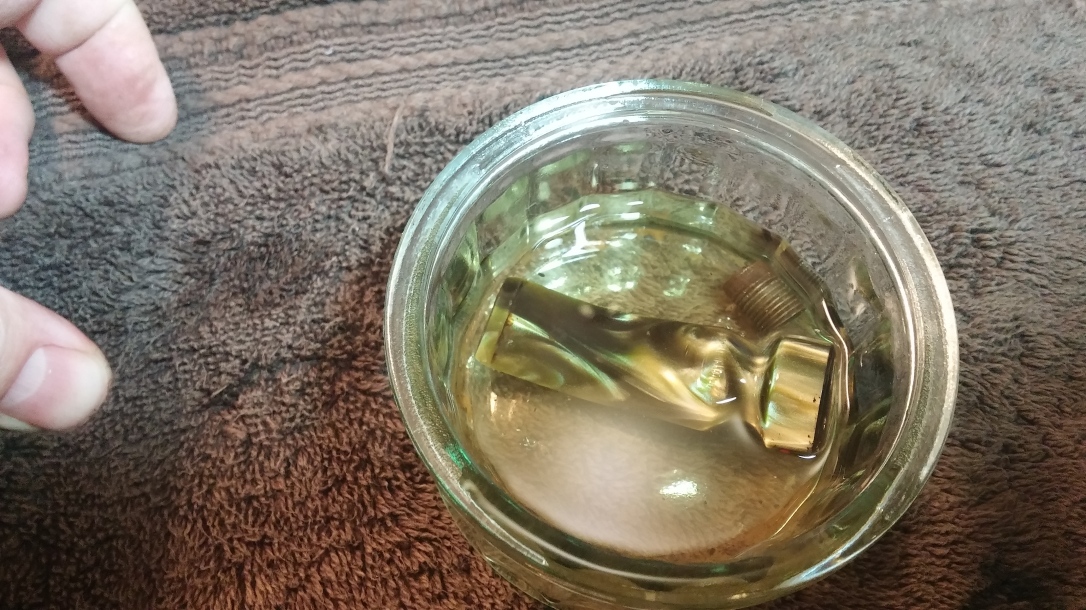
Looking at the misaligned shank, I also guessed that I may be dealing with a less-than-successful previous repair. This indeed proved to be the case. When the stem would not turn clockwise in the mortise, I tried turning it counter-clockwise and ended up unscrewing the acrylic stem from a short section of threaded pipe that had been used to join stem to shank, presumably after the original tenon broke off.
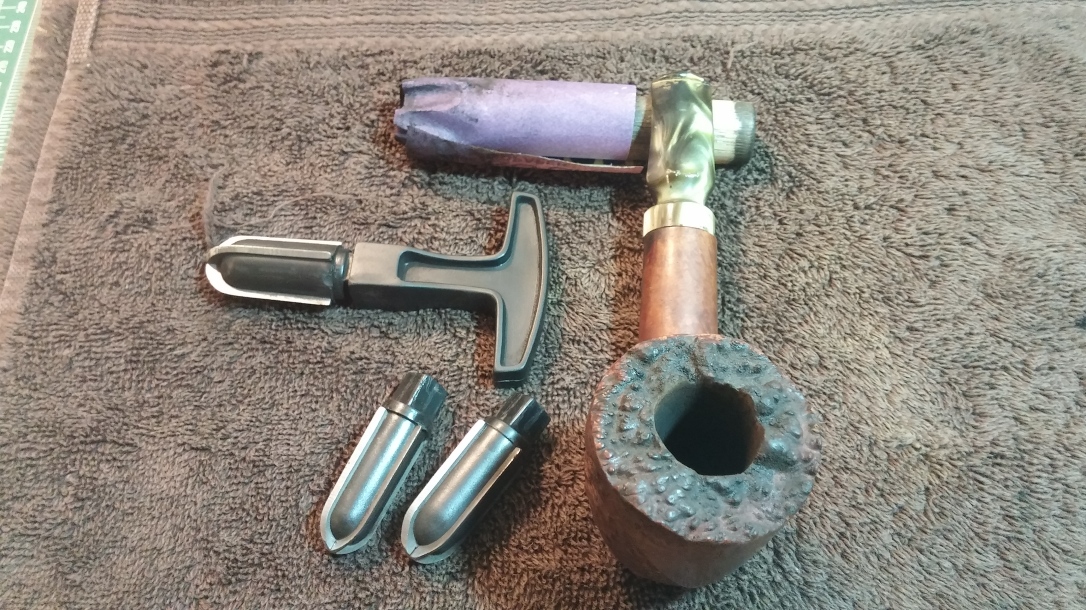
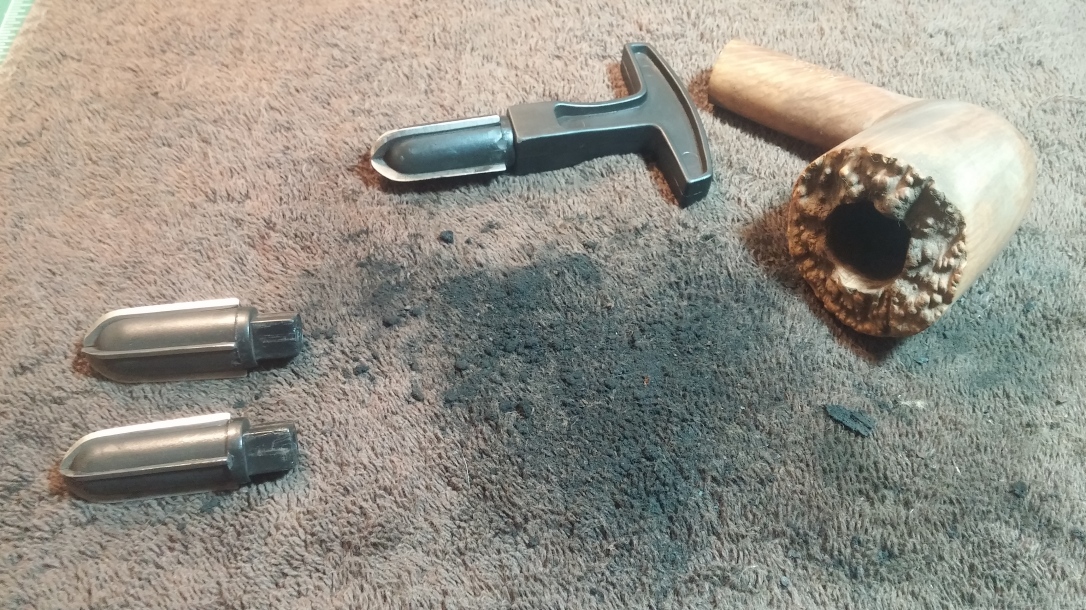
I separated the pipe into its three pieces – stummel, stem and ersatz tenon – and took some close-up pics to show what I was dealing with. It was fairly obvious that I’d have to install a proper new tenon, but there was quite a buildup of gunky tars and other goodies in both the mortise and stem face that would have to be cleaned up before I could evaluate next steps.

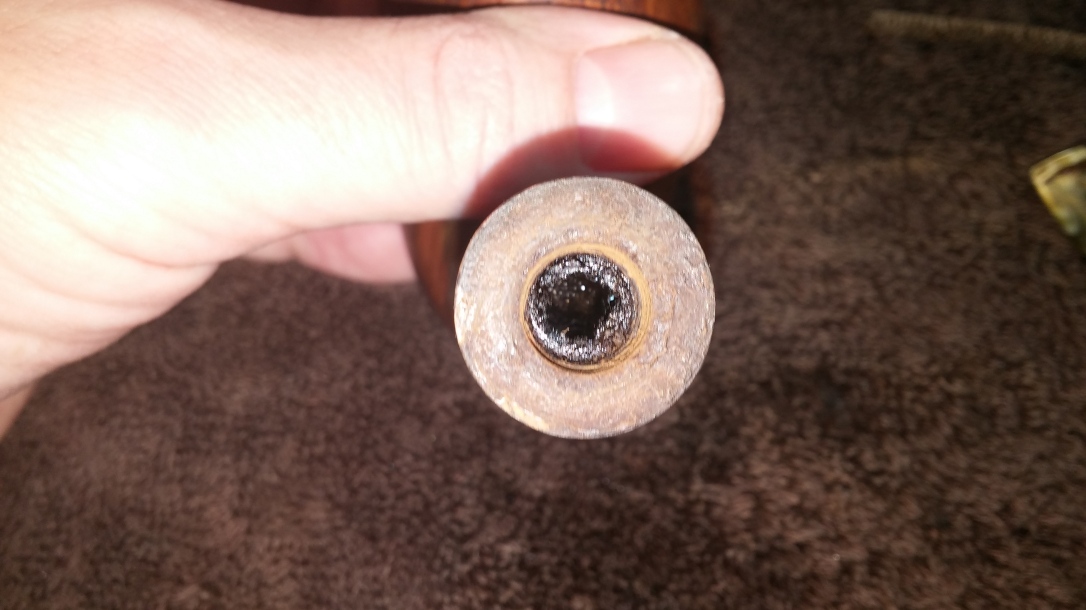
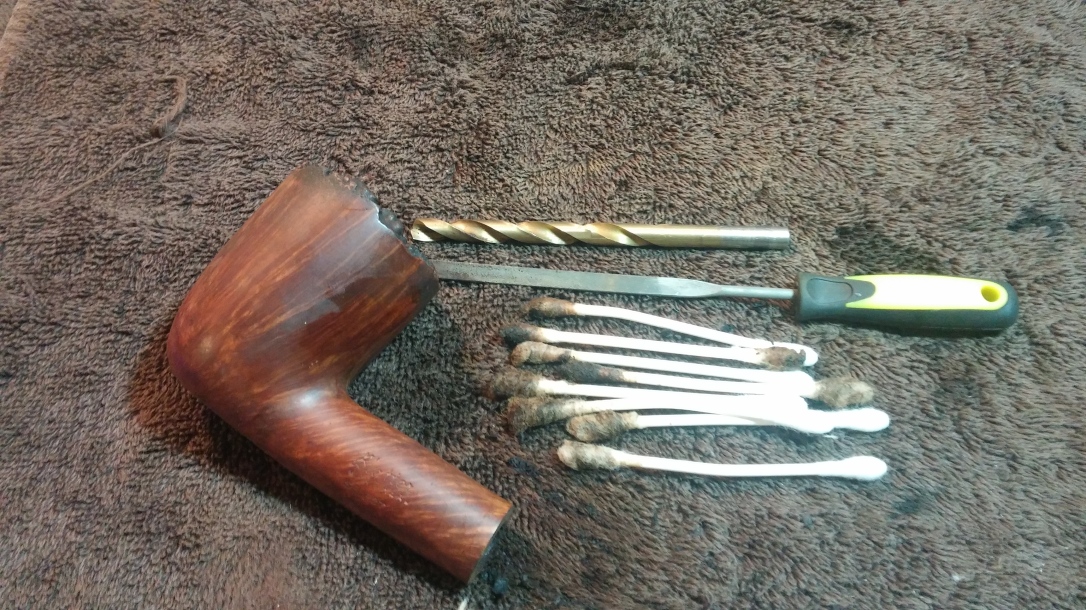
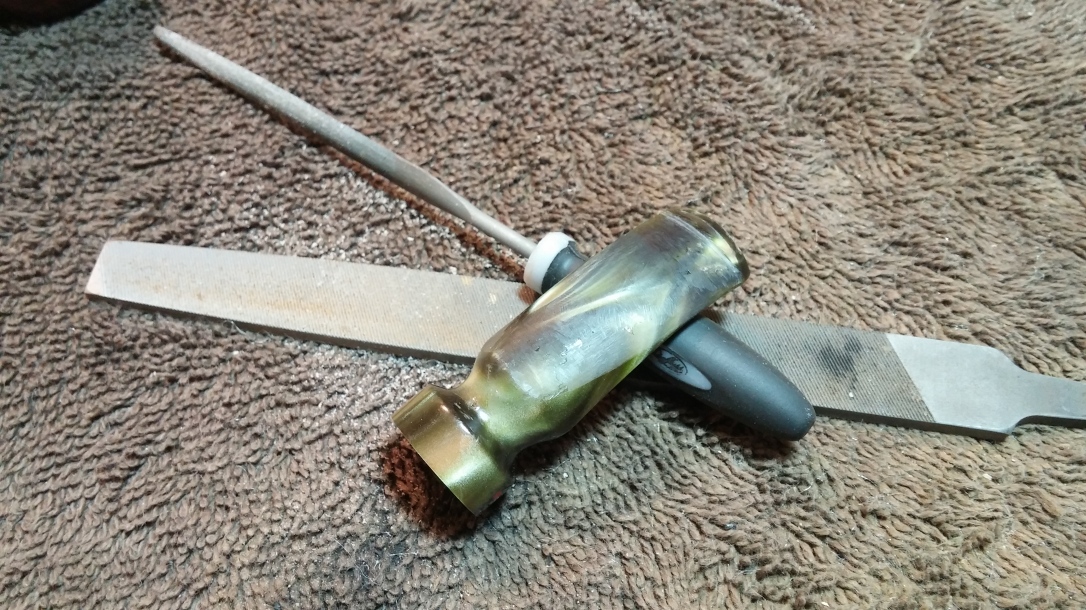
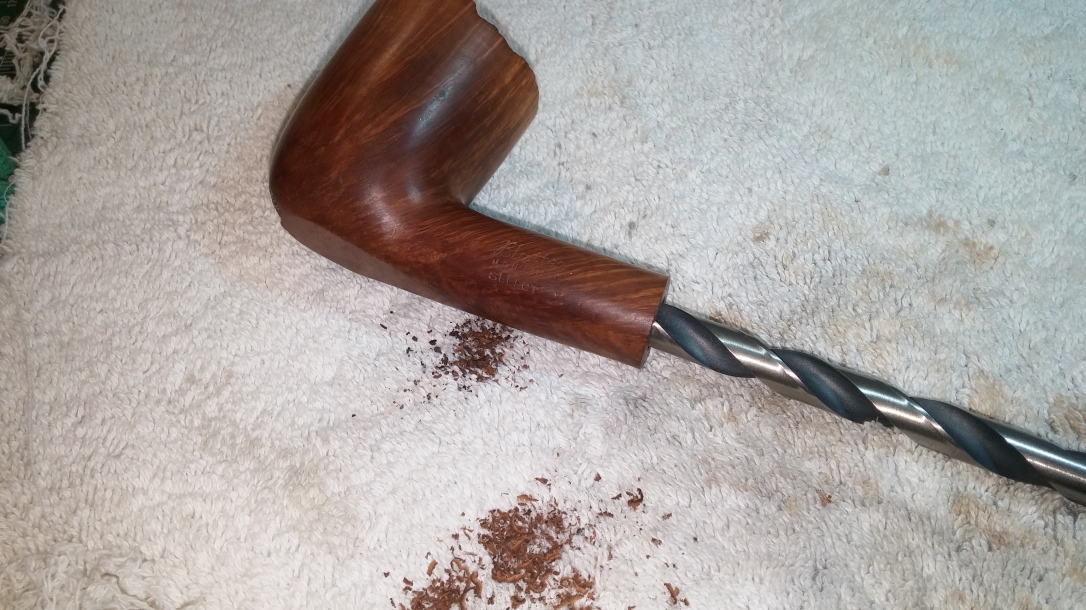
I dropped the stem and threaded rod tenon into a dish of alcohol to soak while I worked on the shank and airway with drill bit, scraper and cotton swabs dipped in alcohol. The drill bit, turned by hand, effectively augered out the worst of the heavy buildup of tars, while I used the flat end of a needle file to scrape the end of the mortise clean. Once the heavy lifting was out of the way, cotton swabs and pipe cleaners could take over to finish things off.
Time was ticking onwards by now, and I was nearing the end of my day. Hoping to soften the remaining hard cake and the lava still covering the plateau rim, I dropped the stummel into an alcohol bath for an overnight soak.
I’ve found this to be an effective strategy for deep cleaning a pipe, but note that it usually means you’ll also need to completely refinish the pipe once it’s clean as the alcohol also dissolves the old finish along with the tars and cake.
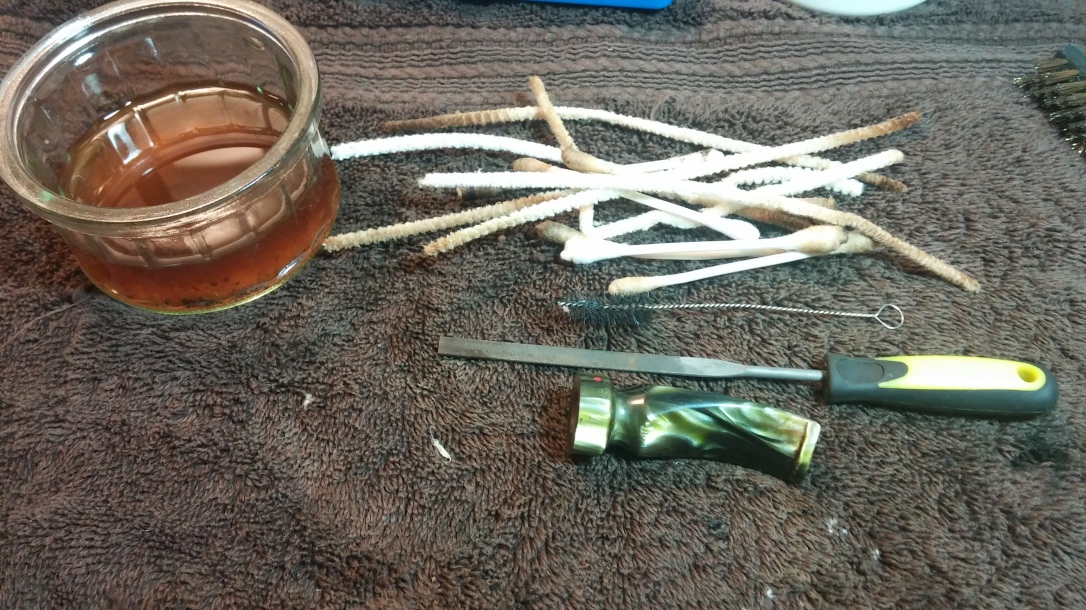
Just before calling it a day, I pulled the stem from its alcohol bath and cleaned the internals with pipe cleaners, shank brush and more alcohol. Note in the pic here the colour of the alcohol left in the glass soaking dish, and the relative lack of tars on the pipe cleaners and swabs. The alcohol soak dissolved a lot of crud in a relatively short period of time.
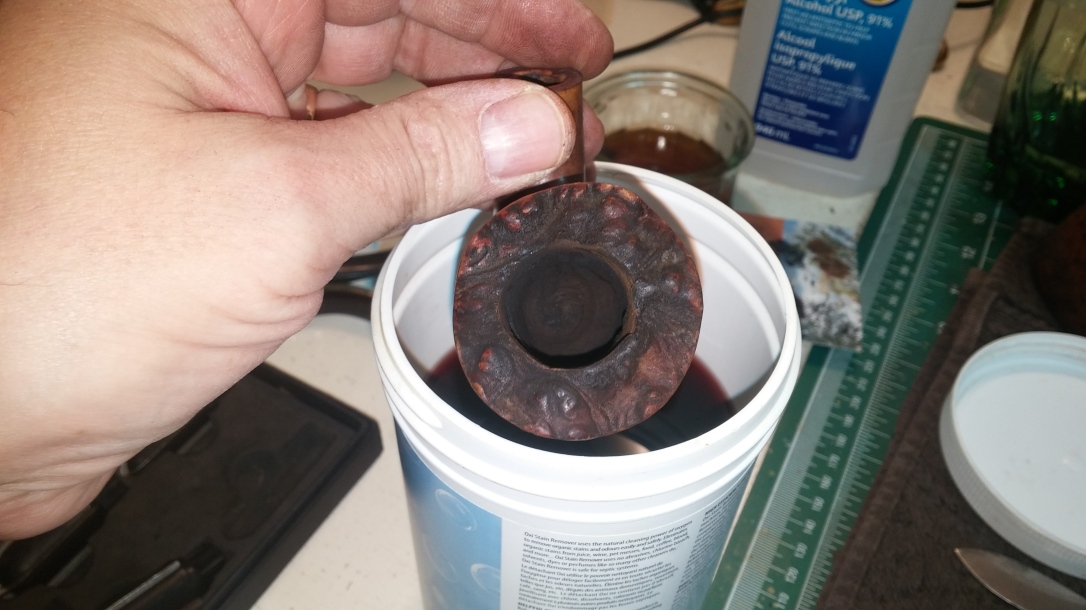
The next day I pulled the stummel from the alcohol and immediately noticed a difference – quite a lot of the lava stuck into the plateau rim had come away overnight. The rest of it scrubbed away easily now with a brass bristle tire brush, revealing a damage-free rim – whew!
Mounting a second offensive against the enduring cake in the chamber, I again used reamer and sandpaper to scour the chamber walls clean of old carbon. This pic shows just how much cake there was to remove during this phase of operations. Note also the stripped appearance of the stummel, the other effect of the alcohol soak.
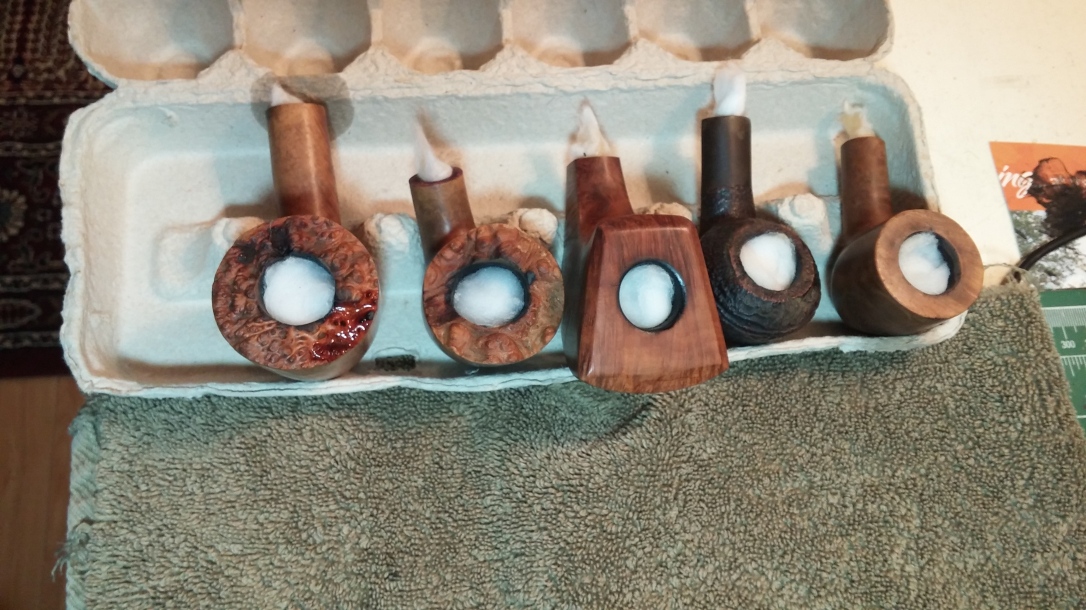
To be doubly sure I had purged the briar of all the old tars and crud I set the stummel up with an alcohol treatment. I was temporarily out of my preferred kosher salt, so substituted cotton balls for this process. As you can see in this pic, I often work on several pipes at the same time, especially during the initial cleaning stages of a restoration. Here are all five Iqaluit pipes sent to me for refurbishment lined up for their salt treatment. The large freehand at the left end is our current patient. I’ll be writing about several of the other pipes in the near future.
While the stummel sat, I turned my attention to the stem. The first order of business here was to settle on a replacement tenon. I had a few sizes of ready-made Delrin tenons on hand in my parts box, but they all proved too small to fit the enlarged mortise cut into the stem face. Undeterred, I test-fit a section of 3/8” Delrin rod – bingo!
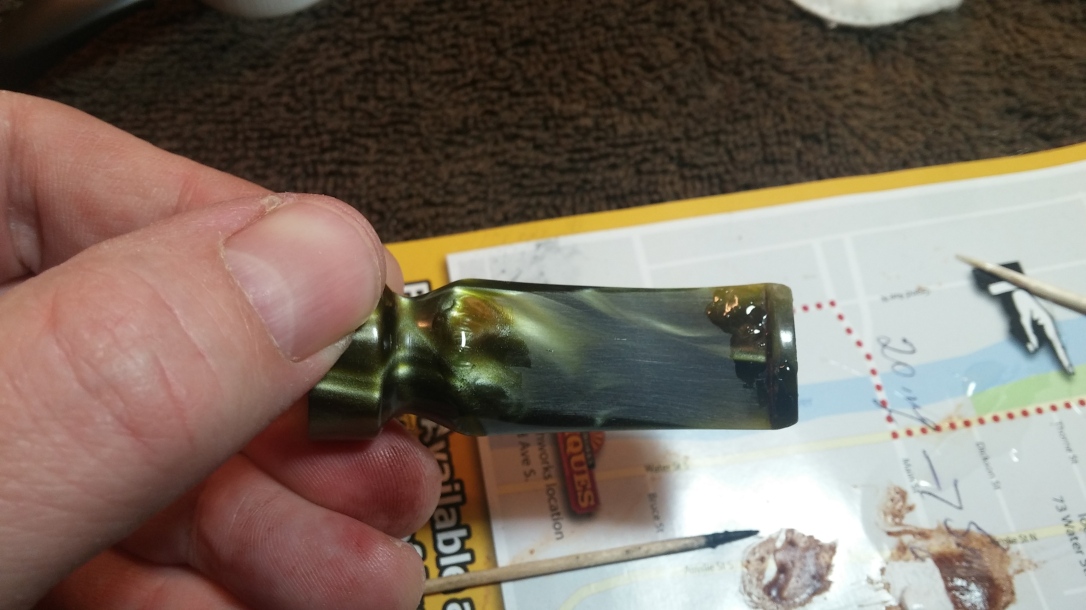
Before drilling out the stem to fit the new scratch-made tenon, I repaired the plier marks and tooth dents in the acrylic with some clear CA glue, drop-filling the damaged areas and then sanding things smooth once the glue had cured.
I find acrylic stems often more forgiving than their vulcanite siblings. The repairs sanded out beautifully and with a bit more polishing would be invisible.

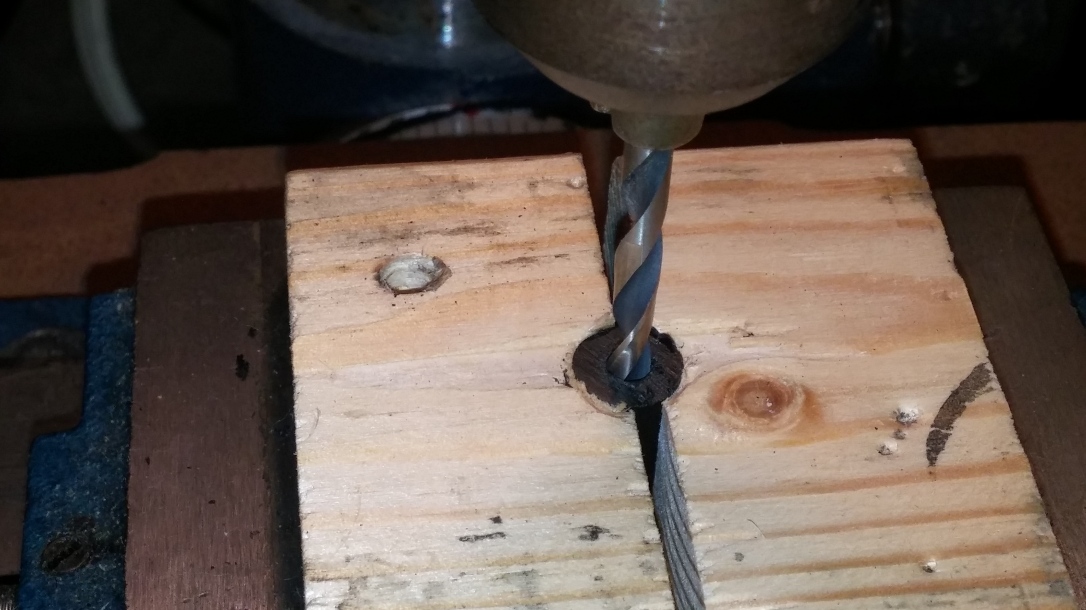
Now it was time to get to the meat of this repair. Step One was to drill out a short section of Delrin rod to create the new tenon. I clamped the rod into place on my drill press and bored a 5/32” airway down the length of the Delrin. I also cleaned up the mortises in both stem and shank with a 3/8” drill bit, turned by hand to avoid overdoing things.
With the drilling done and the tenon test-fit several times, I glued the tenon into the stem with a bit of JB Weld epoxy and assembled the pipe, holding the pieces together until the epoxy took hold.

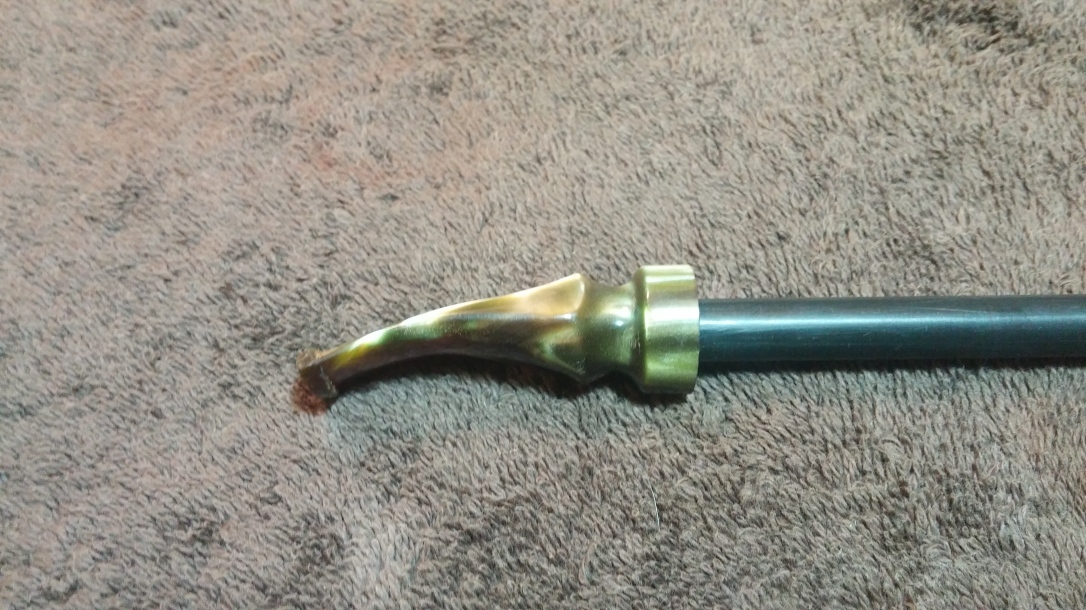
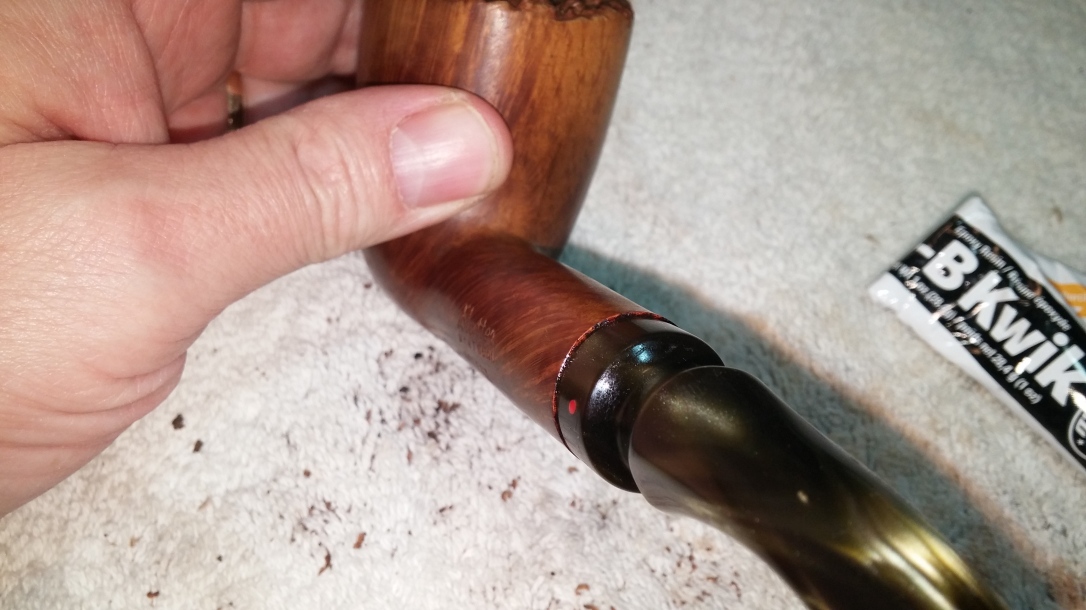
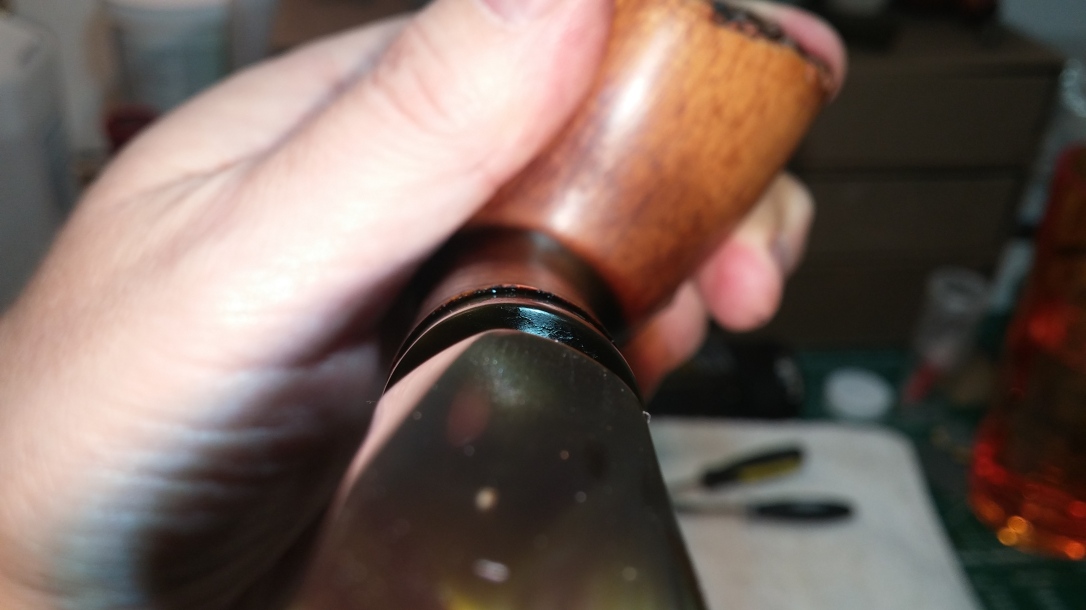
While I was careful to align the stem and shank as accurately as I could, I was unable to completely overcome the offset induced by the original re-drilling of the mortise done during the previous repair. These pics show the remaining misalignment between stem and shank. I’d have to reshape and smooth out this transition to recapture the original flow of the pipe from bowl to button.
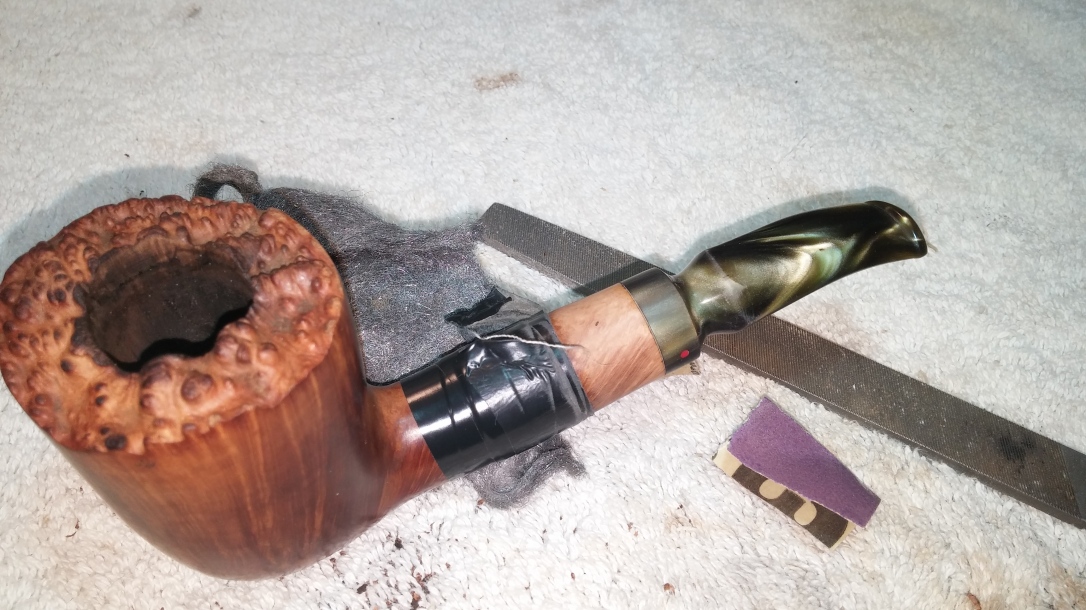
I protected the stamps on the briar shank with several layers of electrical tape before roughing in the new contours of the stem/shank junction with a flat file. It’s vital here that the stem remains in the desired orientation while the rough shaping is underway. Once finished, the stem will only seat properly in one position against the shank, so make sure it’s the position you want!
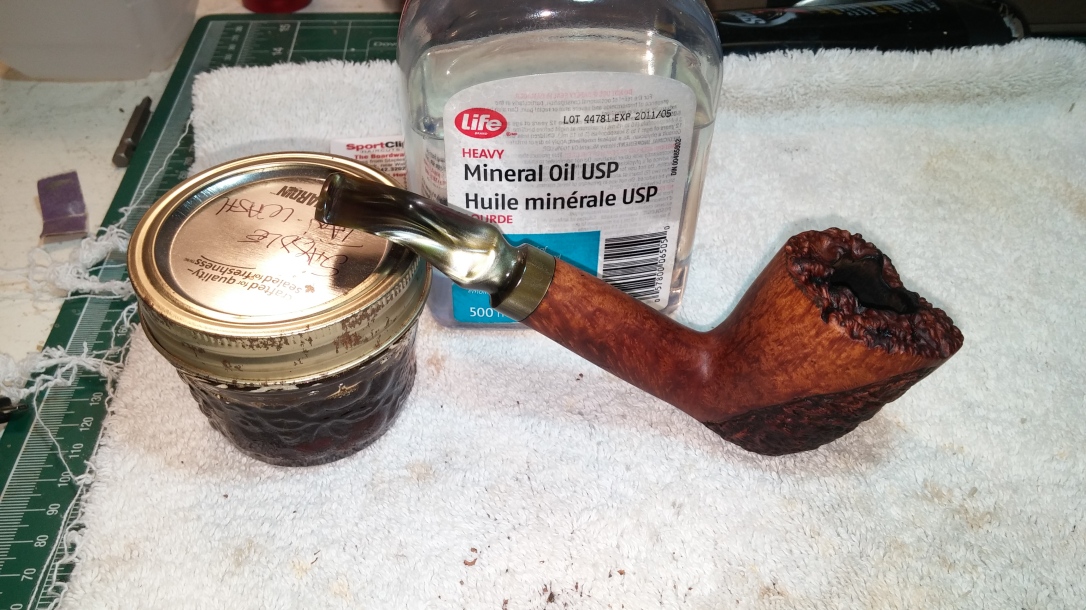
Happy with the rough shaping, I finished the shank work with sandpaper and micromesh sanding pads before refinishing the pipe using Feibing’s Saddle Tan leather dye diluted to a wash to let the grain shine through. A wipe of mineral oil refreshed the briar and injected some much needed moisture and life in the wood.
The following day I took the pipe to the buffer for a final polishing with White Diamond compound on the wheel followed by several coats of Carnauba wax to shine and protect the freshly restored pipe.
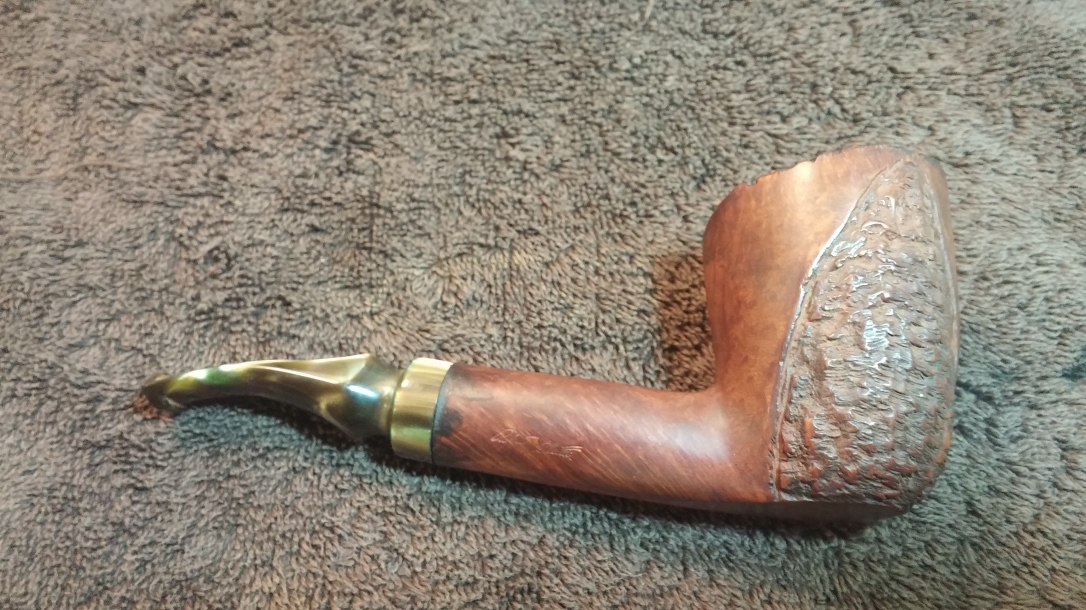
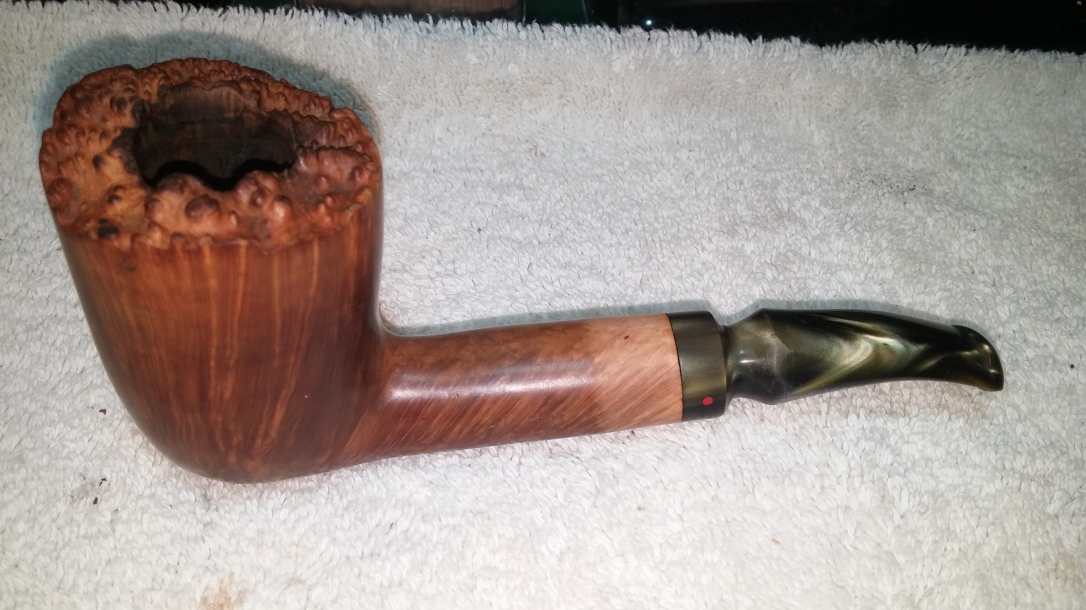
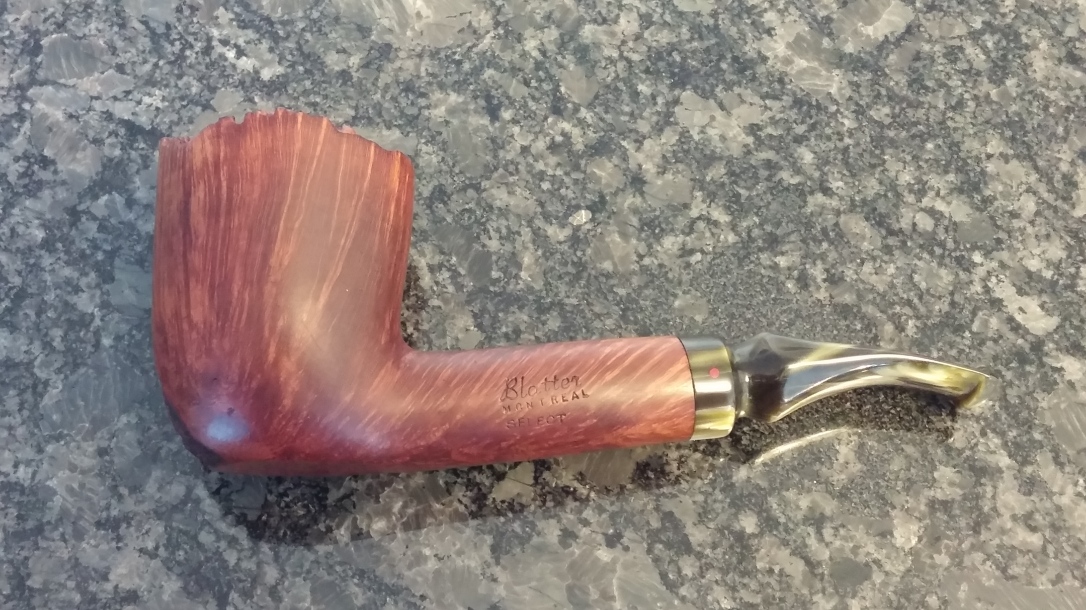
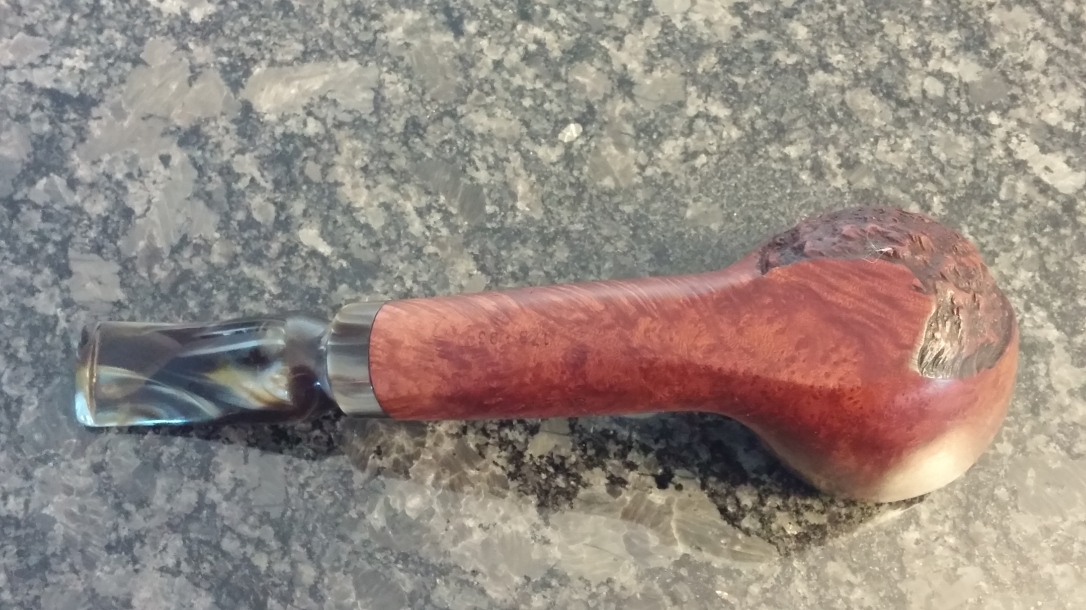
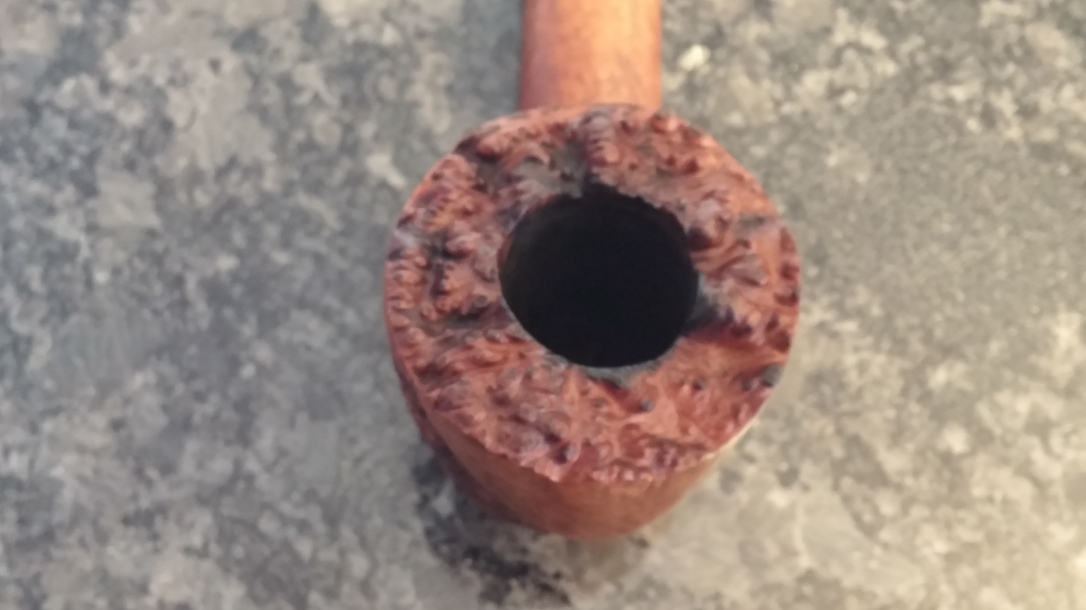
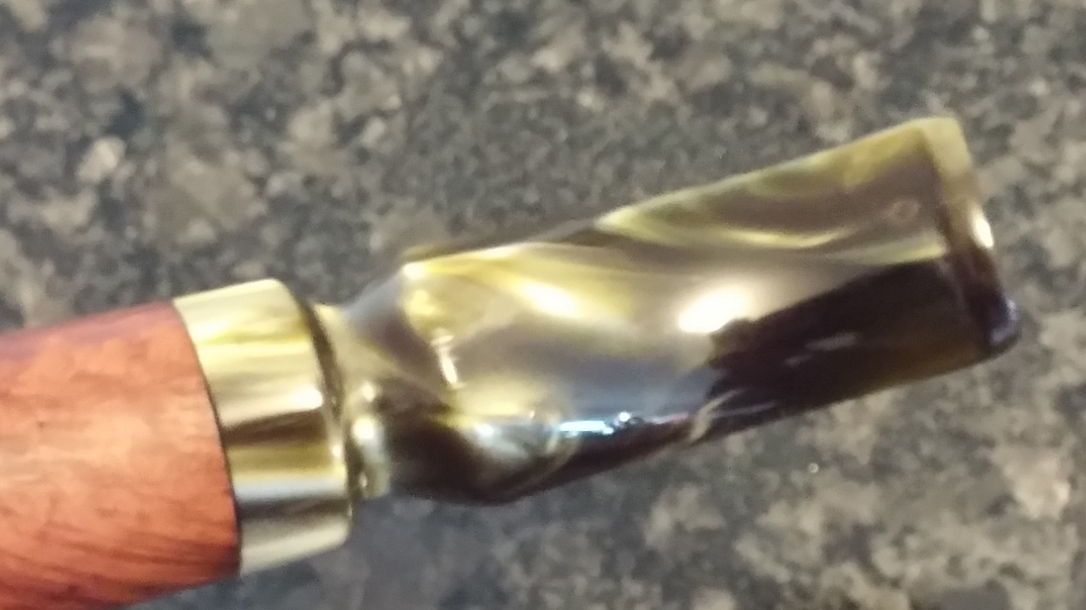
This Robert Blatter Select Freehand is barely recognizable to me as the carbon-covered briar I started with. The plateau rim is clean and fresh, and the chamber has been restored to its original dimensions. The briar’s exterior glows with an inner radiance and shows off some really lovely grain, highlighted by the darker rusticated area on the front right face of the bowl – a contrast echoed in the darker finish on the plateau.
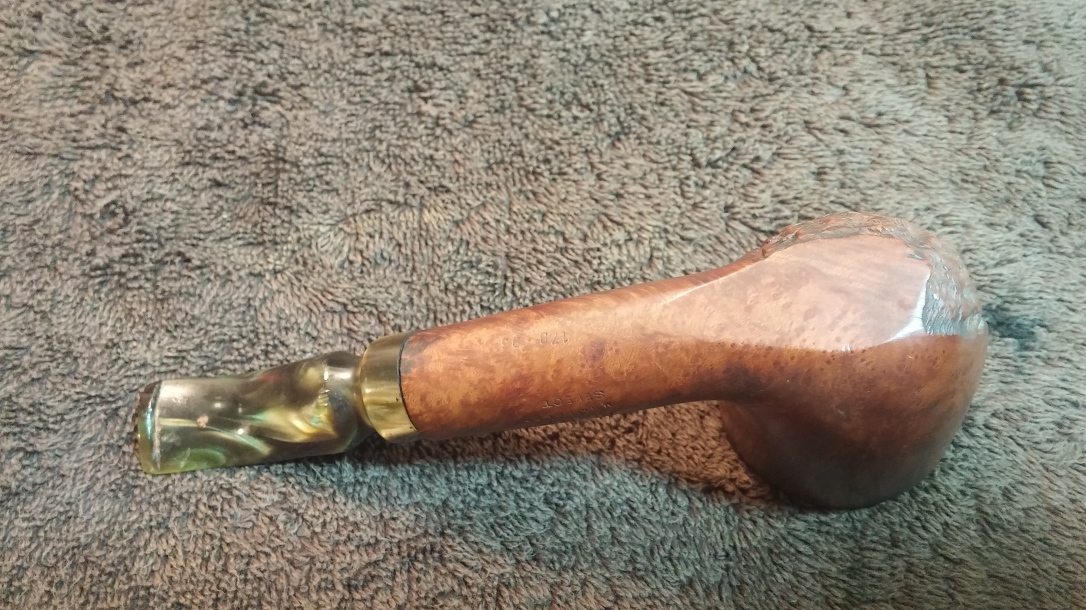
Even better, the stem has been realigned with the shank with a proper Delrin tenon that should last the lifetime of this pipe. The acrylic stem, now dent and damage free, shows a deep gloss that highlights the green and gold swirls in its depths. From bowl to button this Blatter pipe is ready to provide decades of companionship to its new owner.
Thanks for joining me for another interesting restoration. This pipe presented several challenges during the cleaning and repair stages that illustrate the often hidden complexities of estate pipes, and the importance of careful investigation and planning when in the midst of a tricky refurbishment. I hope you enjoyed walking through this one with me.
Here’s the finished pipe. Until next time, Happy Piping!


Reblogged this on rebornpipes and commented:
Great work on making the new tenon on this old Blatter pipe. Well done on getting it all aligned.
LikeLiked by 1 person
Thanks Steve. This was a fun but challenging project.
LikeLike
Looks good. The alignment on a new tenon is always tricky. You did a great job.
LikeLiked by 1 person
Good job, Charles. The tenon repair turned out well. I wish you could have shown a few more pics working with the Delrin rod and construction of the new tenon. I assume you purchase the rods at different diameters and have to drill them out according to your needs. The pipe turned out very nice. Thanks!
LikeLiked by 1 person
Thanks Dal. I’ll try to get better pics of the next tenon replacement.
LikeLiked by 1 person
You did a great job! I’m just a poor learner need pictures! Thank you!
LikeLiked by 1 person
Poor learner?? I’ve seen your restorations, Dal. 😀😀
LikeLike