
A DadsPipes reader contacted me a little while ago to ask about a Brigham pipe he’d picked up at a local antique shop. Initially he had planned to clean up the pipe himself, but after running into possible burnout problems, he decided to send the pipe my way for an opinion.
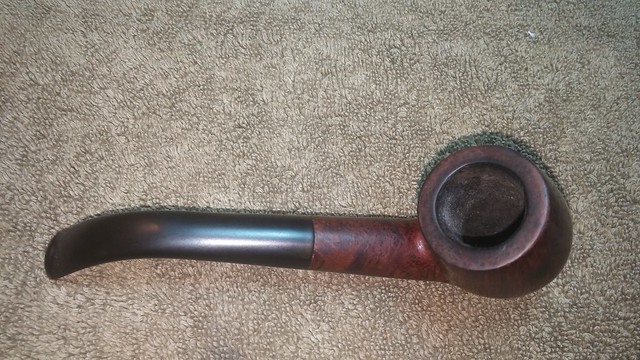
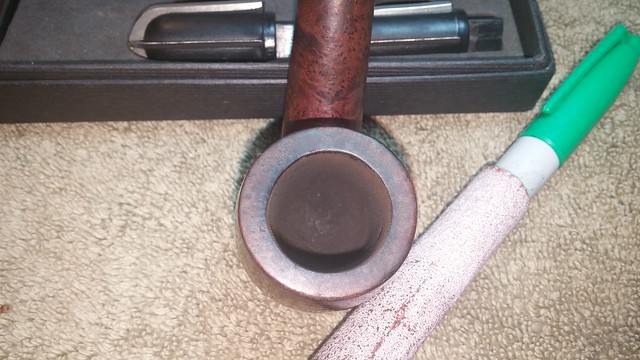
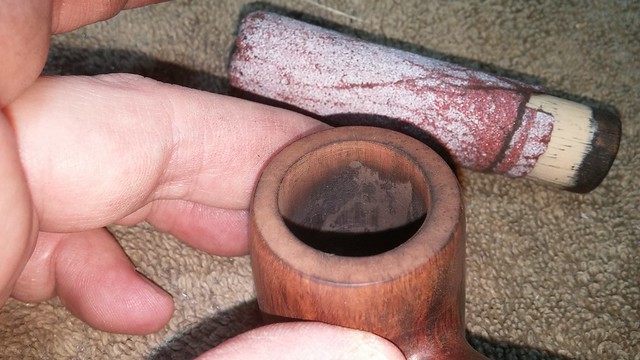
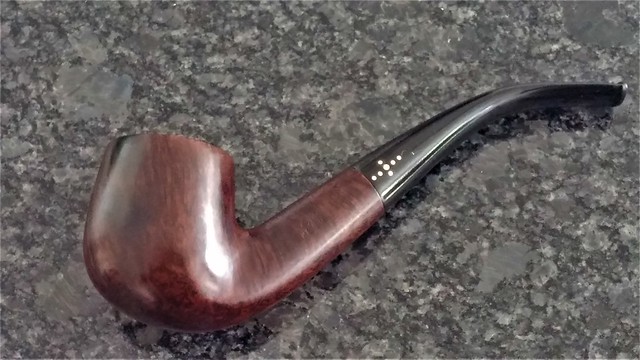
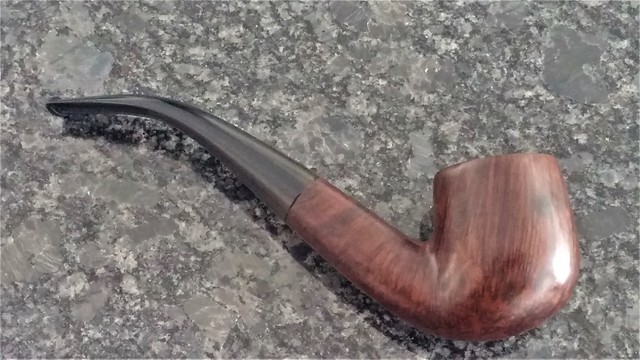
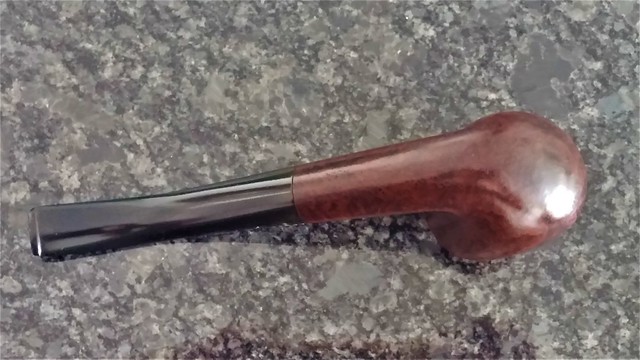
I was sent these pictures as an introduction to the pipe. As you can see, there were several large scorch marks on the outside of the bowl, and a damaged area inside the chamber that I’d have to sort out. While potentially serious issues, the scorch marks didn’t peak my interests as much as the stampings. Can you spot what made me sit up and take notice in these pics?
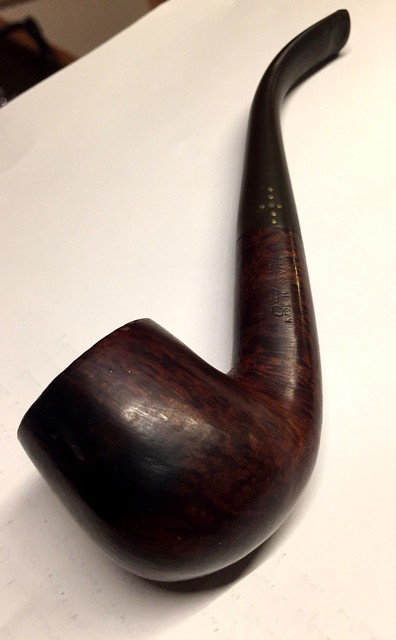
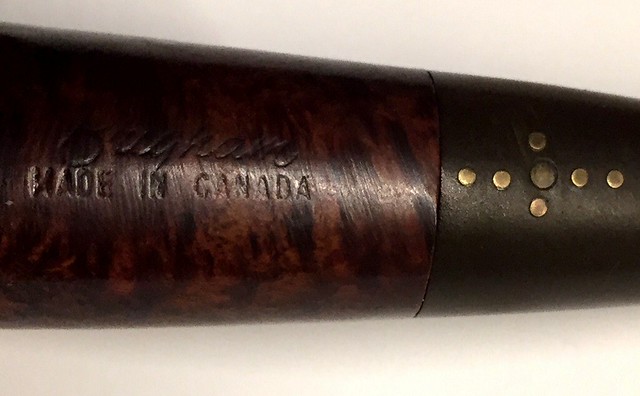
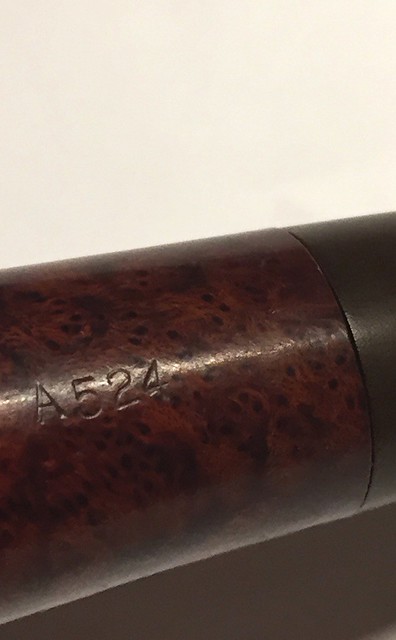
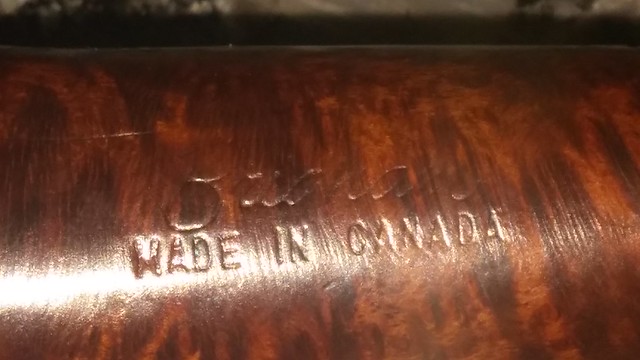
The pipe is stamped on the left shank “Brigham” over “MADE IN CANADA”, and on the right shank “A524”. The stem is inset with the 7-Dot “starburst” pinning pattern.
The first clue to deciphering this pipe’s origins is that the 7-Dot stem pinning configuration does not match the three-digit series number stamped on the stummel. The stummel is marked “A524”; while the “A” is a mystery at this point, the “524” marks this stummel as a 5-Dot grade, Shape 24 Bent Billiard pipe.
The second red flag is the Made in Canada stamp. This style of COM stamp dates the stummel to the late 1960’s or early 1970’s; however, the 7-Dot grade of pipe was not introduced until 1980 when Brigham re-jigged the grading system.
The upshot of this little exercise is that the 7-Dot stem is not original to the pipe. With that fact confirmed, it was time to dig into the anomalous “A” stamping. I had no information in my Brigham database about letter stamps on pipes in the 60’s or 70’s, so I turned to expert advice from Daniel More, CEO of Brigham Enterprises Inc. Daniel has been with Brigham since the 1980’s and his first-hand knowledge of factory practices over the years is invaluable to a collector like me. I’ve reproduced his response to my emailed questions here:
Thanks for the pictures and puzzle. I really enjoy the Brigham Antique Road Show challenge. Here goes….I absolutely agree with your assessment that the stem is not original. Not only does the numbering on the shank not match the pinning on the stem but the facing of the shank/stem is not accurate.
In the earlier 1960’s we had not yet incorporated a clear 1-5 Dot progression. Instead we has 1-3 Dot; Brigham Executive (with three vertical Dots – the middle one being larger); 4 Dot; and finally Brigham V.I.P. (three horizontal Dots – middle one larger). By the mid 1970’s our pinning had evolved to 1-4 Dot; Special Grain (Formerly quality and pinning the same as Brigham Executive mentioned previously); Select Grain (which had the pinning of a 5-Dot).
From here it gets speculative… By the time I joined the company in the 1980’s we used alpha-grading (A-E) on President pipes (freehand) as well as adding this to 7-Dots (traditional shapes) to indicate President grading or exceptional 7-Dot pieces (A724 for example). I suspect that with the Special Grain/5-Dot being the highest grade at the time, in the early 1970’s, the “A” on your pipe has been used to identify it as being greater than a regular 5-Dot. I would suggest that this is a transition piece both in respect to being a forerunner of the 6-Dot and also to the later grading system used with President and 7-Dot pipes. – Daniel More, CEO, Brigham Enterprises Inc.
I was actually able to find examples of this transitional grading in a copy of the 1975 Brigham brochure sent to me, among others, by the folks at Brigham to assist with the Shape Chart project. though there is no mention of the letter grading in the printed material.
For those interested, I have added this transitional grading system to my article “Brigham Pipes – A Closer Look at Dots, Dates and Markings”. Updates will show in the article posted to Pipedia.org in due time.
Now that I knew what I was working with, I could get on with restoring this unique piece of Brigham history.
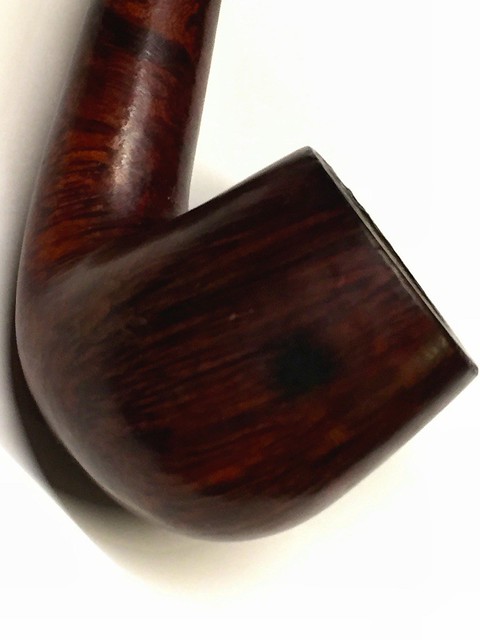
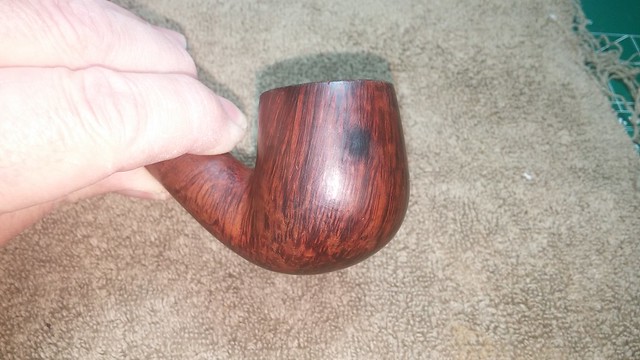
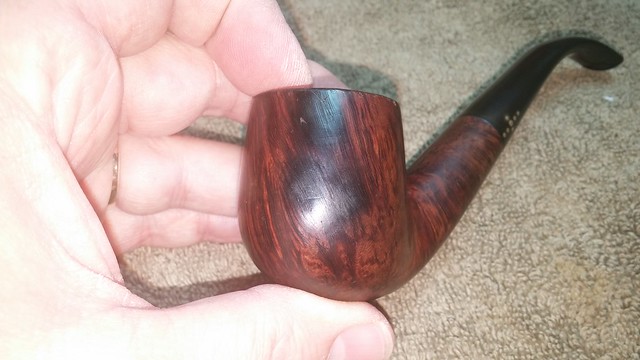
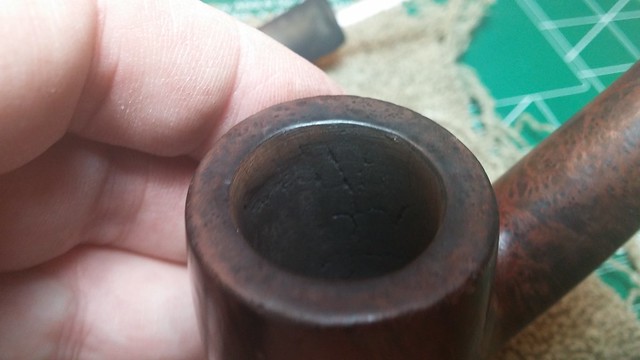
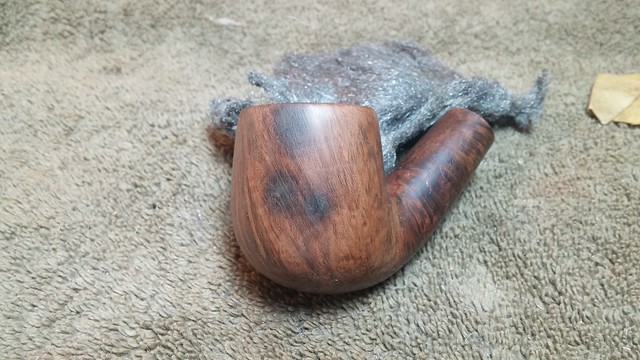
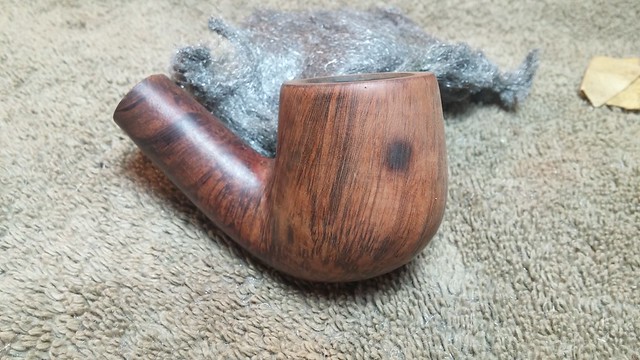
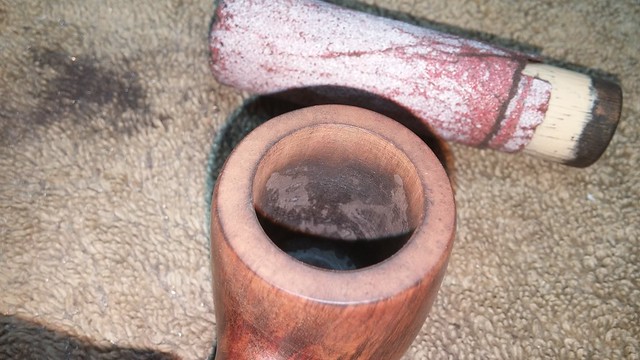
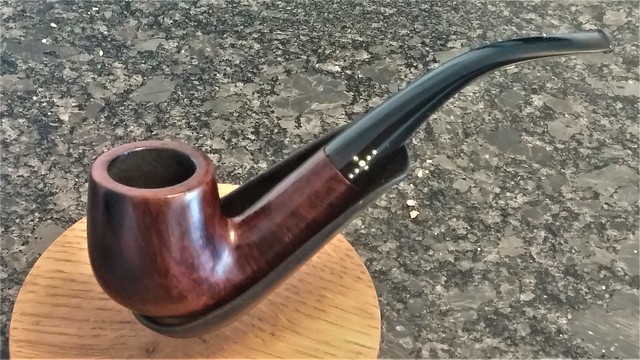
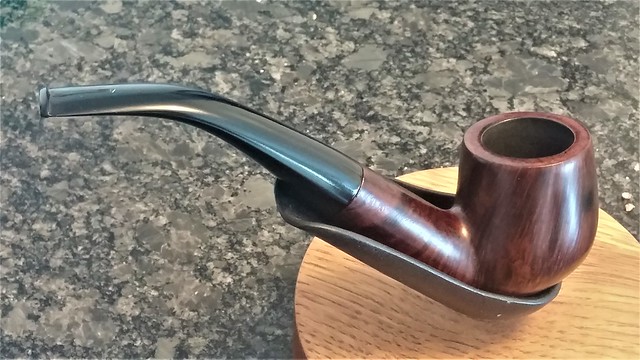
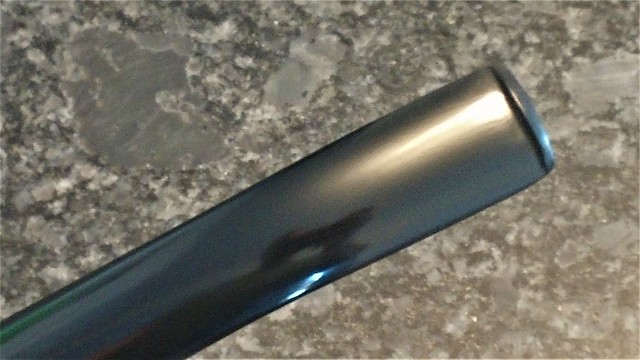
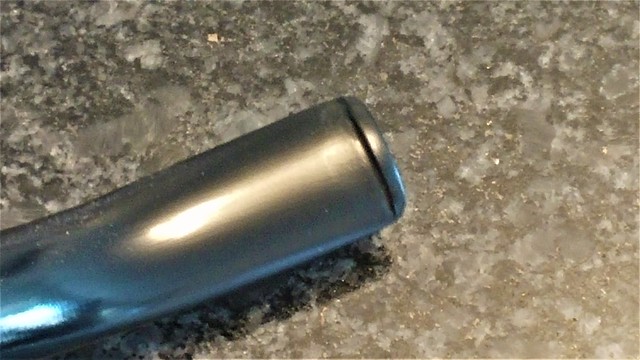
Apart from the obvious scorched briar on the bowl, the stummel appeared to be in rather good shape; there was certainly enough interesting grain showing to back up the idea that this 5-Dot pipe was made from higher than average quality briar! I snapped these pics to show the pipe as it looked on arrival.
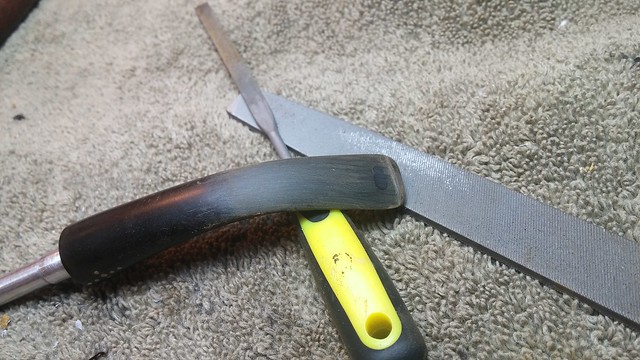
The stem needed some help at the bit – the vulcanite behind the button had been chomped on, pinching the airway nearly shut and pretty much destroying the button. Otherwise, a good cleaning and polishing would do the trick.
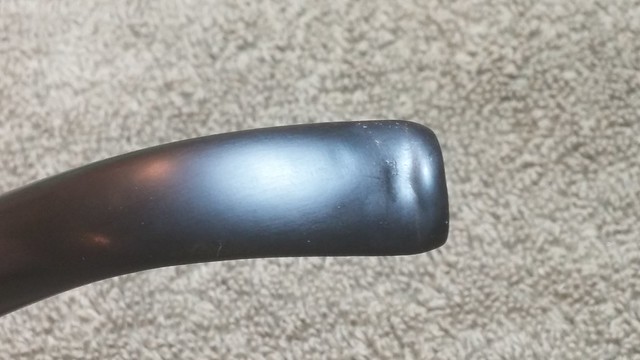
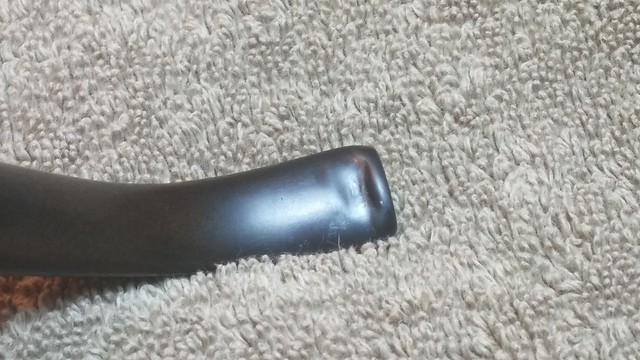
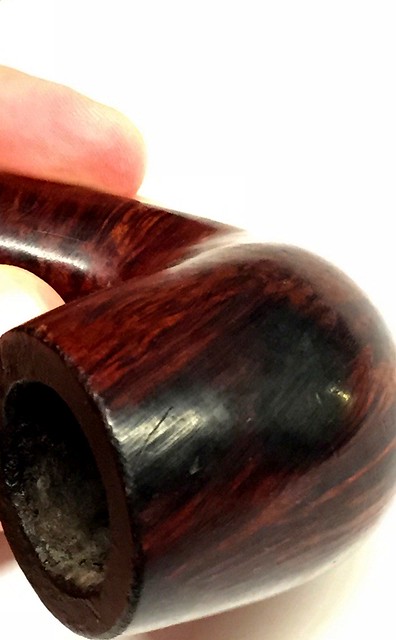
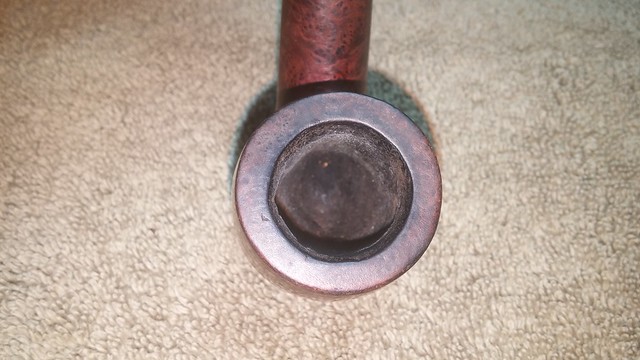
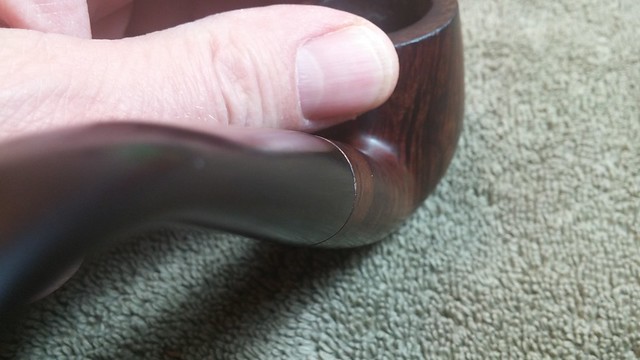
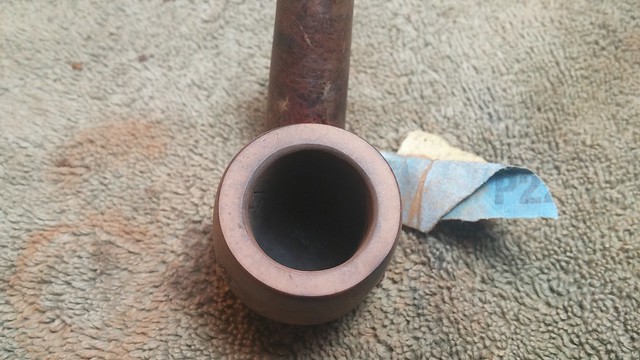
I also took a few closeup pictures of the stem/shank junction to highlight the slight mis-fitting of the stem. It’s actually quite difficult to spot with the naked eye, but the camera flash reveals all.
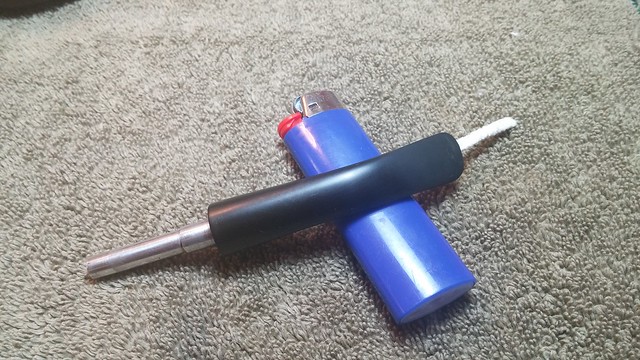
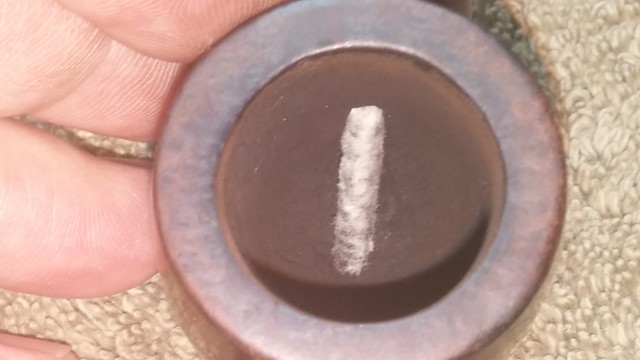
To open up the pinched airway and hopefully raise some of the dented vulcanite, I heated the bit over a lighter flame until soft and then pushed a pipe cleaner through the airway from the tenon end. I left the cleaner in place while the stem cooled and set in its new shape.
While the stem sat, I cleaned out the thin layer of cake from the stummel using sandpaper wrapped around a convenient Sharpie marker. The pipe’s owner had started the reaming process before sending the pipe to me, so there wasn’t much work for me to finish up here.
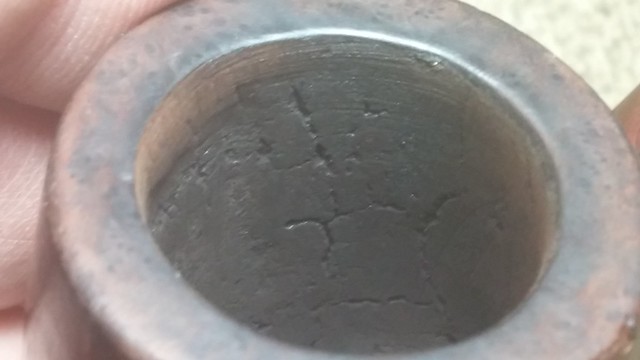
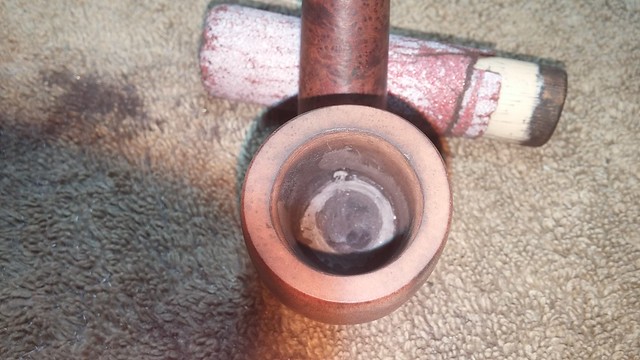
With the cake removed, it was easy to see what caused the scorch marks on the outside of the stummel. The interior walls of the chamber were riddled with deep heat fissures and a burned-out spot correlating to the larger of the two scorched areas on the exterior. The bowl was also over-reamed, leaving the draft hole somewhat up the side of the bowl.
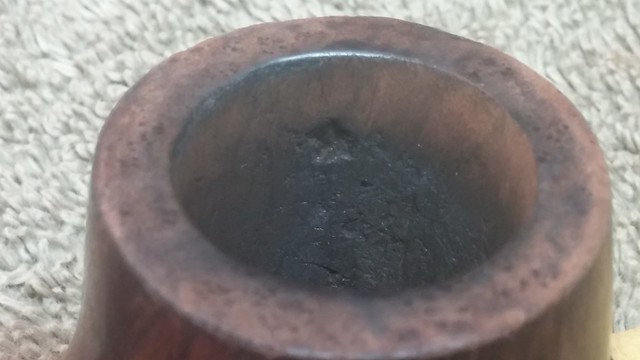
I decided to start repair work on the outside of the bowl. A gentle sanding of the briar improved the appearance of the scorch marks but didn’t remove them completely. The heat damage from smoking the pipe hot extended right through the briar walls of the chamber.
While there were no complete burn-throughs, the scorched briar was very soft – I felt I could sand straight through the bowl if I kept going, so I chose what I thought was a happy medium solution. I sanded the exterior of the bowl smooth and then soaked the charred areas with thin CA glue in an effort to bind the damaged briar back together. I followed up by filling the deeper pitted areas with CA glue mixed with briar dust.

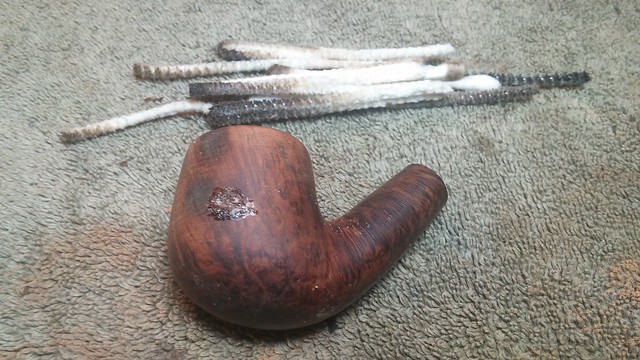
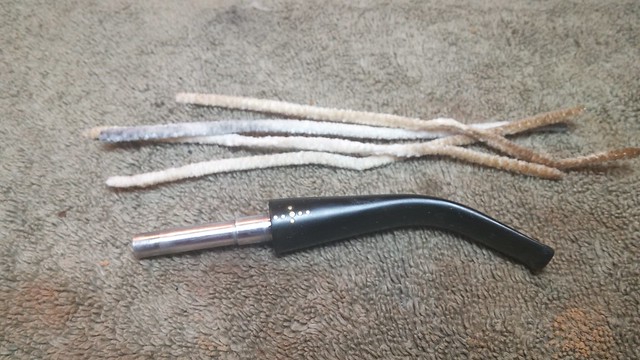
A few pipe cleaners and alcohol cleared the dirt and debris from the pipe’s shank and airway.
After sanding the patches, the briar was smooth and free of indents, though the dark scorch marks still remained. Unfortunately, this was about as good as this abused pipe was going to get, though a darker stain would help disguise the discolouration. With the exterior work finished, I polished the briar with 0000 steel wool to remove my sanding marks and bring up the shine.
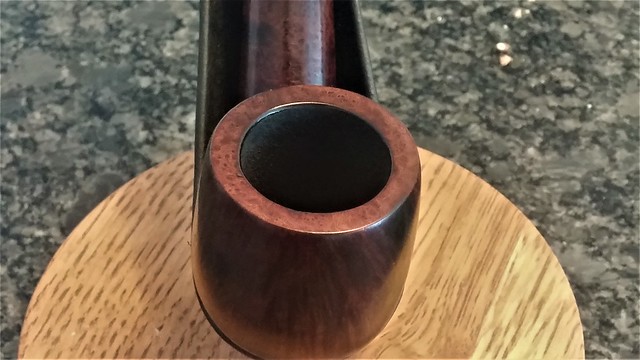
The inner and outer edges of the rim were nicked and dinged, so I topped the bowl very lightly and cut a small bevel into the inner edge. Much smarter looking!
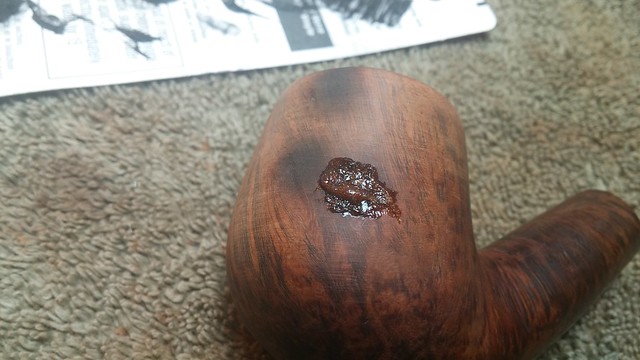
Next on the list of tasks was raising the floor of the tobacco chamber to meet the draft hole. I accomplished this by applying a layer of JB Weld to the bottom of the bowl. The JB is more or less self-levelling when initially mixed, so it was easy to add just enough to bring the floor to the bottom edge of the draft hole opening. I propped the bowl carefully, ensuring it sat at the proper angle, and left the JB to cure.
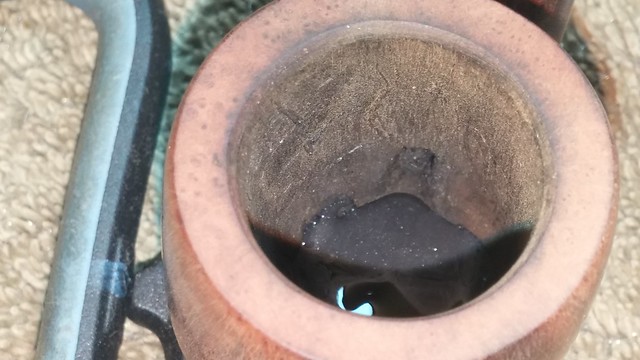
When the floor patch had cured, I applied more JB Weld, this time to the chamber walls to fill and repair the burnout and heat fissures. As you can see in these pic, I was not stingy with the epoxy. The excess filler would be sanded out later, but I wanted enough material in there to fill the damaged areas.

Setting the stummel aside to cure, I moved my attention to the stem. A few pipe cleaners made short work of the airway cleaning, and a good scrub with alcohol on a cotton pad removed the grime and grease from the exterior of the vulcanite. Thankfully, it looks like this pipe had been stored out of sunlight, as there was little to no oxidation to deal with.
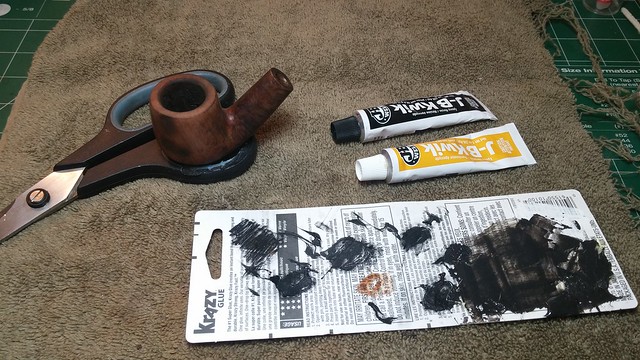
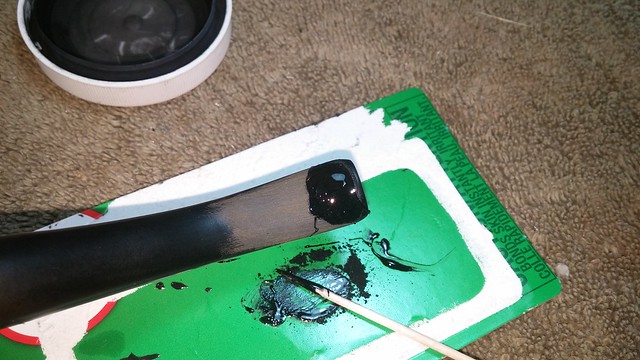
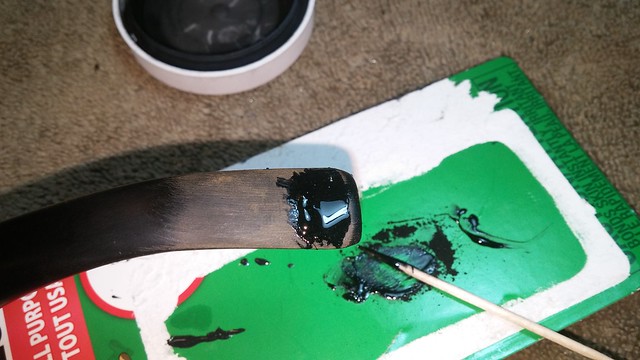
To rebuild the button and fill the deep tooth dents I applied several layers of thick CA glue mixed with activated charcoal powder until there was enough new material in place to work with. When the patch had fully cured, I used needle files and sandpaper to cut and shape the new button.
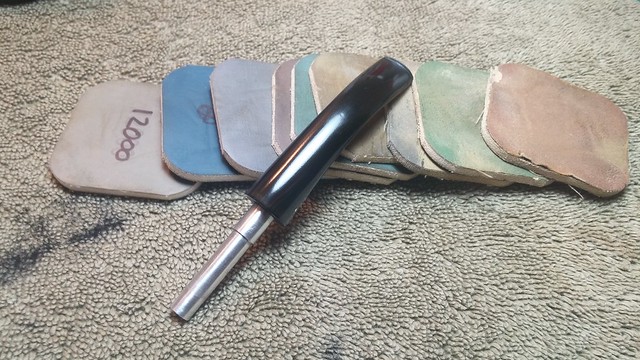
I had to reapply CA glue several times to fill stubborn air bubbles before I was happy with the results. Sanding scratches were removed by going over the stem with a full course of micromesh pads.
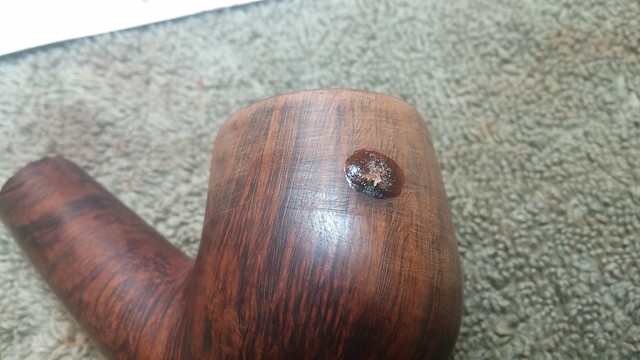
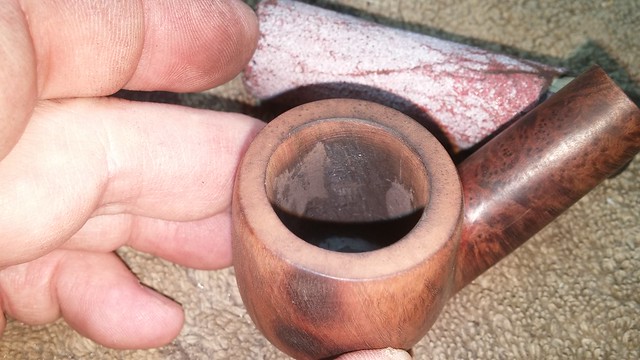
Done with the stem work, I sanded the excess epoxy from the chamber. These pics show the extent of the heat damage caused by smoking this poor pipe too hot. Our piper must have been part steam train!
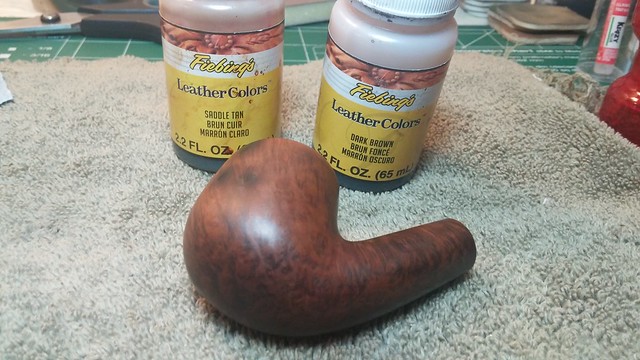
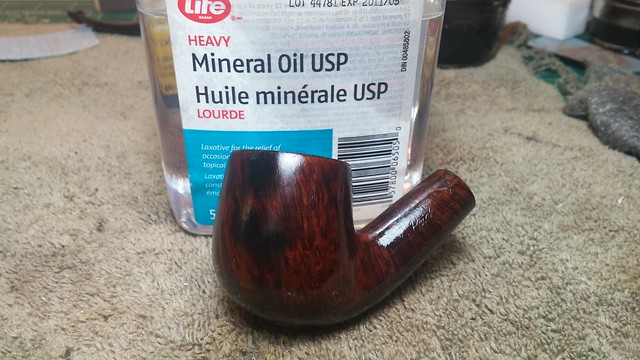
On to the cosmetics! I stained the briar with Fiebing’s Dark Brown leather dye, followed by a coat of Saddle Tan dye to bring out the reds in the briar. A wipe with mineral oil darkened the stummel further, while adding a bit of hydration to the briar.
Just before taking the pipe to the buffer, I applied a bowl coating of maple syrup and activated charcoal. This not only spruces up the appearance of the chamber but also adds a layer of protection between the tobacco and the repaired briar. The charcoal also has a slightly grippy texture, which encourages the formation of a new layer of protective cake.
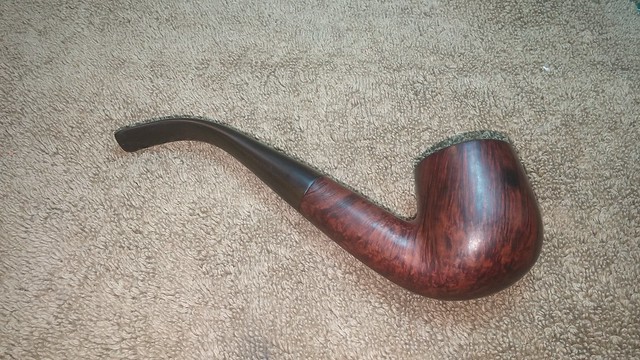
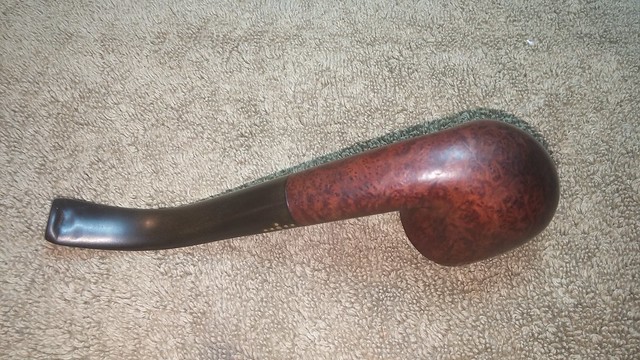
I buffed bowl and stem with White Diamond compound on the wheel and applied several coats of Carnauba wax to shine and protect the surfaces. While this pipe will always carry the burn scars left by a careless piper, there are many years of valuable service left in it. Repaired and rejuvenated, this pipe is now back in the hands of its new owner, where I am sure it will be treated with a bit more care than that shown by its original piper.
This was an interesting pipe to work on, by virtue of both its extensive repairs and its unique history. I hope you enjoyed following me through the research and refurbishment! Until next time, Happy Piping!
Here’s the finished pipe.

Reblogged this on rebornpipes and commented:
Nice work Charles on a great piece of Brigham history.
LikeLiked by 1 person
Thanks Steve. The transitional grading helps to explain the scarcity of 6-dot Brigham pipes on the estate market!
LikeLike
It really does answer a question I have often wondered about.
LikeLiked by 1 person
Nice detective work and hiding that scorch mark.
LikeLiked by 1 person
It is an interesting presentation. However, I am shocked that you used JB Weld for repair inside the bowl. In another post, you made a point of not using CA glue for repair inside the bowl and here you are using epoxy to fill up and solve all kinds of problems.
You simply introduced poison for the user of this pipe. Please explain…
Thanks,
Wiktor
LikeLike
CA glue and JB Weld are very different compounds. CA will burn/vaporize at high temperatures; JB Weld is specifically formulated as a high-heat epoxy, and is completely inert when cured. One of my favourite briars was repaired with JB. I’ve been smoking it regularly for years with no breakdown of the repair and no ill effects. I wouldn’t recommend ingesting the epoxy resin straight from the tubes but once cured it’s harmless.
LikeLike
Thanks for your comments. However, I would like to talk to the author of this post and I can’t find the name on this site.
Who is the owner of this blog?
LikeLike
I own this blog. You can reach me by email via the contact form. Thanks.
LikeLike