
When it comes to the regular care and feeding of one’s pipes, it seems that pipe smokers can be divided into one of two camps – those who treat their pipes well and those that do not. In the first camp you will find people who clean their briar, meer or cob before it blocks up with tar, those who trim the carbon in their bowls to a respectable thickness when it gets unruly, and those who take care to avoid inflicting damage to their favourite piping companions. In the second camp are those who do none of these things and who, to my mind, seem to almost go out of their way to treat their pipes with disdain.
As a pipe restorer I see the handiwork of the latter group regularly, and often wonder what was going through the piper’s mind. This 1960 Dunhill Shell Briar 142 Dublin is a perfect example. It was sent to me for repairs by a fellow Ontario collector, and when I had assessed the full scope of the necessary repairs I wondered if the effort and expense was in fact worth undertaking.
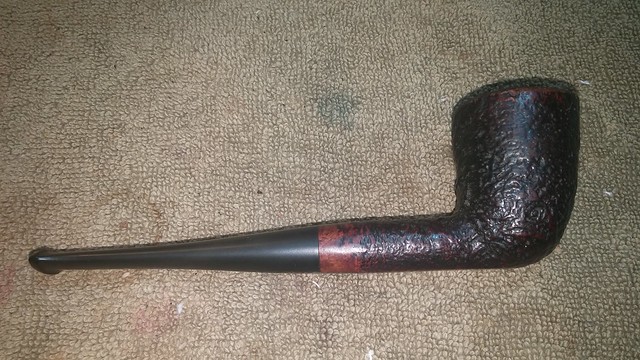
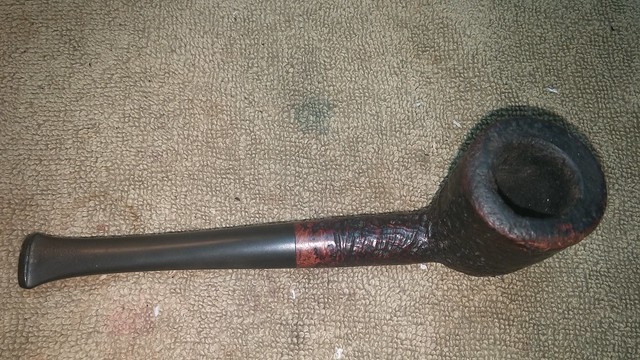
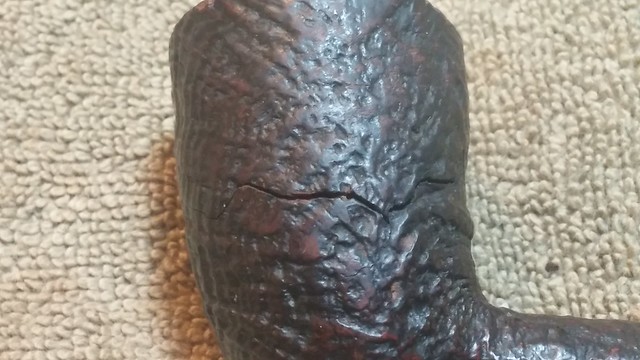
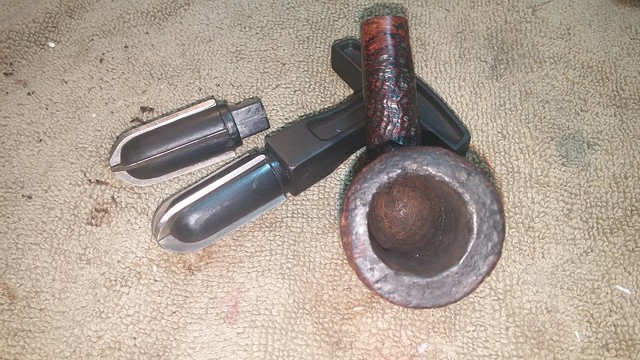
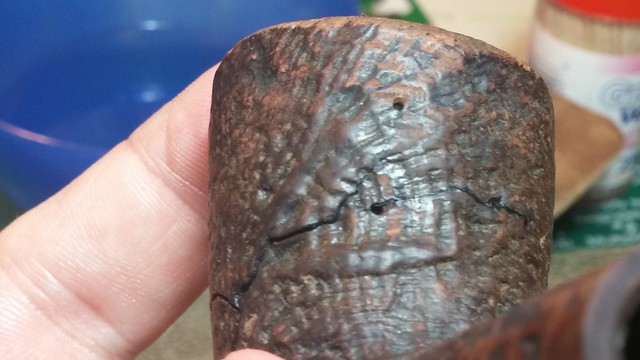
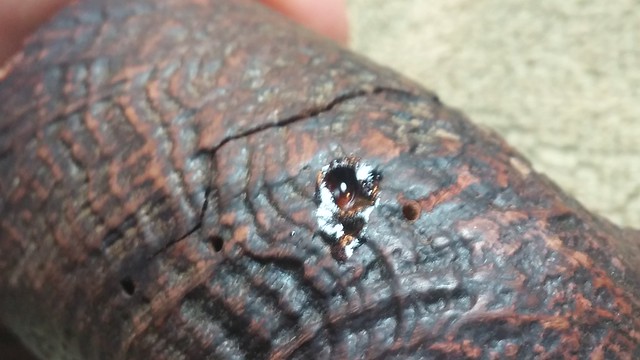
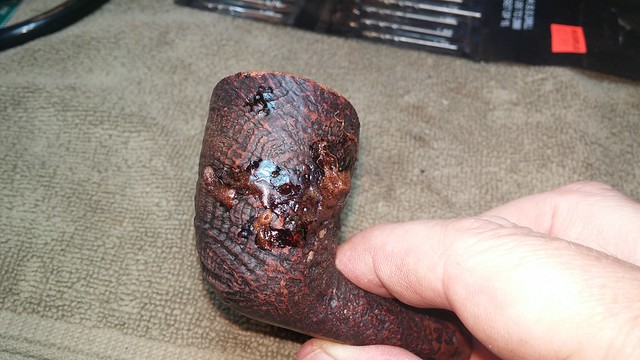
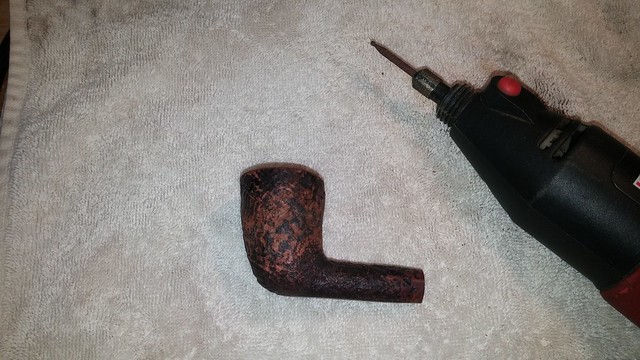
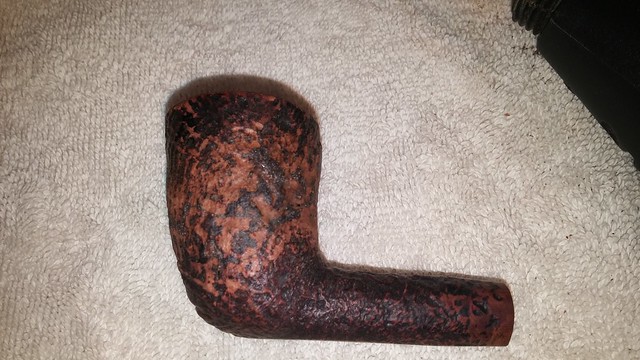
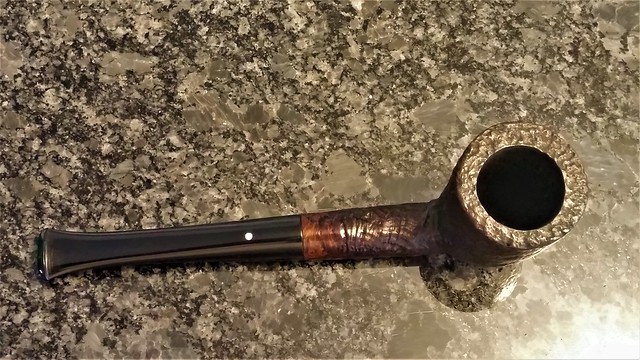
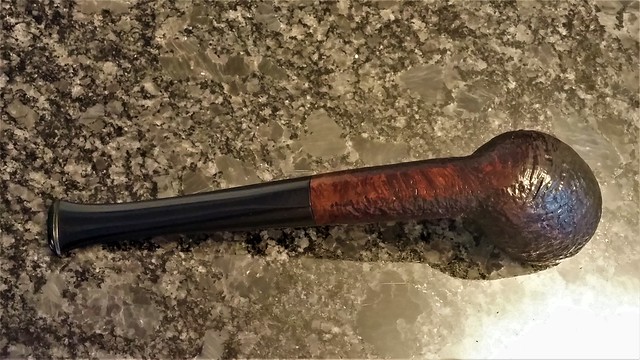
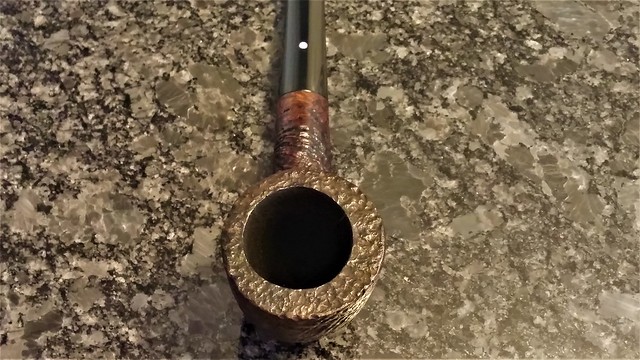
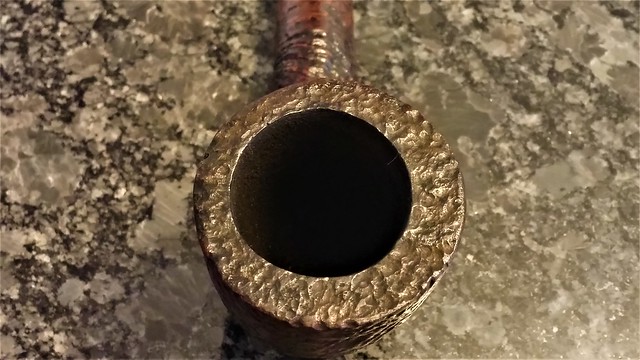
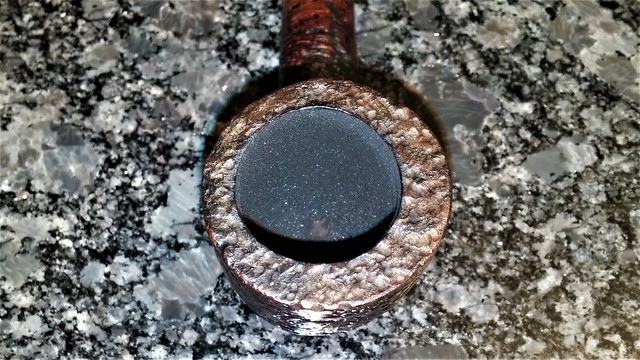
As these pictures show, the pipe was in fairly dire straits when it came to the worktable. Most obvious and concerning of the damage was a large open crack running horizontally across the left side of the bowl. The tobacco chamber was heavily caked; I’d have to ream it clean before I’d know if the crack penetrated the chamber wall.
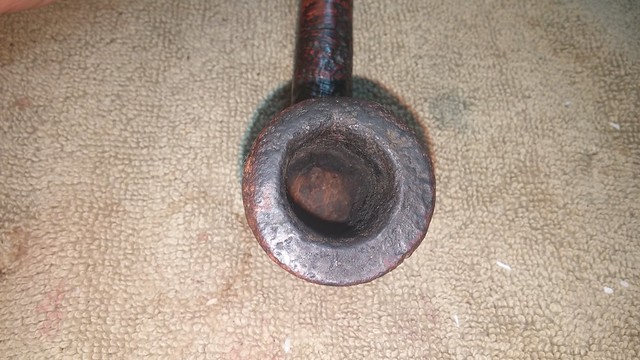
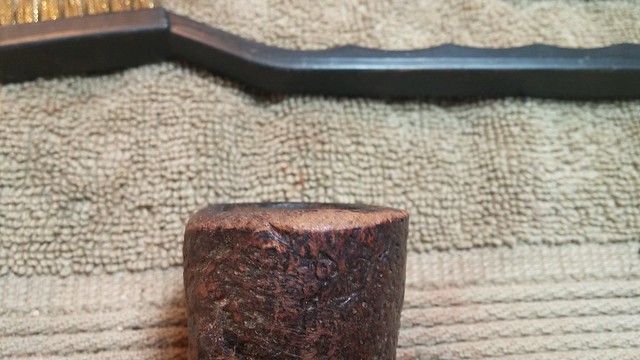
In addition to the structural damage, the pipe’s rim was covered in a thick crust of lava. Despite this overcoat of muck, it was obvious that the rim had been beaten against hard surfaces regularly. The rear right edge especially was missing a fair amount of briar.
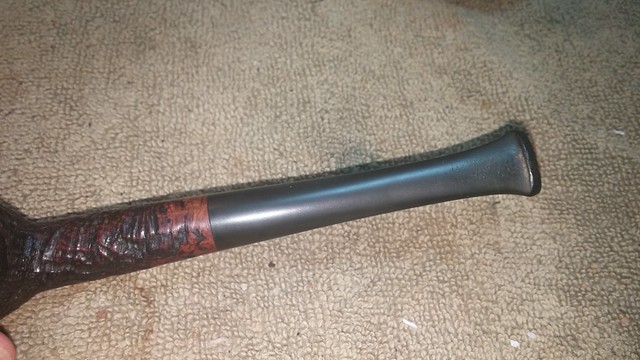
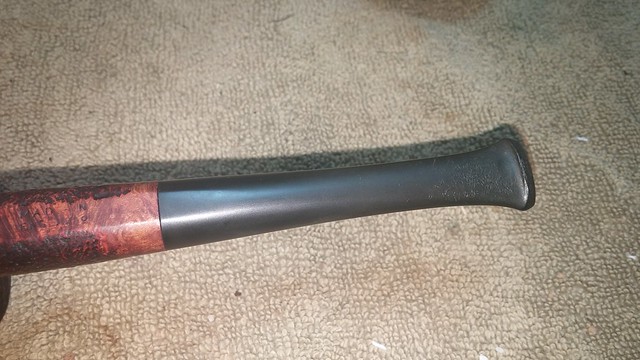
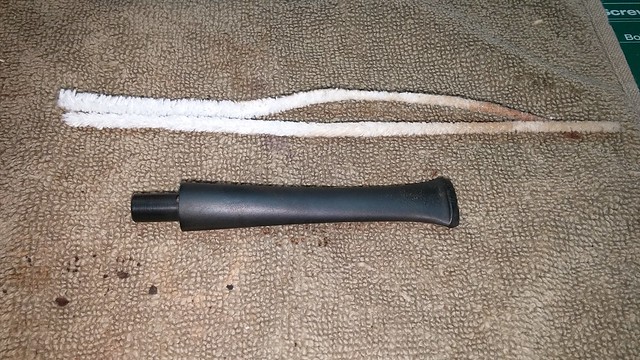
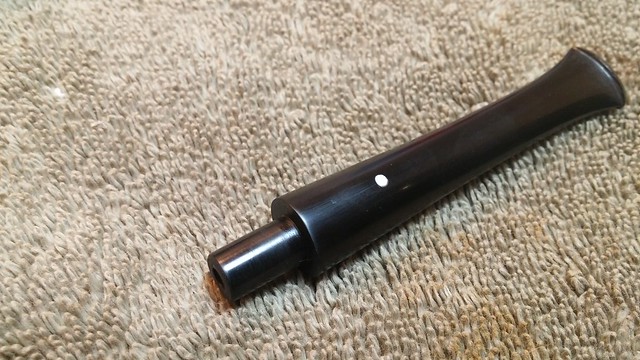
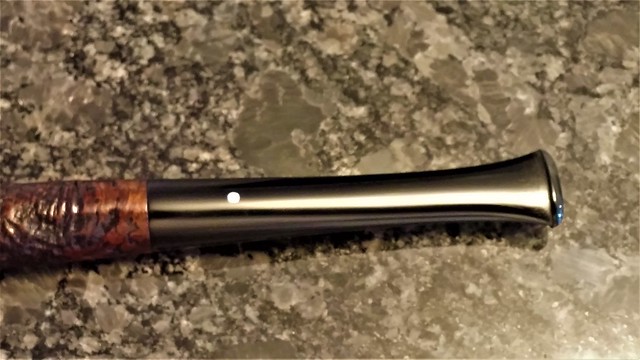
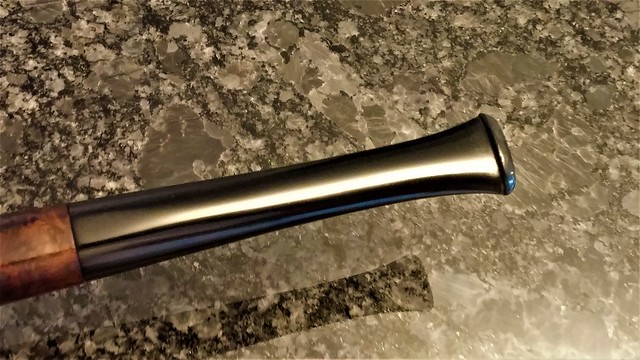
The part of the pipe in the best condition was the stem – a pre-formed Vulcanite replacement, though well fitted to the shank. It was missing the famous Dunhill White Spot, but showed only a small amount of tooth chatter and a bit of oxidation.
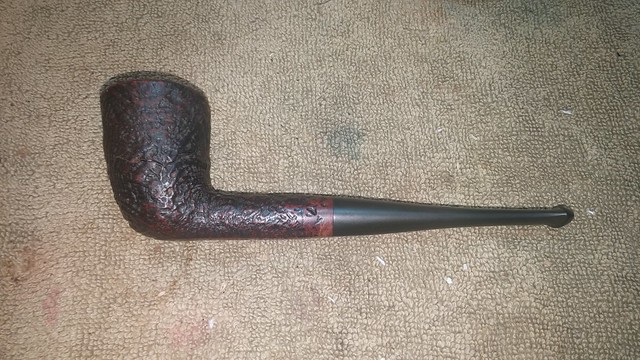

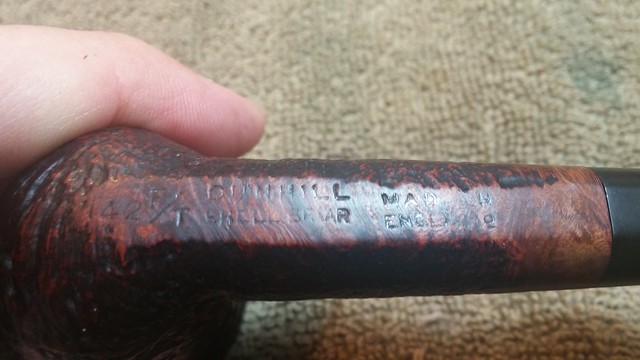
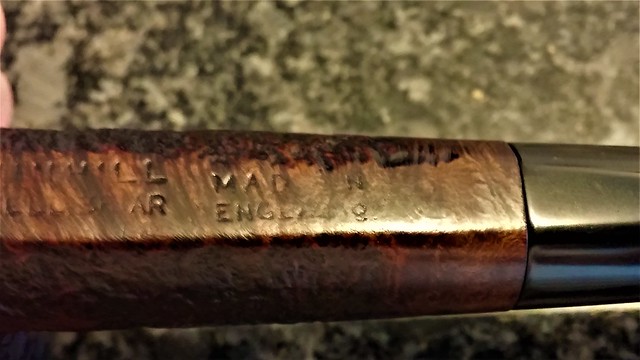
The pipe is stamped on the underside “142 F/T” then “DUNHILL” over “SHELL BRIAR” followed by “MADE IN” over “ENGLAND0”. Though somewhat worn, the stamps are in surprisingly good condition given the state of the rest of the pipe. A quick look at the Dunhill dating guide on Pipephil.eu tells me that this Dublin Shell Briar was made in 1960.
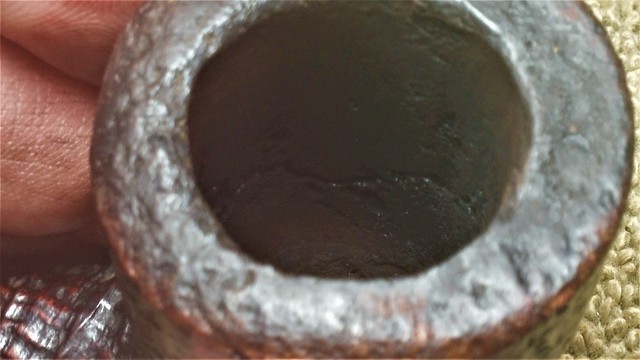
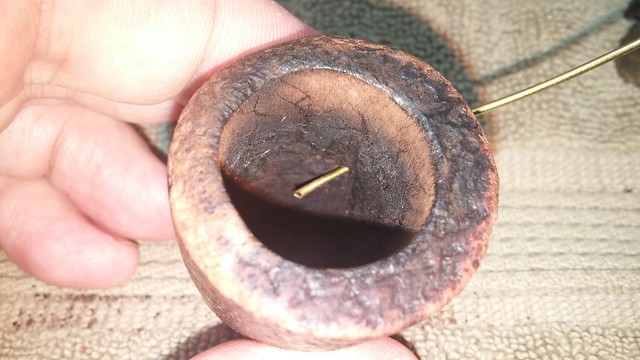
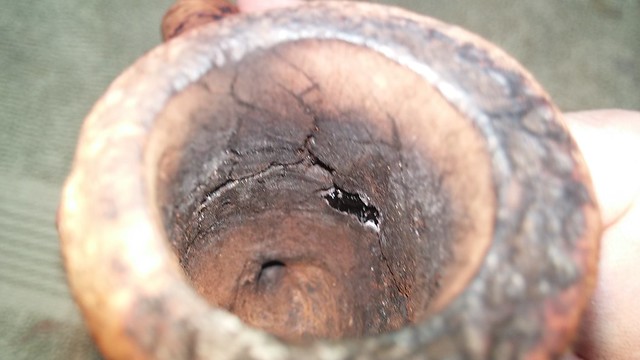
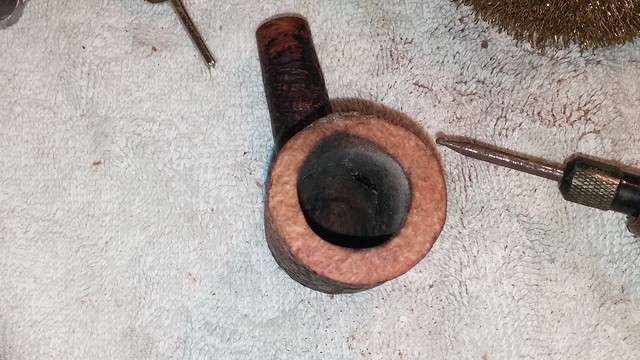
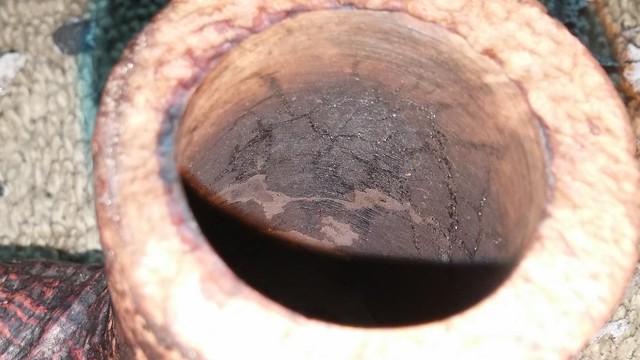
Before I could determine the extent of the damage to the stummel, I needed to inspect the interior walls of the tobacco chamber. Half expecting the bowl to shatter in my hand, I reamed the hard, old cake from the briar as gently as I could.
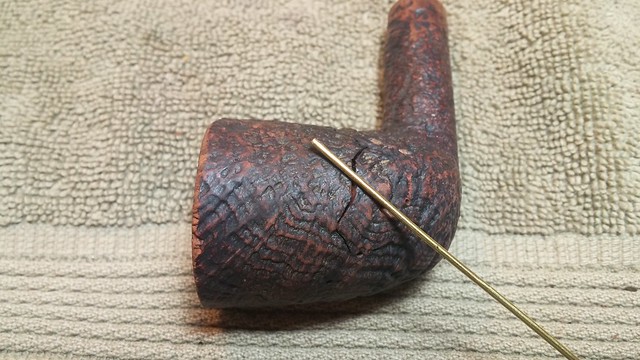
With the cake out, I could clearly identify a crack inside that correlated to the crack on the outside. The cracks didn’t line up perfectly – a strong light shone into the bowl wasn’t visible through the outer crack, but I could wiggle the entire top half of the bowl by levering the point of a dental pick in the damaged area. I believe the thick hard cake had actually held the bowl together until now.
I relayed my findings to the pipe’s owner and presented my plan of attack – I would need to install several brass pins across the crack to stabilize and reinforce the damaged area, and then fill and seal the damaged briar. Blending the repairs into the sandblast finish would require further cosmetic work, as would the rim repair. I could add a White Spot to the stem, but otherwise I would limit the stem work to a basic cleaning and smoothing of tooth chatter.
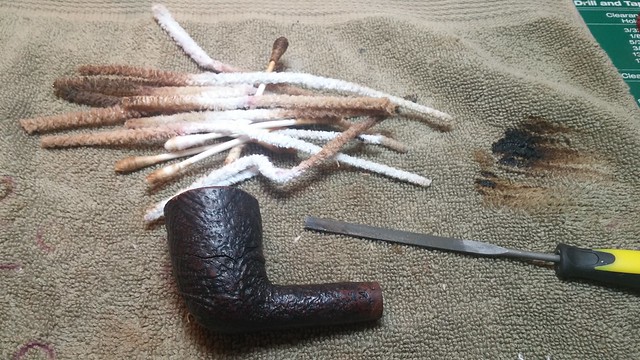
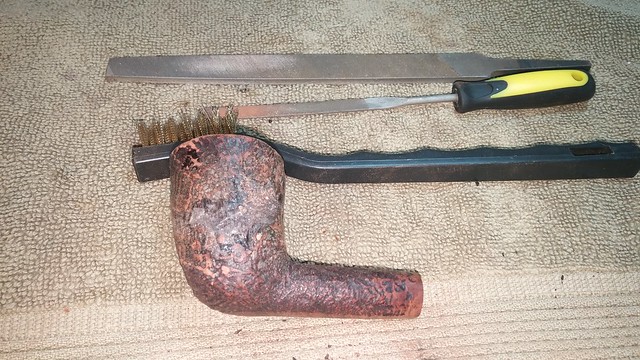
The owner agreed with my assessment and thus, with marching orders in hand, I set about cleaning the pipe to prepare it for its surgery. The stem went into an Oxyclean bath to raise the oxidation while I dealt with the stummel. The shank and airway were pretty mucky. I used pipe cleaners, cotton swabs, alcohol and the flat end of a needle file to clear years of old tars and muck from the stummel.
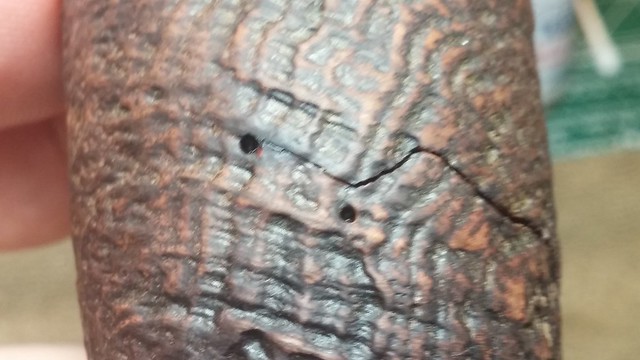
With the dirt and crud out of the way, I could focus on the number one job – crack repair. I began by carefully tracing the multiple paths of the crack and drilling a tiny hole at the end of each leg (but not all the way through the chamber wall) to stop the crack from stretching further across the briar. I used the smallest micro-drill bit I could fit in my drill to keep the refinishing work to a minimum, but even so I ended up drilling six holes in the briar during this operation alone.
I then selected my thinnest brass rod stock (approximately 1.5mm in diameter) and began laying out the “pin stitches” that would knit the briar back together across the crack. I have published a detailed tutorial on crack pinning here on DadsPipes, so I won’t repeat too much of the details this time.
The main points to remember when planning your pin placement are to drill the pin shafts within the chamber wall (ie not penetrating into the tobacco chamber), and to vary the angle of the shafts to limit the amount of potential movement of the briar after the pins are installed.
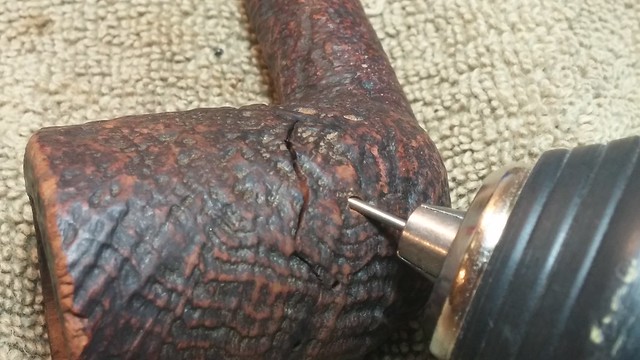
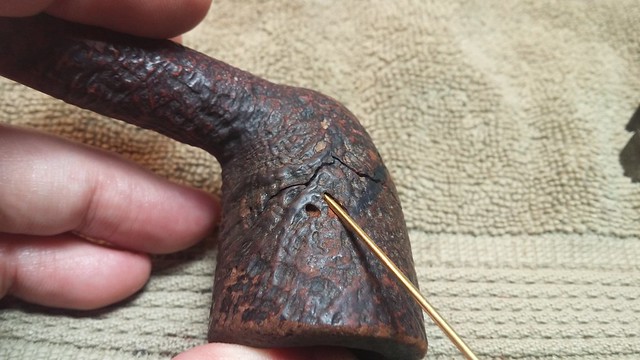
As this next shot shows, I drilled the first pin shaft at a very low angle. The placement of the crack on the bowl made drilling a bit awkward, but patience and a steady hand pay off. With the shaft drilled, I cut the brass rod slightly short to make sure it would seat within the briar, dripped a bit of CA glue down the hole and ran the pin home using the rest of the brass rod as a pusher.
The second pin shaft proved to be less cooperative than the first. The interior damage penetrated the chamber wall deeply at this point, and my first two attempts at drilling ended up coming right through the damaged area. The third time’s the charm, though, as they say, and I finally got a pin shaft where it needed to be. The extra holes would simply add a bit more patching work afterwards.
I had hoped to add at least one more pin to brace up the crack, but the position of the crack and the geometry of the stummel prevented another viable drilling route. That said, I now had a good sturdy brass pin across each major leg of the crack and even without additional glue the chamber wall was noticeably more rigid already.
Completing the exterior repairs, I mixed a batch of CA glue and briar dust and packed it into and around the open crack. It took several applications to completely fill the damaged areas. I also ran clear CA glue across all the smaller micro-fractures to seal the briar.
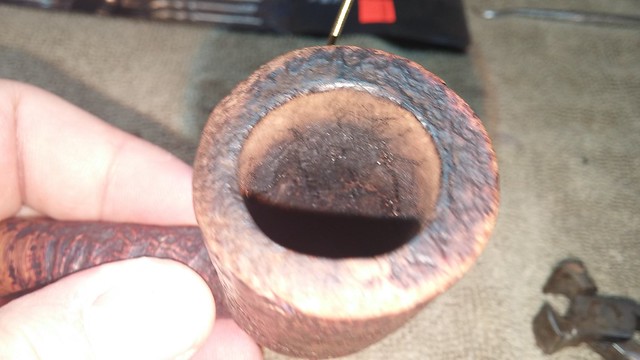
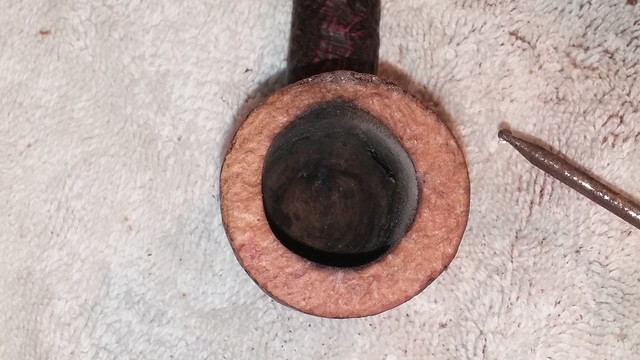
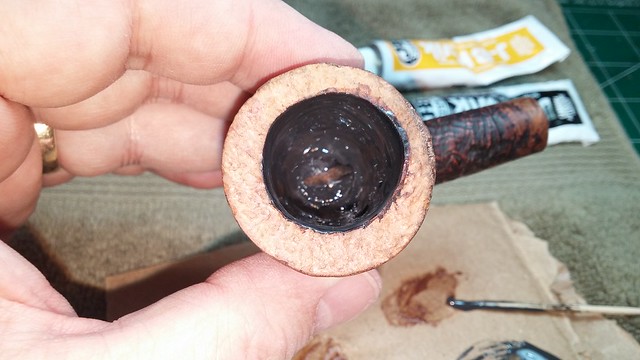
This shot is a quick look inside the chamber after the CA & briar dust patches had cured on the exterior. The white crystalline frost around the large burn mark tells me that I managed to get the patch material well into the open crack from the outside. Great!
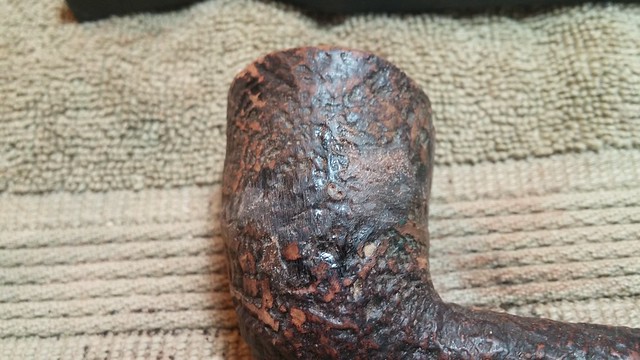
When the patches had fully cured, I roughly filed them flush with the original Shell finish. Even without any more work, I’d say this is a vast improvement!
While I had stummel in hand, I took a brass bristle tire brush to the rim and scoured off the lava to reveal the extend of the damages there. This side-on shot shows how much briar is missing, all due to careless dottle-knocking.
It was time to blend in the repairs. I mounted a small round carving burr in my rotary tool and ground down the remaining patch material, texturing the repairs to blend into the existing finish. Thankfully, the sandblast on this stummel was already quite worn and I didn’t have to match any deep ring grain. Still, I worked slowly and carefully – a small misstep with a rotary tool can be costly. When I was happy with the overall look, I knocked the rough edges off the new surface with the brass brush and some 320-grit sandpaper.
The rim got a hybrid sort of repair – both a topping and a rebuild. I sanded the rim mostly flat, but added CA and briar dust fill to the lowest area to build it back up. This approach salvaged more of the original briar than a more aggressive topping would have.
Again I employed the rotary tool and carving burr to sand down my patches and replicate (or at least approximate) the original sandblast finish. Here is a pic of the rebuilt rim after the carving burr.
Apart from cosmetic refinishing, the exterior of the stummel was now as good as it was going to get, but the chamber walls still needed a bit of assistance. I mixed up a small batch of JB Weld and pressed it into the cracks.
When the JB had cured I sanded away the excess, leaving the high-heat resistant epoxy only in the now repaired areas. It took two applications of JB Weld to fill all of the dents, cracks and fissures in this bowl, but apart from the curing time, it’s a fairly quick and easy process.
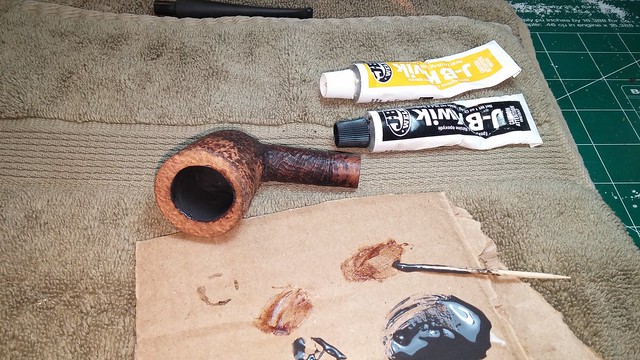
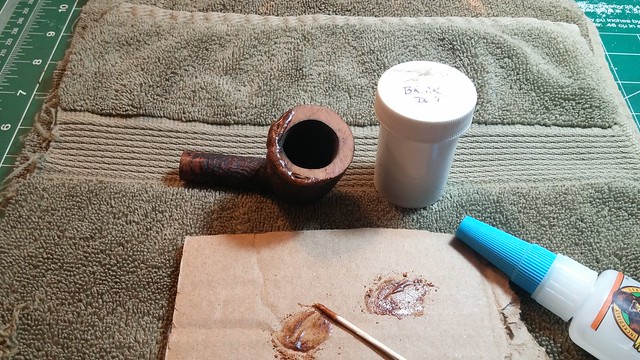
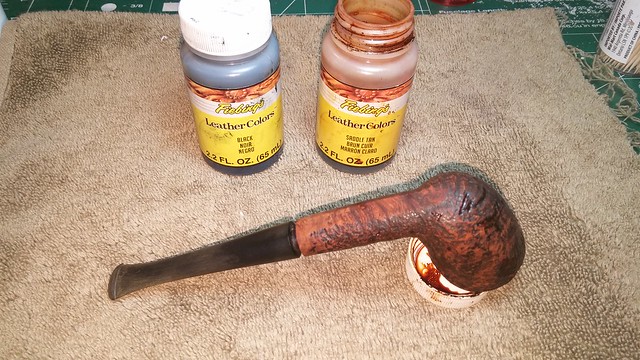
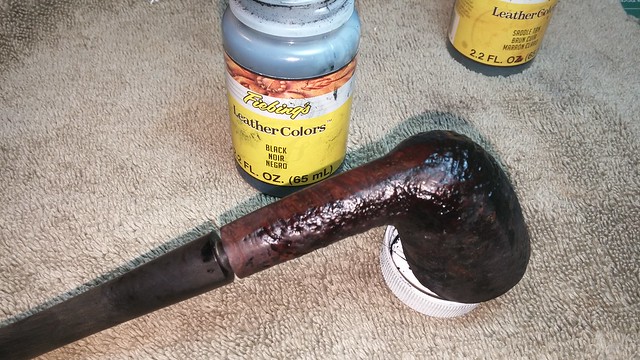
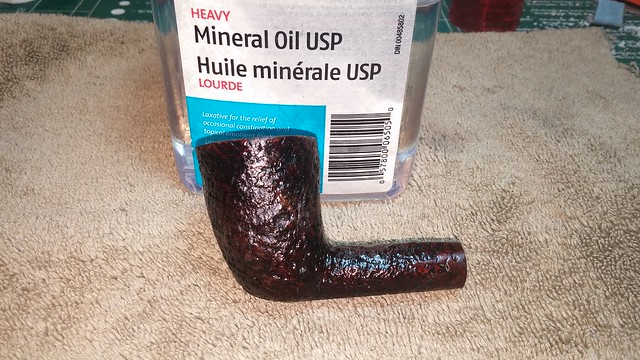
With all my repairs complete, I prettied up the stummel with a new two-tone stain, first applying a coat of Fiebing’s Saddle Tan leather dye and then a coat of Black dye. Wiping the black dye from the high points of the blasted finish allows the red to shine through from underneath, producing the warm tones the Shell Briar finish is known for. A wipe of mineral oil after the staining helped refreshed the briar and give the new finish depth and glow.
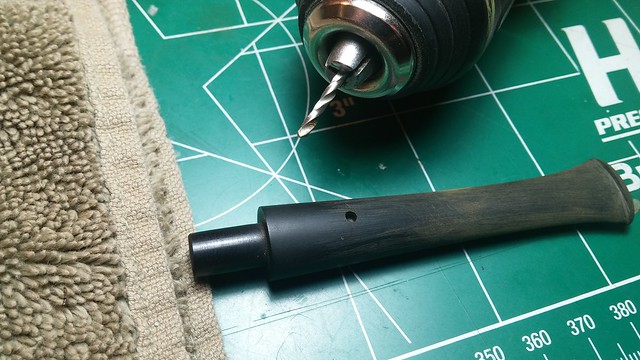
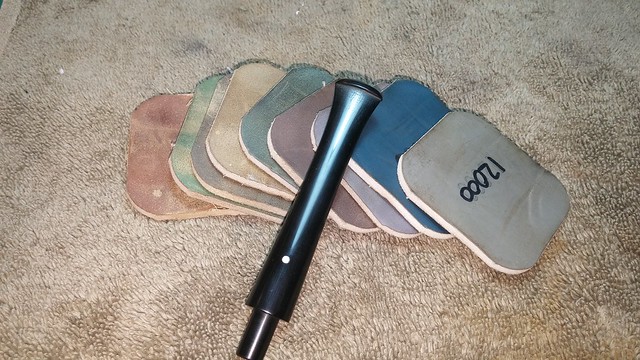
I set the stummel aside to rest while I turned my attention to the stem. I sanded out the light tooth chatter at the bit and then installed the White Spot as requested by the pipe’s owner. For this operation, I marked and drilled a hole part way through the stem and then glued in a short section of white plastic rod. After sanding it smooth, it looks like the Spot has been there all along.
I gave the stem a quick round of micromesh pads to remove the sanding marks and give the vulcanite some shine, but I didn’t spend a lot of time on this process. A few superficial micro-scratches are still visible if you look for them, but apart from the extra labour costs, I think a few small marks of use are acceptable for a 57-year old pipe that has gone through everything this poor briar has experienced.
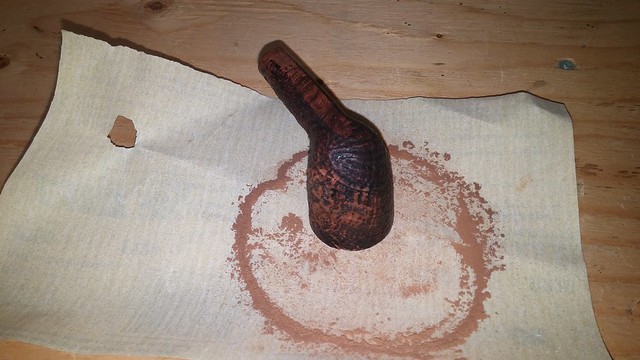
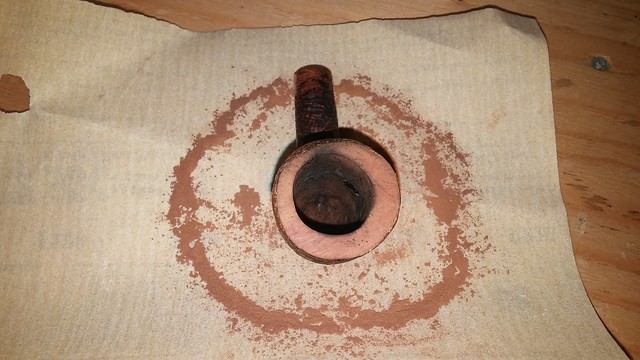
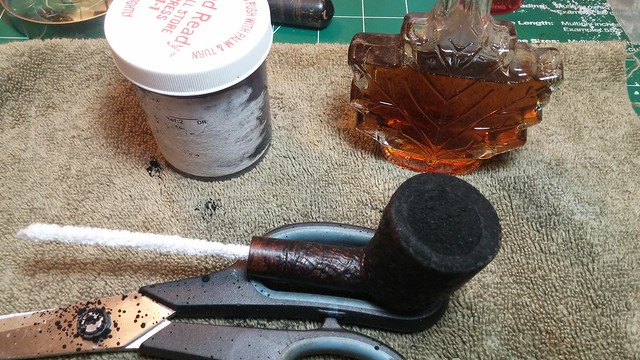
Just before taking the pipe to the wheel for a final buff and polish, I applied a bowl coating of maple syrup and activated charcoal powder. The purpose here is twofold – the coating will cover the repairs, but more importantly, it will provide a smooth yet slightly “grippy” surface on which a new protective cake layer can form.
I wanted a slightly thicker bowl coating on this pipe, so instead of simply wiping on some maple syrup and shaking a bit of charcoal powder around inside the bowl, I applied the syrup and then filled the chamber completely with charcoal and let the pipe sit overnight.
Filling the bowl helps prevent the syrup from sagging or sliding down the chamber walls before it sets, and the added sitting time allows the syrup to absorb more charcoal powder, producing a thicker protective layer.
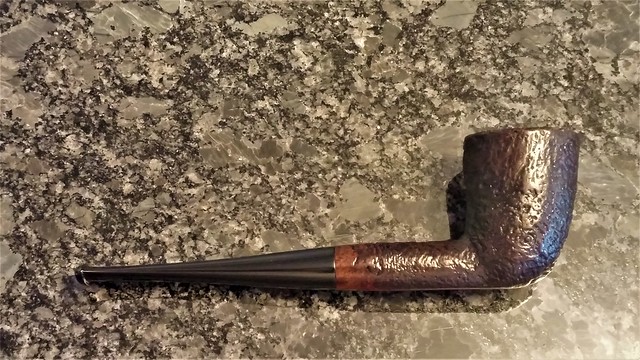
Both stem and stummel enjoyed a run of White Diamond compound on the wheel and several coats . of Canrauba wax, and this rather involved refurbishment was complete!
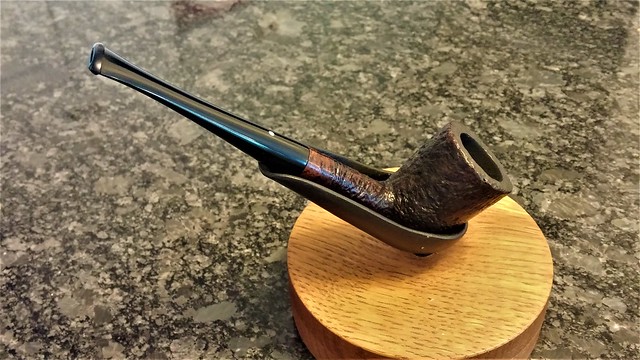
As I look at the pipe on the table in front of me now, it’s hard to remember the broken, downtrodden briar I started with. I actually had to go back and look at the as-found photographs to remind me of the details. While I doubt a serious pipe collector or Dunhill aficionado will ever mistake this Shell Briar Dublin for a factory original, I am happy to have saved this small piece of pipe history from the scrap heap.
The pipe is structurally sound, the garish cracks are gone, and the briar once again exudes a warm, healthy glow. The replacement stem fits well and looks good, and the pipe should provide decades of smoking companionship to its owner. What more could one ask for?
Thanks for joining me on this marathon restoration. The pipe was on my bench for close to a week, start to finish, but in the end I think the results were worth the effort. This case also illustrates a point both I and Steve Laug of Reborn Pipes have made several times – given the motivation, any pipe can be restored.
Here’s the finished pipe. Until next time, Happy Piping!


An ingenious repair, invisible too!
LikeLiked by 1 person
Very nice job, Charles! I appreciate the details of the process description.
LikeLiked by 1 person
Great repair Charles. You got to use the pin process you developed on the one we did together. You saved that old dawg. Well done.
LikeLiked by 1 person
Thanks Steve. I was thinking about that pipe while planning the approach to this one. The horizontal crack proved a bit tricky to get an angle on!
LikeLike
I noticed the finesse you did on that. Nicely done “cross stitching”
LikeLiked by 1 person
Thought you might pick up on that. 😀
LikeLike
Reblogged this on rebornpipes and commented:
Charles has done another old dog rescue. His ingenious pinning of a cracked shank, reshaping and reworking a damaged rim and putting a dot on the stem is a great tutorial. Everything is well done but there can be no mistake that the stem is a replacement.
LikeLiked by 1 person