
I’ve mentioned in an earlier post that Brigham offered the ever-popular Straight Billiard shape in several sizes and considered them from the start as separate product offerings rather than variations on a theme. Thus there are three shape numbers for a Brigham Billiard – 02 for a small pipe , 03 for a medium pipe, and 04 for a large pipe.
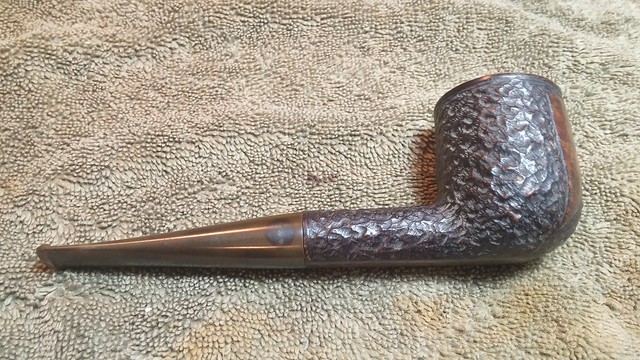
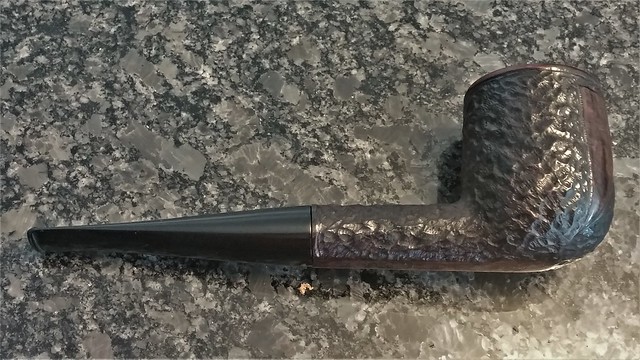
The pipe on the table today is the largest of the shapes listed above, the 04 Large Straight Billiard, and it certainly lives up to the designation. As a rough size reference, Brigham’s 02 Billiard shares the same stummel dimensions as my Dunhill Group 3 Shell Briar; Shape 03 approximates a Dunhill Group 4, and the 04 Large Billard is a big one, at a Group 6.
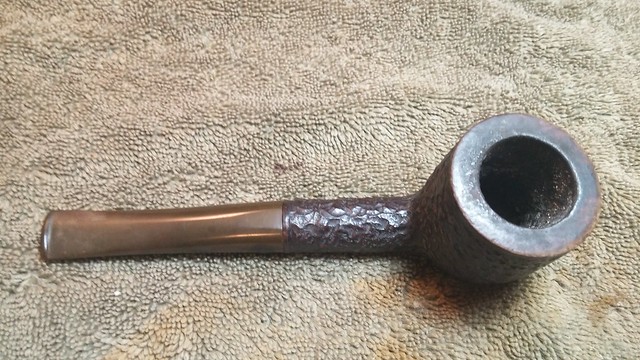
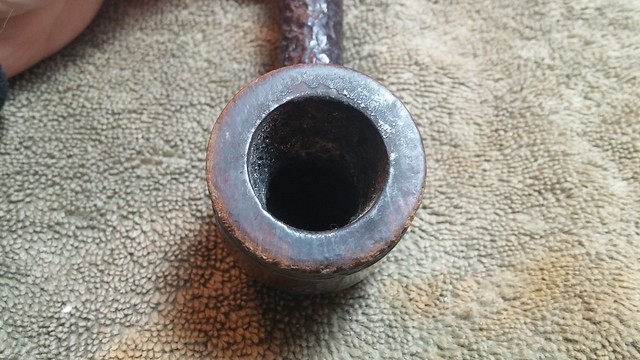
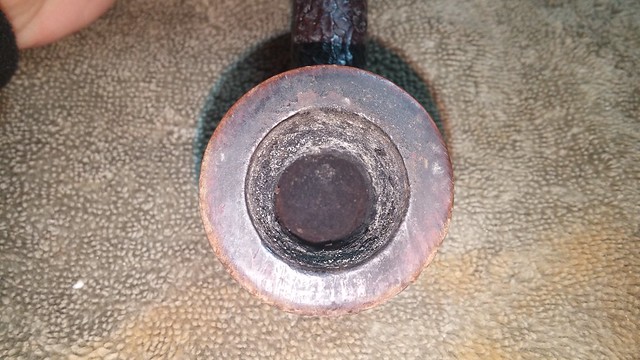
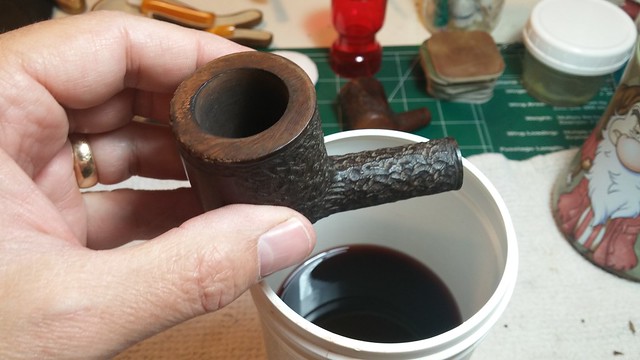
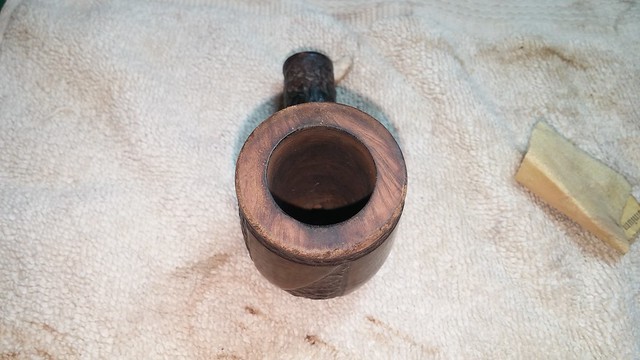
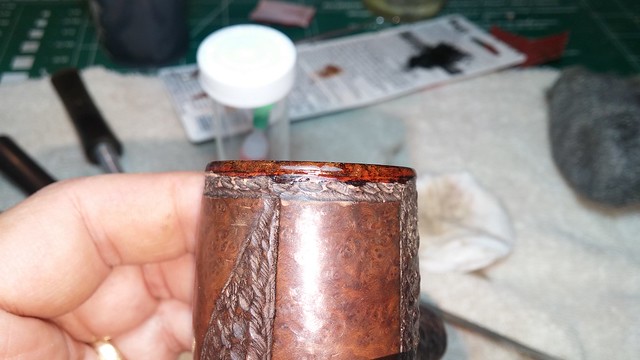
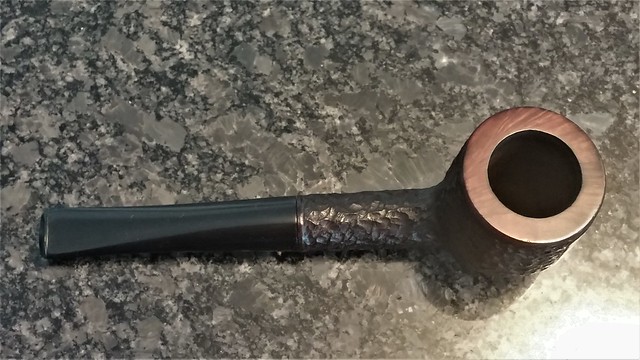
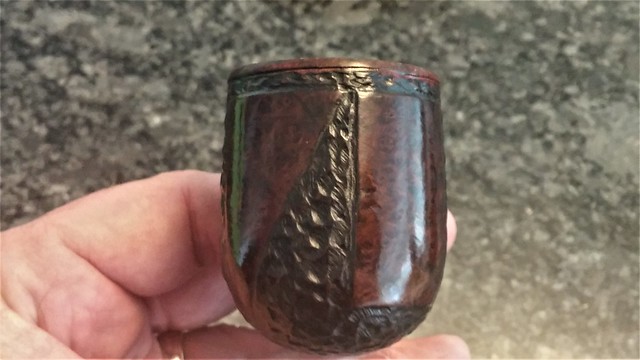
This old billiard is an impressive handful of briar, even in the rather rough state in which it arrived for refurbishment. As you can see from the pictures below, there was a fair bit of work to be done to bring this pipe back to form. The stummel was dirty and greasy, and the outer rim was riddled with dents and chips from careless dottle-knocking. Most of the rim, especially at the rear of the bowl near the shank, was hidden under a layer of lava, and the chamber was heavily caked.
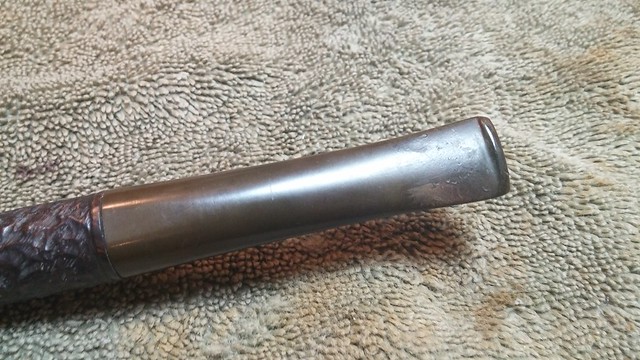
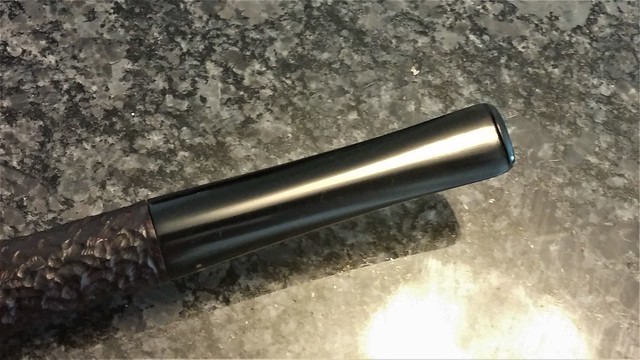
The stem was oxidized a sickly yellow-brown colour, but showed only light tooth chatter. My guess is that this bruiser of a pipe was too heavy for its owner to clench. Holding it in the hand while smoking saved the button from serious tooth damage.
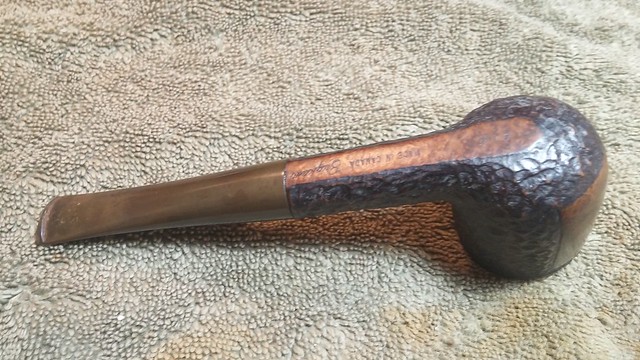

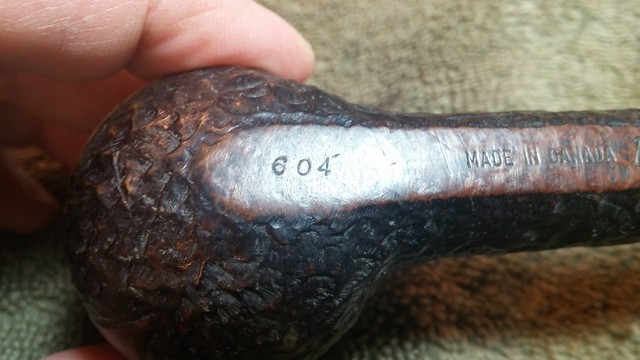
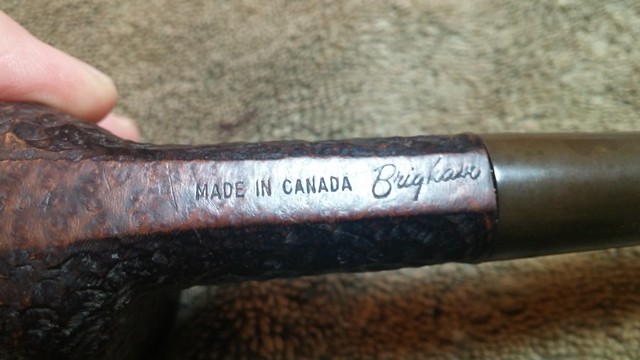
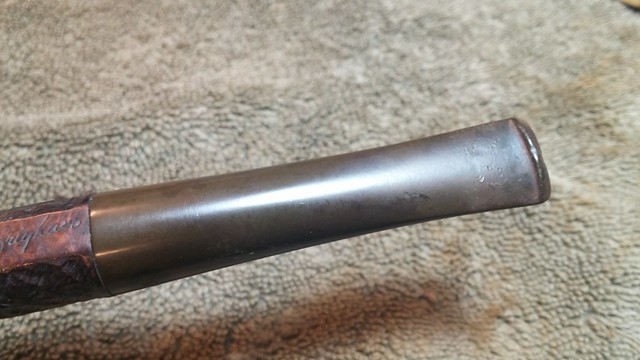
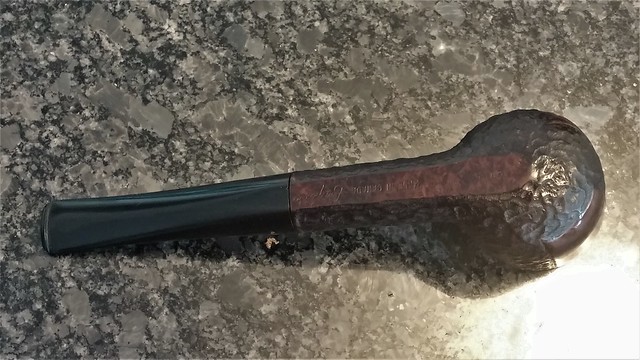
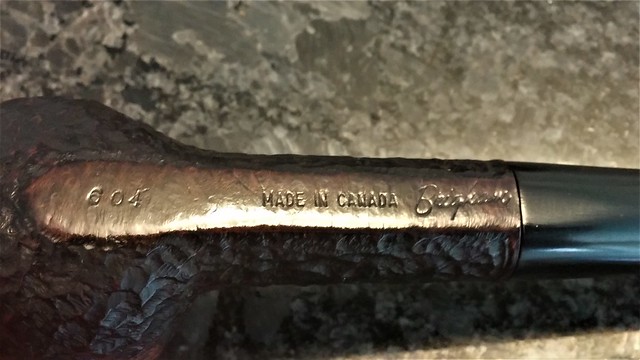
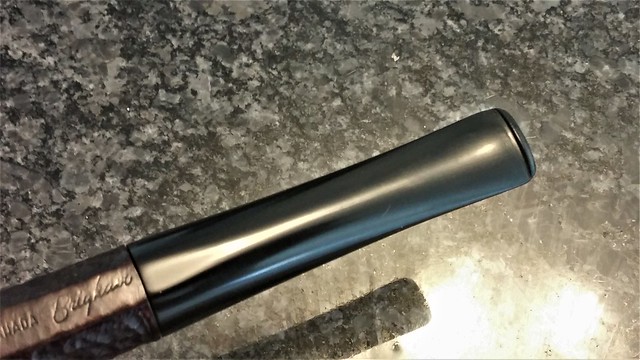
The pipe is stamped on its flat underside “604” followed by “Made in Canada” in block letters, and then “Brigham” in a script font. This combination of marks dates this pipe to the 1960’s or early 1970’s.
 .
.
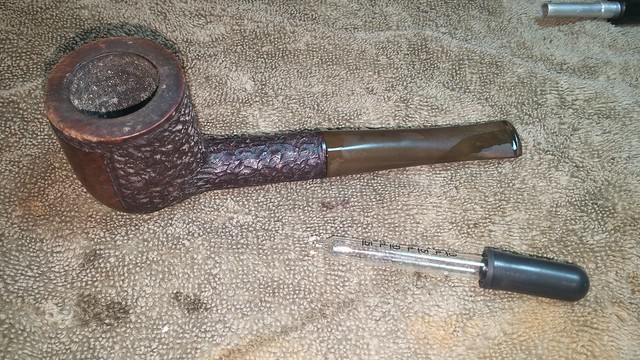
One important detail the sharp-eyed among you may have noticed in the pictures is that the stem is mounted upside down in the mortise. Curious, as the flat “notch” in the stem is clearly meant to align with the corresponding flat area on the stummel. Sometimes these oddities are simply that, with no real significance, but other times they seem to foreshadow a bigger restoration job than first meets the eye.
In this case, the latter is true – despite my best efforts, including freezing the pipe for a few hours, I found the stem very firmly and decidedly seized in the mortise and unwilling to budge even a millimetre. Ugh!
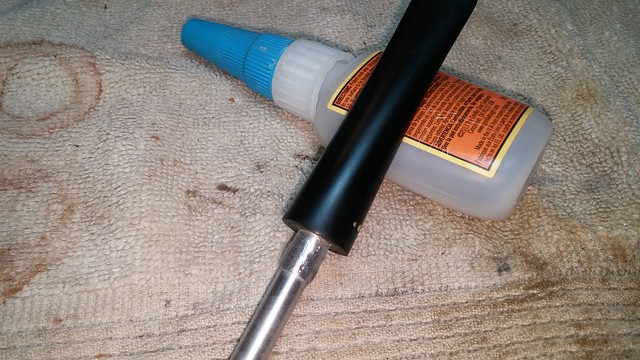
Suspecting that the stem had been glued in place, I used an eye dropper to drip isopropyl alcohol down the crack between the stem and shank in an attempt to loosen the stem. This was unsuccessful, even after repeated applications, though the alcohol did manage to make its way into the bottom of the bowl.
I decided that a longer alcohol soak was in order, so I dropped the pipe bowl-down into a container of isopropyl and left it overnight. The alcohol came slightly above the stem/shank joint, so I knew it would make its way into the mortise and airway from above and below given sufficient time. However, when I returned to the pipe the next day, I found the situation had not improved. The stem was still firmly stuck in the shank.
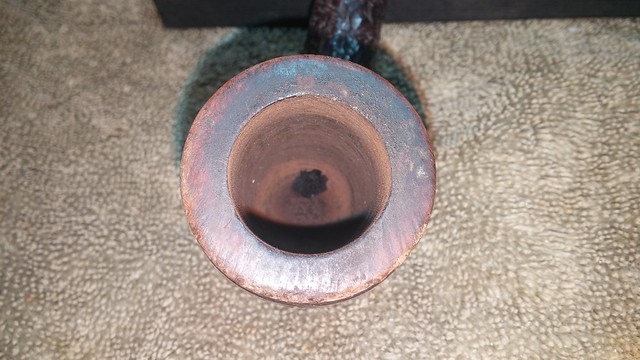
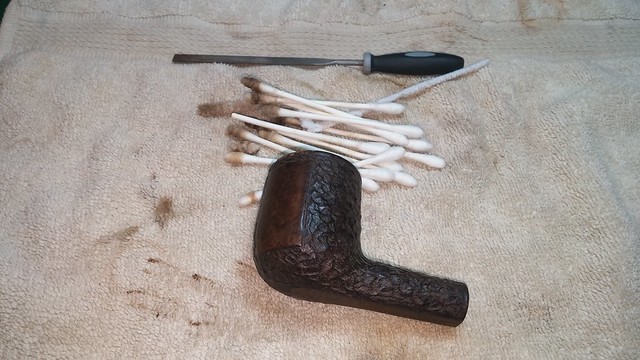
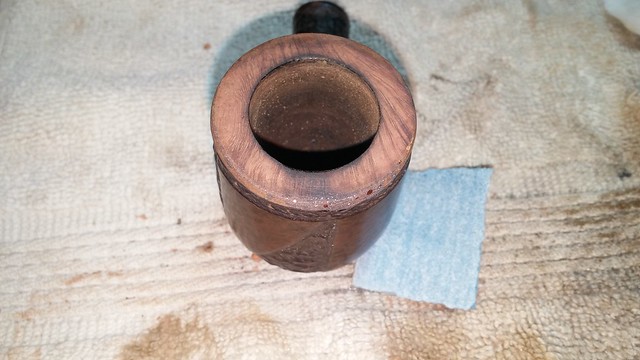
I knew I’d have to take much sterner measures to get this pipe apart, but before I amped up my efforts, I decided to ream the bowl back to briar. My Castleford reamer made short work of the old cake, now much softened by its soak, and I was glad to find that the tobacco chamber was in good shape underneath it all.

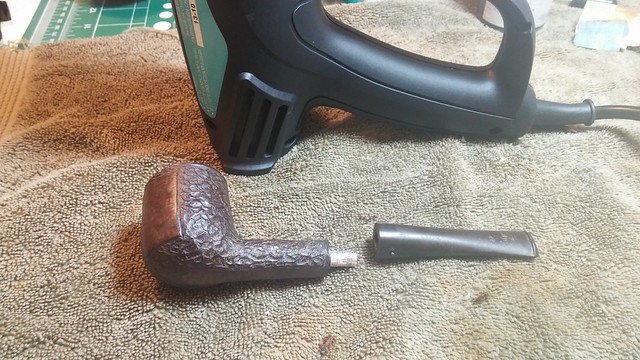
Having failed with cold and alcohol, I decided to try heating the pipe in hope that whatever glue or contaminants were holding the stem in the shank would soften and release their fierce grip on the tenon. A word of warning – this was definitely a Cowboy move, and not one that I’d recommend to novice restorers. There is a real risk of cracking the shank, destroying the stem or both when you resort to force.
Working cautiously, I warmed the pipe over my heat gun, focusing on the shank area where I figured any glue would be concentrated, and testing the stem regularly for signs of loosening or movement. Eventually, things started to move, but not as expected – instead of the tenon coming free of the mortise, it twisted out of the stem!
This view sheds a bit of light on the situation – as you can see, there is a whitish substance (either white glue or aluminum corrosion) filling the gap between tenon and mortise walls. An old rock maple distillator was also left in the pipe but has broken down to wood pulp inside the tenon. Nice mess!
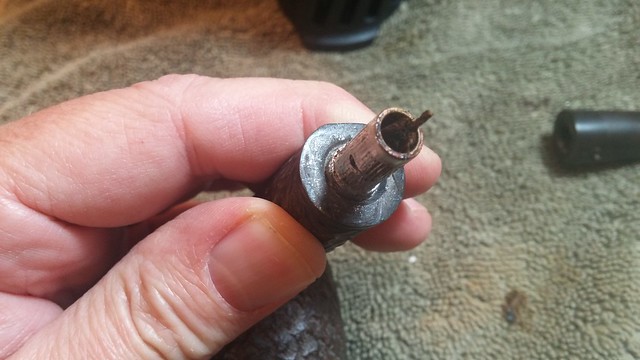
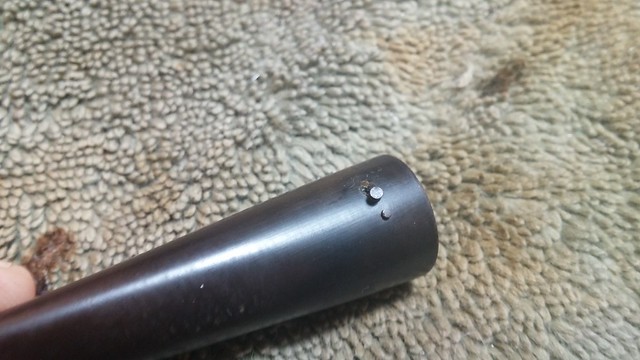
.Twisting the tenon off the stem also damaged the vulcanite around the brass pins on the left flank. The larger centre Dot is the first pin installed on this stem, and actually pins the end of the tenon into the end of the stem. There will be some repair work necessary to fix the torn vulcanite.
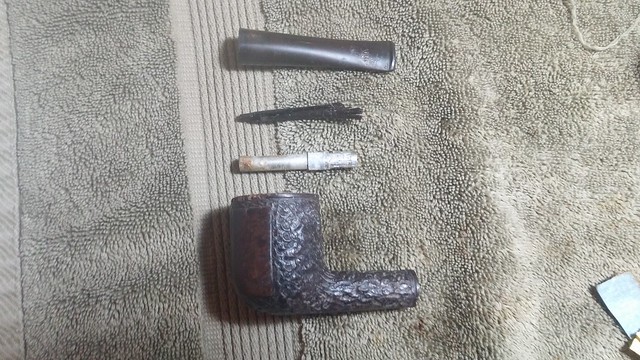
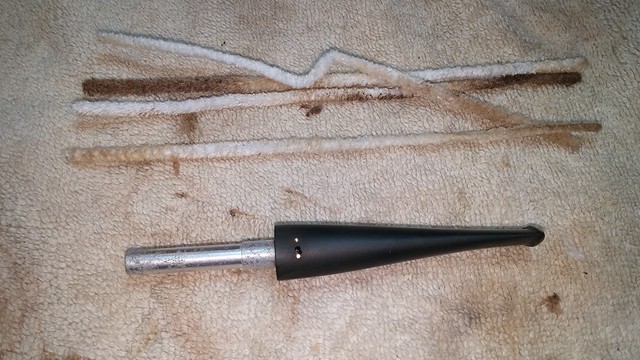
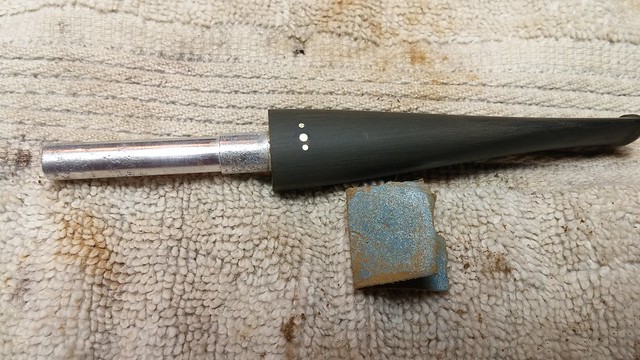
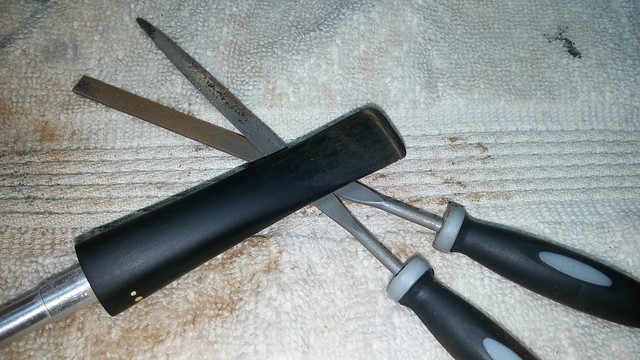
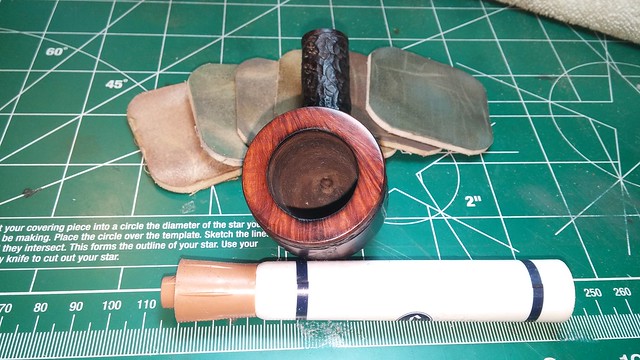
After a bit more heat and a lot more wrangling, I finally separated the pipe into its component parts – from top to bottom below, the vulcanite stem (complete with plier marks), the remains of the rock maple filter, the aluminum tenon/filter holder and the stummel.
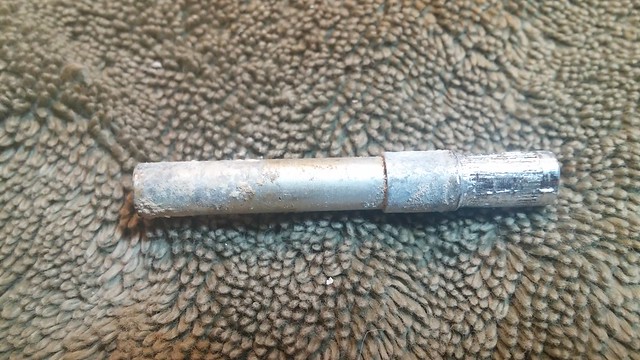
A few close-up shots shows the aftermath – I believe the white substance in the mortise and airway is a combination of glue and corrosion. You can see how built up it is on the tenon and mortise walls. The last pic below shows the aluminum cap from the rock maple filter, still firmly lodged in the airway.

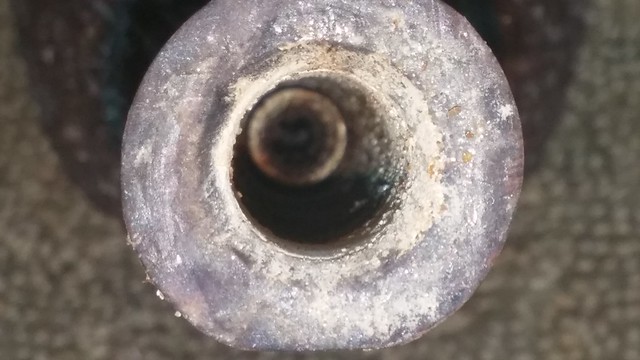
Now the I had unimpeded access to the pipe’s internals, I dropped both the stummel and aluminum tenon into an alcohol bath for another soak to dissolve the worst of the glue residue and any tars lurking within. The vulcanite stem went into an Oxyclean bath to raise the oxidation and start the clean-up process on that end.
I pulled the stummel and tenon out of the alcohol the next day and saw that I had finally made some progress. The aluminum tenon polished right up with a bit of steel wool, and the stummel was in much better shape both inside and out.
Before I could really clean the stummel’s internals, though, I needed to clear the filter cap from the airway. For this I used a drill bit, turned by hand, until it bit into the soft aluminum of the filter cap. Another twist and a pull had the filter cap on the worktable and the airway open.

Pipe cleaners and cotton swabs dipped in alcohol quickly cleared the remaining dirt and debris from the mortise and airway. You can see by the pic that there wasn’t much left; the bulk of the tars were dissolved during the two alcohol soaks.
While I had the stummel in hand, I decided to address the rim damage. I first topped the rim lightly to square things up and remove the last traces of the lava that had covered the rim surface. The topping also showed the full extent of the damage to the outer rim around the front of the bowl.
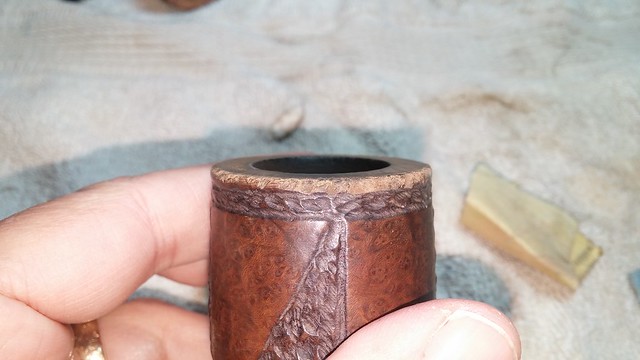
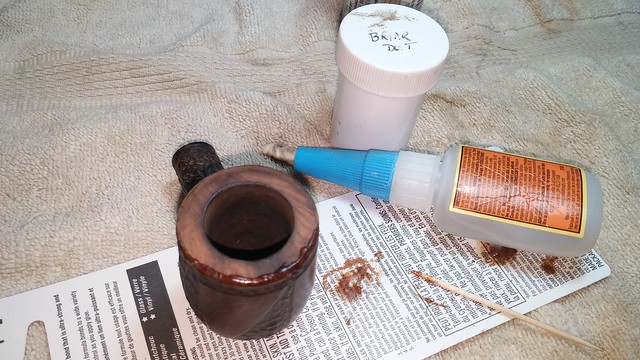
The design of the pipe called for smooth band of briar running around the bowl just below the rim. To regain the lost briar, I rebuilt the damaged area with CA glue and briar dust and set the stummel aside to cure.
While the stummel sat, I fished the stem out of its Oxyclean bath and scrubbed it clean with 0000 steel wool and Magic Eraser before assessing the damage to the pinning area. The larger centre pin had come out with the tenon, but the flanking pins of the vertical three-Dot pattern had remained in place. Overall, things weren’t looking too bad.
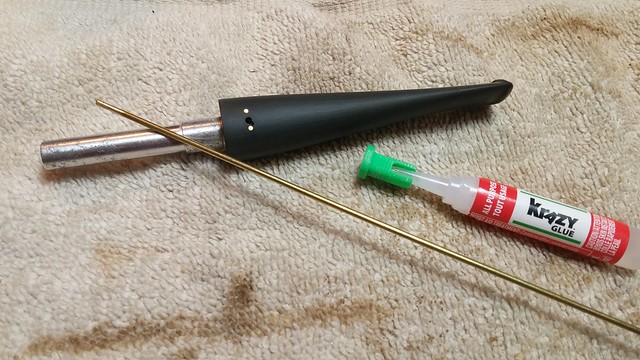
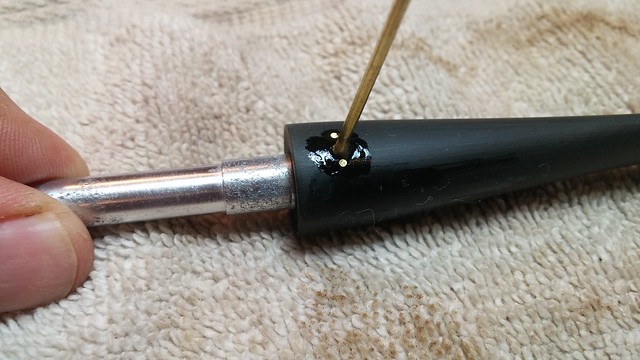
I warmed both the tenon and the end of the stem to make it easier to slide the tenon back into place squarely in the mortise. Happy with the alignment, I dug out some 1/16” brass rod from my supplies. This series of pic shows the tenon in place in the stem and the installation of the brass pin. I dripped a bit of CA glue into the open hole and pushed the brass rod home. When the glue set and the rod was firmly in place, I cut off the excess and added more glue around the pin to fill in any imperfections.
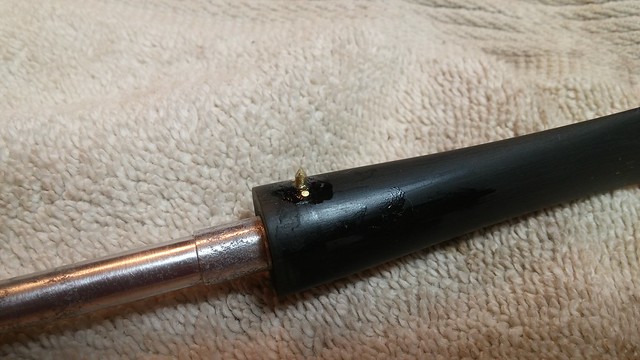
After the glue had dried, I used a few pipe cleaners dipped in alcohol to clean the remaining gunk from inside the stem, and then used needle file and sandpaper to bring the brass stub down to the level of the surrounding vulcanite. These pins are looking good as new, or almost – I goofed a bit here using clear CA instead of black. In the right light you can see the reflection of the brass pin shining through the glue. Whoops. Not a major issue though, except for flash photography.
While I had the stem in hand, I used the files and sandpaper to sharpen up the lines of the button and remove my clumsy plier scars inflicted while trying to remove the stem.
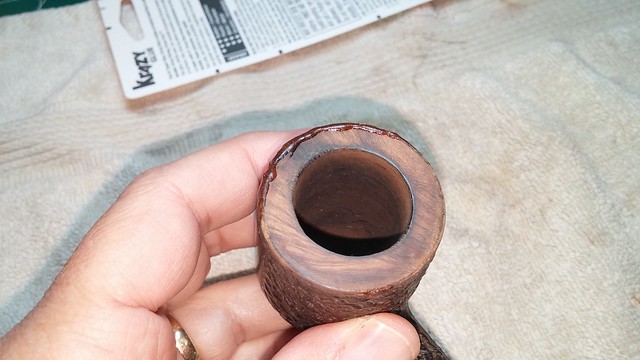
I took a break from the stem work and sanded out the patches on the rim of the stummel. Looking pretty good, though there were some air bubbles I’d have to fill in. A few applications of clear CA glue took care of the bubbles and left a nice smooth ring around the rim.
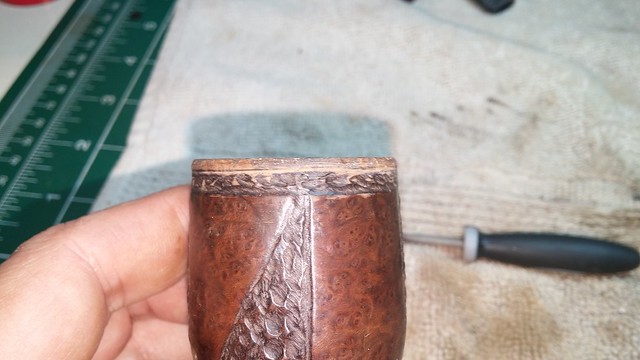
I polished the rim with micromesh pads and colour matched the fresh briar with a stain pen. I also used the micromesh pads on the stem, erasing my sanding marks and bringing up the shine. Those photos somehow went AWOL, but the process was uneventful.
Just before heading to the buffer, I adjusted the stem fit in the mortise. Cleaning up the glue and corrosion had left the fit rather loose, so I bulked up the business end of the tenon with a layer of CA glue, sanding things smooth after the glue had cured.
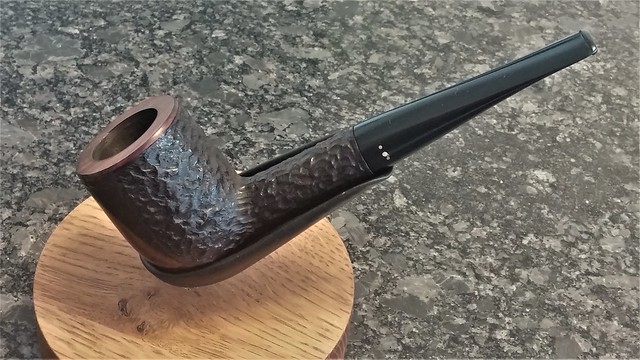
After this marathon restoration it was a real joy (and relief) to take the pipe to the buffer. A run of White Diamond compound brought up the shine on both briar and vulcanite, and a few coats of Carnauba wax put the icing on the cake.
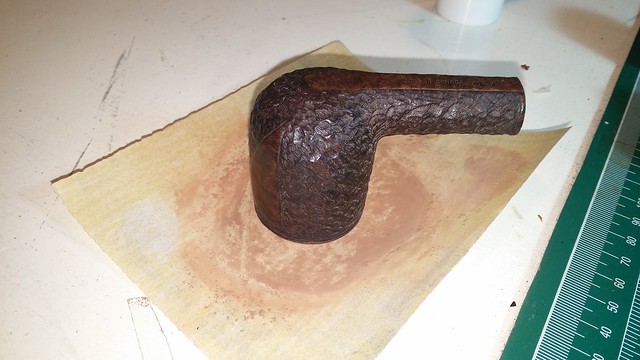
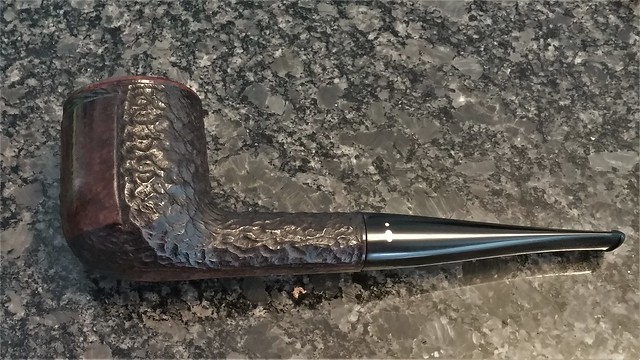
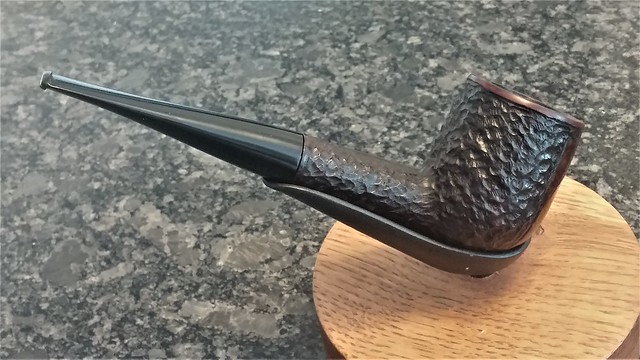
I like the contrast between the rusticated and smooth areas on this pipe, and the geometric pattern on the bowl is a nice change from the more familiar shark-tooth smooth areas carved into Brighams starting in the 1970’s. The restored rim shows some nice cross-grain, too. The large bowl fits well in the hand, and the 7/8” x 1-5/8” chamber bore promises many long, leisurely smokes from this substantial Billiard.
Thanks for joining me for another estate pipe refurbishment. This one required me to draw on many of the techniques I’ve developed over the years, but the end result is very satisfying.
Here’s the finished pipe. Until next time, Happy Piping!


Reblogged this on rebornpipes and commented:
A nice combination of a pipe restorers skills made this pipe a success. Well done Charles.
LikeLiked by 1 person
Thanks, Steve. This one certainly tested a few, especially patience! 😀
LikeLike
Charles, beautiful job and a very nice looking pipe. Thanks for the clinic in techniques. Question, are the brass rods you used to repair the dots a specialty order or can one find them at most hardware stores? I discovered the use of acetone in dissolving CA glue a few restorations ago which you commented on. As I read, I wondered if you might try acetone to soak in the bowl/mortise. I was anxious to see if it may have made some progress on the seized stem. The rim repair came out very well, too.
LikeLiked by 1 person
Thanks Dal. I hadn’t considered acetone, though I may well on the next stuck stem!
I found the brass rod at my local hobby store among the supplies for R/C aircraft. I’m not sure where else it might be available.
LikeLike
Very good! Thanks.
LikeLiked by 1 person
Nicely done!
LikeLiked by 1 person
Thanks. This one took a lot of work!
LikeLike