
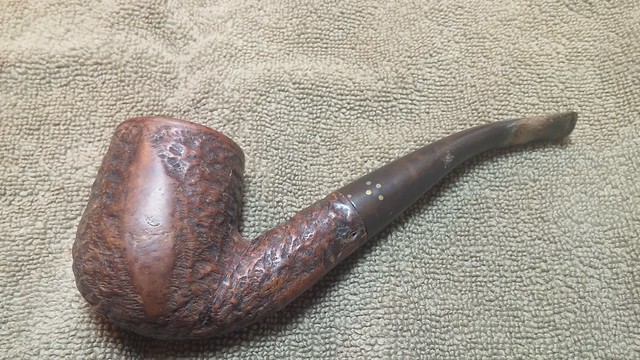
I have worked on a lot of Brigham pipes over the last year, and posted most of them here on the DadsPipes blog. I’m trying to maintain some sort of balance to my regular posts as to avoid becoming “the Brigham blog”, but I do love them and tend to buy them for myself whenever I come across one at an estate sale or antique market. The 424 Bent Billiard under discussion today, however, is not one of mine; rather, it was sent to me for refurbishment as part of a small estate lot purchased by a DadsPipes reader.
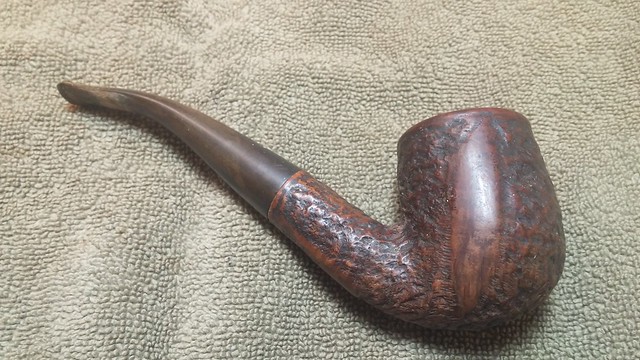
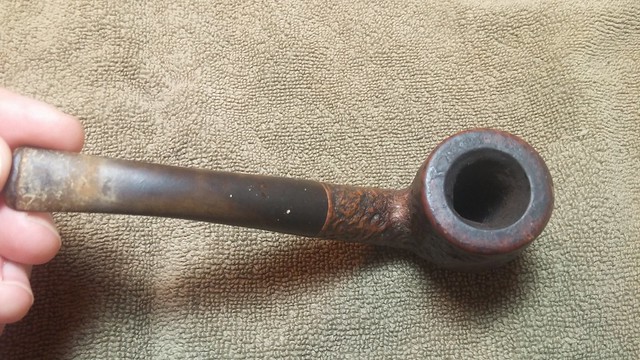
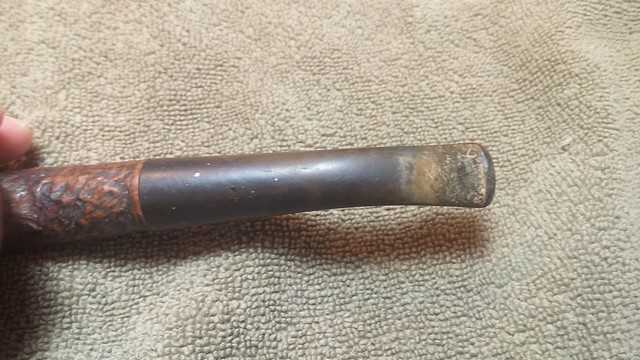
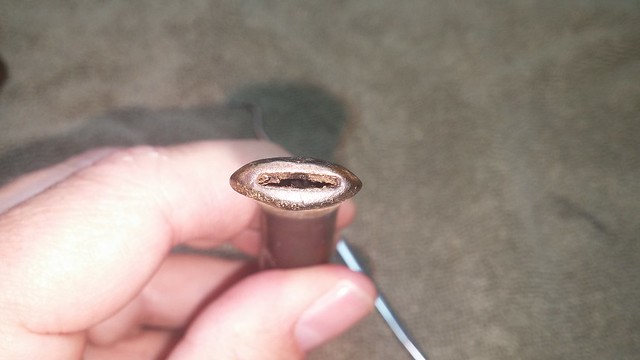
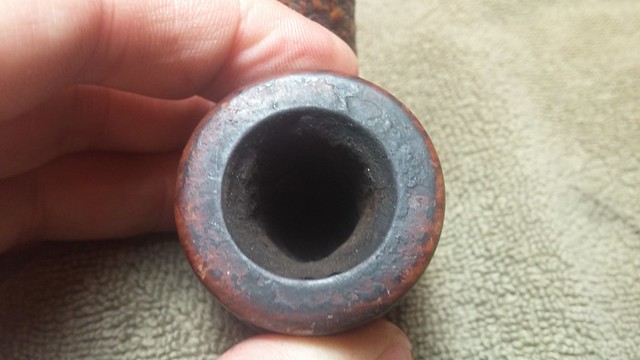
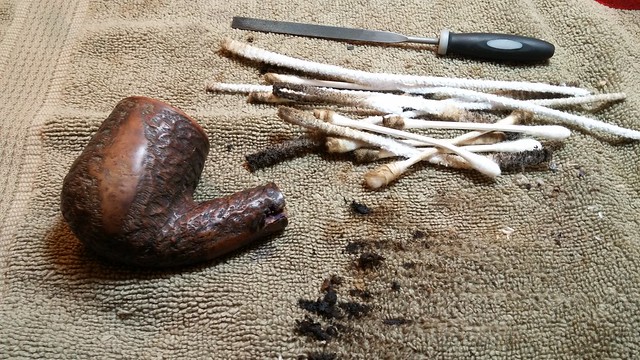
This classic Bent Billiard had clearly led an eventful life prior to arriving on my worktable. The chamber was heavily caked, to the point of choking off the airway, and a crust of lava covered the rim. The stem was oxidized, with thicker calcium deposits at the bit end.
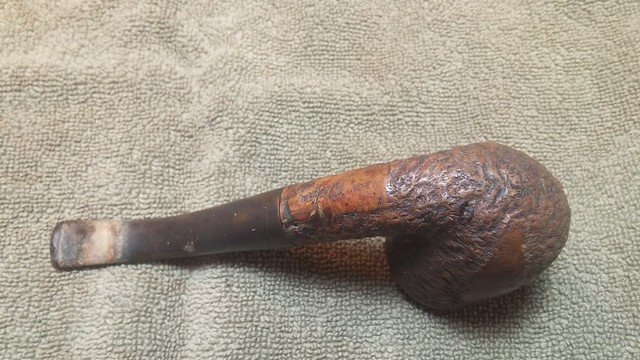

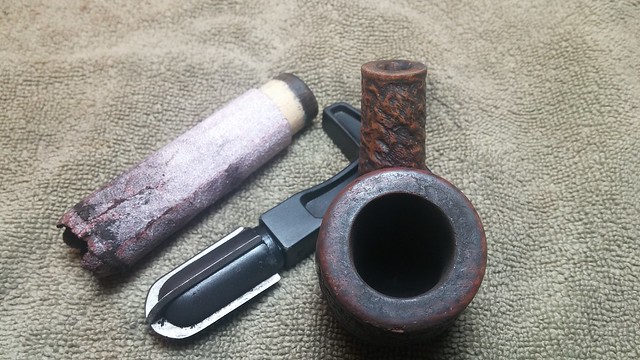
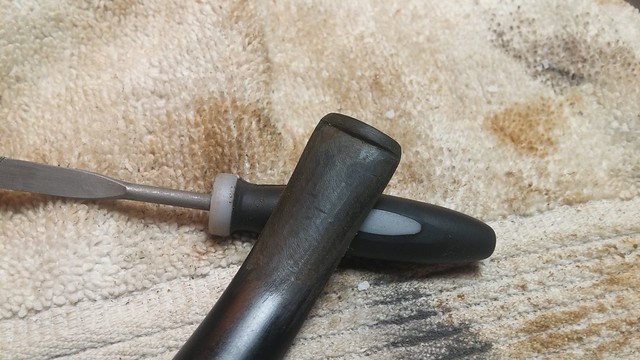
It looked like the original piper had slipped a rubber Softie bit over the end of the stem sometime after the tooth dents became evident. Nice of him to have considered extending the life of the bit, but perhaps he could also have thought to pass a pipe cleaner through the stem once in a while – the stem slot, and likely the rest of the airway, was clogged with tars and debris.
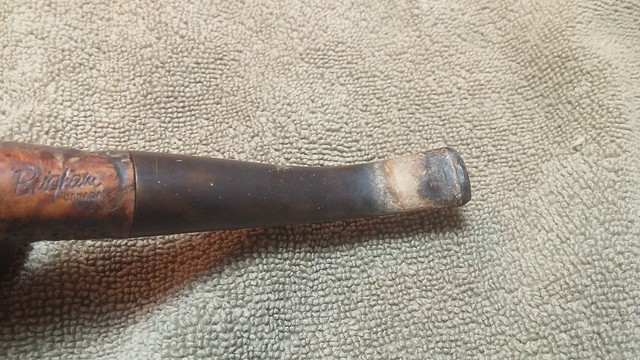
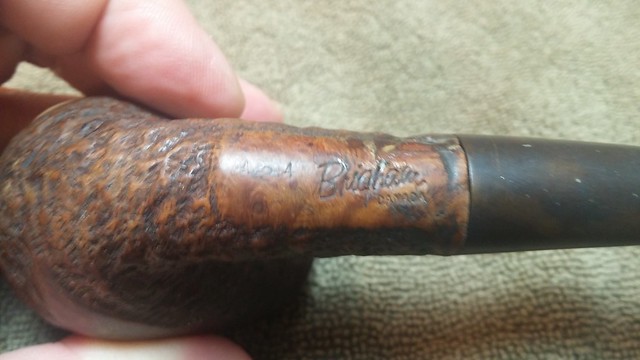
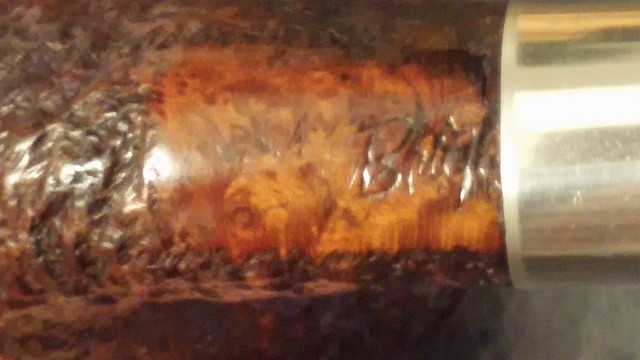
The pipe is stamped “424” followed by “Brigham” over “Canada”. The marks date this particular pipe to the late 1980’s or early 1990’s. The stem is original, with the aluminum filter holder/tenon and 4 brass pins, or Dots, inlaid in the left flank.
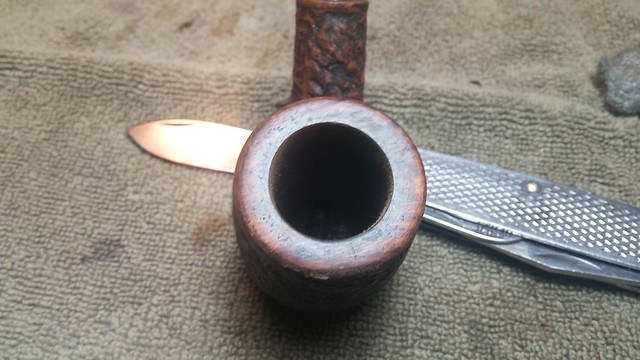
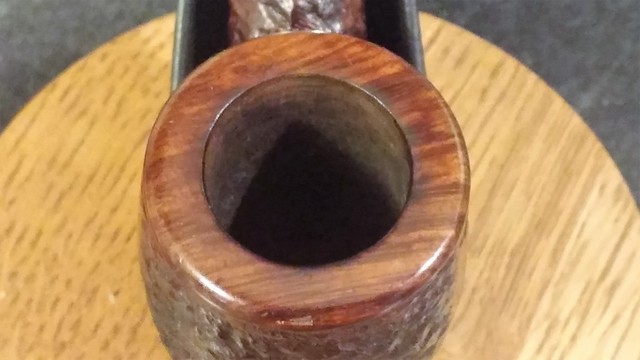
I started cleaning up the pipe by reaming the thick cake out of the bowl. I’ve found my Castleford reamer quite adept at taking most Brigham bowls back to briar – the U-shaped bore matches well with the reamer heads, leaving very little to touch up with sandpaper afterwards.
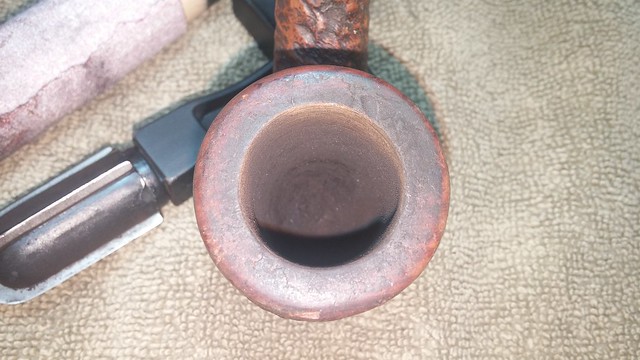
I scraped away the worst of the rim lava with my pen knife, taking care to keep the blade square to the rim top to avoid gouging the briar.
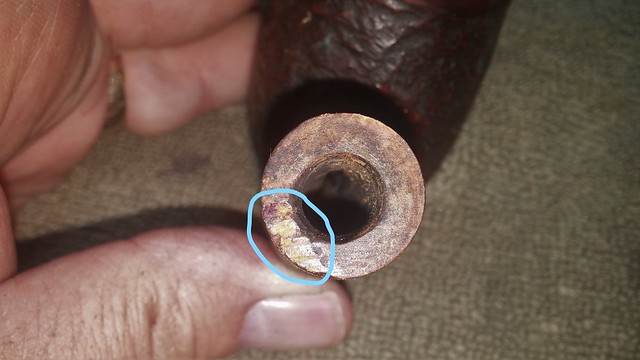
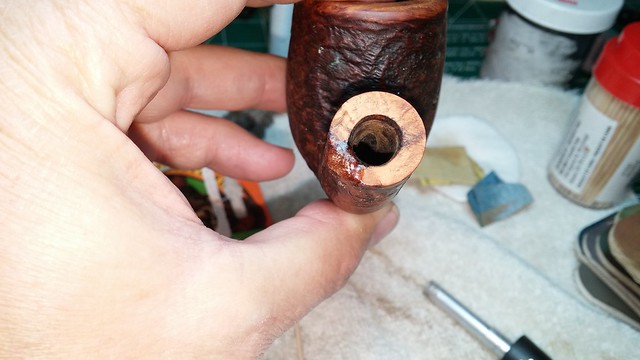
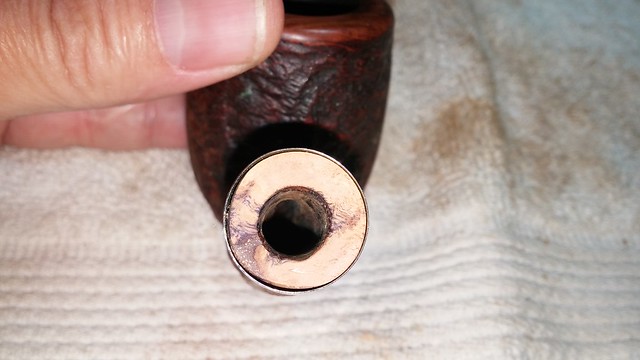
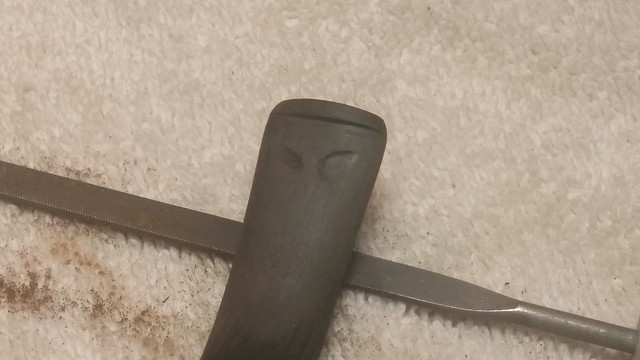
As I suspected, the stummel’s mortise and airway were in a bit of a state. This preliminary picture shows the ring of build-up inside the shank. Also notice the area I’ve circled at the 7 o’clock position on the shank end. There was something off about that bit of shank that would move this refurbishment to another level very soon.
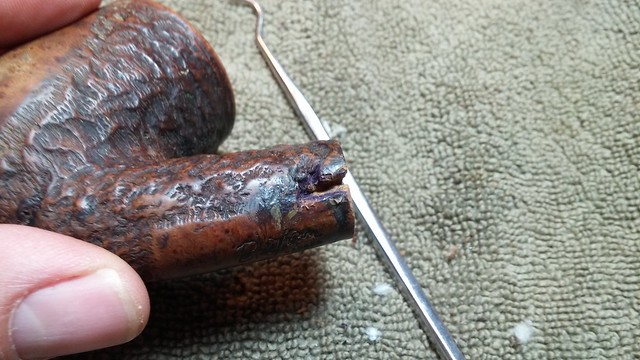
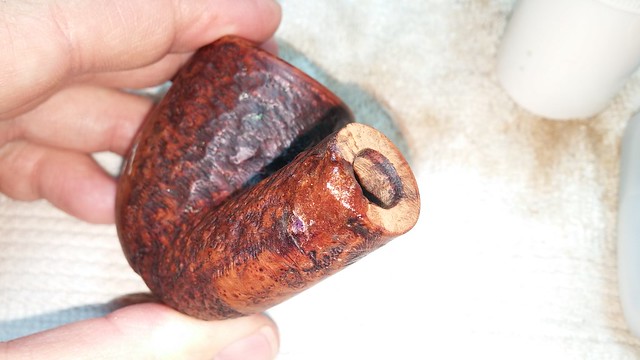
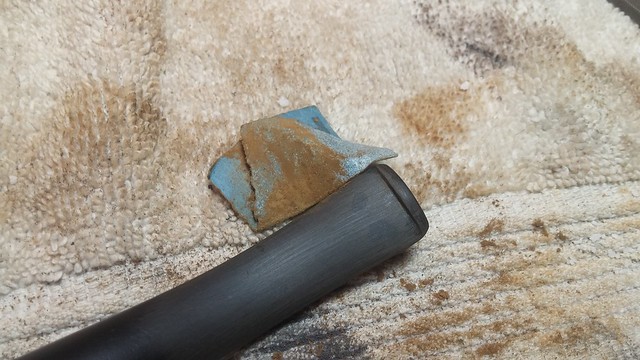
Taking a closer look at the shank, I found an old putty fill on the left side. I went at it with a dental pick and quickly realized I’d found a major issue. The putty just kept coming out of the briar, and the damaged area got larger and larger.
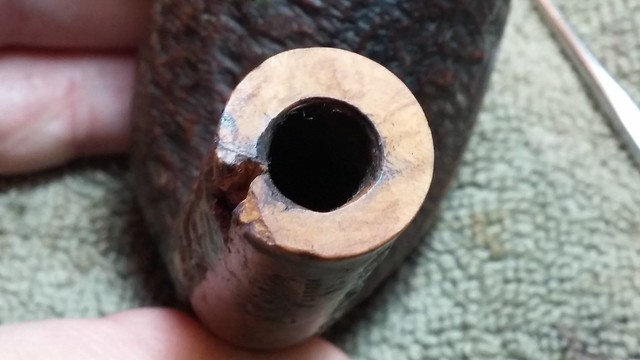
By the time I was satisfied that all the putty was out, the pit covered a significant portion of the left side of the shank. I’m sure the original fissure was much smaller and tighter, but over the years the briar had expanded and twisted slightly, opening the crack straight through to the mortise.
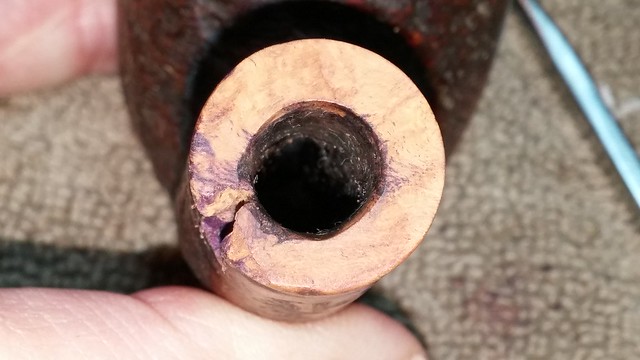
The last pic shows just how far the briar had moved – from the side you can see that the mortise face no longer lined up across the crack.


I passed on the news to the pipe’s owner and recommended filling the damage area with CA glue and briar dust before fitting a shank band for a permanent repair. The band would partially obscure the pipe’s stamps, but there wasn’t much avoiding that at this point.
Before I could repair the shank, I needed to clean it. I scraped a LOT of tars and muck from the mortise with the flat end of a square needle file. When the worst of the gunk was gone, I used pipe cleaners, cotton swabs and alcohol to finish the job.
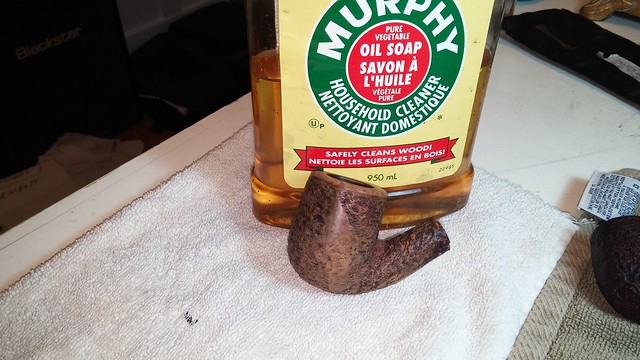
With the internals clean, I gave the exterior of the stummel a good scrub with Murphy’s Oil Soap to lift the dirt and grease from the briar.
Then it was time to mix up a batch of CA and briar dust and start layering fill material into the damaged area. It took more than a few applications to completely fill the pit, leaving the fill slightly proud of the surrounding briar to facilitate sanding later. I took these pics and then set the stummel aside to let the CA glue cure fully.
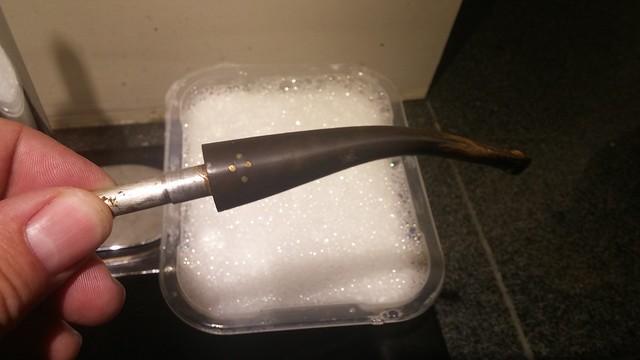
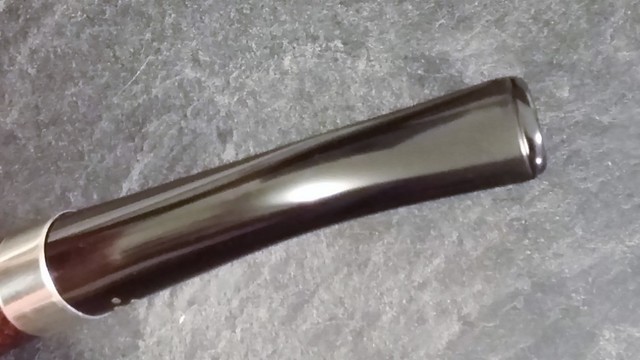
While the stummel sat, I ran a pipe cleaner through the stem to make sure the airway was open and then dropped it into an Oxyclean bath for a long soak. This series of pictures shows the stem before and after the soak, and again after the initial scrub-down with 0000 steel wool and Magic Eraser. Quite a difference!
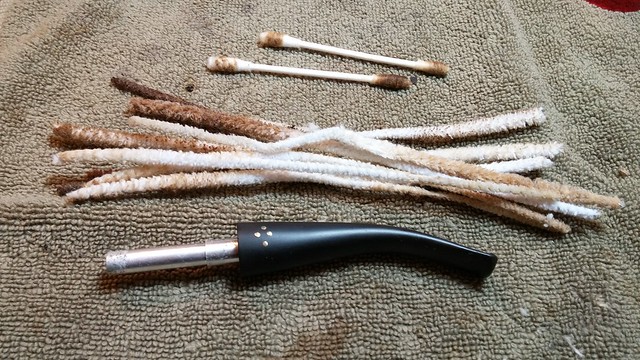
I finished cleaning the stem with pipe cleaners and cotton swabs dipped in alcohol. The Oxy bath had dissolved quite a bit of the muck in there already, making this part of the job much easier.
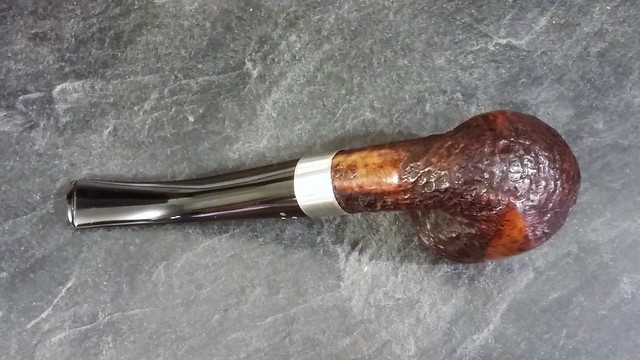
Moving back to the stummel, I filed and sanded the contours of the CA & briar patch flush with the surrounding area. I selected a shank band from my supplies and worked on the shank until I could slip the band most of the way into place. Heating the band over my heat gun, I pushed it the rest of the way onto the shank, completely covering the patched area. The band shrunk as it cooled, making a nice tight pressure fit. I left the rear edge of the band slightly proud of the shank face to facilitate a seamless fit with the stem.
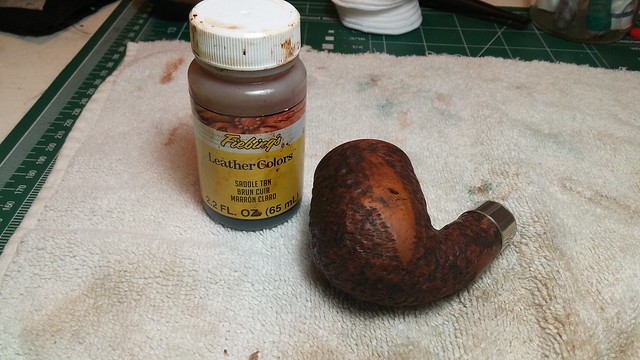
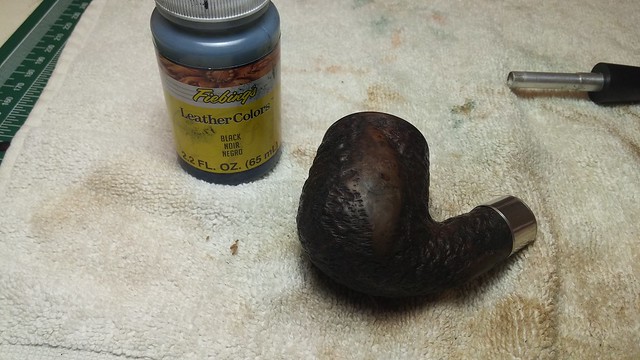
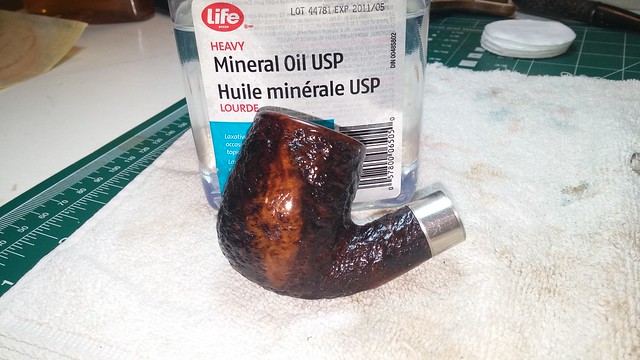
Relieved to have the pipe structurally sound again, I spruced up the briar finish with a fresh two-part stain of Fiebing’s Saddle Tan leather dye under a top coat of Black. A quick wipe of the smooth side patches and rim with a damp cotton pad pulled off most of the black stain to create the contrast finish I was after. A last wipe with mineral oil rehydrated the briar and gave the finish some much needed pop.
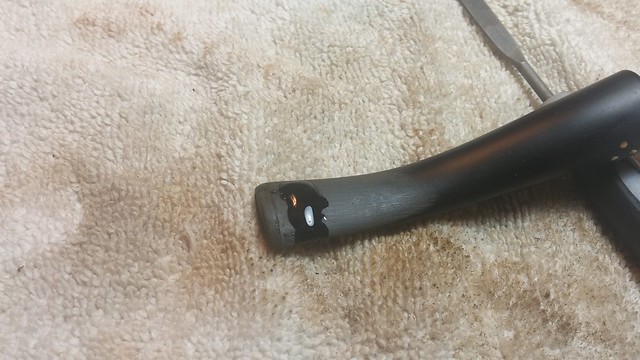
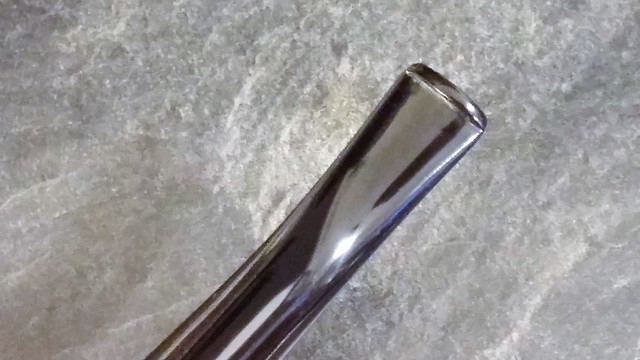
The next task was to sort out the tooth dents in the stem. The dents on the top side were shallow, only needing a bit of filing and sanding to smooth out. The bottom of the bit was a different matter, with two deep dents that would not raise with heat.
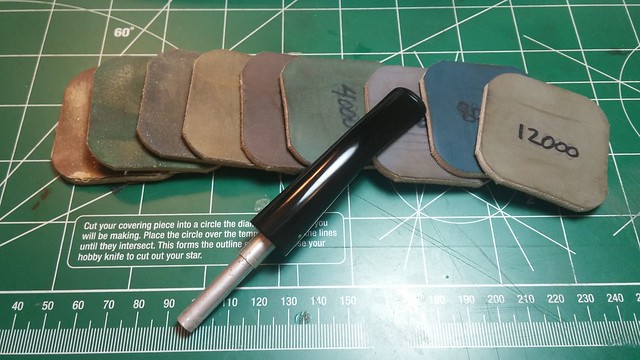
I mixed a bit of CA glue and activated charcoal powder and dropped the patch material into the dents. When the glue had fully cured, I filed and sanded the fills smooth. A full course of micromesh sanding pads removed the sanding scratches and brought the vulcanite to a mirror shine.
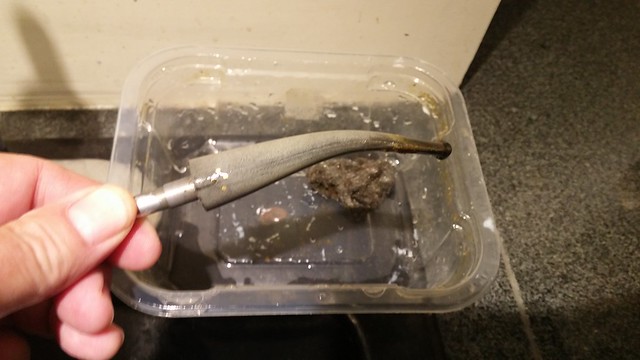
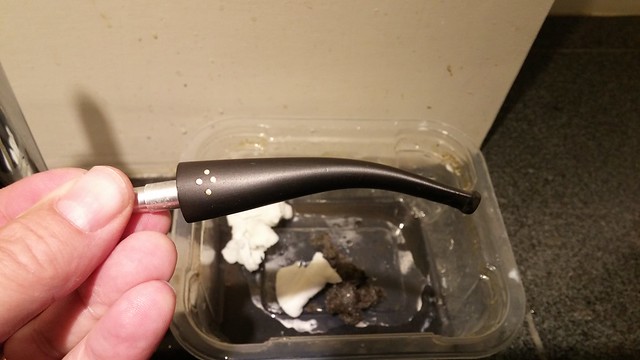
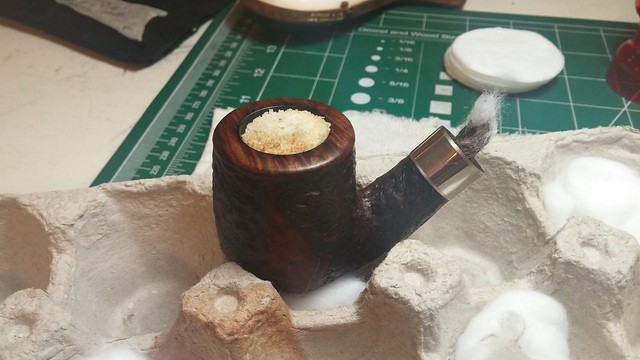
Last, but certainly not least from the client’s point of view, I set up the stummel with a salt and alcohol treatment to pull the last stubborn tars and their associated odours from the pipe’s internals. The pics below show just how much deeply-ingrained tars were left behind inside the “clean” pipe.

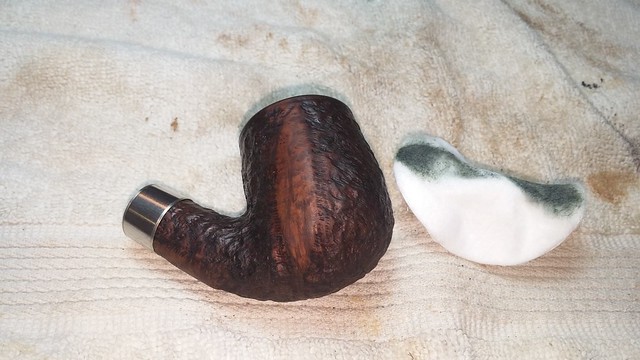
Then it was time to take the pipe to the buffer for a run of White Diamond and several coats of Carnauba wax. The wheel brought up the shine on the smooth areas of the stummel nicely, increasing the contrast with the dark rustication.
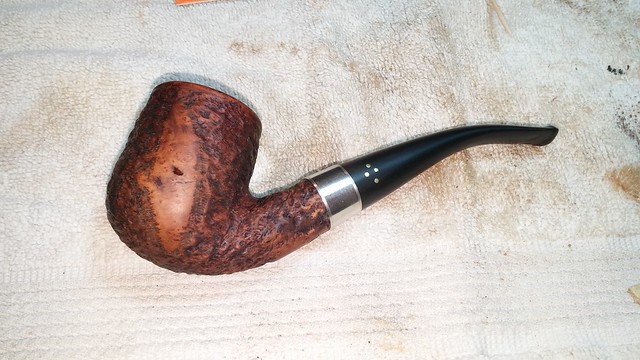
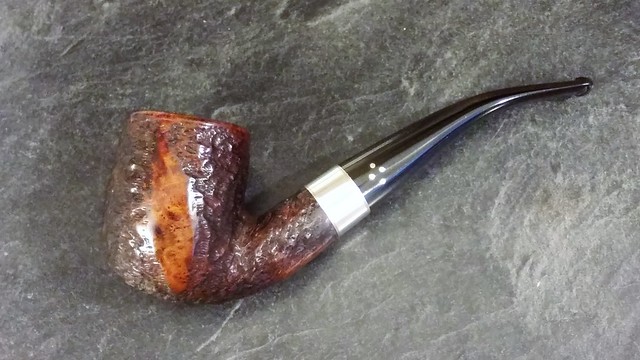
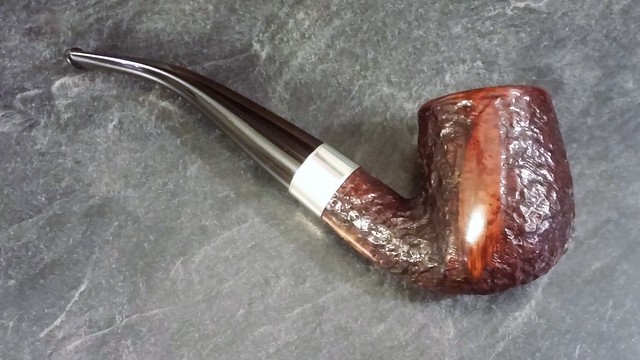
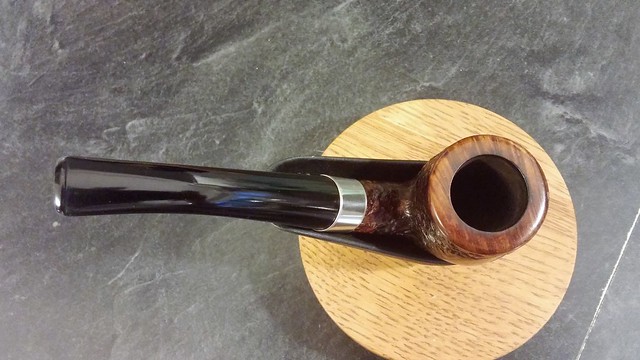
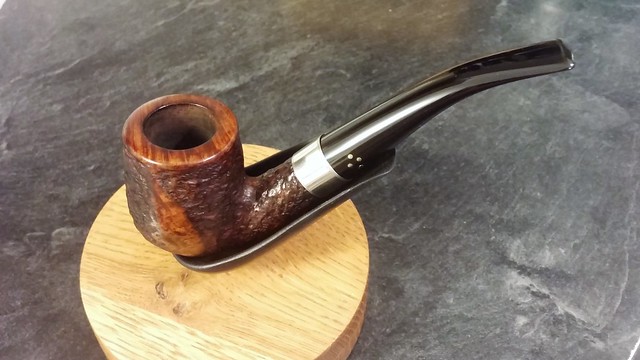
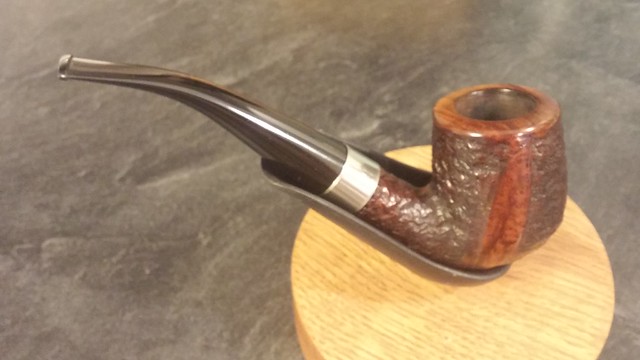
The finished pipe has come a long way since it hit the worktable a few days ago. Gone is the grubby old pipe, replaced by polished briar and deep black vulcanite. This Brigham 4 Dot Bent Billiard is ready to take its place in its new owner’s regular rotation, where it will doubtless serve well for decades to come.
Thanks for following along on this rather extensive refurbishment. It took some time, but I think the results speak for themselves.
Here’s the finished pipe. Until next time, Happy Piping!

Interesting you should post this now Charles. I have a pipe (not a Brigham) coming my way with a similar issue but also a crack running from the end of the missing chunk. It is in the identical location and my plan to repair is virtually the same. Well done.
LikeLiked by 1 person
The small world of pipe repair, Steve! There’s only so many things that can go wrong with briar, I suppose. 😄
LikeLike
Very nice recovery of the shank repair, Charles.
LikeLiked by 1 person
Thanks Dal. This surprise repair shows the value in keeping a small supply of shank bands handy – you just never know when you’ll need one.
LikeLike
Yes, the band was necessary and it looks good, but I know you hate covering that Brigham stamping!
LikeLiked by 1 person
Charles, Lovely job. I know how you love your Brighams. Do you collect other Canadians’ work, such as Blatter’s and Paradis’s? As a New Yorker, I’m equally drawn to Wilkes, Wally Franks and the Nastris’ Barclay-Rexes and Trinity’s, plus our long-gone local masters like Aaron Beck of Queens, Don Lou of Brooklyn, Gregorio of The Bronx, Joe Cortegiano, Eddie Burak (how dare I put him at the end of the line, Ed will ask — purely alphabetical (not), Ed, but love you all the same) and others. Carry on. Todd
LikeLiked by 1 person
Thanks Todd. I do have a few Paradis pipes in the rack, and I watch for Blatter & Vesz pipes as well. All well made, though covering a wide price range. 😀
LikeLike
Reblogged this on rebornpipes and commented:
Charles’ repair on the shank is a classic repair of a serious flaw in the briar of a Brigham. Well done.
LikeLiked by 1 person
Looks great! As someone who is starting out on refurbishing some estates, would it be better for me to do the S/A treatment before I restain to possibly avoid getting alcohol on the newly stained stummel?
LikeLiked by 1 person
That is a good idea, especially if you use alcohol-based dyes. Fyi, I use an eye dropper to add alcohol to the bowl for a bit more control.
LikeLike
Nice work on the shank Charles!
LikeLiked by 1 person