
One of the many benefits of belonging to a pipe club is the access membership provides to other pipe collections and tobacco cellars; this was demonstrated for me last November when the Briars & Bull Pipe Club here in Kitchener, ON held a Swap Meet during our monthly Smoker. Folks brought in pipes and tobacco to barter, sell or trade as they saw fit, and more than a few items migrated between collections that afternoon. Among them was this Pioneer meerschaum, which ended up in a small pile of goodies in front of me at the end of the day.
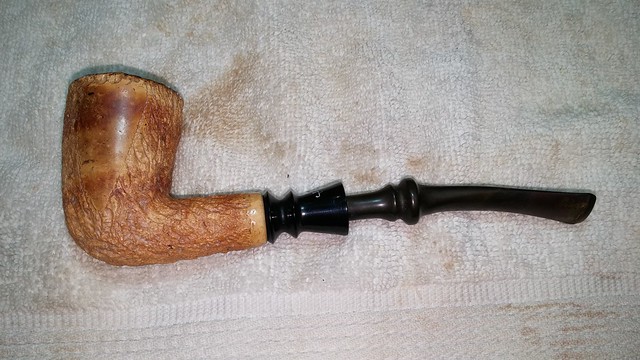
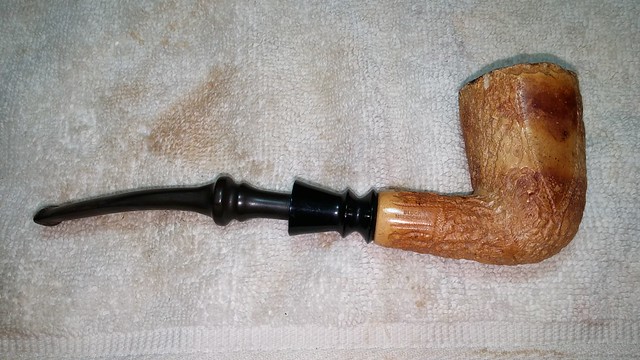
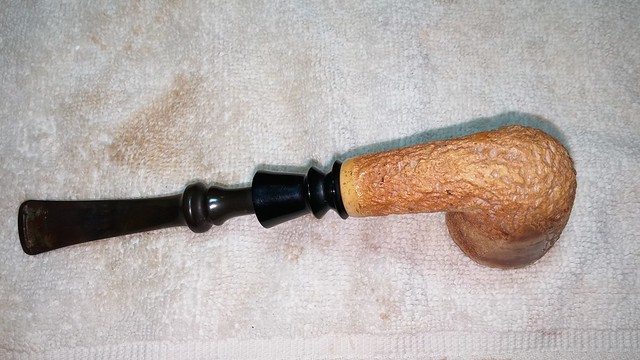
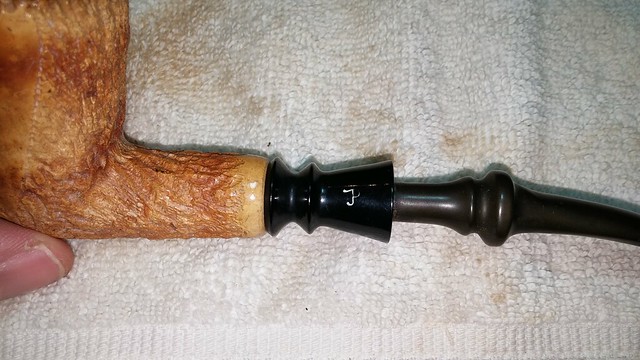
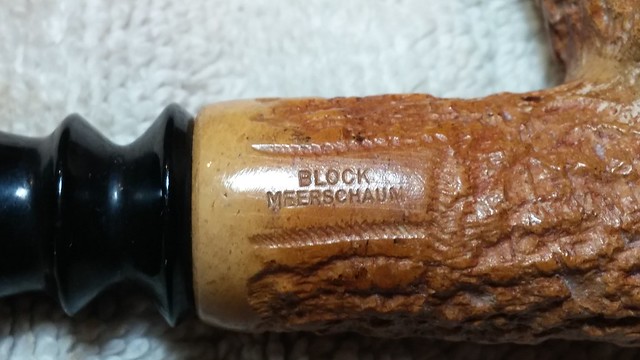
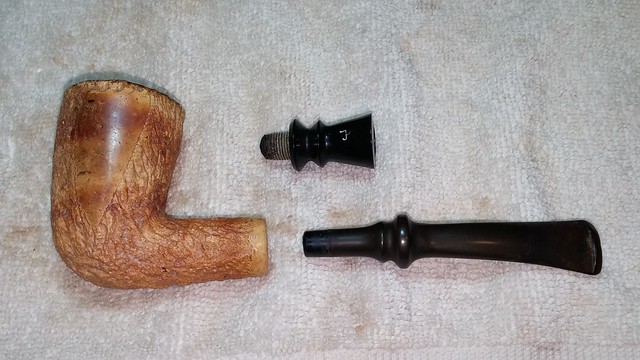
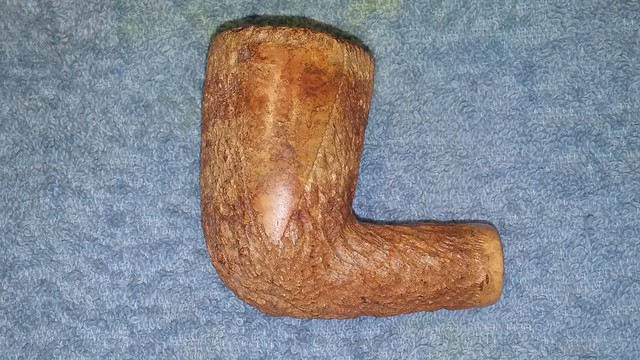
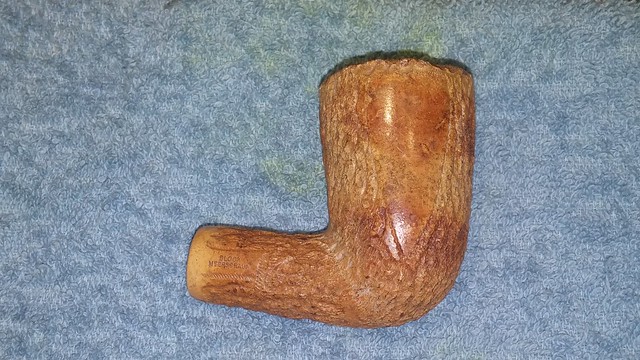
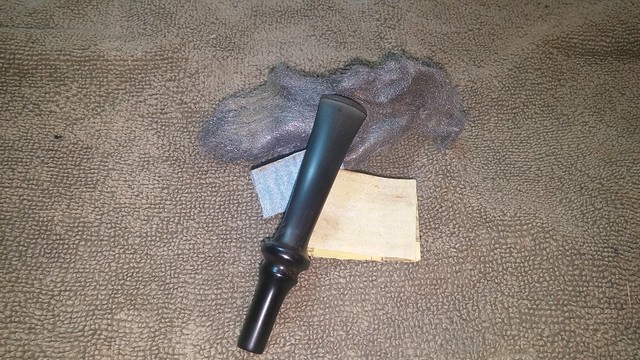
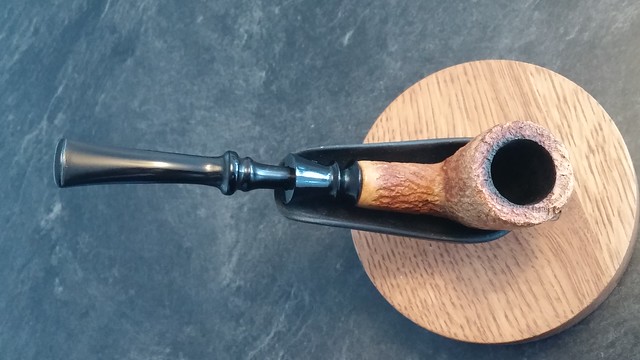
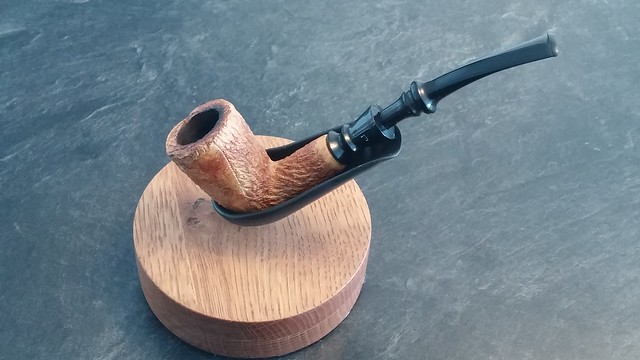
The pipe is made of African or Tawny Meerchaum, known for its tannish brown colouring, distinct from the pure white of Turkish Meerschaum. The pipe is a mostly-rusticated Bent Dublin shape which could just be tall enough to call a Stack, featuring two triangular areas of smooth finish, one on either side of the bowl. The shank is stamped “Block Meerschaum” on the right side, and the black plastic shank extension is marked with the Pioneer “P”. A fancy freehand-style stem finishes the look.

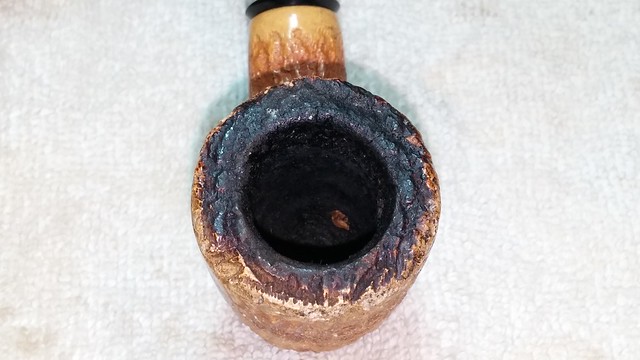
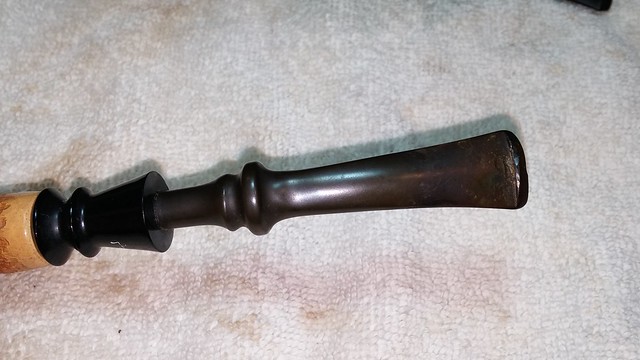
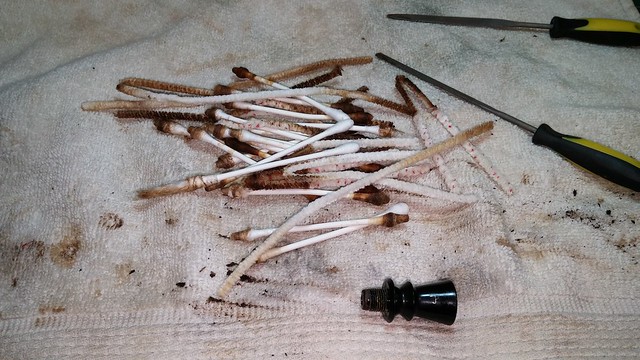
The pipe was in need of a good cleaning, and smelled strongly of vanilla aromatic tobacco but otherwise was sound. There was a fair amount of cake built up in the bowl which would have to come out, and lava had boiled up and over the rim, filling in much of the rustication there. The black plastic shank extension was slightly overclocked but otherwise undamaged. The stem showed a few deeper bite marks near the button but was only lightly oxidized.
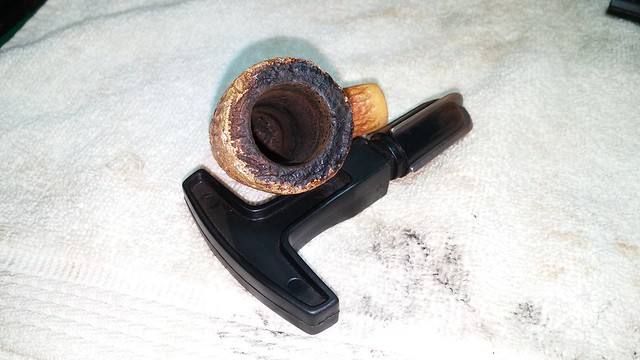
I removed the stem from the shank extension and unscrewed the extension from the meerschaum shank. The glue that had originally held the extension in place had simply given up the ghost, but the threads looked to be in decent shape, though it was hard to tell through the black goo I found hiding in there. Ick.
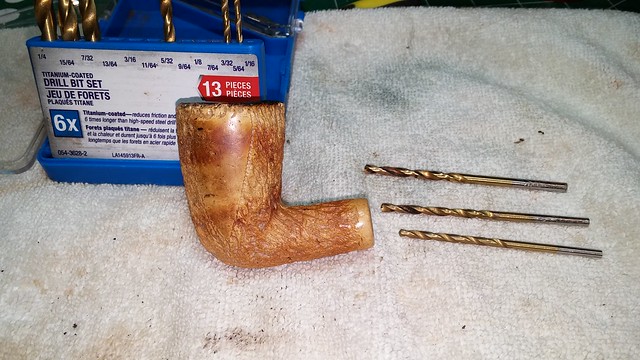
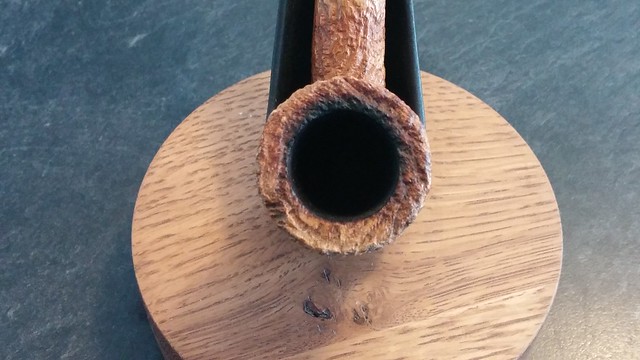
My Castlefod reamer made short work of the cake in the bowl, though I worked slowly and carefully – both because it’s relatively easy to crack a meerschaum bowl with over-enthusiastic reaming, and also because this pipe has a conical tobacco chamber. This meant I had to work in reverse order through my cutting heads – reaming with a larger head just until I cleared the carbon from the meer, and then switching to a smaller head to move down the cone without damaging the chamber walls. This series of pics shows this “step reaming” clearly, and the finished bowl after clearing out the leftover “steps” with sandpaper.


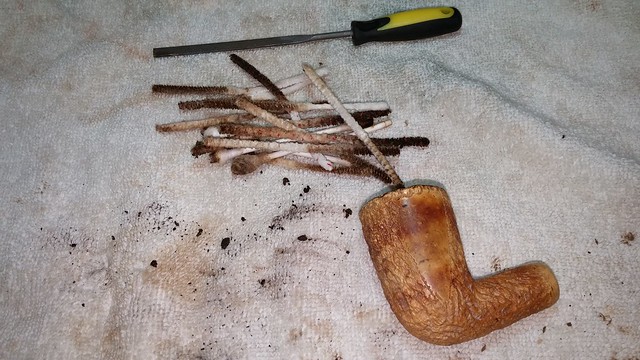
The gooey aromatic blend favoured by the previous piper had made a gunky mess of the stummel’s internals. I used a lot of pipe cleaners and cotton swabs dipped in alcohol to cut rhough and remove the grunge. Many people will tell you that alcohol and meerschaum don’t mix; this is certainly true of pressed meerschaum – alcohol can dissolve the adhesive holding the meer dust together, destroying a pressed meerschaum bowl. Solid block meerschaum is much more forgiving, though I take care to follow an alcohol dipped swab with a dry one to soak up any excess liquid quickly.
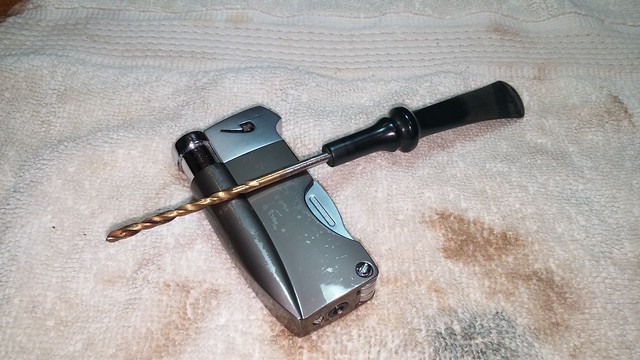
The airway through the shank was quite clogged up with tars and residues; to open up the flow I very gently reamed the airway with several sizes of drill bits, turned by hand. This can get a bit delicate, as the goal is to remove the crud blocking the draw without cutting into the meerschaum.
When I had the meerschaum as clean as it was going to get, I set the stummel aside to rest and attacked the built-up tars trapped in and around the plastic shank extension. Lots more alcohol, pipe cleaners and cotton swabs!
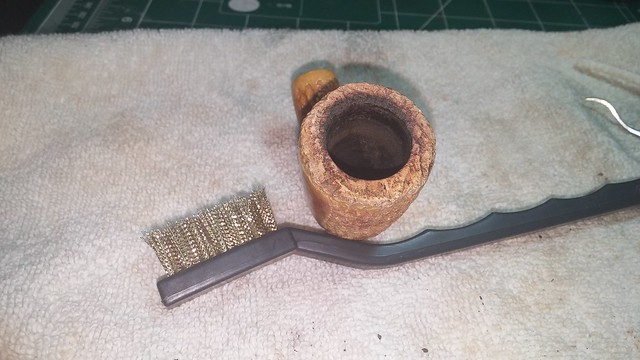
I took a break from messy smelly tar removal at this point, and used a brass bristle tire brush to scrub the lava out of the rustication. I focused on the rim area, but ended up giving the entire stummel a gently brushing while I was at it.
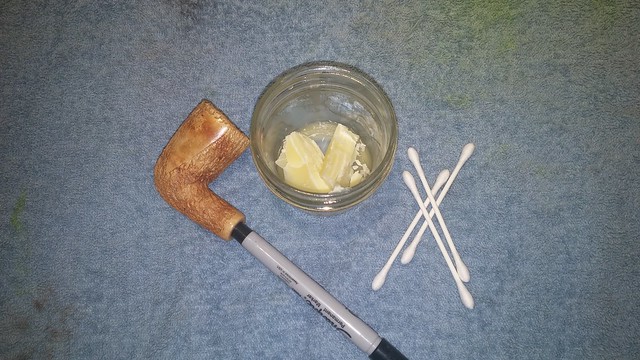
Before working on the stem, I decided to give the stummel a nice coat of beeswax. I’ve described my meerschaum waxing routine several times on the blog now, so I hope readers have realized how easy this process can be. The purpose of waxing meerschaum is really to assist in the colouring or “ageing” of the pipe. It’s harder to see patina develop on African meerschaum, but the process is the same as that for white Turkish meer.
I set up my station for meerschaum waxing by melting a few tablespoons of pure beeswax in a small Mason jar, which I placed next to my heat gun, running on low heat. I warmed the stummel over the heat and a cotton swab served as my wax mop, delivering melted wax to the warm meerschaum. I coated the entire stummel several times, until the warm meer no longer absorbed the wax. At this point the stummel was set aside to cool, after which any excess wax was buffed off with an old towel.
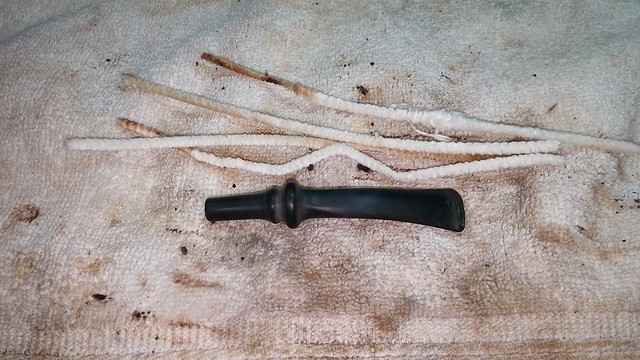
Moving back to the stem, I found the airway here remarkably clean especially when compared to the state the shank had been in. I only needed a few pipe cleaners to tidy things up.
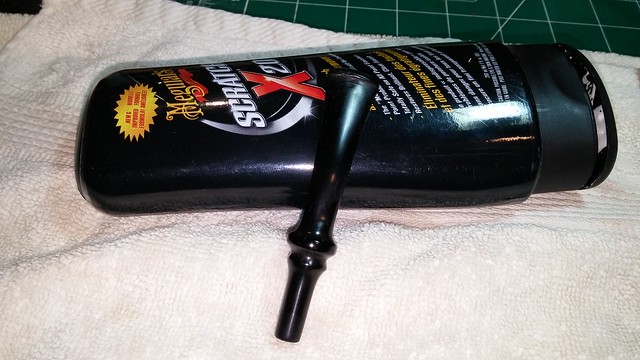
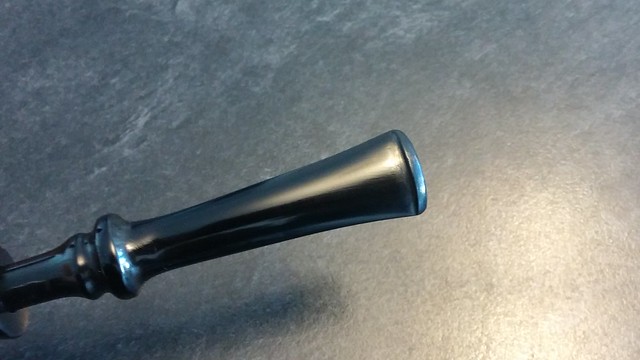
Meguiar’s Scratch-X Plastic Polish is great for quickly scrubbing away dirt and light oxidation from pipe stems. I apply it with a cotton pad and scrub til the stem shines.
Without all the gooey crud in the shank to hold it tightly in place, the stem wiggled in the shank extension and was prone to falling out. I tightened things up by heating the end of the stem over a lighter until warm and expanding the tenon with the smooth end of a suitably sized drill bit.
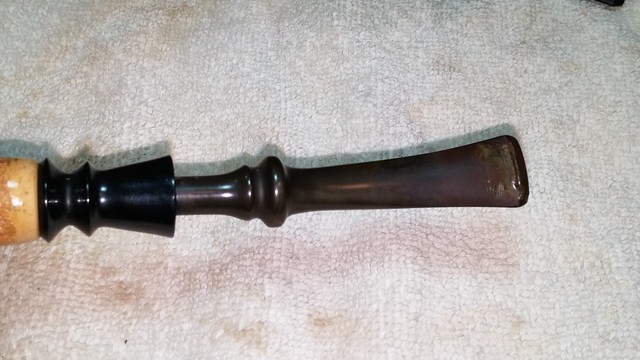
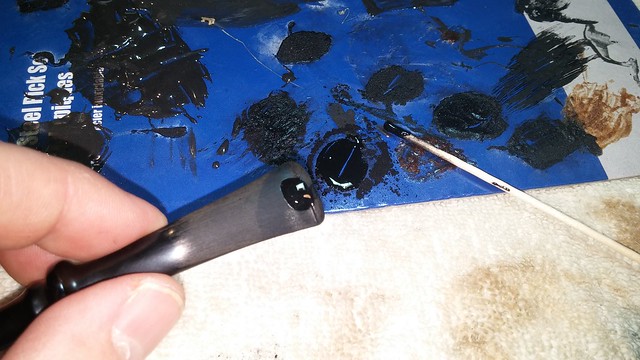
The last major task of this refurbishment was to deal with the tooth dents marring the button area of the stem. I roughed up the vulcanite to ensure good adhesion of my patch material and then drop filled the dents with thick CA glue mixed with charcoal powder.
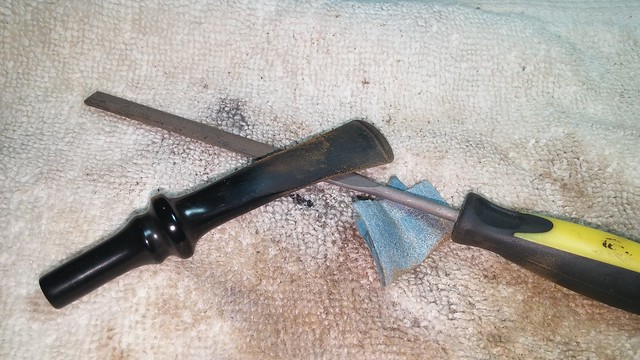
I let the fills cure for several hours before smoothing the repairs with needle files and sandpapers. When I was happy with the finished shape, I sanded out the file marks with 220 and 320 grit sandpapers followed by a good polishing with 0000 steel wool.
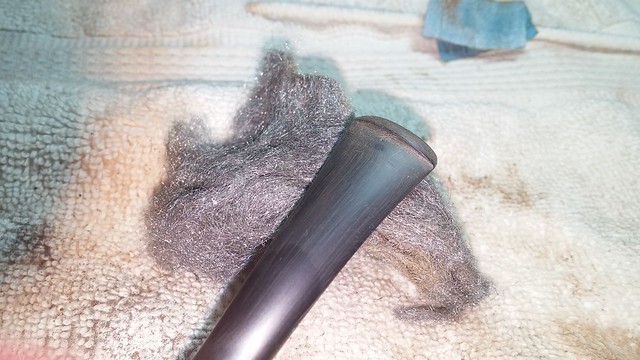
This pipe is destined for my own use, so I passed on further polishing with micromesh sanding pads. I’ve found that, provided the repair work is smooth, I can achieve satisfactory results buffing after steel wool, at last for my personal needs. Someone else’s pipe always gets the micromesh.
To that end, I gave the stem and shank extension a run of White Diamond compound on the wheel and a few light coats of Carnauba wax. A drop of CA glue on the threads secured the shank extension in place on the meerschaum stummel, and the pipe was ready to go.
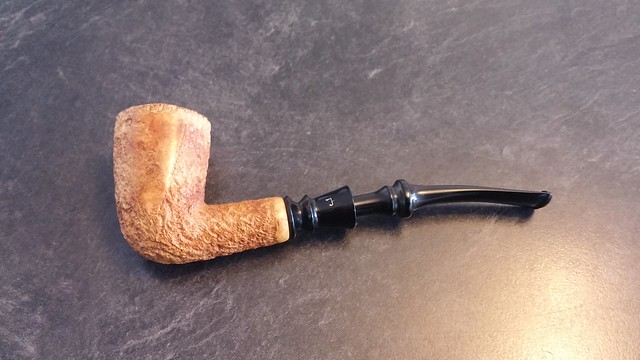
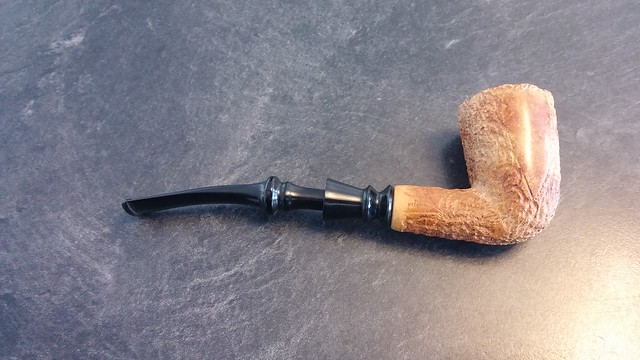
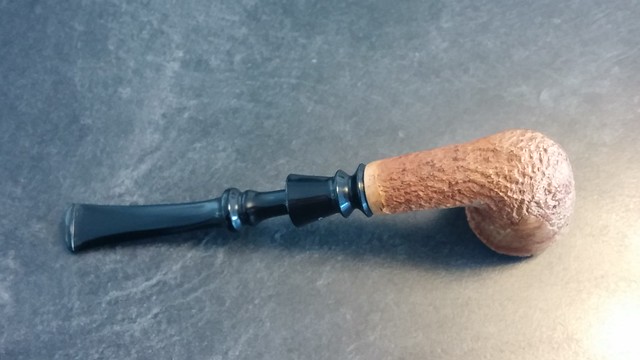
Most of the transformation of this refurbishment is internal to the pipe. The tawny meerschaum, while noticeably cleaner looking than before, is more or less the same shade of mottled tan with a few darker streaks of colouring. The big difference is in the way the pipe feels and smells – the meer is clean, the plastic shank extension is smooth and shiny and the vulcanite stem glows a deep black. Gone is the overbearing vanilla-and-soot aromatic odour; the only aroma enveloping this pipe now is the gentle honey scent of beeswax.
I’m looking forward to having a reliable, good-smoking meerschaum pipe on hand, and by all indications, this pipe is a good smoker. If I can keep it cleaner than I found it, this Pioneer should prove a faithful smoking partner for many years.
Here’s the finished pipe. Thanks for looking and until next time, Happy Piping!

WOW ! I can barley recognize that pipe anymore. Another fine job my friend. (Ps the nasty smell was solani sweet mystery X) See you soon, Adam.
LikeLiked by 1 person
Thanks Adam. Another mystery solved too! 😀
LikeLike
Hi. I just acquired one of these pipes and your demo will be a great help as it is filthy. I do have one question. The smooth side panels on my pipe are quite dirty and I don’t want to mar them with the bristle brush. Do you think a gentle scrubbing with alcohol will do the trick?
LikeLike
Hi Arden. Try cleaning the exterior of the pipe with a damp cotton pad. Plain water will remove a fair amount of surface dirt. Another option is to use high-proof alcohol on a pad (I use 99% isopropyl). Note that alcohol will likely bring some coloring to the surface as it will dissolve some of the tars caught in the meer. This is ok, as a good waxing after cleaning will draw even more colour to the surface. Avoid using alcohol on pressed meerschaum as it will dissolve the glues holding the meer dust in place.
LikeLike
I actually took a toothbrush and mild detergent to it followed by a good rinse with good results. I’ll do a final cleaning with the alcohol to get the last of the crud. My black plastic shank extension was slightly overclocked also but undamaged. Finger tightening puts the Pioneer “P” right on top instead of on the side without forcing at all. It’s actually still on the loose side that way. My question to you is do you see any difference using two part epoxy to reglue it as opposed to the glue you use? I’m thinking of the longer working time of seven minutes for this particular glue before hardening.
LikeLiked by 2 people
Two part epoxy will be fine.
LikeLiked by 1 person
Also the thicker epoxy would do a good job of filling that loose fit.
LikeLiked by 1 person