
It’s officially Winter, and as the cold takes hold here in Southern Ontario, here is a pipe story that is sure to warm the heart. It involves a long-lost pipe, a walk in the pasture and a clever fellow who recognized a unique opportunity to secure the perfect gift for a hard-to-buy-for family member.
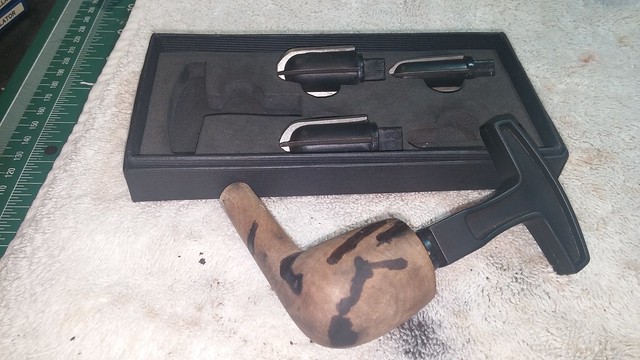
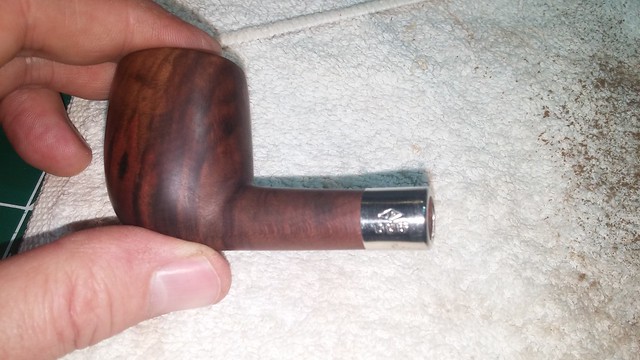
I was contacted by a DadsPipes reader with a restoration request. It would be, he said, a “full overhaul” job, and included this picture of the pipe – well, really half a pipe.
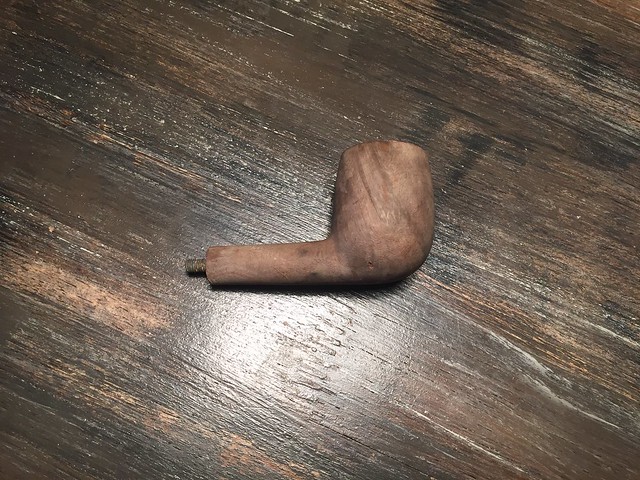
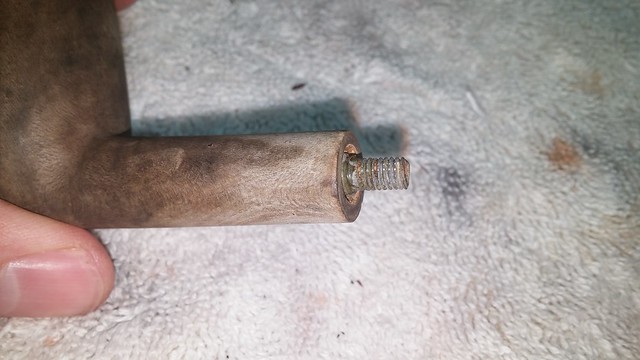
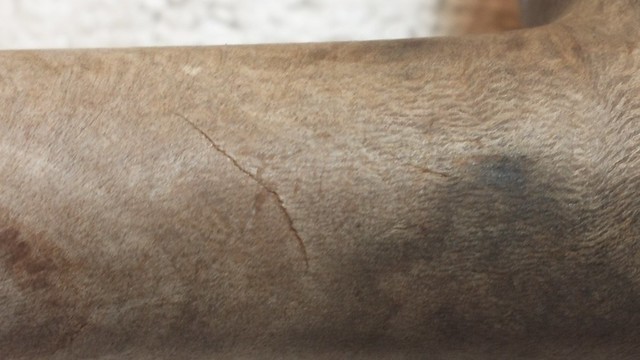
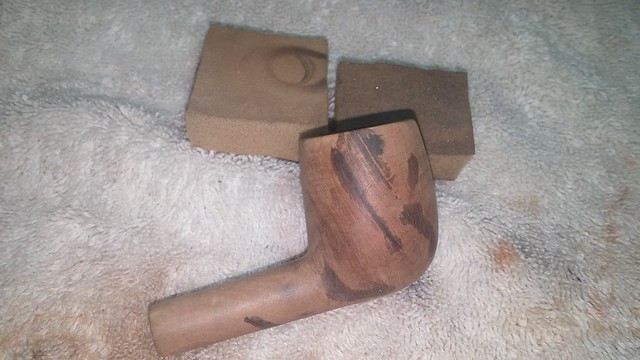
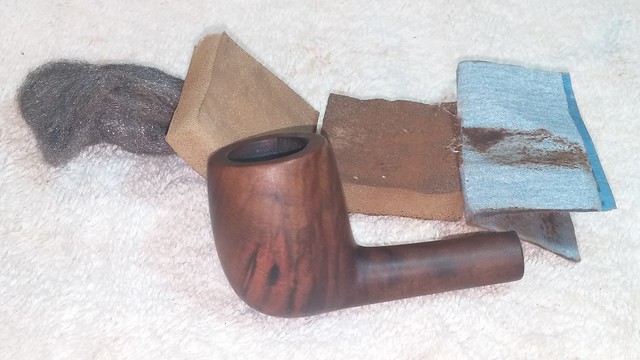
As you can see, the pipe was just a stummel and an old-style threaded reverse tenon. There were no obvious cracks or other major structural damage, and I was fairly certain I could find a suitable stem, so I asked the owner to send the pipe to me. In due time, a parcel arrived at the door. Here are a few pics of the pipe as it looked when it arrived.
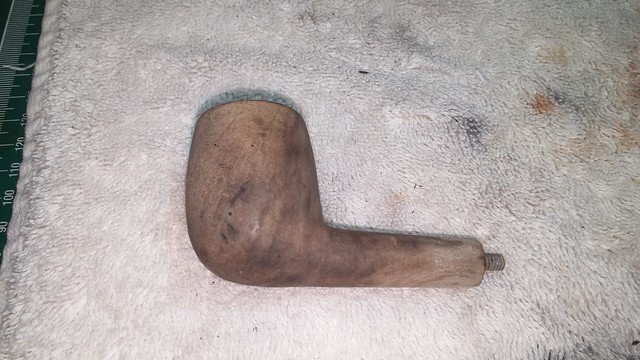
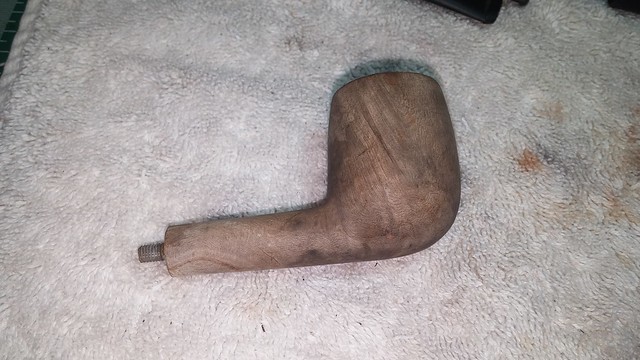
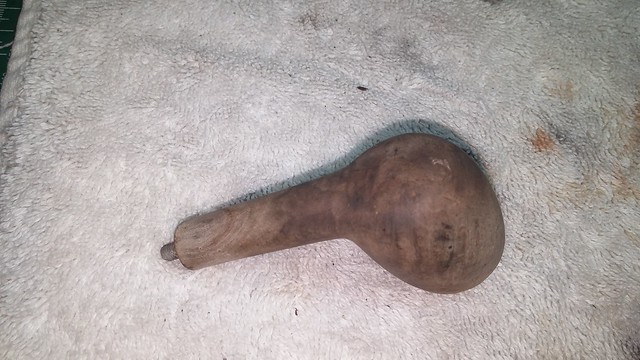
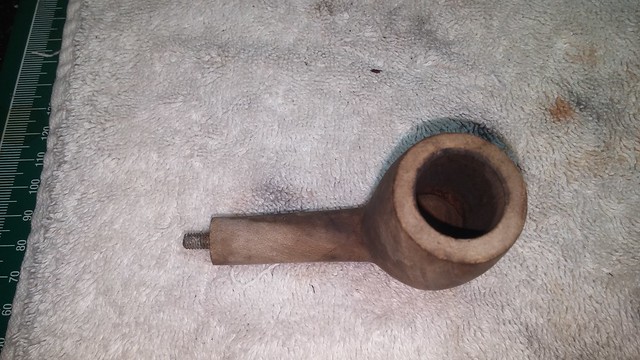
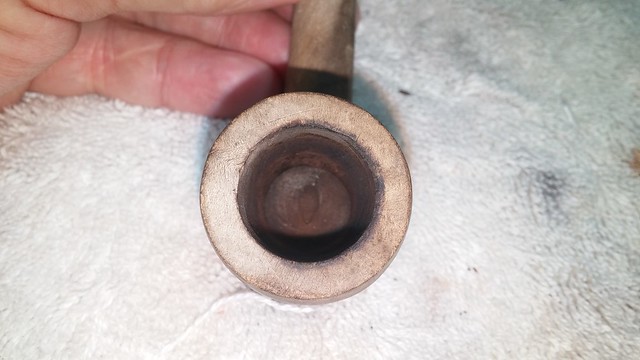
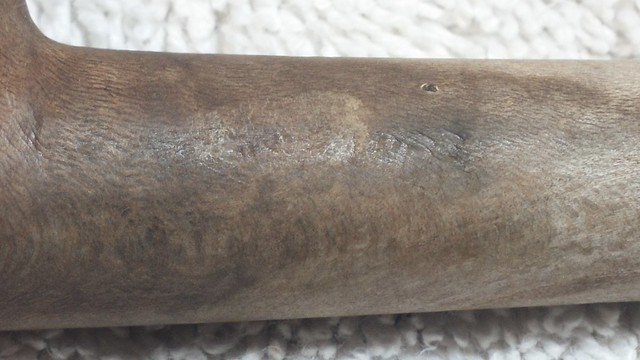
The wood was weathered and faded to a dull grey with darker streaks and looked to me like it had been under water or at least very wet for a period of time and then dried. The surface of the stummel was crazed with tiny cracks much like those in deck boards baked in the sun. Any markings the pipe once carried are long gone.
I contacted the owner to let him know that the pipe had arrived safely and asked him if he knew how the pipe had come to its current state. Here is the story:
The pipe, I am told, was discovered in a pasture by the owner last summer while taking a walk on family land with his stepfather. How the pipe came to be in the pasture is a mystery lost to time. Perhaps the stem broke while its original owner was working the land; perhaps it dropped unnoticed from a pocket. What was immediately evident was that the pipe had been exposed to the elements for a long time.
After, I am sure, a bit of research, which in my romantic mind’s eye involved dusty old leather-bound albums of yellowed photographs, it was determined that the pipe had belonged to the older gentleman’s great-great uncle. The stepfather being one of those notoriously impossible to buy for men, our young fellow determined to have the pipe restored as a Christmas gift.
And so the pipe moved from pasture to pocket and thence to my worktable, where I sat and stared at it, wondering how (or if) this weather-beaten piece of wood could be rejuvenated.
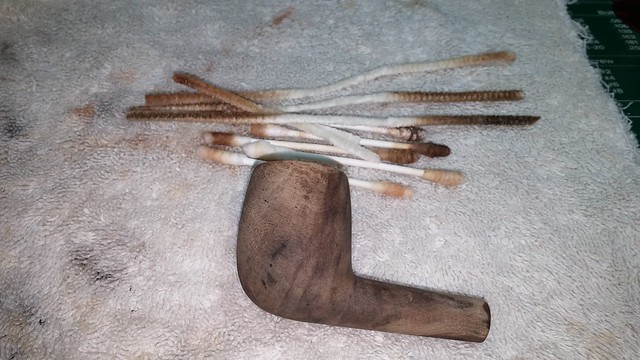
The stummel had obviously been cleaned of dirt and debris before I received it, but I decided to start off the restoration by soaking the stummel in an alcohol bath overnight to remove any remaining soil and kill off any potential molds or fungi lurking about. I then used pipe cleaners and cotton swabs to clear out the loosened debris.
The stummel felt very light in my hands, and the wood proved to be rather porous. I ran clear CA glue over the myriad surface fissures to seal them up, and the glue was instantly sucked into the wood. A lot of the wood’s thirstiness can be attributed to the pipe’s long exposure to the elements, but I was also pretty sure I wasn’t dealing with briar at this point.
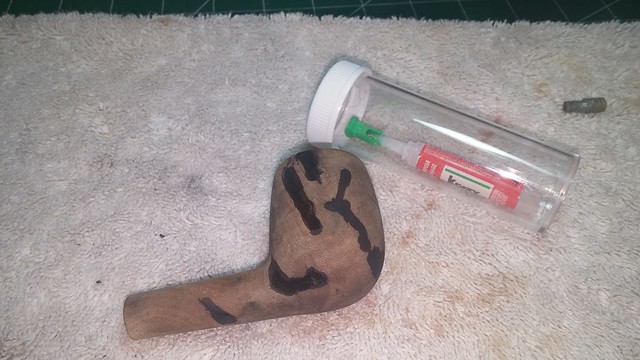
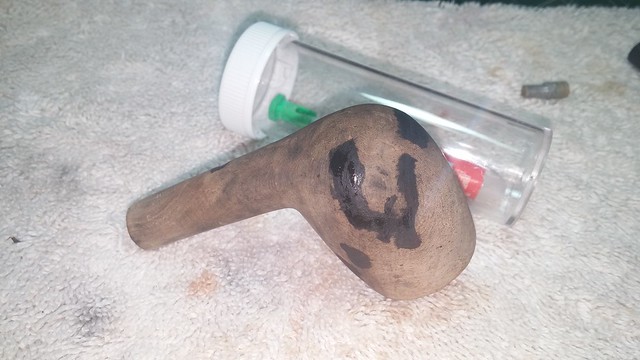
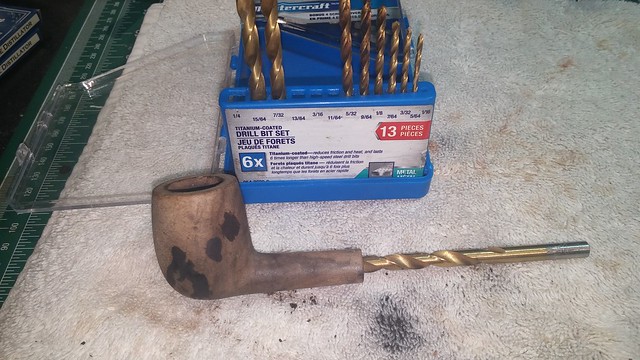
I decided to convert the stummel to a push tenon, as I wasn’t sure the wood had the structural integrity to withstand the constant torque of a threaded stem. With that in mind, I used a series of drill bits turned by hand to open up the mortise and clear out the remnants of the old glue that had held the reverse tenon in the shank. With that accomplished, I reamed the bowl clear, though to be honest any cake built up in there had long since washed away.
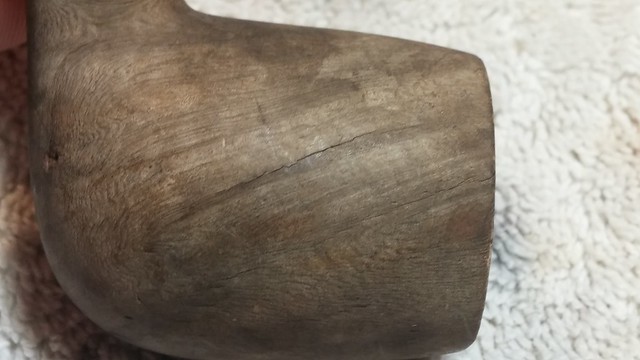
The stummel was as clean as it could be on the inside, so I set myself to working on the exterior. I used various sandpapers and sanding sponges to remove the damaged outermost layer of wood from the bowl and shank. This proved to be a long and tedious process made more difficult by the depth to which the CA glue had been drawn into the wood. This picture shows the pipe after about a half hour of work. The glue lines are still quite dark, while the wood grain underneath is just starting to peek out.
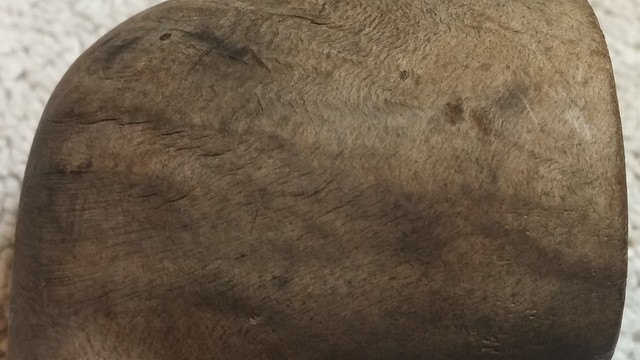
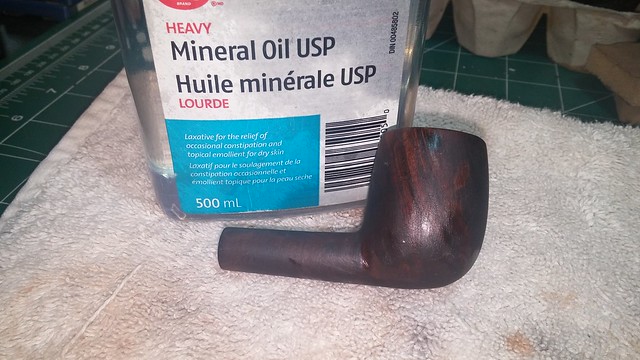
After a bit of thought, I realized that most of the difficulty I was encountering rose from the exceeding dryness of the wood. It was literally parched. I decided to try wiping the wood with mineral oil on a cotton pad to reintroduce some moisture. The oil was absorbed as quickly as the glue had been, with dry patches showing almost instantly. I applied more oil, wiping and wiping again until the dry patches were gone and the wood was a more or less homogeneous dark brown colour.
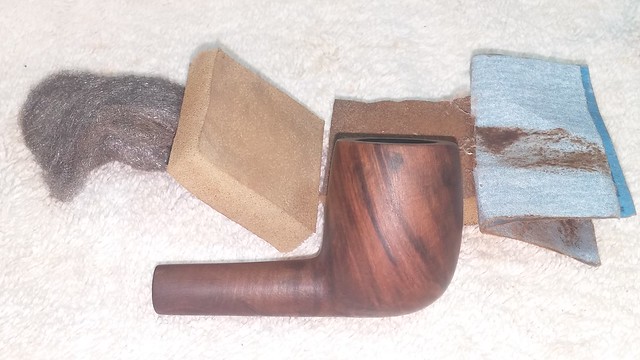
I let the stummel rest overnight to give it time to find its equilibrium again. The following day I set to with 220-grit sandpaper, medium and fine sanding sponges and 0000 steel wool. The damaged outer layer of wood, now softened by the oil, came off much more easily but very thickly. Notice the clogged paper in the pic below. I went through almost an entire sheet of 220-grit sandpaper on this stummel as the paper clogged up and quickly became useless.

The effort was worthwhile though, as eventually the damaged wood was gone, taking the last of the CA glue residue with it and bringing the wood grain into focus. I was right – this isn’t briar. My best guess is pear-wood, or perhaps olive-wood.
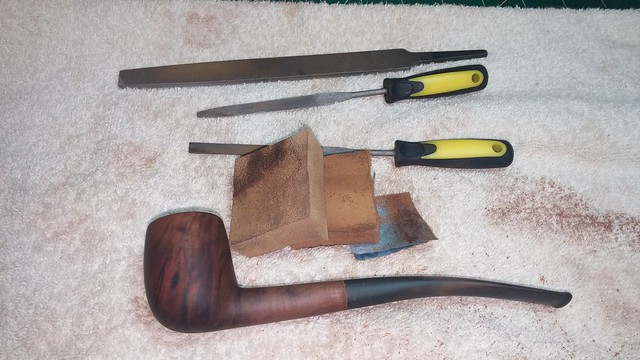
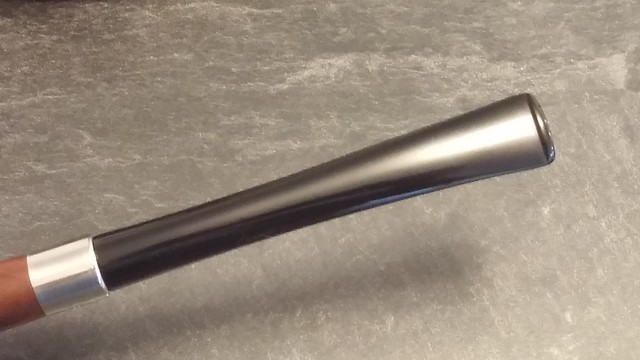
With the stummel more or less in its final shape I could fit a new stem. I dug up several possibilities from my box could work, but didn’t like the wide fishtail bit on most of them. They just didn’t work on a pipe this old. After some debate, I settled on a long, slender stem that suited the period better and which I felt gave the pipe a certain elegance. Here it is roughly fitted to the shank. The stem is a bit too curved for this application; I ended up straightening it somewhat, which you’ll see in the pics of the finished pipe.
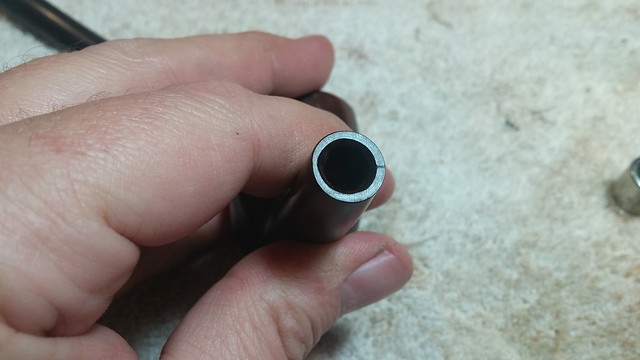
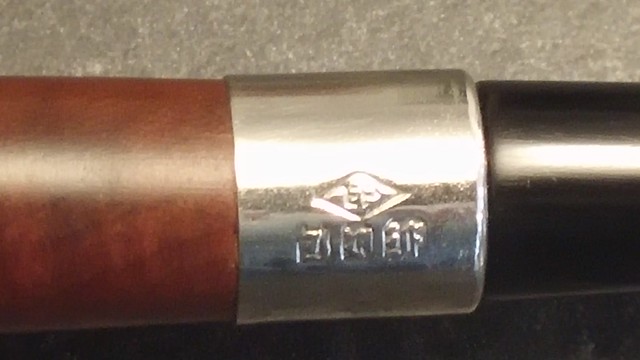
Not totally unexpectedly, the thin walls of the mortise weren’t quite up to the manhandling and cracked during the stem fitting process. Taking this minor setback in stride, I selected a shank band from my supplies to repair and reinforce the old wood.
The band is an end-cap style that wraps around the end of the shank slightly. It’s an older look which I thought suited the pipe very nicely. To seal the crack and add a bit of extra staying power, I wiped a bit of wood glue around the shank end before heating and pressing the band into place.
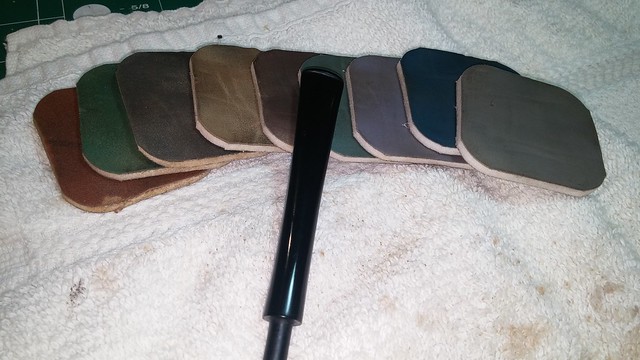
I polished the stem with micromesh sanding pads from 1500-12000 grits, wet sanding with the first set of three pads and dry sanding with the remaining sets.
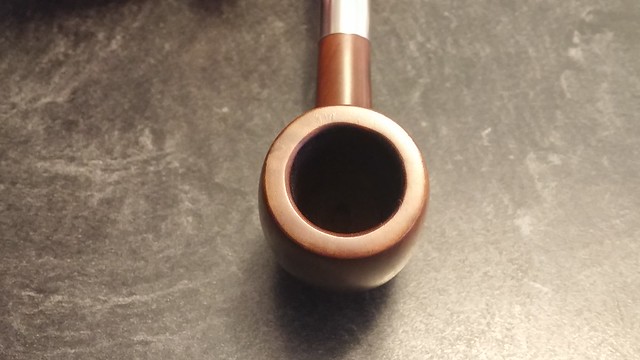
The pipe was ready for final buffing, so I took it to the wheel for a run of White Diamond compound and several coats of Carnauba wax. I have to say that the stummel took to the buffer like a duck to water – the wheel polished the wood to a lovely lustre and brought the grain into much sharper resolution than I thought possible.
This is likely due to the softer nature of the wood as compared to briar. If there had been any surviving stamps on the pipe, I would have had to tread very carefully indeed so as not to wipe them out, but in this case I had free rein to get the most out of the wood.
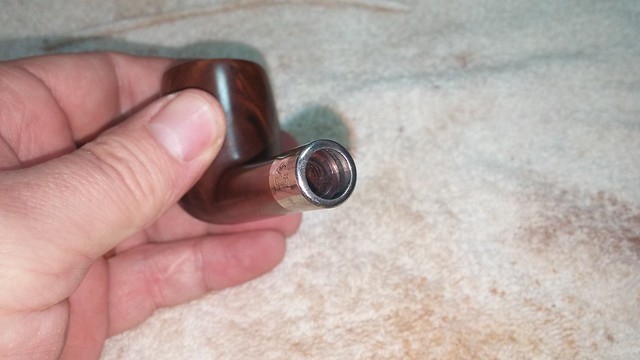
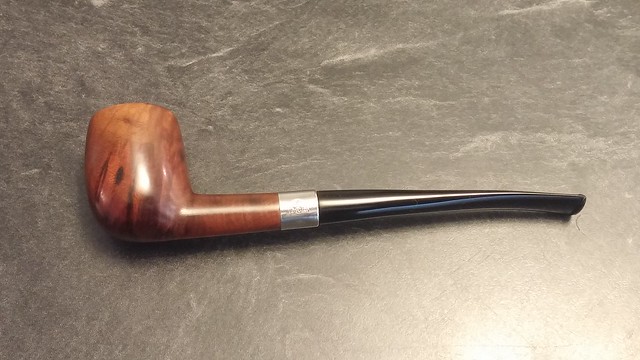
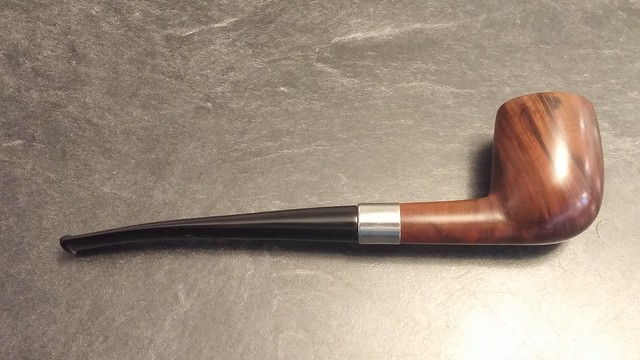
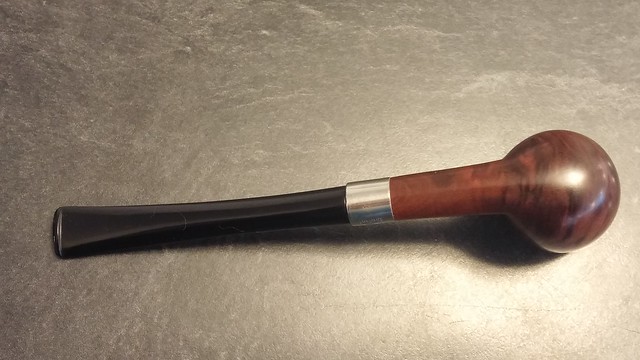
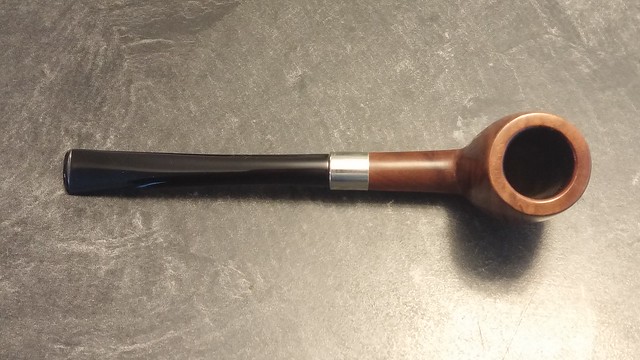
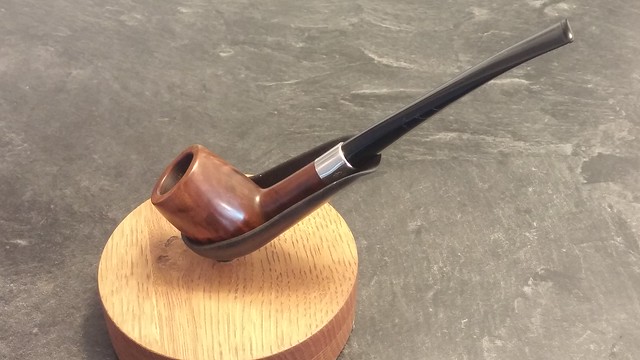
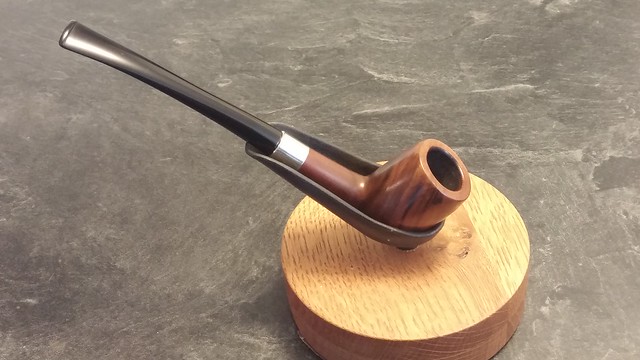
The finished pipe bears little resemblance to the weather-beaten piece of flotsam that arrived on the table a few days ago. The damage caused by exposure to soil, water, wind and sun are gone though they have left their marks on and in the wood – I did not stain the pipe, but age and experience have coloured it a rich chestnut brown shot through with an attractive darker grain.
The nickel band gives the pipe a military-mount look and the faux hallmarks combine with the gracefully slender stem to create a charming period impression. I’ve already sent a few pictures to the pipe’s owner, who has responded very enthusiastically to the restored pipe, as will, I am sure, his stepfather upon opening his son’s gift this Christmas.
I’m always pleased when I can preserve and restore a cherished family heirloom; thanks, Matthew, for allowing me to work on this piece for you. May your stepfather enjoy it in good health for many years.
Here’s the finished pipe, which is on its way home to its family as, I hope, are all of you this Holiday Season. Thanks for looking, and until next time, Happy Piping!


Charles, this is a superb restoration you have performed. An amazing transformation. Upon first seeing the stummel I immediately thought of it being Black Walnut. I could be wrong, but that is what it looks like to me. Congrats again on this restoration. I’m sure the owner will be over the moon on its new look.
LikeLiked by 1 person
Thanks Al. When it first arrived I wondered if I could do anything with it at all. Glad it’s back in the saddle so to speak!
LikeLiked by 1 person
Wow, nicely done Charles. It’s amazing what life you brought back out of an old piece of deteriorated wood. And that stem looks like a perfect fit too.
LikeLiked by 1 person
Nice work. It looks like Black Walnut to me as well. Did you unthread the metal tenon before drilling or did you just drill it out?
LikeLiked by 1 person
Thanks Steve. Yes, the old threaded tenon unscrewed easily. The glue around the threads was there in name only by the time I got my hands on it.
LikeLike
Reblogged this on rebornpipes and commented:
Really nicely done reclamation by Charles! Thought I would share what can be done! Great work Charles.
LikeLiked by 1 person
Thanks for the reblog! This one was a fair bit of work but the results were very gratifying.
LikeLike
Charles, wonderful job! I found myself rooting for the old boy. I’m thankful he found his way to capable hands! The transformation is stunning. The band and stem simply work.
LikeLiked by 1 person
Thanks Dal!
LikeLike
Looks smashing with that style band, great job saving that one for future generations.
LikeLiked by 1 person
Thanks Al. I’m hoping it’s all smiles around the tree on Christmas with this gift pipe. I sure would be grinning!
LikeLike
This is a great transformation. I didn’t know that pipes could be made out of pear/olive wood.
LikeLiked by 1 person
Thanks, Chap. While briar is definitely the most widely used wood for pipes, it’s not alone. You can also find pipes made of briar, pear, olive, and cherry woods. Meerschaum and clay have also been used for centuries. Several readers have suggested the pipe restored here may be made from Black Walnut.
It certainly keeps me on my toes when I set about identifying an old pipe!
LikeLiked by 1 person