
I spotted this Dunhill Dublin pipe on eBay. It was one of those listings that somehow flew almost completely under the radar, collecting just a few bids along the way. The eBay listing was chock full of superlatives extolling the many virtues of the product on offer, but I have learned to downplay or disregard such salesmanship when evaluating an online offering, choosing to rely more on product images than ad copy. The pipe looked to be in good shape, judging by the photos, so I tossed my hat into the ring.
More than half expecting to have my bid blown out of the water at the last minute, I was happily surprised when I won the pipe! In due course (or rather undue course, as the seller took over a week to ship the goods!), the pipe arrived at my door and I got my first good look at it. At first glance, the pipe appeared to be in excellent condition, but closer inspection revealed a few issues I’d have to contend with before I could call the pipe “ready to smoke”.
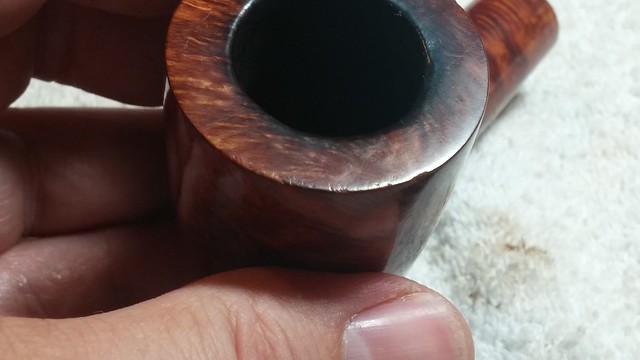
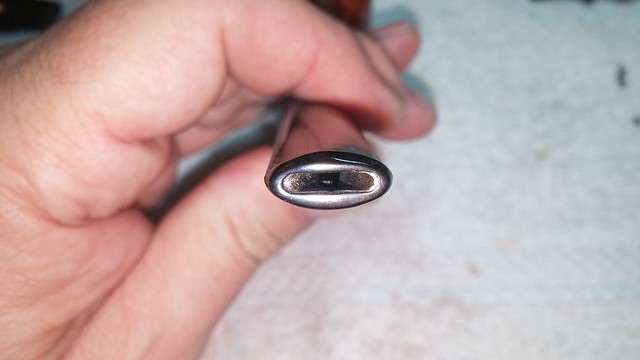
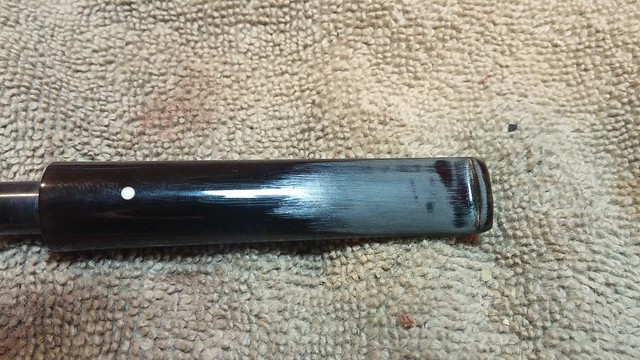
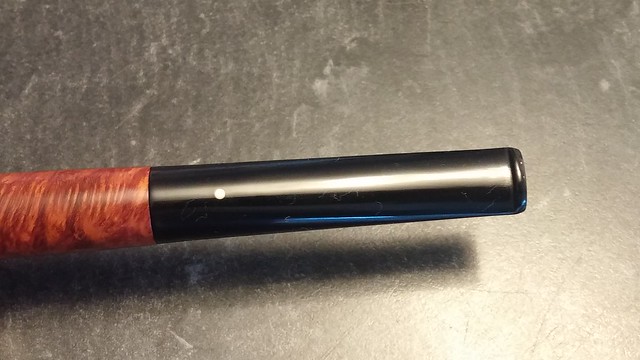
The pipe arrived heavily waxed, so much so, in fact, that I immediately wondered what the seller was trying to hide. As it turns out, there were several issues – a darkened rim knife gouges to the inner edge of the chamber, a handful of smallish nicks and dings around the outer edge of the bowl, and some pretty significant tooth dents in the stem.
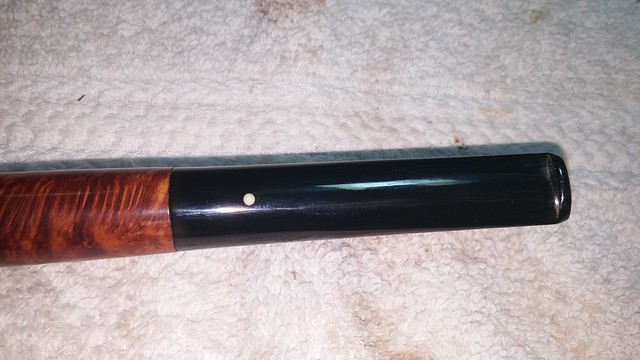
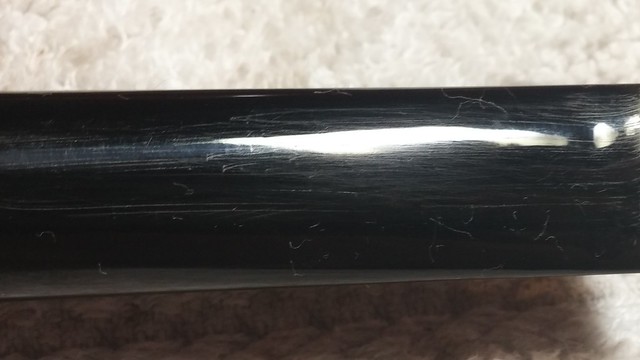
For the record, I’ve never seen such thoroughly buffed and waxed tooth dents. Too bad the wax didn’t hide the sanding scratches running lengthwise down the stem! On a positive note, the stem looked original, complete with White Dot, and the stummel had obviously been cared for. The bowl was reamed nicely, and the tobacco chamber was in excellent condition; the drilling is spot on.
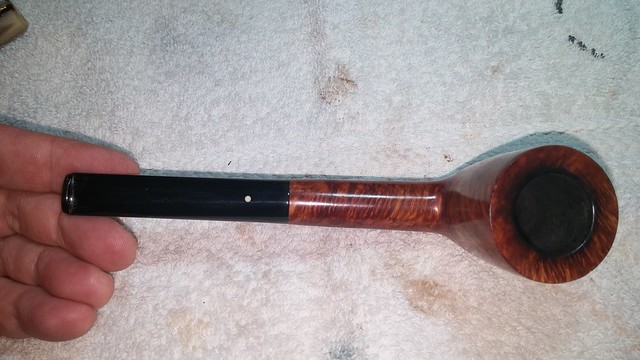
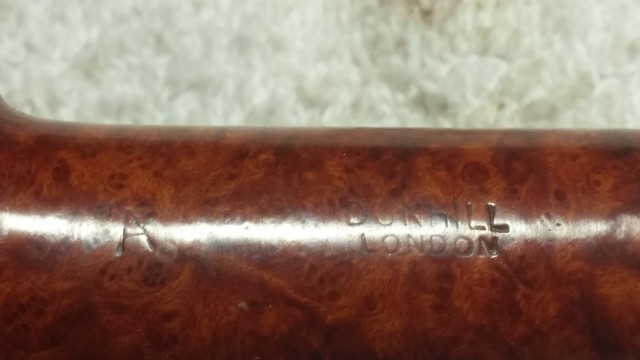
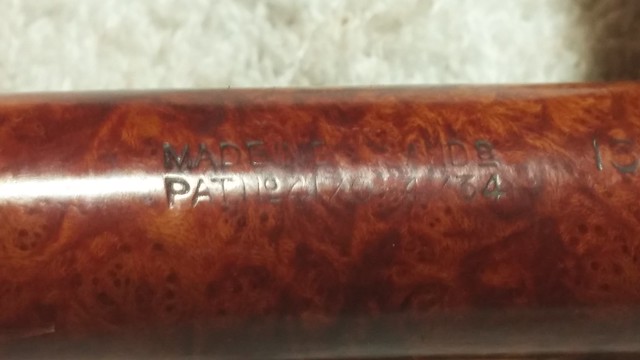
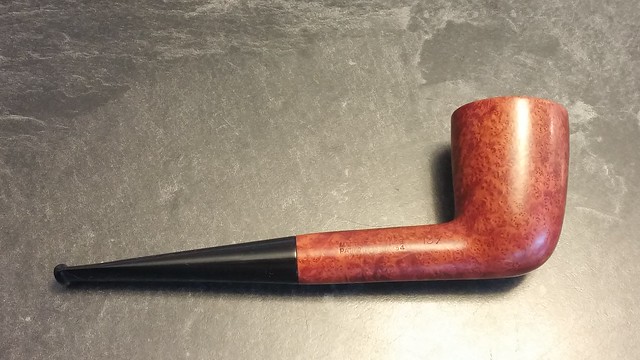
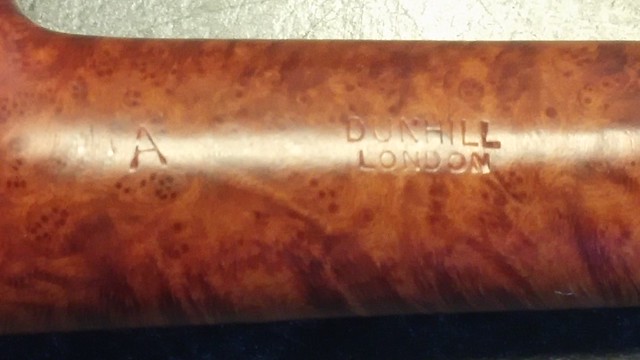
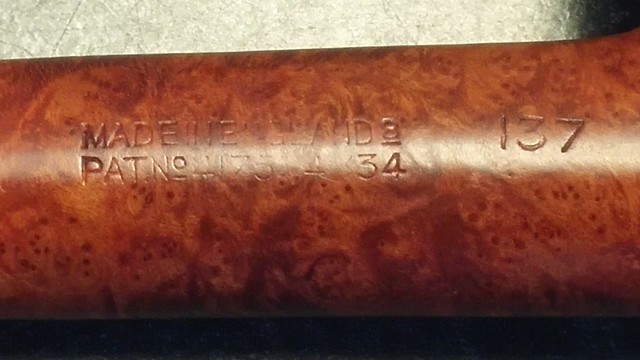
As can be seen in the pics, the stamps on this old Dunnie are worn (or over-buffed) in spots but still legible. The pipe is stamped “A” then “DUNHILL” over “LONDON” on the left shank, and “MADE IN ENGLAND 8” over “Pat. No.417574/34”, and a shape number, “137” on the right shank. According to the Dunhill Dating Key on Pipephil.eu, this combination of stamps dates the pipe to 1948.
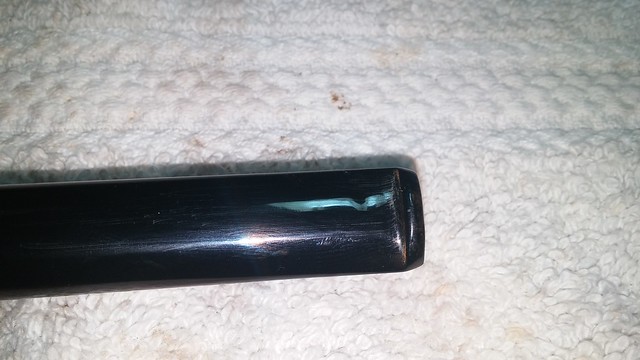
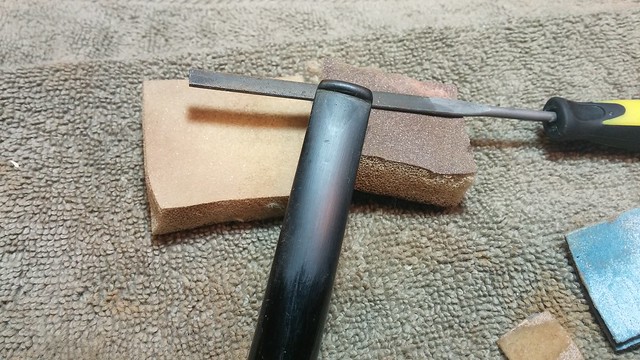
I started reworking this “eBay restored” pipe by wiping the stem down with alcohol to remove the layers of wax. A scrub with 220-grit sandpaper brought the tooth dents and a few wavy areas in the stem to light. The low spots show in these pics as black patches in the sanded areas.
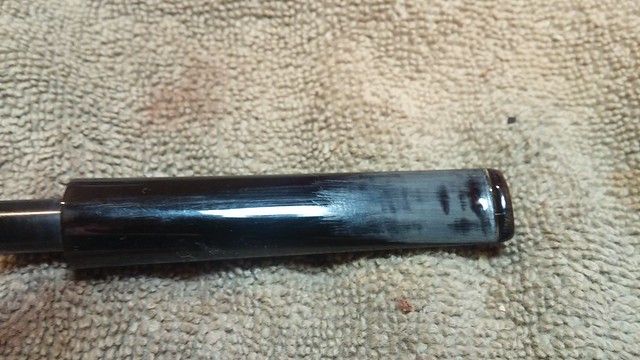
I mixed up some CA glue and charcoal powder, filled the damaged areas, and set the stem aside to let the fills cure completely before sanding and shaping.
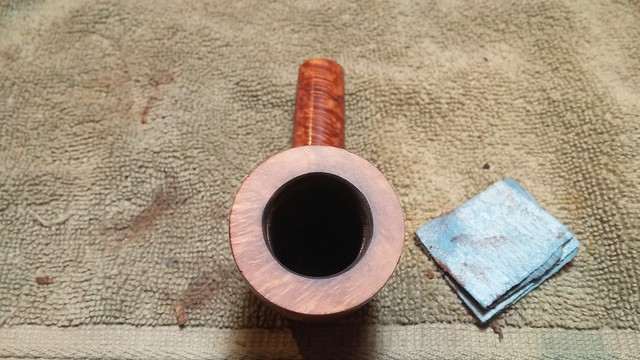
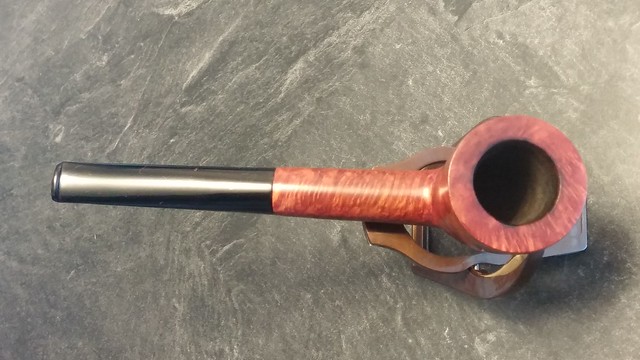
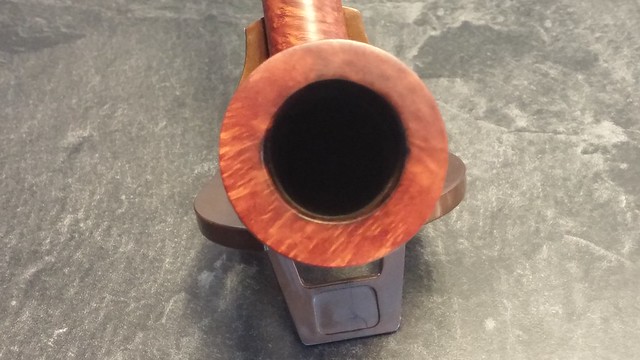
While the stem sat, I topped the bowl very lightly to clean up the myriad dents and dings around the rim and remove the darkened spot. I used a scrap of worn 220-grit sandpaper to tidy up the inner edge of the chamber, removing the knife gouges and restoring the round appearance of the bore.
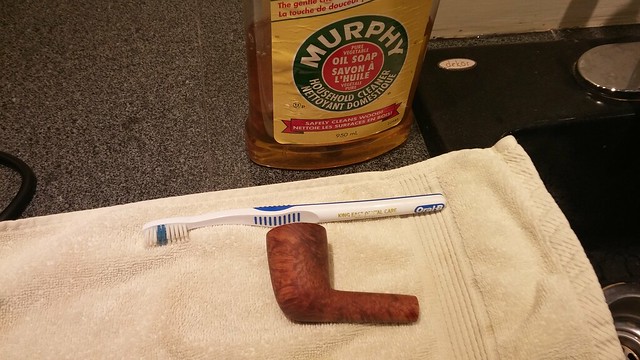
Muprhy’s Oil Soap is a mainstay of my restoration routine. It’s readily accessible, specifically designed for use on wood, and does a great job of dissolving old wax, oils and grime. I scrubbed it on full-strength using a soft toothbrush, and then rinsed it off under the tap.
With the uber-wax coat gone, I spotted a small nick in the edge of the bowl. A drop of CA glue in the nick filled it, and micromesh pads removed the excess glue and blended the patch invisibly into the finish.

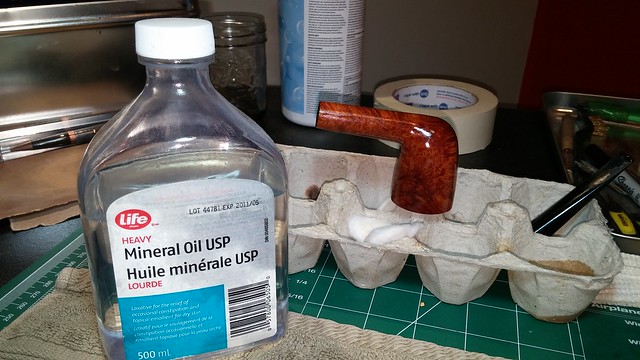
The stummel had arrived cleaned and reamed (I checked, just in case), so I touched up the rim colour with a stain pen and then gave the briar a wipe of mineral oil to refresh the wood and bring out the grain.
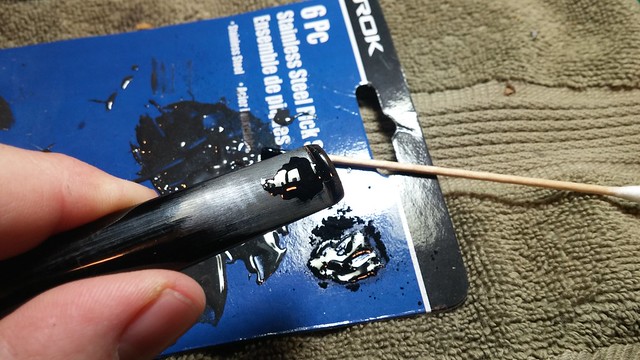
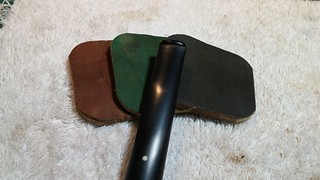
The stummel was ready to go to the buffer, so it was time to work on the stem. I used needle files, sandpapers and sanding sponges to level and smooth the patches. The few pictures make it look quick and easy, but I actually spent quite a bit of time on this stage of the refurbishment. I’d sand and shape, wipe the stem down, and check for any scratches or flaws that needed more attention. I filled tiny flaws a few times with clear CA glue, filing and sanding each time, before I was happy with the results.
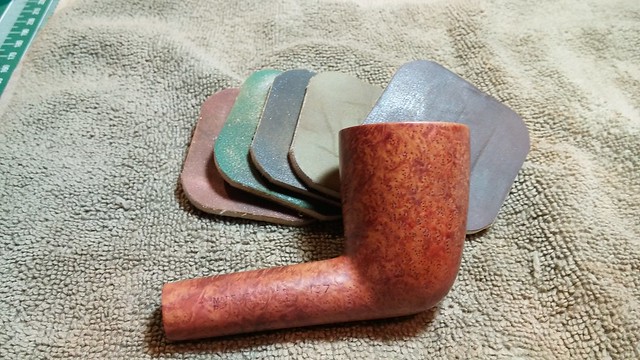
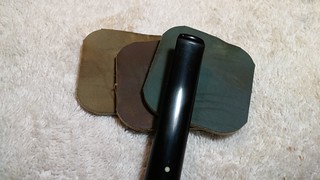
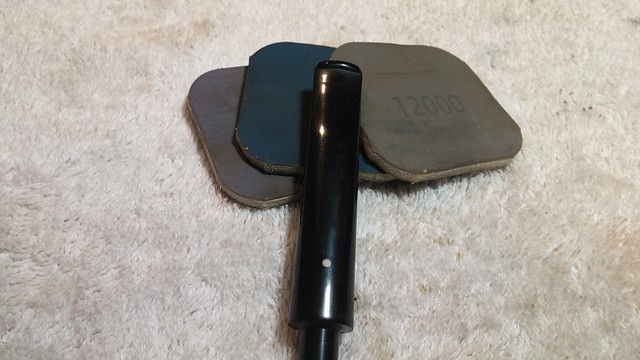
A full course of micromesh sanding pads erased the scratches left from the previous work. I wet sanded with the first set of three pads, and dry sanded with the remaining sets. When the sanding was done, I wiped the stem with mineral oil and let it soak into the vulcanite.
Then it was time to give the pipe a final buffing with White Diamond compound and apply several light coats of Carnauba wax. I worked carefully at the buffer to preserve the 68 year old stamps.
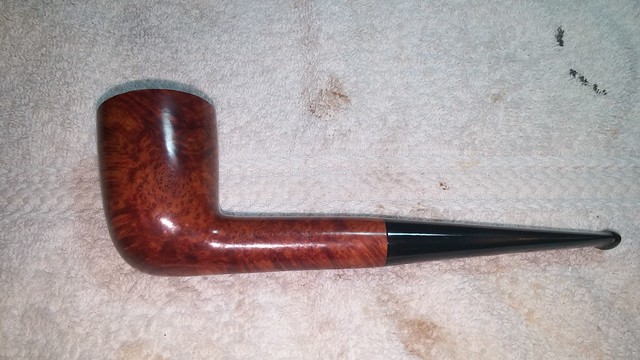
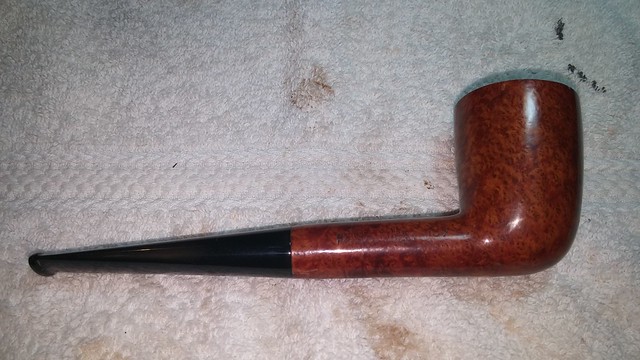
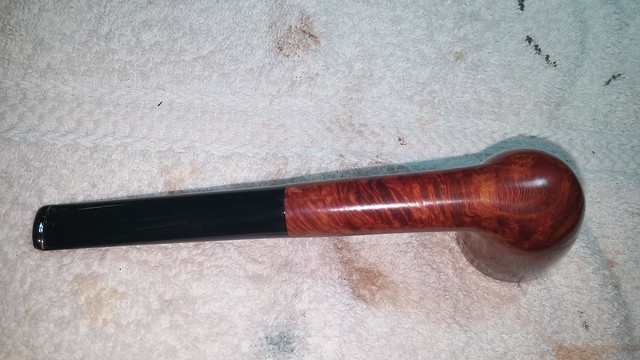
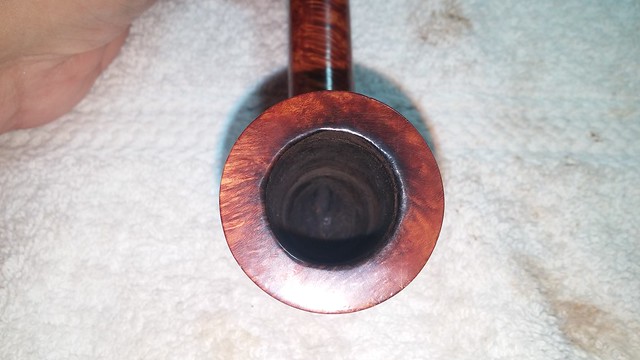
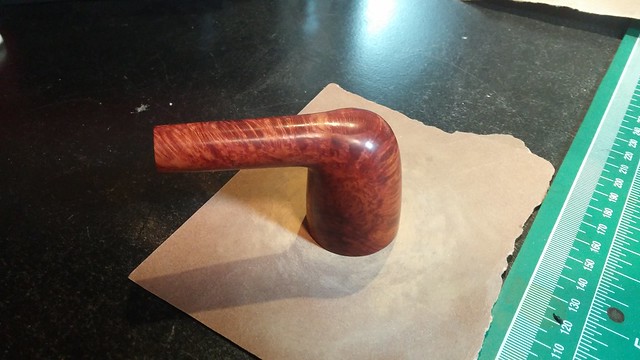
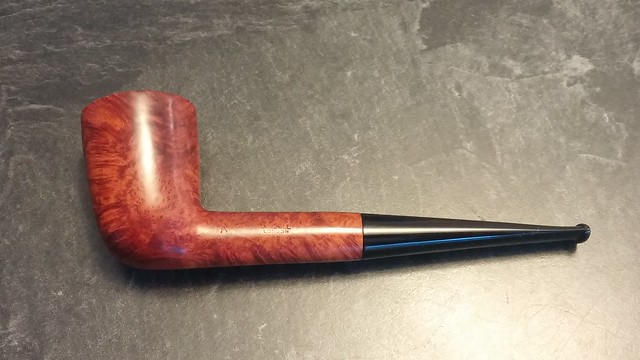
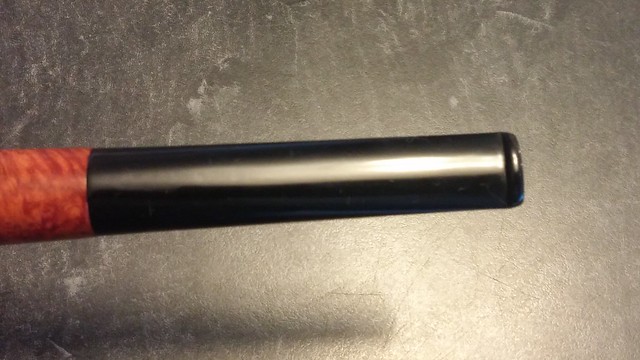
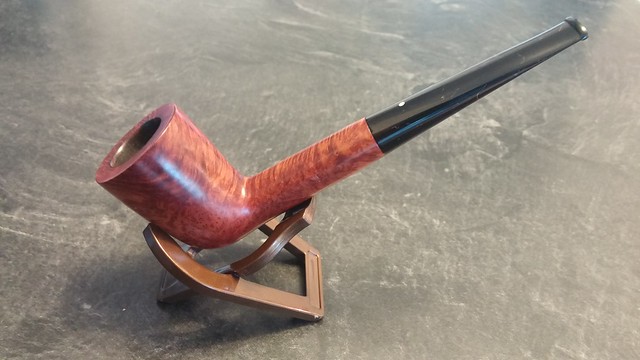
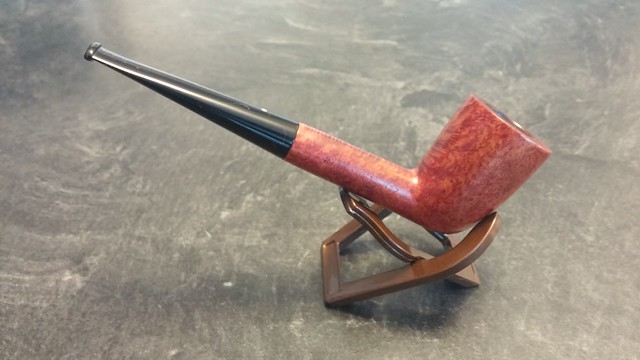
This 1948 Dunhill Patent A Dublin is barely recognizable as the pipe I started with. The changes are subtle but pervasive – this pipe proudly shows its smooth rim and round chamber opening. The tooth dents and ripples are gone from the stem, as are the poorly hidden sanding scratches.
Most noticeable, to my eye, at least, is the loss of the troweled-on wax coat. The rich red-over-brown contrast stain is now free to highlight the wealth of Birdseye and cross-grain in this superb piece of vintage briar, and the stamps show much more clearly through the thinner finish. This classic pipe is ready to provide many years of loyal companionship to a fortunate piper.
If you’d like to take this Dunhill Dublin home with you, it is available at the DadsPipes Store now.
Here’s the finished pipe. Thanks for looking, and until next time, Happy Piping!


Ah, much better!
LikeLiked by 1 person
Thanks, Al. I’m pretty sure the briar was suffocating under the candy-apple thick layer of wax it arrived with. Incredible.
LikeLike
That is much better. Great grain on it. Well done.
LikeLiked by 1 person
Thanks Steve. The birdseye on this bowl is quite something in person. Nice tight whorls that remind me of Van Gogh’s Starry Night.
LikeLiked by 1 person
Brilliant find, Charles. Very nice cleanup on an almost 70 year old classic.
LikeLiked by 1 person