
“Step up, lad,” cried Silver. “I won’t eat you. Hand it over, lubber. I know the rules, I do; I won’t hurt a depytation.”
Thus encouraged, the buccaneer stepped forth more briskly, and having passed something to Silver, from hand to hand, slipped yet more smartly back again to his companions.
The sea-cook looked at what had been given him.
“The black spot! I thought so.”
– Robert Louis Stevenson, Treasure Island
Stevenson’s Black Spot was the last thing a pirate captain wished to receive. I loved reading the story as a kid, but I never thought I’d have to deal with a dreaded Black Spot of my own restoring pipes.
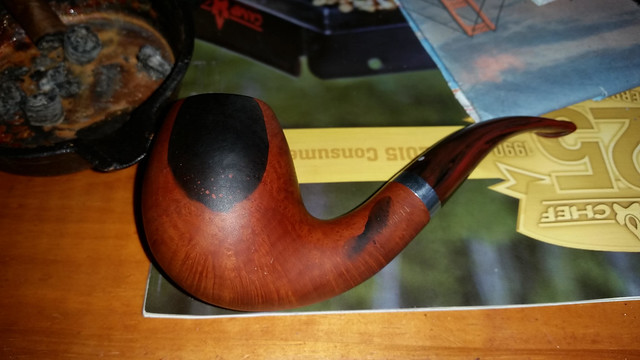
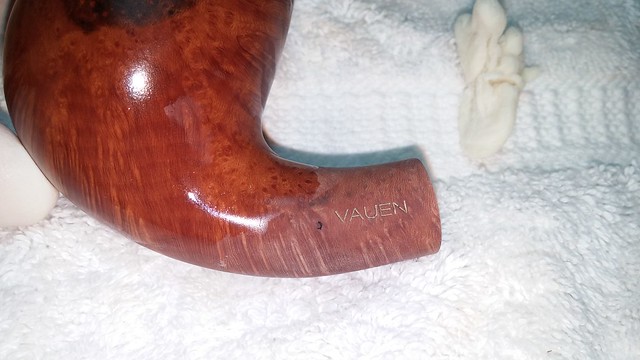
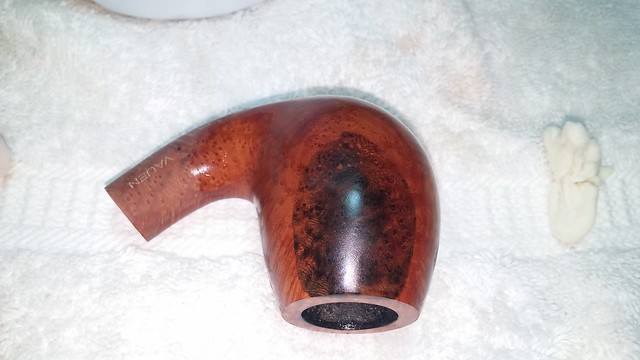
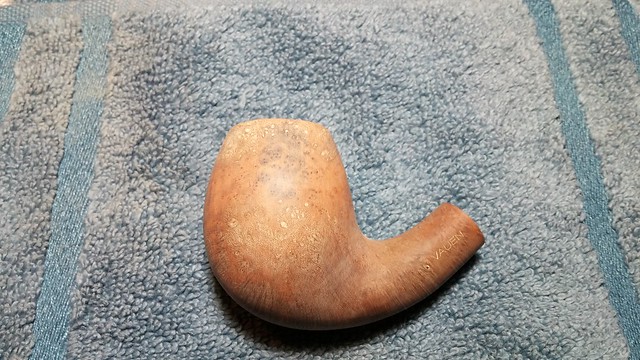
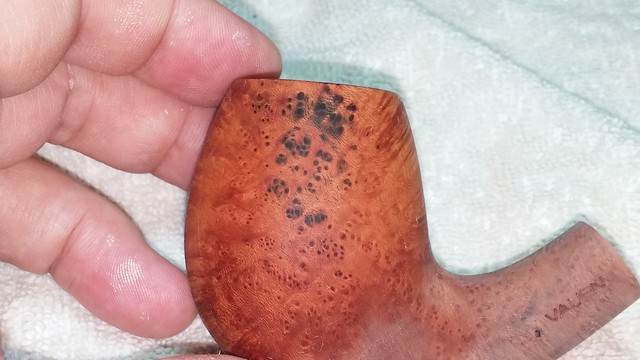
This pipe belongs to a fellow pipe club member who contacted me to ask for help. He had been given a rather handsome Vauen Natura pipe as a gift for his 60th birthday and was in the process of breaking it in. One day, our piper finished up a bowl and laid the spent pipe in an ashtray made of cast iron to cool. When he came back to the pipe a while later, he found that the pipe’s lovely Virgin finish had been seriously marred by two areas of black staining, one on the shank and a much larger and darker spot on the side of the bowl. Both stains corresponded to areas of the pipe which were in direct contact with the cast iron. Attached to the email was this picture:
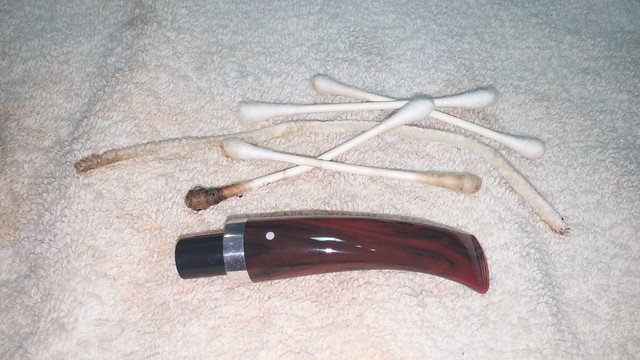
I had never heard of briar staining in such a manner before, but I agreed to have a look and help if I could. I took this series of pictures when I got the pipe home to my worktable.


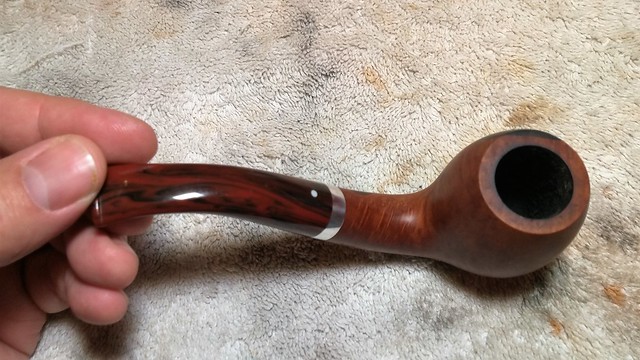
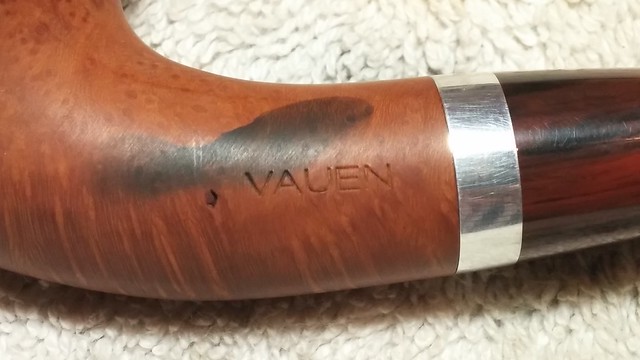
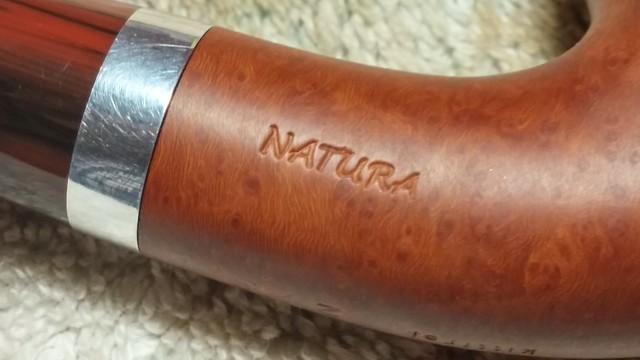
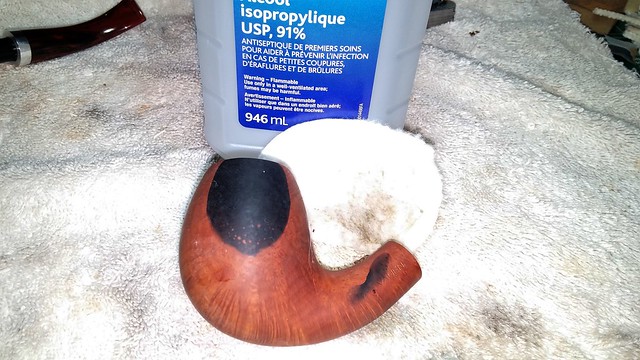
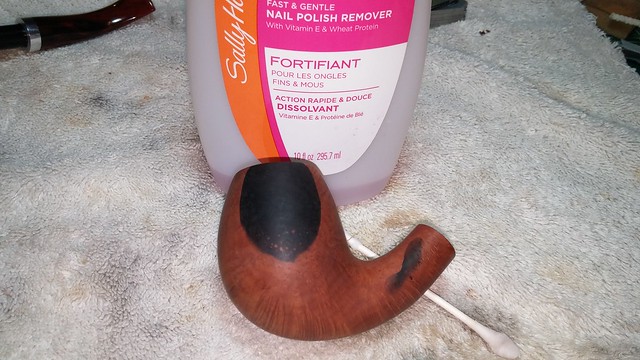
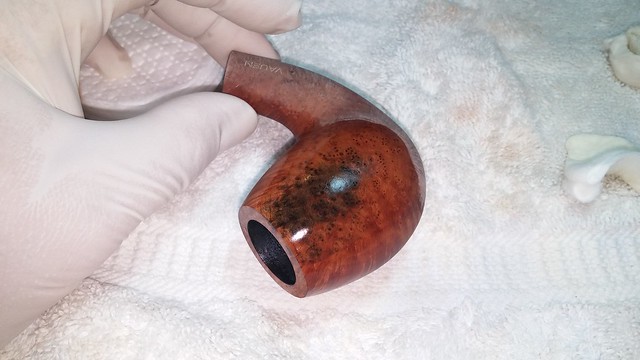
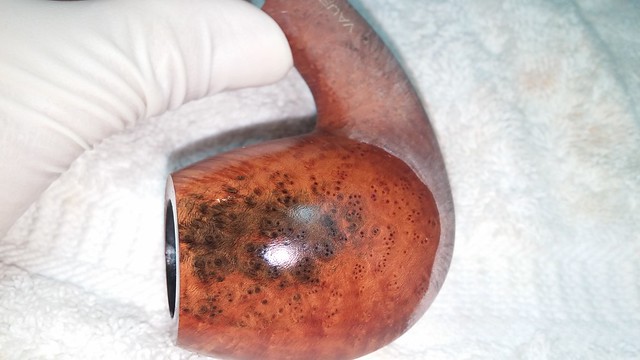
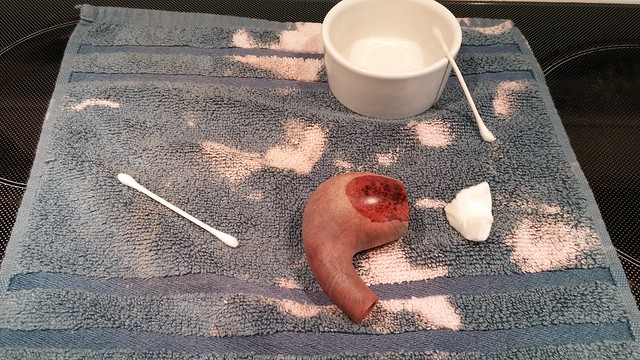
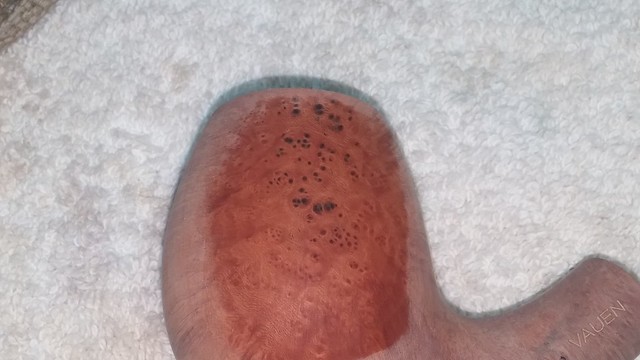
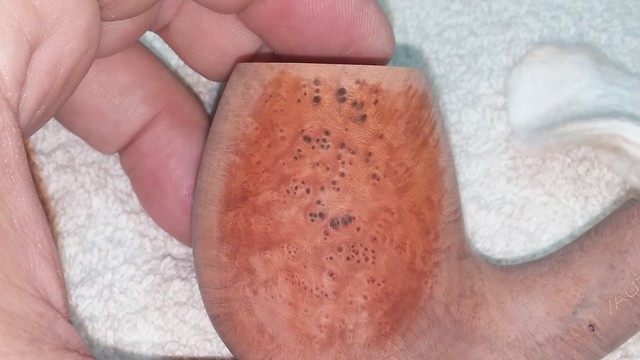
As the name suggests, the Natura line from German pipe-maker Vauen features a Virgin finish and some very nice briar. The ad copy claims “perfect” briar, but I did find one small fill in this pipe near the stamps on the left shank. This pipe is fitted with a nice looking Cumberland acrylic stem, which I removed and set aside in order to focus on the briar. I began testing the stained areas, first with isopropyl alcohol and then with acetone to see if I could lift the stain. These pictures illustrate the results – nada!
At this point, I went online for a bit of research, the upshot of which suggested that I was dealing with iron oxide (aka rust) trapped in the pores of the briar as a result of a reaction between the cast iron ashtray and the post-smoke moisture in the briar stummel. The recommended course of treatment was a wash with oxalic acid, a chemical used in deck cleaning solution to remove the grey streaks from wood.
Unfortunately, oxalic acid is difficult to obtain in the Canadian market, so I moved down the list of possible cleaners and landed on readily available chlorine bleach. Borrowing the jug of bleach from the laundry room, I poured a small amount into a plastic container and pulled on a pair of disposable latex gloves. A folded cotton pad served as my combined paintbrush and scrubber as I rubbed dabs of bleach into the stained area on the stummel’s left shank. After just a few minutes of work, this smaller stain had definitely loosened its grip on the briar.
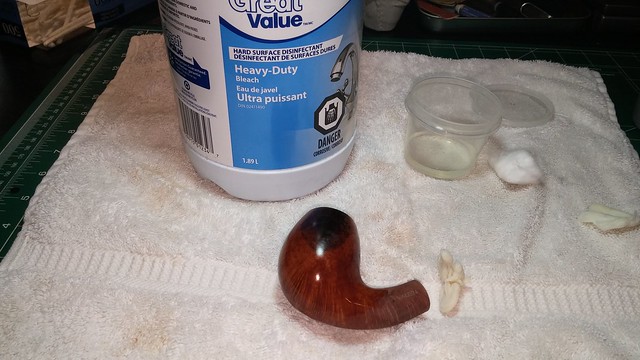
Encouraged by these initial results, I forged ahead, applying the bleach full-strength onto the larger stain. It too reacted positively to the treatment, though much more slowly than the smaller spot on the shank. This series of pictures shows the progress of my labours over approximately two and a half hours. By this time, my head was spinning from bleach fumes and I swear my beard was whiter. As I worked, I periodically wiped down the entire stummel with the bleach in order to maintain an even colouration (or lack thereof).
Needing some fresh air and a stretch, I left the stummel on the worktable while I took a break. When I came back, the stummel had dried and I wondered how I was going to make this ugly duckling beautiful again.

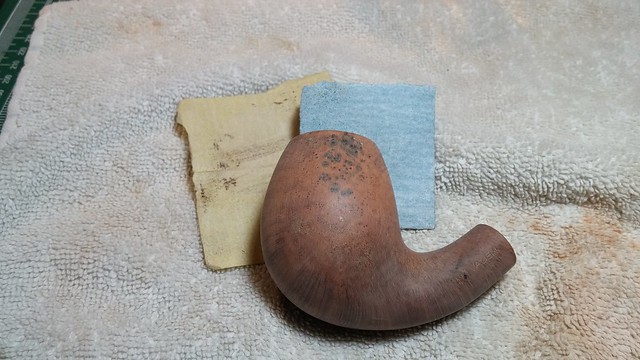
The answer, thankfully, was simple and close at hand. A wash-down of the stummel with common drug store hydrogen peroxide solution neutralized the chlorine bleach and removed the horrid looking white spots. I would repeat the peroxide wash several times to get the white bleach residue out of the grain of the briar, but this pic shows that it works and that I had successfully removed 80 percent of the iron stain.
I wanted to bleach out more of the remaining dark spots before turning to sandpaper to clear up the residual marks. Moving this time to the smooth top of my kitchen stove (and its exhaust hood), I gave the briar another hit with the chlorine. When I reached the point where the bleach was loosing effectiveness, I washed the stummel down with peroxide again and let it dry.
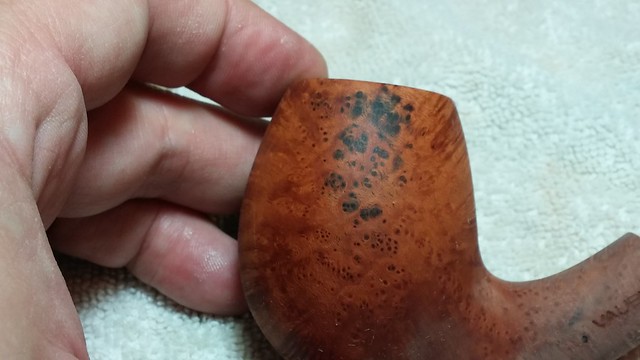
The bleach and peroxide had raised the grain of the stummel, leaving an especially rough patch where most of the scrubbing had occurred. I smoothed things out with 220 and 320 grit sandpapers and took the following shots. The briar is not looking bad at this point, at least not until I wiped it down with a bit of alcohol.
I carried on with the sandpaper, being careful to sand around rather than up and down the bowl. This maintained the original curvature of the stummel and avoided accidentally sanding a flat spot on the side of the bowl.
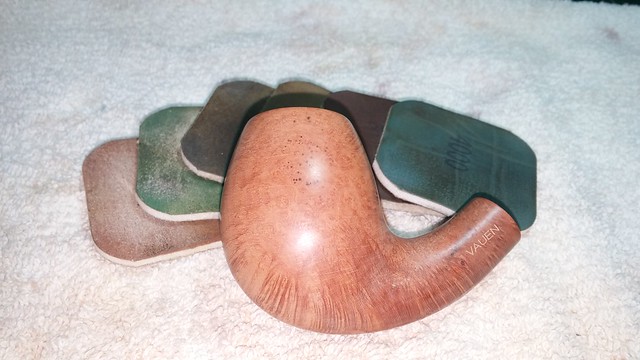
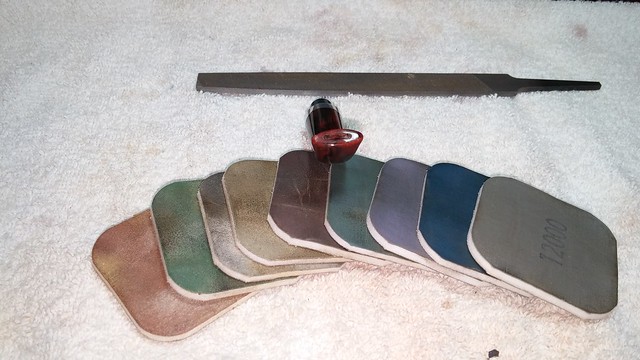
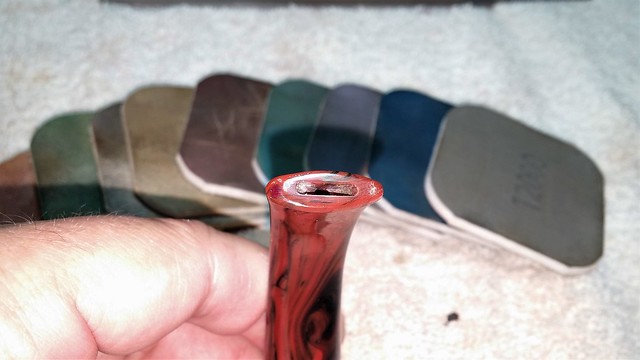
At this point I polished the stummel with micromesh pads in 1500 through 4000 grits. With every pad, the briar became smoother, and the natural honey colour of the wood began to re-emerge.
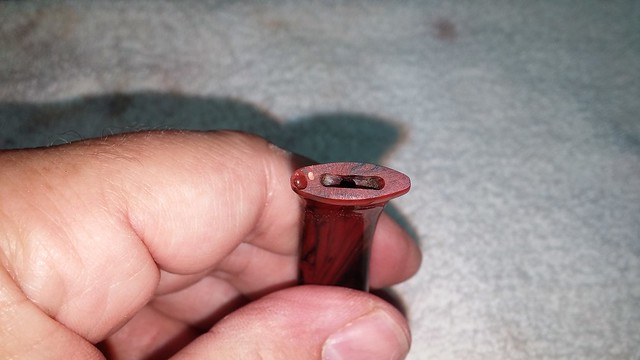
As I approached the four-hour mark, I took a break from briar work and picked up the stem. While giving it a quick cleaning, I noticed a stray lump of acrylic at the left-hand end of the bit. Sanding the lump smooth revealed a circular flaw in the acrylic, which I filled with a dab of clear CA glue and then polished out. Good as new.
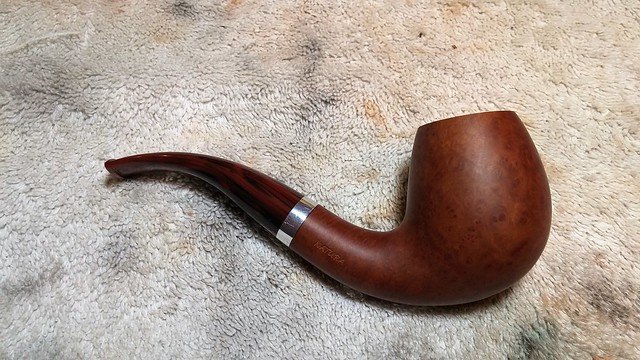
I finished this repair by buffing the stummel with White Diamond compound and applying several coats of Carnauba wax to the entire pipe. This one was a lot of work, but the results speak for themselves. The massive black blotch is gone, leaving only the barest pinpoint traces lodged deep in the Birdseye grain.
I think it more than passes casual inspection, and I am happy to have been able to help a friend salvage a beautiful pipe and a sentimental favourite.
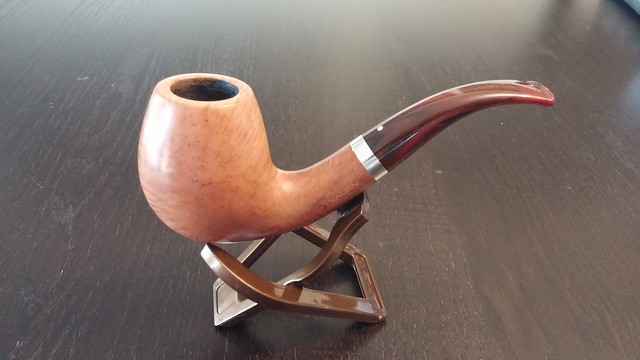
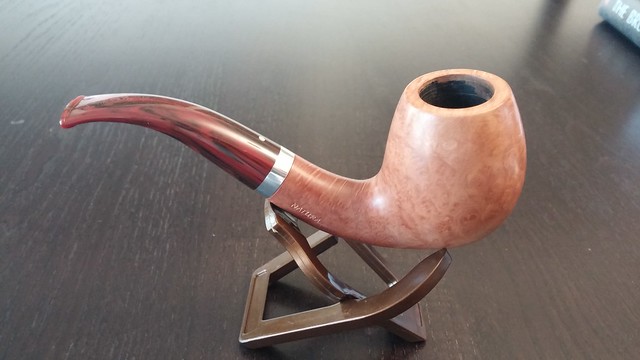
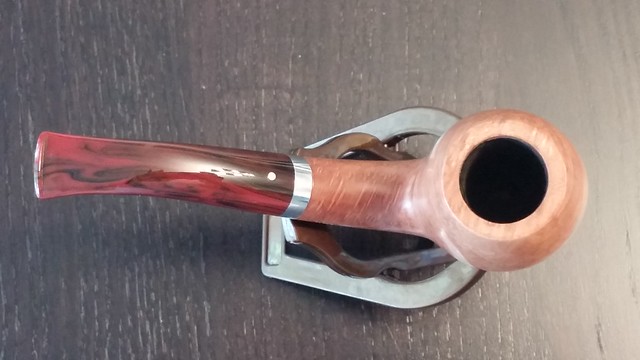
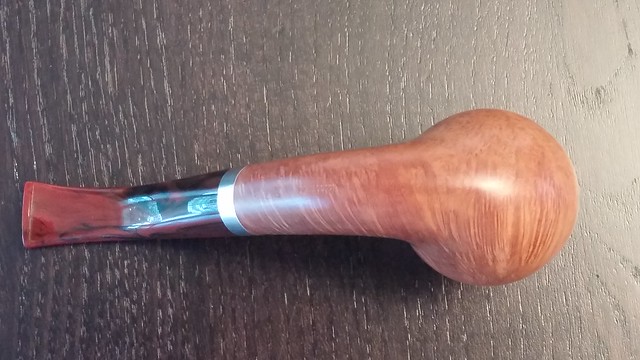
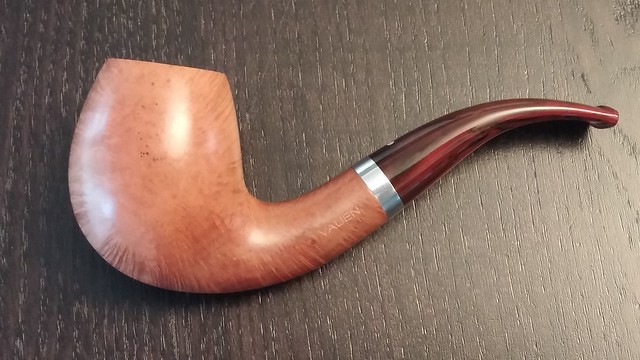
Here’s the finished pipe. Thanks for looking and until next time, Happy Piping!

Reblogged this on rebornpipes and commented:
Great work on that Charles. Well done. That was the largest black stain I have seen. I too have used the bleach treatment and it does work. It is labour intensive however. Good job sticking it with it and conquering the mess.
LikeLiked by 3 people
Thanks, Steve. It was certainly a lot of elbow grease! If it hadn’t been a virgin finish, a black contrast stain under a lighter top coat could have been used to hide the stain without all the sanding, but I’m very pleased with the way it turned out. I must admit the natural briar is very attractive against the Cumberland stem!
LikeLiked by 2 people
Charles, I agree with Steve on a job well done. At first I saw the stain I wondered how you would ever get it off. If I ever have a pipe like that I’m sending it to you! Again, very good work.
LikeLiked by 2 people
Thanks, Al!
LikeLiked by 1 person
Your friend must have been thrilled to get that one back! I’d dare say it looks better than new with the repaired button and polished stem. That is one good looking pipe!
LikeLiked by 2 people
Thanks, Al. He was indeed happy to see it again. That black spot gave us both quite the start!
LikeLiked by 1 person
I seem to recall that a product called “Bartenders Friend” has as it’s active ingredient oxalic acid. It is a very mild abrasive as well. Would this have worked on this problem?
LikeLiked by 1 person
Hi Joe and thanks for the tip! Someone else pointed this out to me today too – I had no idea. I’ll definitely be trying it next time I’m faced with a tough stain like this. It can’t be any worse to work with than chlorine bleach!
LikeLiked by 1 person
Great job as usual, Charles. The rescued pipe IS better than new.
LikeLiked by 2 people