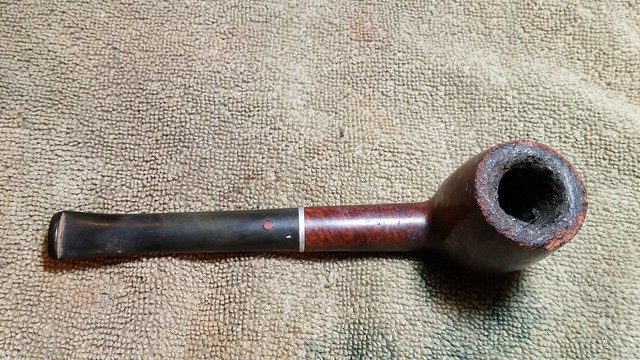
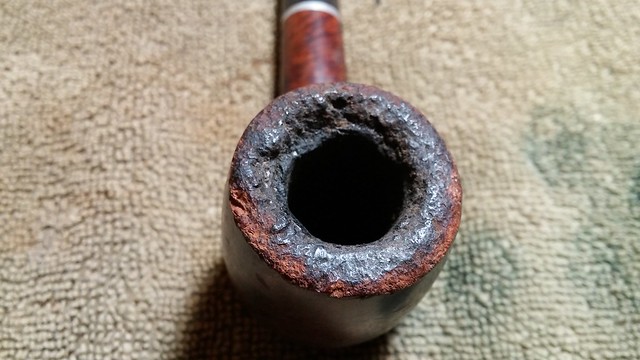
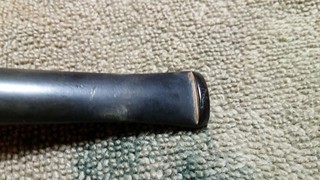
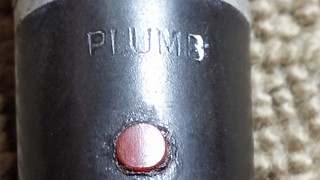
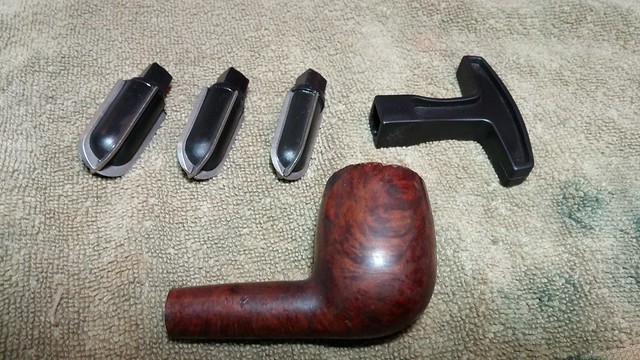
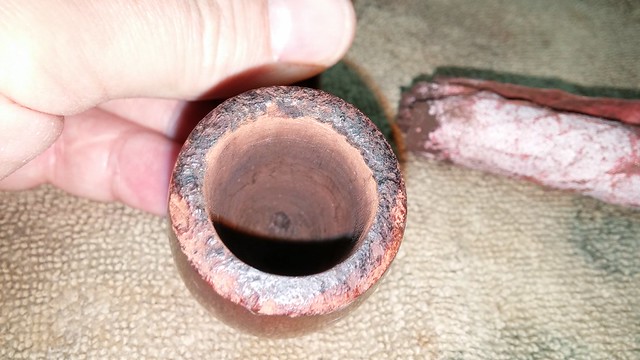
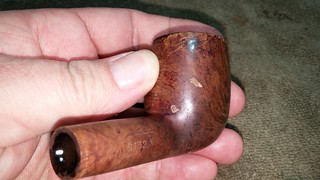
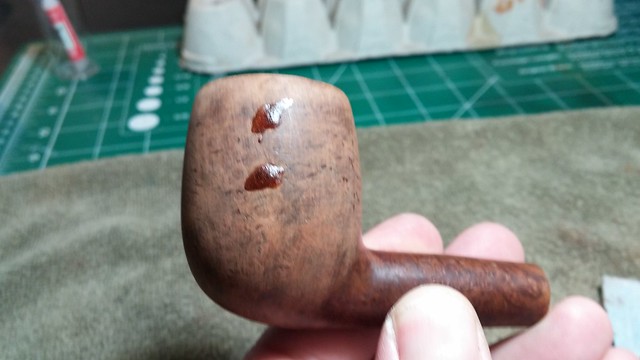
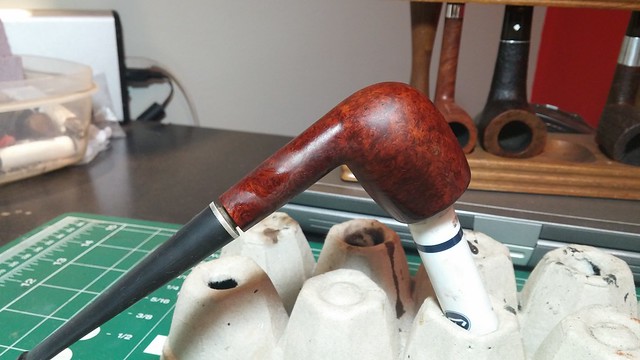
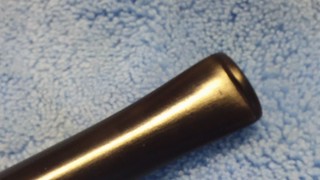
I picked up this Dr Plumb billiard off eBay for very little money; the pics below of its original condition will tell you why. It was in rough shape to say the least. The rim had been absolutely destroyed by repeated hard dottle-knocking against stone or brick. The scarred remains were layered with lava and the bowl was nearly plugged with cake. The sides of the bowl and stem had accumulated more than their fair share of dents and scratches, and the stem’s distinctive red dot was raised up above the surface of the vulcanite. It looked a little like someone had attempted to dig it out – the area immediately around the dot was scarred and concave.
Curiously the stem, which was perilously loose in the mortise, didn’t have a single tooth dent – either the piper wasn’t a clencher or he consistently used rubber softie bits. One way or the other, this had clearly been a working pipe, meant to keep the piper going during long days of labour. This pipe was probably ultimately abandoned when the draw became too restricted or when the stem became too loose to hold the bowl upright.
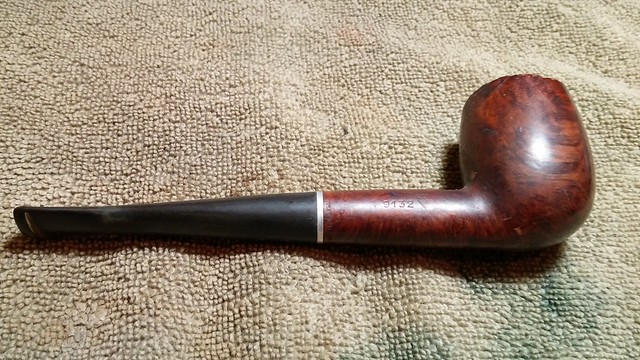
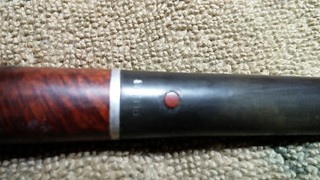
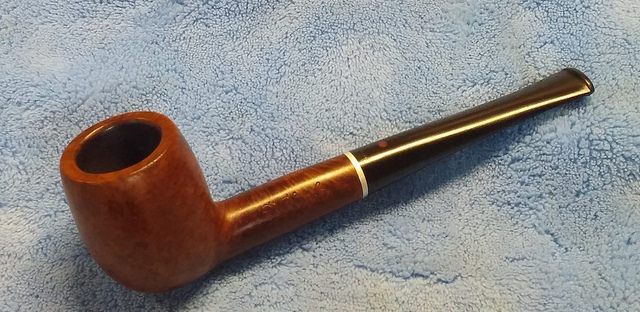
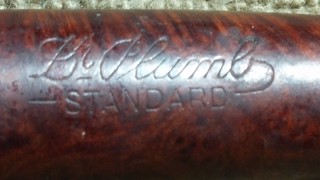
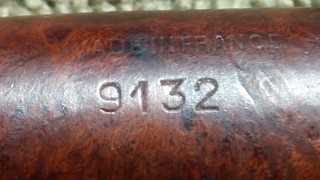
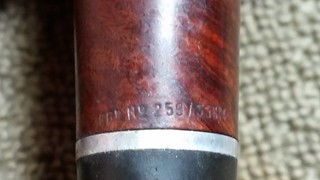
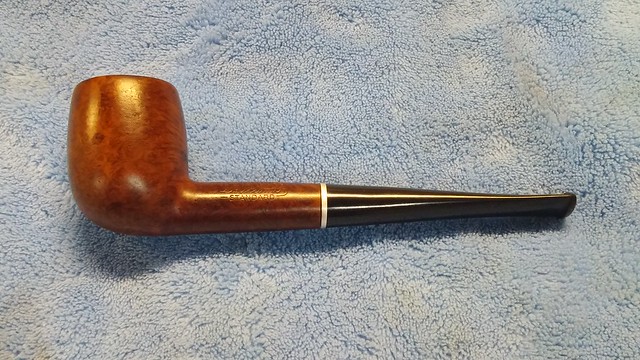
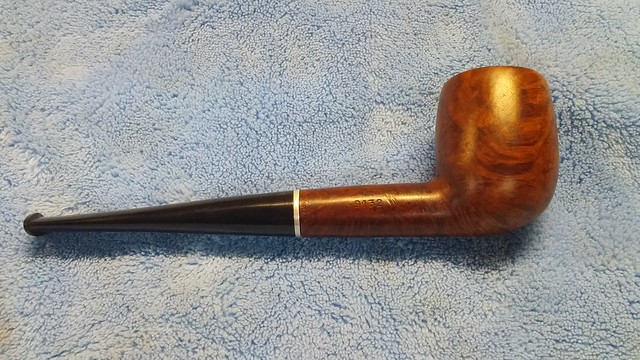
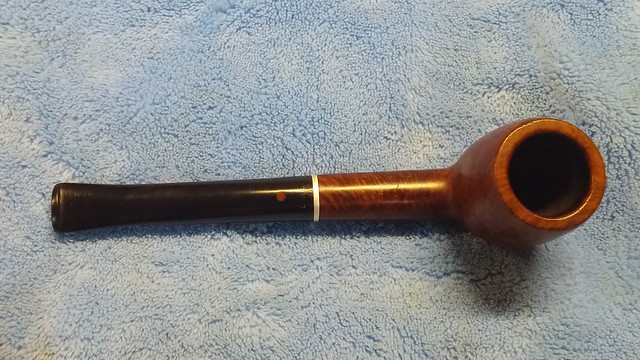
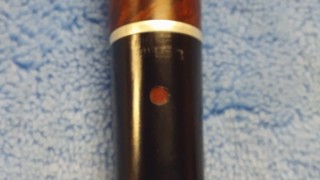
A bit of background on Dr Plumb pipes. The brand was created in 1925 by J.B. Rubinovich, then Parisian sales manager at GBD pipes in France, as a low-cost line of pipes intended mainly for export to North America. One of the niceties that helps prove the provenance is that Dr Plumb pipes often use the GBD shape numbers. This billiard is stamped “9132” under “Made in France” on the right shank. The left shank bears the words “Dr Plumb” over “Standard”, and the shank is stamped at the mortise end “RegD NO 259/55614”. The stem carries the remains of the word “Plumb” in block letters near the tenon, above the red dot.
I began the long road to redemption for this pipe with a careful and thorough reaming of the bowl back to bare briar. I started with the smallest cutting head on my Castleford reamer and worked my way through two consecutively larger heads. Thankfully, the cake, though copious, was soft enough to ream out without any problems. I finished up the reaming with a few twists of sandpaper wrapped around a dowel. This cleared up the ridges left by the reamer heads. By some stroke of luck, there was no damage to the tobacco chamber. I had anticipated finding a burnout or large crack, but was met with only thin, tight heat fissures after the cake had been removed. So far, so good!
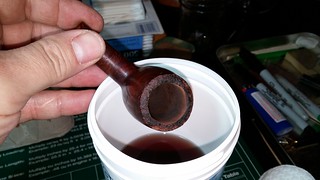
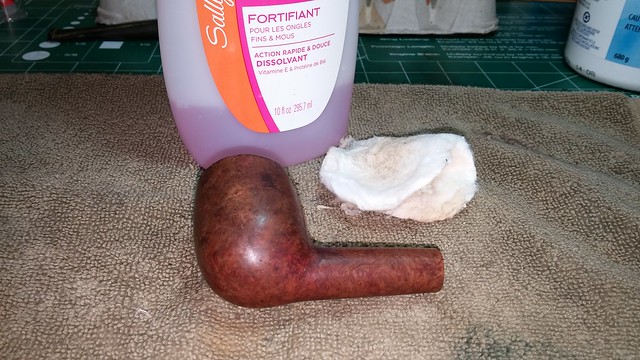
I gave the reamed stummel a good soak in an alcohol bath to remove the old finish and soften a few old putty fills that would need replacing. The fills were easily picked out after the soak. I finished the exterior cleaning with a wipe of nail polish remover (aka acetone).
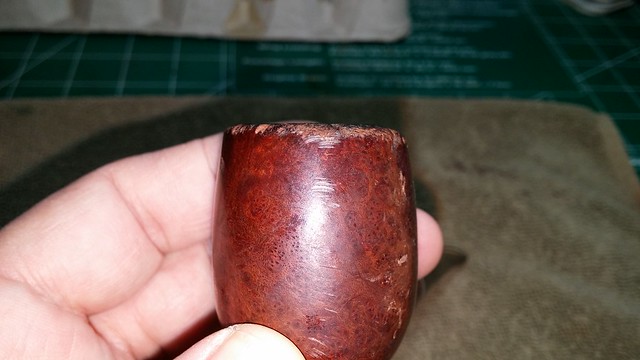
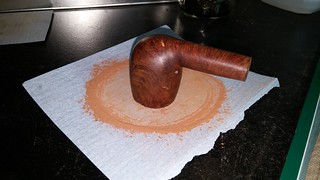
Then it was down to business with the topping board! Using 220-grit sandpaper, I worked carefully to sand down the damaged area and regain a flat, level rim. I stopped topping when most of the rim top was flat. This, of course, left dents and chips around the inner and outer edges, but I didn’t want to remove any more bowl height. Instead, I used a scrap of 220-grit paper to sand bevels on the inner and outer rims to eliminate the remaining damage. The bevels alter the original lines of the bowl slightly, but is the lesser of evils – a more severe topping would have made a pot shape out of a billiard. This series of pics show the rim’s progress.
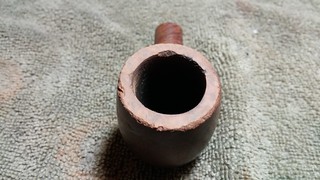
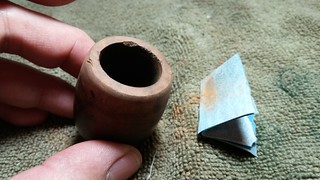
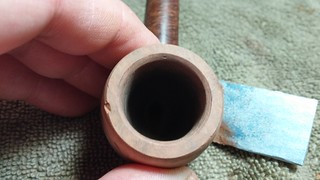
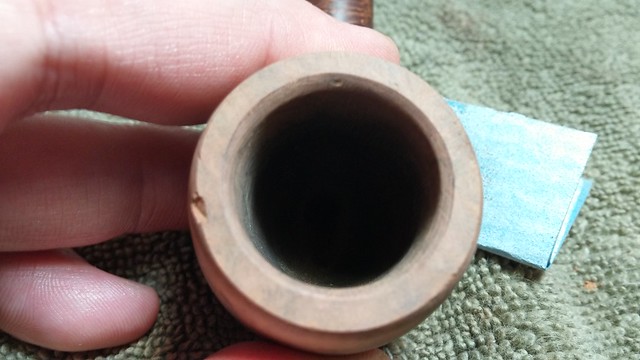
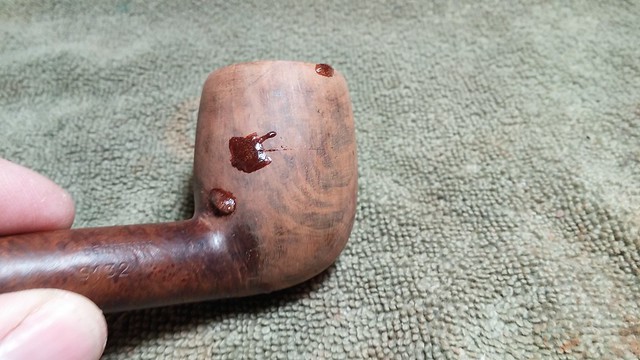
At this point the rim was nearly perfect, except for one large chip on the right front edge. This divot got filled with CA and briar dust; I repaired the old putty fills at the same time. I decided, however, that this old warrior deserved to keep a few of its war wounds to show the grandkids. In the final pics you may spot a few of these “perfect imperfections”.
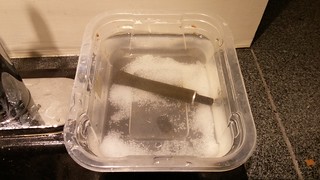
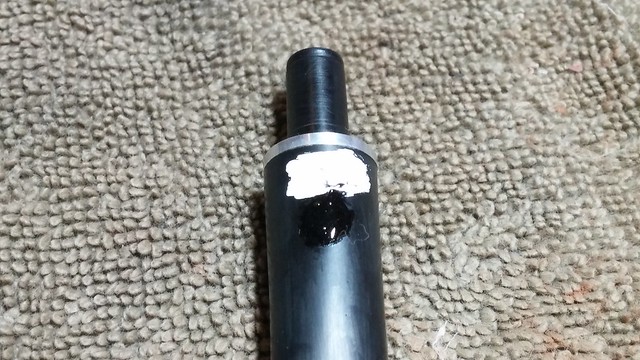
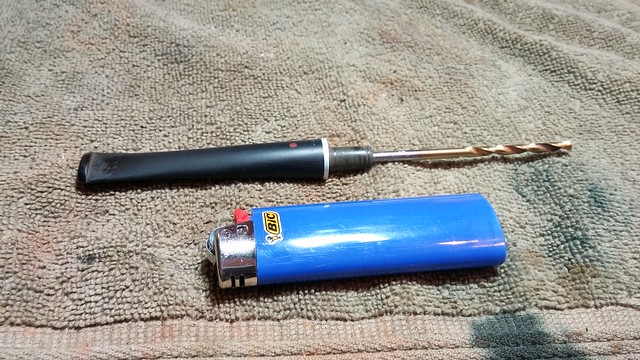
I decided to work on the stem while the new fills cured. I soaked the stem in Oxyclean for a few hours to lift the oxidation, then scrubbed the grime off with Magic Eraser and 2000-grit wet sandpaper. I tried to fill the “Plumb” logo with Liquid Paper, but the letters proved too worn to hold the paint. I had better luck with the red dot, which I pushed back into place in the stem and covered with a tab of CA glue and charcoal powder. When the CA dried, I sanded off the excess, leaving a smooth, unbroken dot inlay. I sorted out the loose stem fit by heating the tenon over a lighter flame until soft enough to push a slightly larger drill bit (the smooth end) into the tenon, enlarging its diameter.

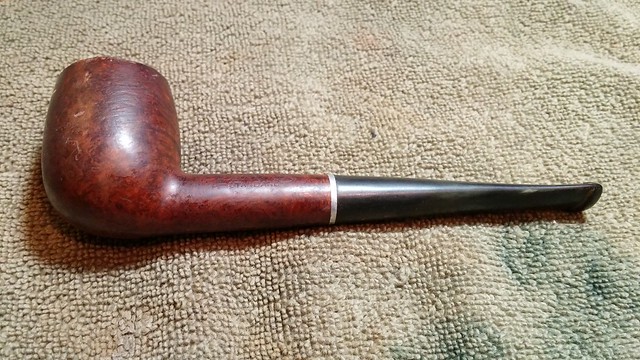
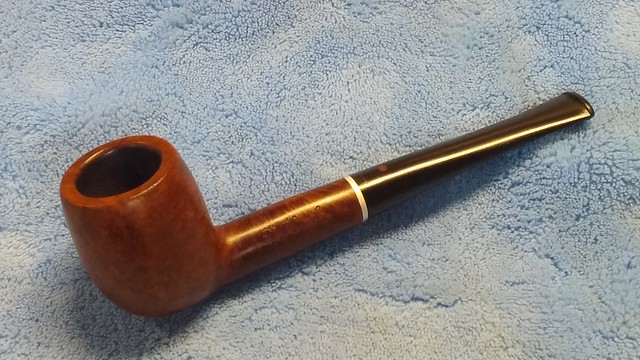
The stem was ready to go, so I finished off the work on the stummel by applying a contrast stain to the briar. First up was a coat of Fiebing’s Black leather dye, which was mostly removed to leave the black only in the softer grain, then a wash coat of a Saddle Tan/Dark Brown dye mixture to bring out the warm reds of the natural briar and provide a good contrast to the black grain.
Then it was time to polish everything up on the wheel – first with a run of White Diamond compound followed by several coats of Carnauba wax. I’m always excited at this part of a restoration. The buffing compound brings out the natural shine of the briar and removes the last of the stray scratches in the pipe stem. The Carnauba provides that deep, rich lustre that can make briar grain look positively three dimensional.
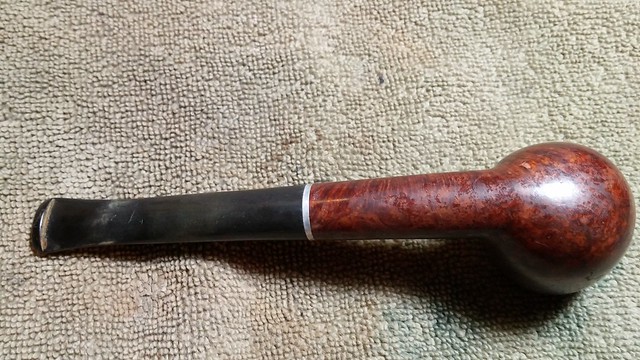
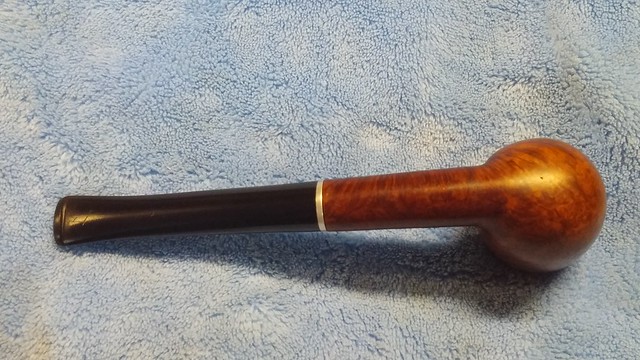
The buffing wheel is the final exam of every pipe restoration project – it reveals every detail of your work, good or bad, and just like in school, sometimes rewrites are necessary to ensure the lesson is properly learned. No backtracking on this project, however. I’m quite pleased with the way this old Dr Plumb has come back to itself. Though a few scars remain, the pipe once again looks like it belongs in the GBD family tree.
Here’s the finished pipe. Thanks for looking and until next time, Happy Piping!

Nice work on the Plumb billiard ! It was certainly well used in its life.
I have a Dr.Plumb poker i re -did and contrast stained. It has several fills but a darn good smoker. They are good pipes for the money.
LikeLiked by 1 person
Thanks Troy. I agree. Dr Plumb is to GBD what the Everyman is to Comoy’s.
LikeLike
Another one not left behind, Charles. Remarkable. How many hours would you estimate you spent on this one, and was it done during a single day?
LikeLiked by 1 person
Cheers, Todd. I split this job over two days but barring the Oxy soak time, there’s only a few hours work in it. 220-grit paper makes quick work of rough rims!
LikeLike
Nice work,particularly on the stem dot! A good analogy to Everyman pipes.
LikeLiked by 1 person
Great work on that old warhorse Charles. It looked rough when you started but when finished it does not look like the same pipe.
LikeLiked by 1 person
Nice save on that rim. You kept the overall balance of the look of the entire pipe. It’s great when they come out this well.
LikeLiked by 1 person
Thanks. I was a bit worried I’d have to really grind the rim down to remove the damage.
LikeLike