
Hunting for estate pipes to refurbish has its ups and downs. Back in the heyday 1950s and 60s, almost every man had a pipe somewhere, which created a steady supply of pipes needing repair. Nowadays we refurbishers must be more adventurous, wading through the flotsam and jetsam of antique shops, second-hand stores and estate sales to find our quarry.
I find antiques & collectibles sales a bit of a hit and miss experience. Sometimes there isn’t a single pipe in the entire place, and sometimes only a few grossly overpriced specimens displayed in glass cases. I go home empty-handed on those occasions. Yet there are those times, like this particular show, when everything comes together in my favour. A seller I had purchased from in the past hadn’t brought any pipes to the show, but my daughter’s eagle eyes spotted a shoebox full of briar at another table, and the game was afoot! A little small talk with the seller confirmed what I had suspected after looking over the pipes on offer – the gentleman in question knew very little about his wares, though he claimed the pipes were from his own collection. Now I don’t generally support taking advantage of another person’s ignorance, but in a situation like this I’m a firm believer in “caveat vendor”. To make a long story short, I was only too happy to move the pipes from his table to my bag, after a little judicious haggling, of course.
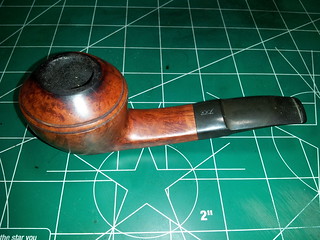
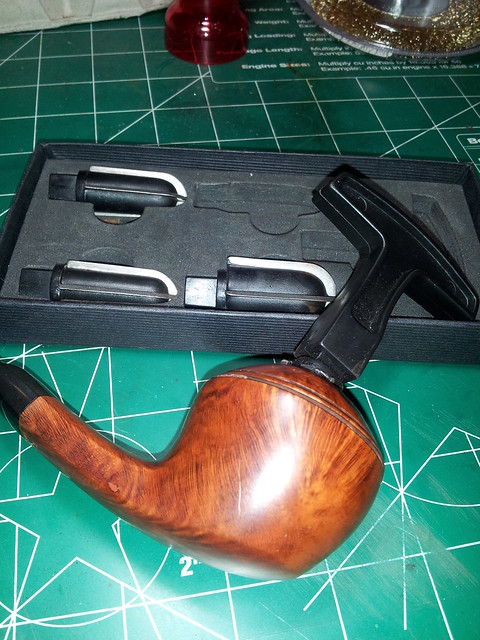
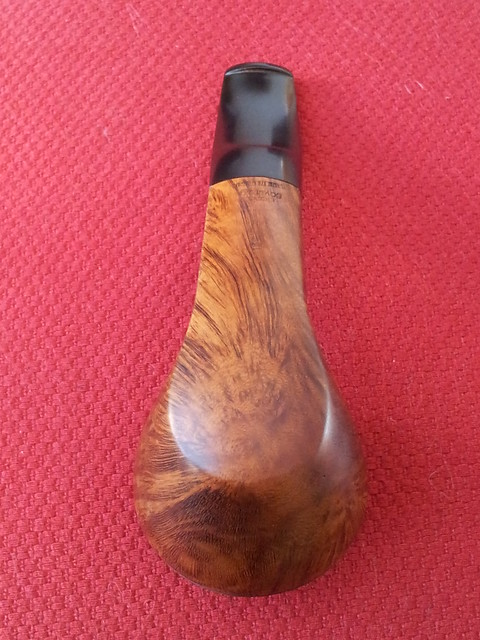
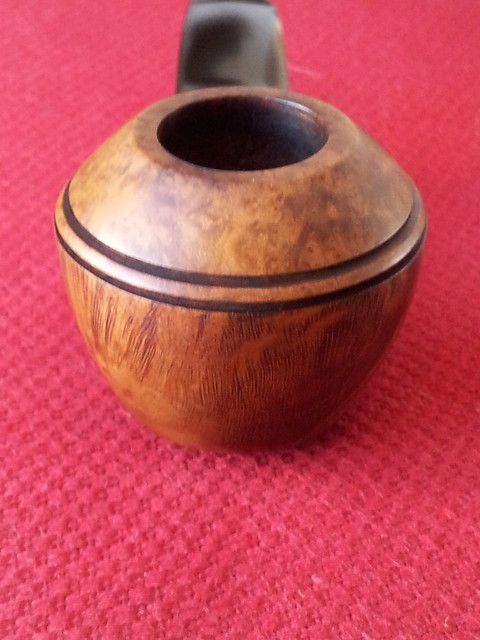
This is the second of the six pipes my daughter and I brought home from that antique show. We were both immediately drawn to the shape and size of this Danish Sovereign (a Stanwell sub-brand marketed exclusively in Canada and the USA) – I guess maybe the love of Bulldogs and Rhodesians is genetic!
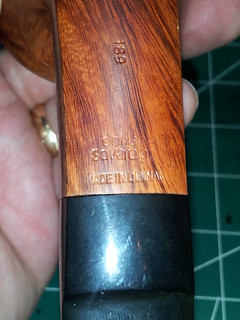
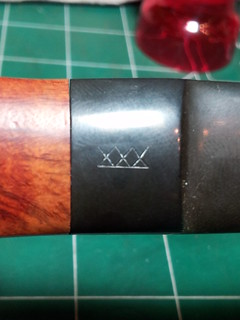
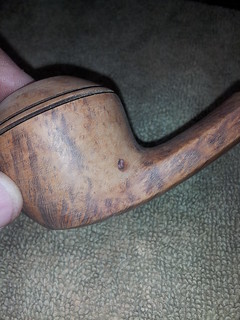
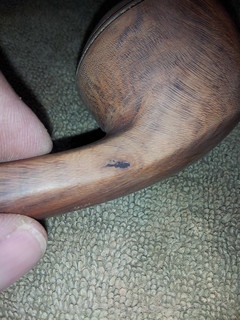
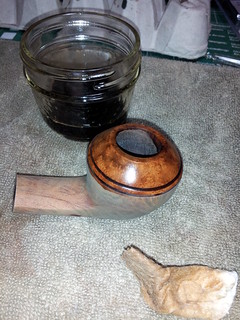
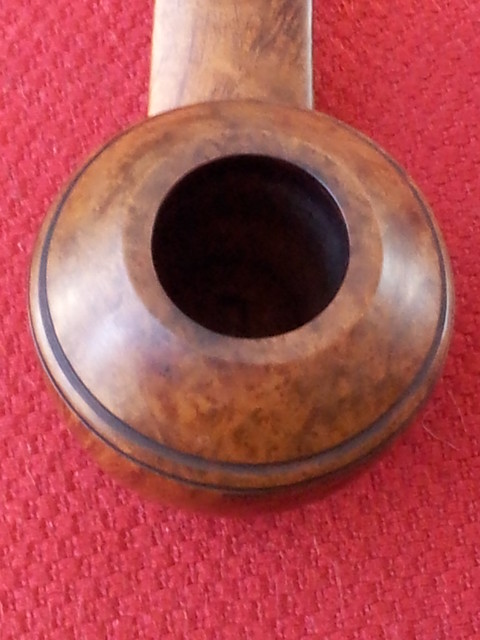
The pipe appeared to be in fairly good condition, with the exception of a large buildup of lava that had collected on the rim and run down the face of the bowl, reaching nearly to the twin bowl rings. The chamber was so heavily caked that there was no way to tell if there was any internal damage, but the rest of the pipe looked good. The stampings on the bottom of the shank were clear and only a little worn or perhaps originally poorly struck. They read “Danish” (missing the “h”) over “Sovereign” (missing the “n”) over “Made in Denmark” (missing the “ark”), and a shape number, “189”. The acrylic stem is stamped “XXX” on the top near the shank.

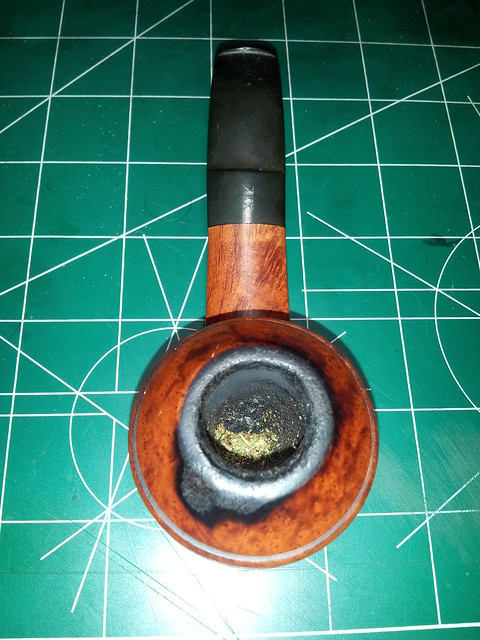
My first action on this pipe was to ream the bowl back to briar and inspect the chamber for any internal injuries caused by the thick cake buildup. This was quite a task, as the bowl was clogged with old carbon. I used the smallest head on my Castleford reamer to carefully bore through the cake down the centre of the bowl until I reached bottom. Then I switched to successively larger reamer heads to work my way through the rest of the buildup. It took about 20 minutes of careful reaming to find the briar walls of the tobacco chamber (!), but thankfully there was no hidden damage. I could concentrate on the lava flow now.

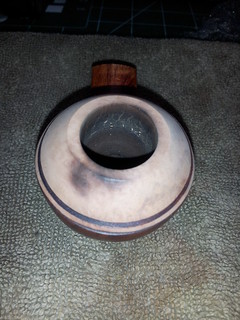
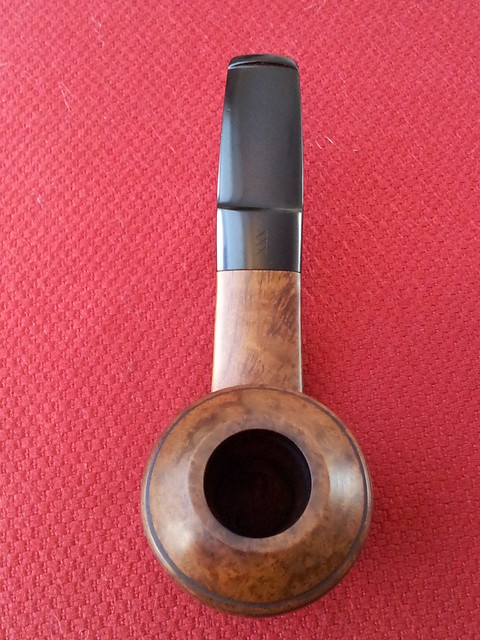
I topped the bowl on a fresh sheet of 220-grit sandpaper to remove the hardened lava from the rim. As with the reaming, I worked slowly and carefully, checking the rim often to make sure I removed only as much material as necessary to clean up the mess and expose sound briar. When the rim was flat and even again, I worked on the dripped lava burn on the face of the bowl. I used a folded scrap of 220-grit paper to sand out the burn mark from the bevelled upper portion of the bowl. I focused my attention on the area above the bowl rings, and worked the sandpaper around the entire circumference of the bowl to avoid making a flat spot at the burn site. I took this series of pictures to show the progress. Thankfully, the burn was not as deep as I had feared. I was left with only the ghost of the old burn mark, which I would eventually remove completely during buffing.
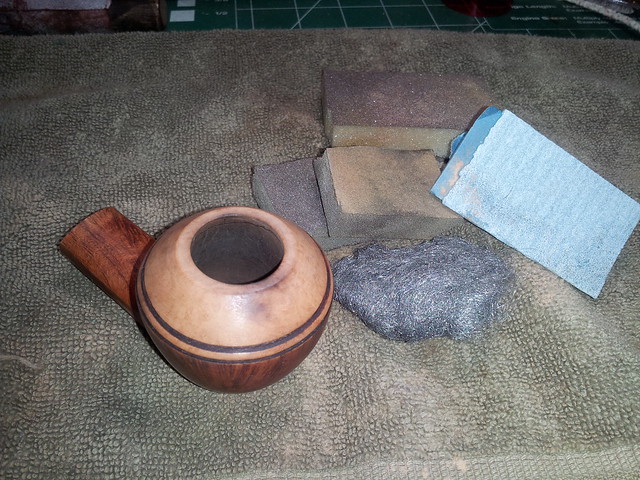
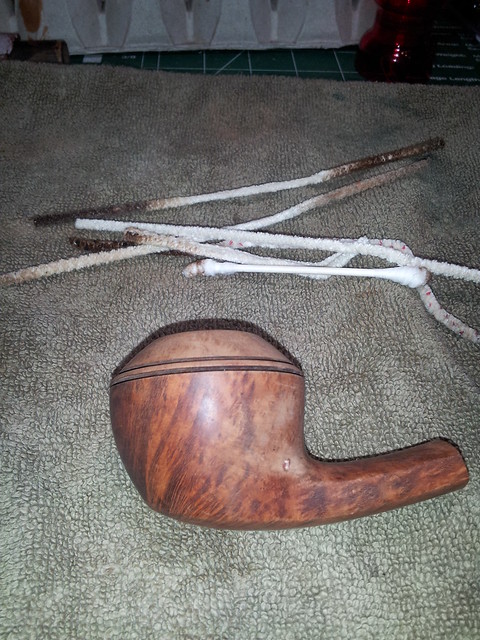
The major repair work was now complete, so I carried on with a basic cleaning. Given the state of the tobacco chamber when I bought the pipe, I felt it prudent to give the stummel an alcohol bath to ensure easy cleaning of the stummel’s airway. I also soaked the stem in Oxyclean and warm water to life the dirt and grime from the surface and loosen any tars in the stem. As the stem is acrylic, there was no oxidation to worry about; it just needed a good cleaning. When the stummel came out of its bath, I cleaned the airway and mortise with a few pipe cleaners and isopropyl alcohol. It took surprisingly few cleaners to get the job done.
The soak had revealed two small putty fills that would have to be replaced, one on either side of the shank. I picked out the old pink putty with a dental pick and then refilled the flaws with CA glue and briar dust, sanding the patches smooth after the glue had cured.
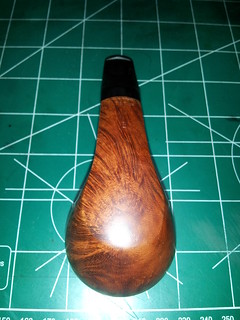
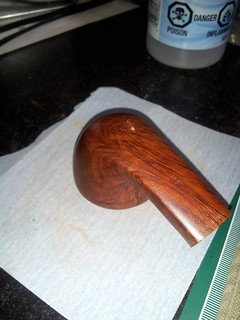
The briar was now ready to refinish. I wanted to recreate the original contrast stain as closely as possible, so I first applied a coat of Fiebing’s Black Leather Dye. I use the water-based dyes, so there’s no flaming necessary. I just let the stain dry and hand-buff the excess away with an old towel. I then used a small chunk of 0000 steel wool dipped in water to very gently wash the stain from the surface of the wood. This leaves the softer grain stained dark. The top-coat stain for this pipe was made from a very diluted mixture of Fiebing’s Dark Brown and Saddle Tan dyes, which I washed over the briar with a cotton pad until I had achieved the overall colour I was looking for. I had to apply more wash to the more heavily sanded top half of the pipe bowl to get a homogenous stain across the entire stummel. When the stain was dry, I wiped the briar with a little mineral oil to hydrate the wood and bring out the richness of the grain.

Then it was time to retrieve the pipe stem from the Oxyclean bath. I cleaned the exterior of the stem with a bit of Magic Eraser and the internals with just a few pipe cleaners. The original owner of this pipe was obviously not a clencher, as there were no tooth marks or chatter to repair.

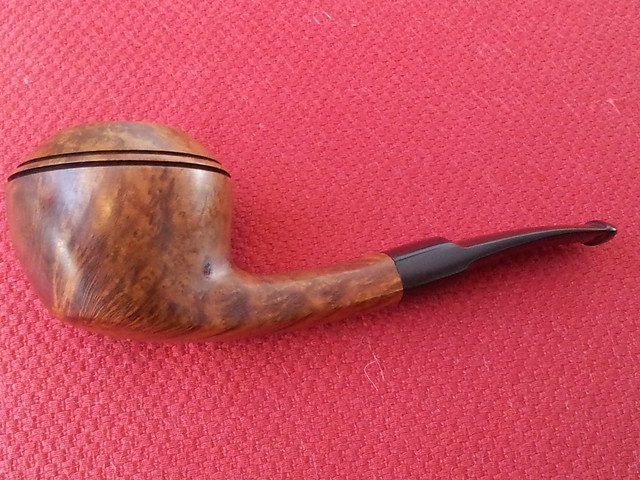
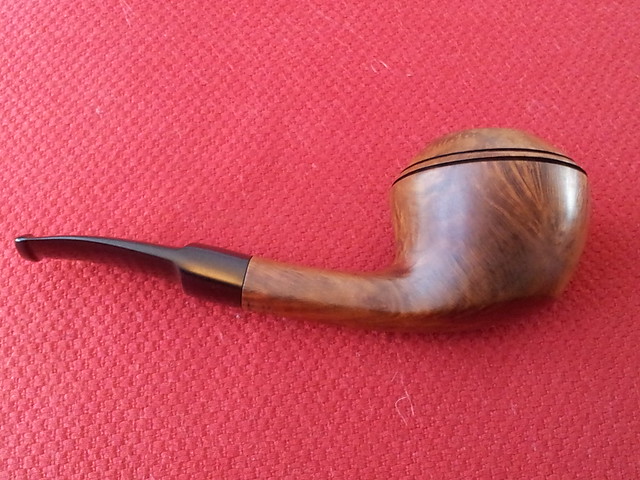
Then the pipe was reassembled and brought to the buffing wheel for a run of White Diamond compound and several coats of Carnauba wax. This Danish Sovereign was obviously a favourite of its previous owner, and I can see why. The shape is both traditional and dramatically different from other Rhodesians I’ve come across. The square sides of the shank flow effortlessly into the stem, while the graceful curves of the pipe work to dispel any idea of awkwardness in the finished shape. Even better, it promises to be an excellent smoker and will make an excellent addition to my collection and rotation.
Here’s the finished pipe.
Thanks for looking and as always, Happy Piping!

Reblogged this on rebornpipes and commented:
Charles’ handling of the burn mark on this Rhodesian is worth the read. His work to keep things even and flowing on the cap of the bowl is worth reading and noting.
LikeLiked by 1 person
Thanks for the reblog, Steve. I think it’s really important to retain the original lines of the pipe as much as possible during a restoration. Otherwise, you’re essentially unmaking the original pipe and making your own in its place.
LikeLike
I could not agree more Charles. Well done
LikeLike
Excellent job, Charles. Removing the burn marks was masterfully done. You kept the shape of the cap and really made those marks disappear. Another opportunity for me to learn from you.
LikeLiked by 1 person
Thanks Al. Sharing & learning ftom each other is what it’s all about. 🙂
LikeLike
Excellent results, Charles. I would not have thought the burn could disappear. You worked magic. Thanks for sharing. The photos tell the tale.
LikeLiked by 1 person
Thanks Dave. I figured going in the job would go one of two ways. Thankfully it went the right way this time! 😉
LikeLike
I want to embarress myself and ask “what is CA glue”? I guess the briar dust you made yourself from a canabalized pipe you already had?
LikeLike
Terminology is great, eh? 🙂
CA is short for Cyanoacrylate, the generic chemical name for Crazy Glue.
And yes, I collect briar dust from other projects – topping a bowl creates a fair bit – or I’ll sacrifice an old bit of briar to make some if I’m out. A little goes a long way.
LikeLike
Very cool..I have decided to get a big Peterson pipe for every day of the week…and reserve some of my other pipes for aromatics, etc…but I cant afford the big new ones…so I want to try and restore some estate Peterson system pipes..I have been learning from reading your stuff and a few other guys…I have my retort and reamer set ordered and am hoping for the best..thank you for geting this info out there..
Question #2: What is “pipe mud” sometimes called “bowl mud” it was referred to in the restoration project with the pipe you tag teamed with? Thanks Greg
LikeLike
Pipe mud is made from cigar ash and a small amount of water to form a plaster of sorts. It sets hard and is traditionally used in chamber repairs.
Congrats on starting your pipe refurbishing journey! My best advice to you is not to rush your first few pipes but to work slowly and methodically through each stage of the restoration. Your skills will improve with each pipe.
Best of luck!
LikeLike