
“It may…be judged indecent in me to come forward on this occasion; but when I see a fellow-creature about to perish through the cowardice of her pretended friends, I wish to be allowed to speak, that I may say what I know of her character.”
― Mary Shelley, Frankenstein
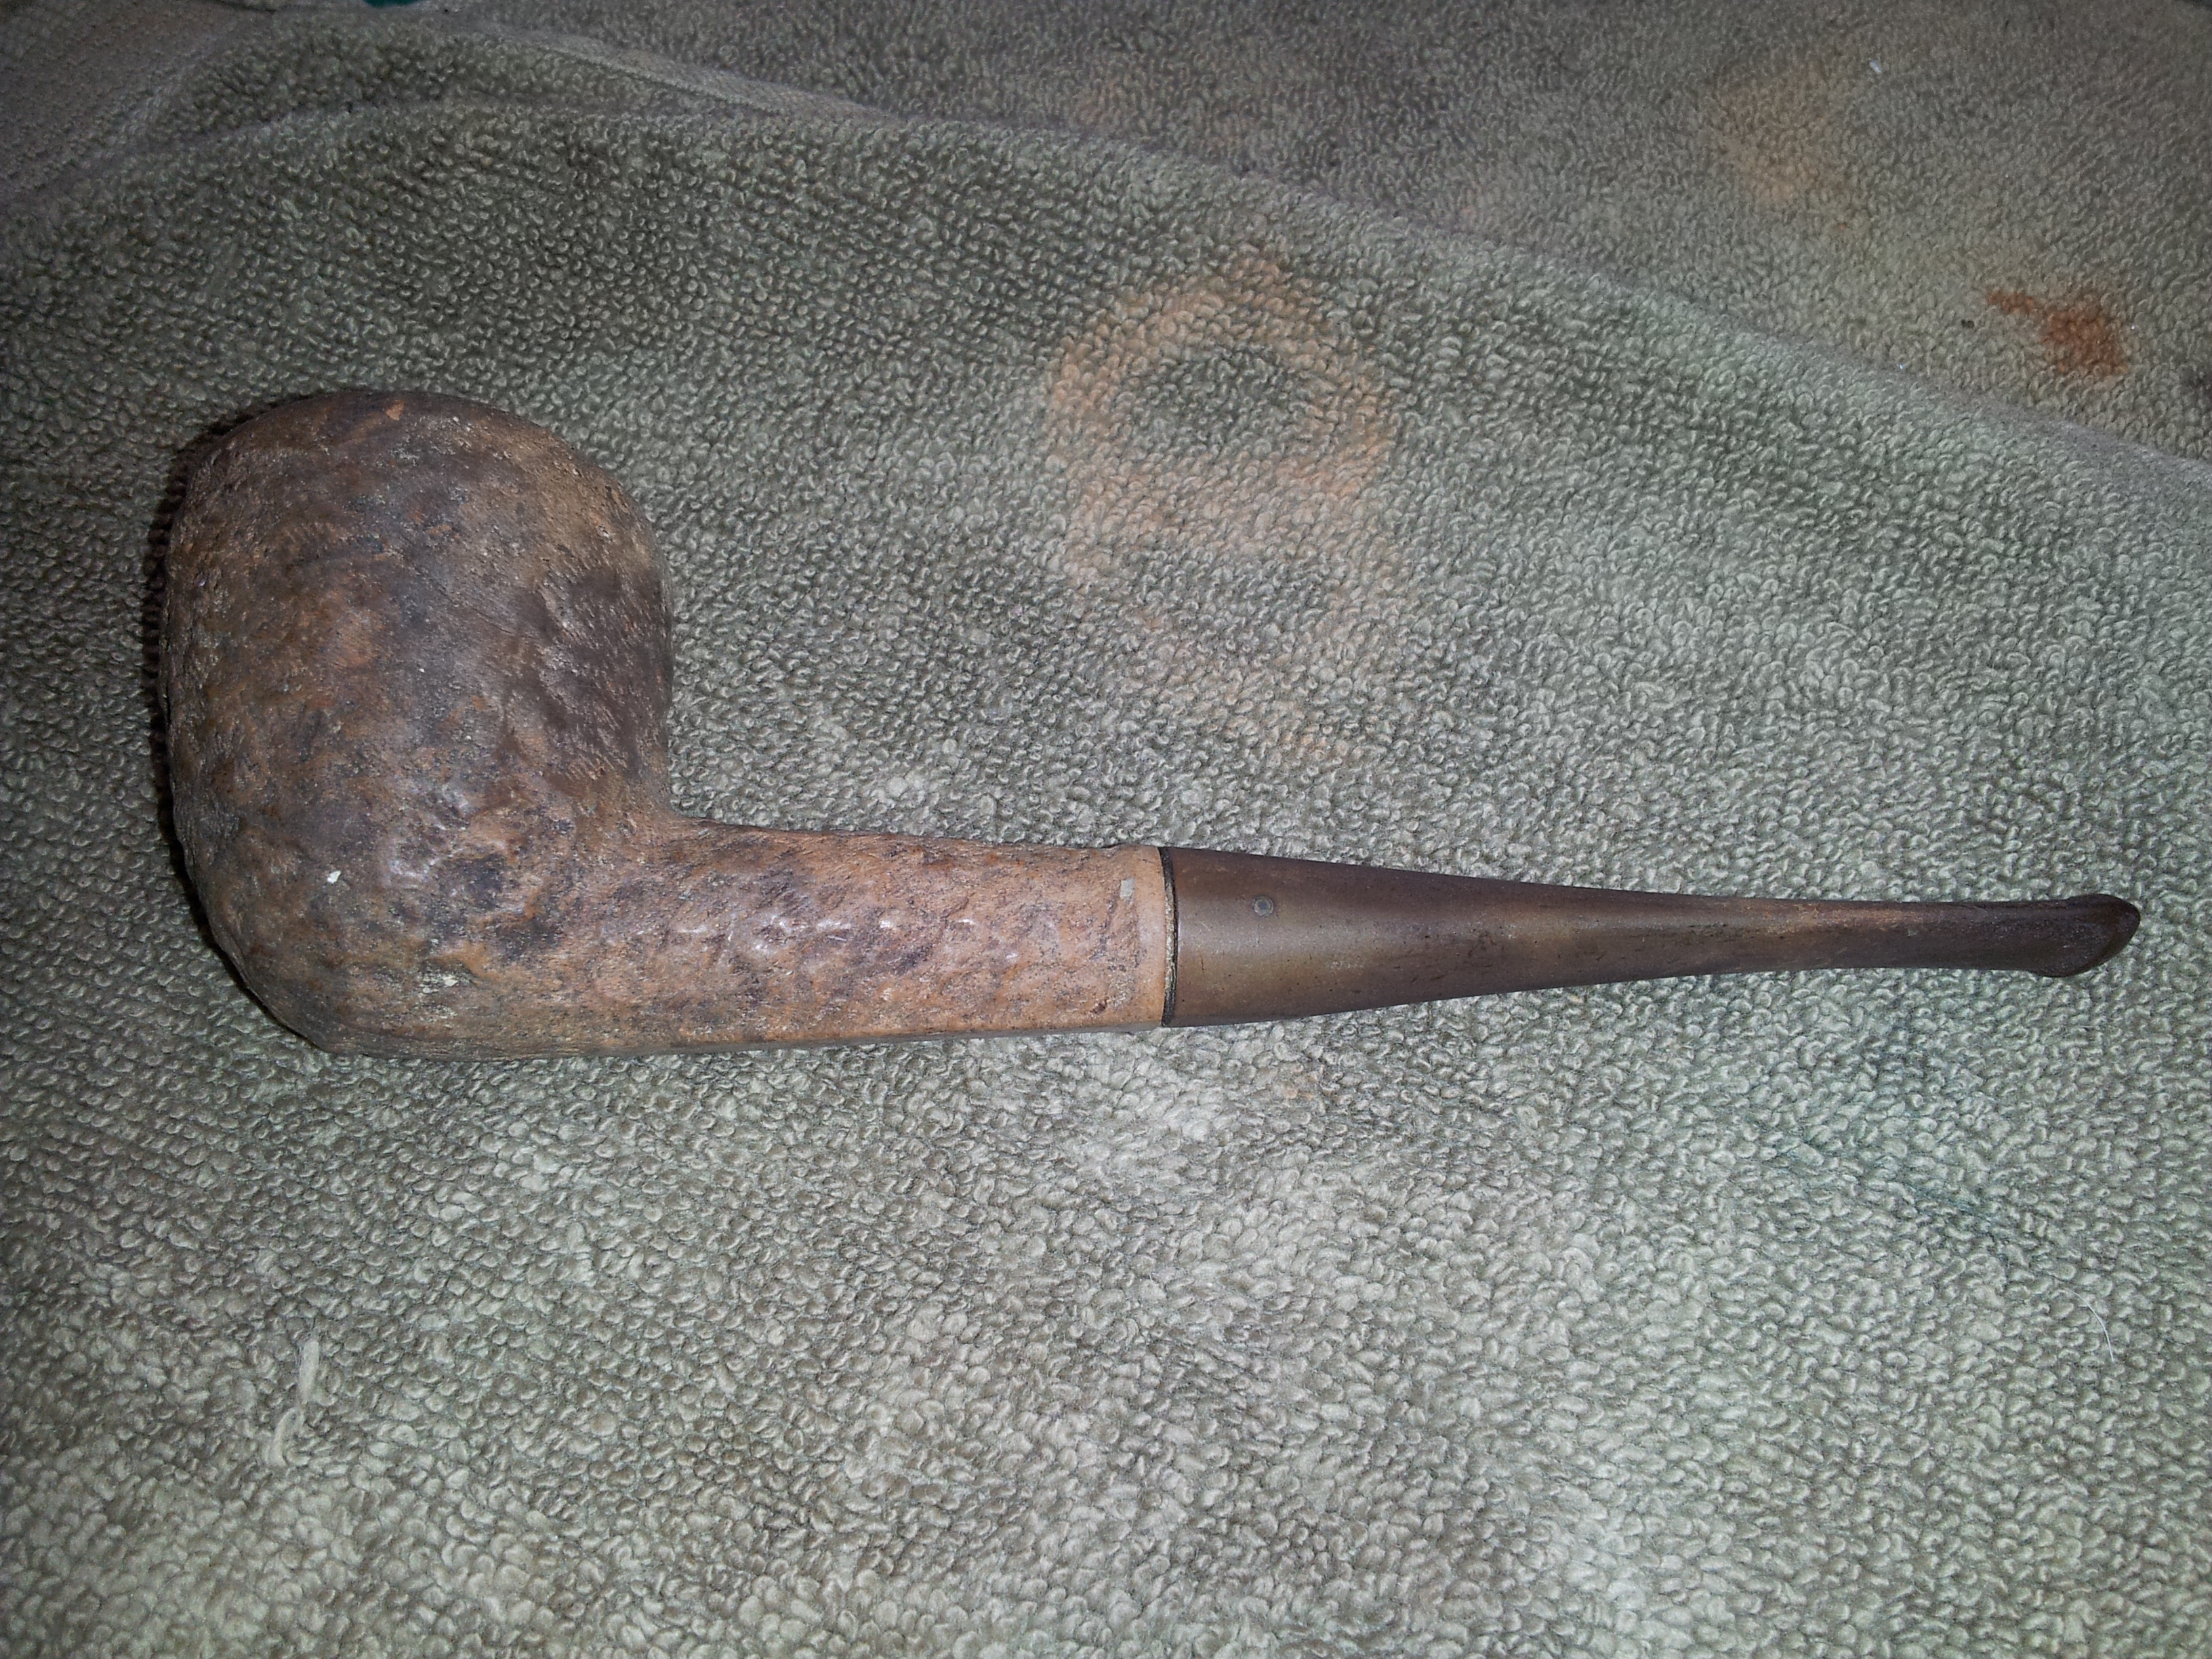
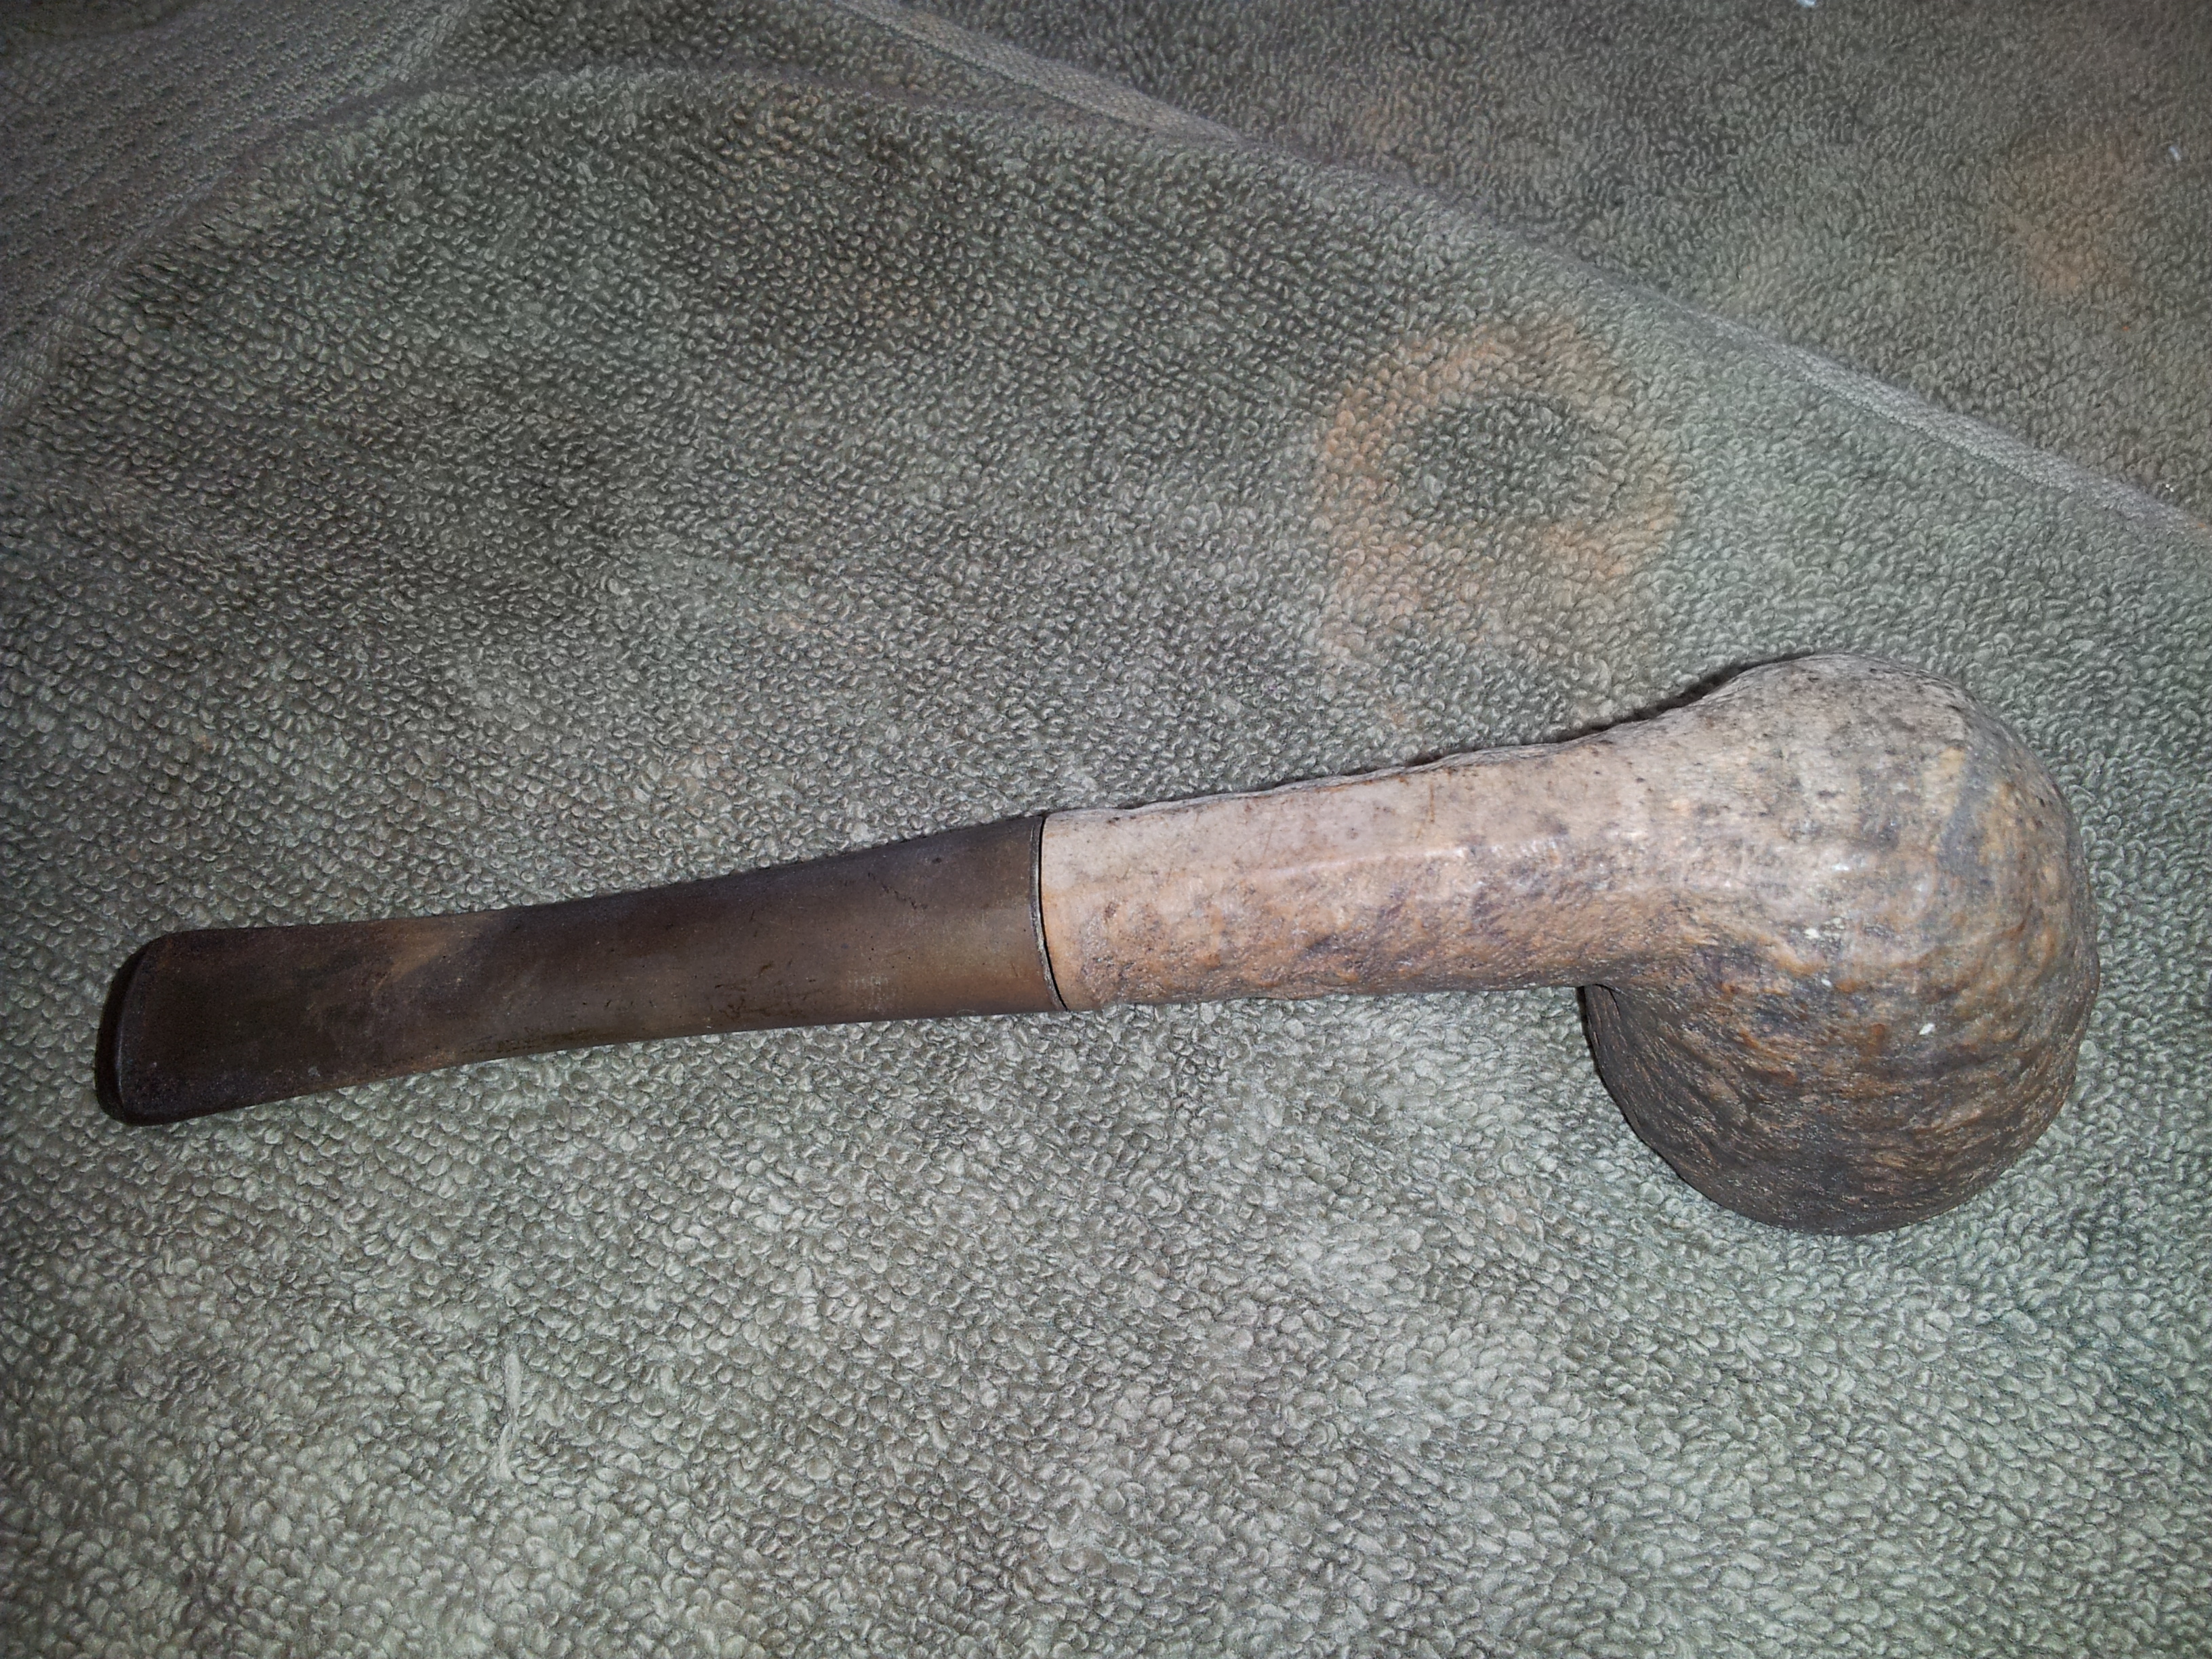
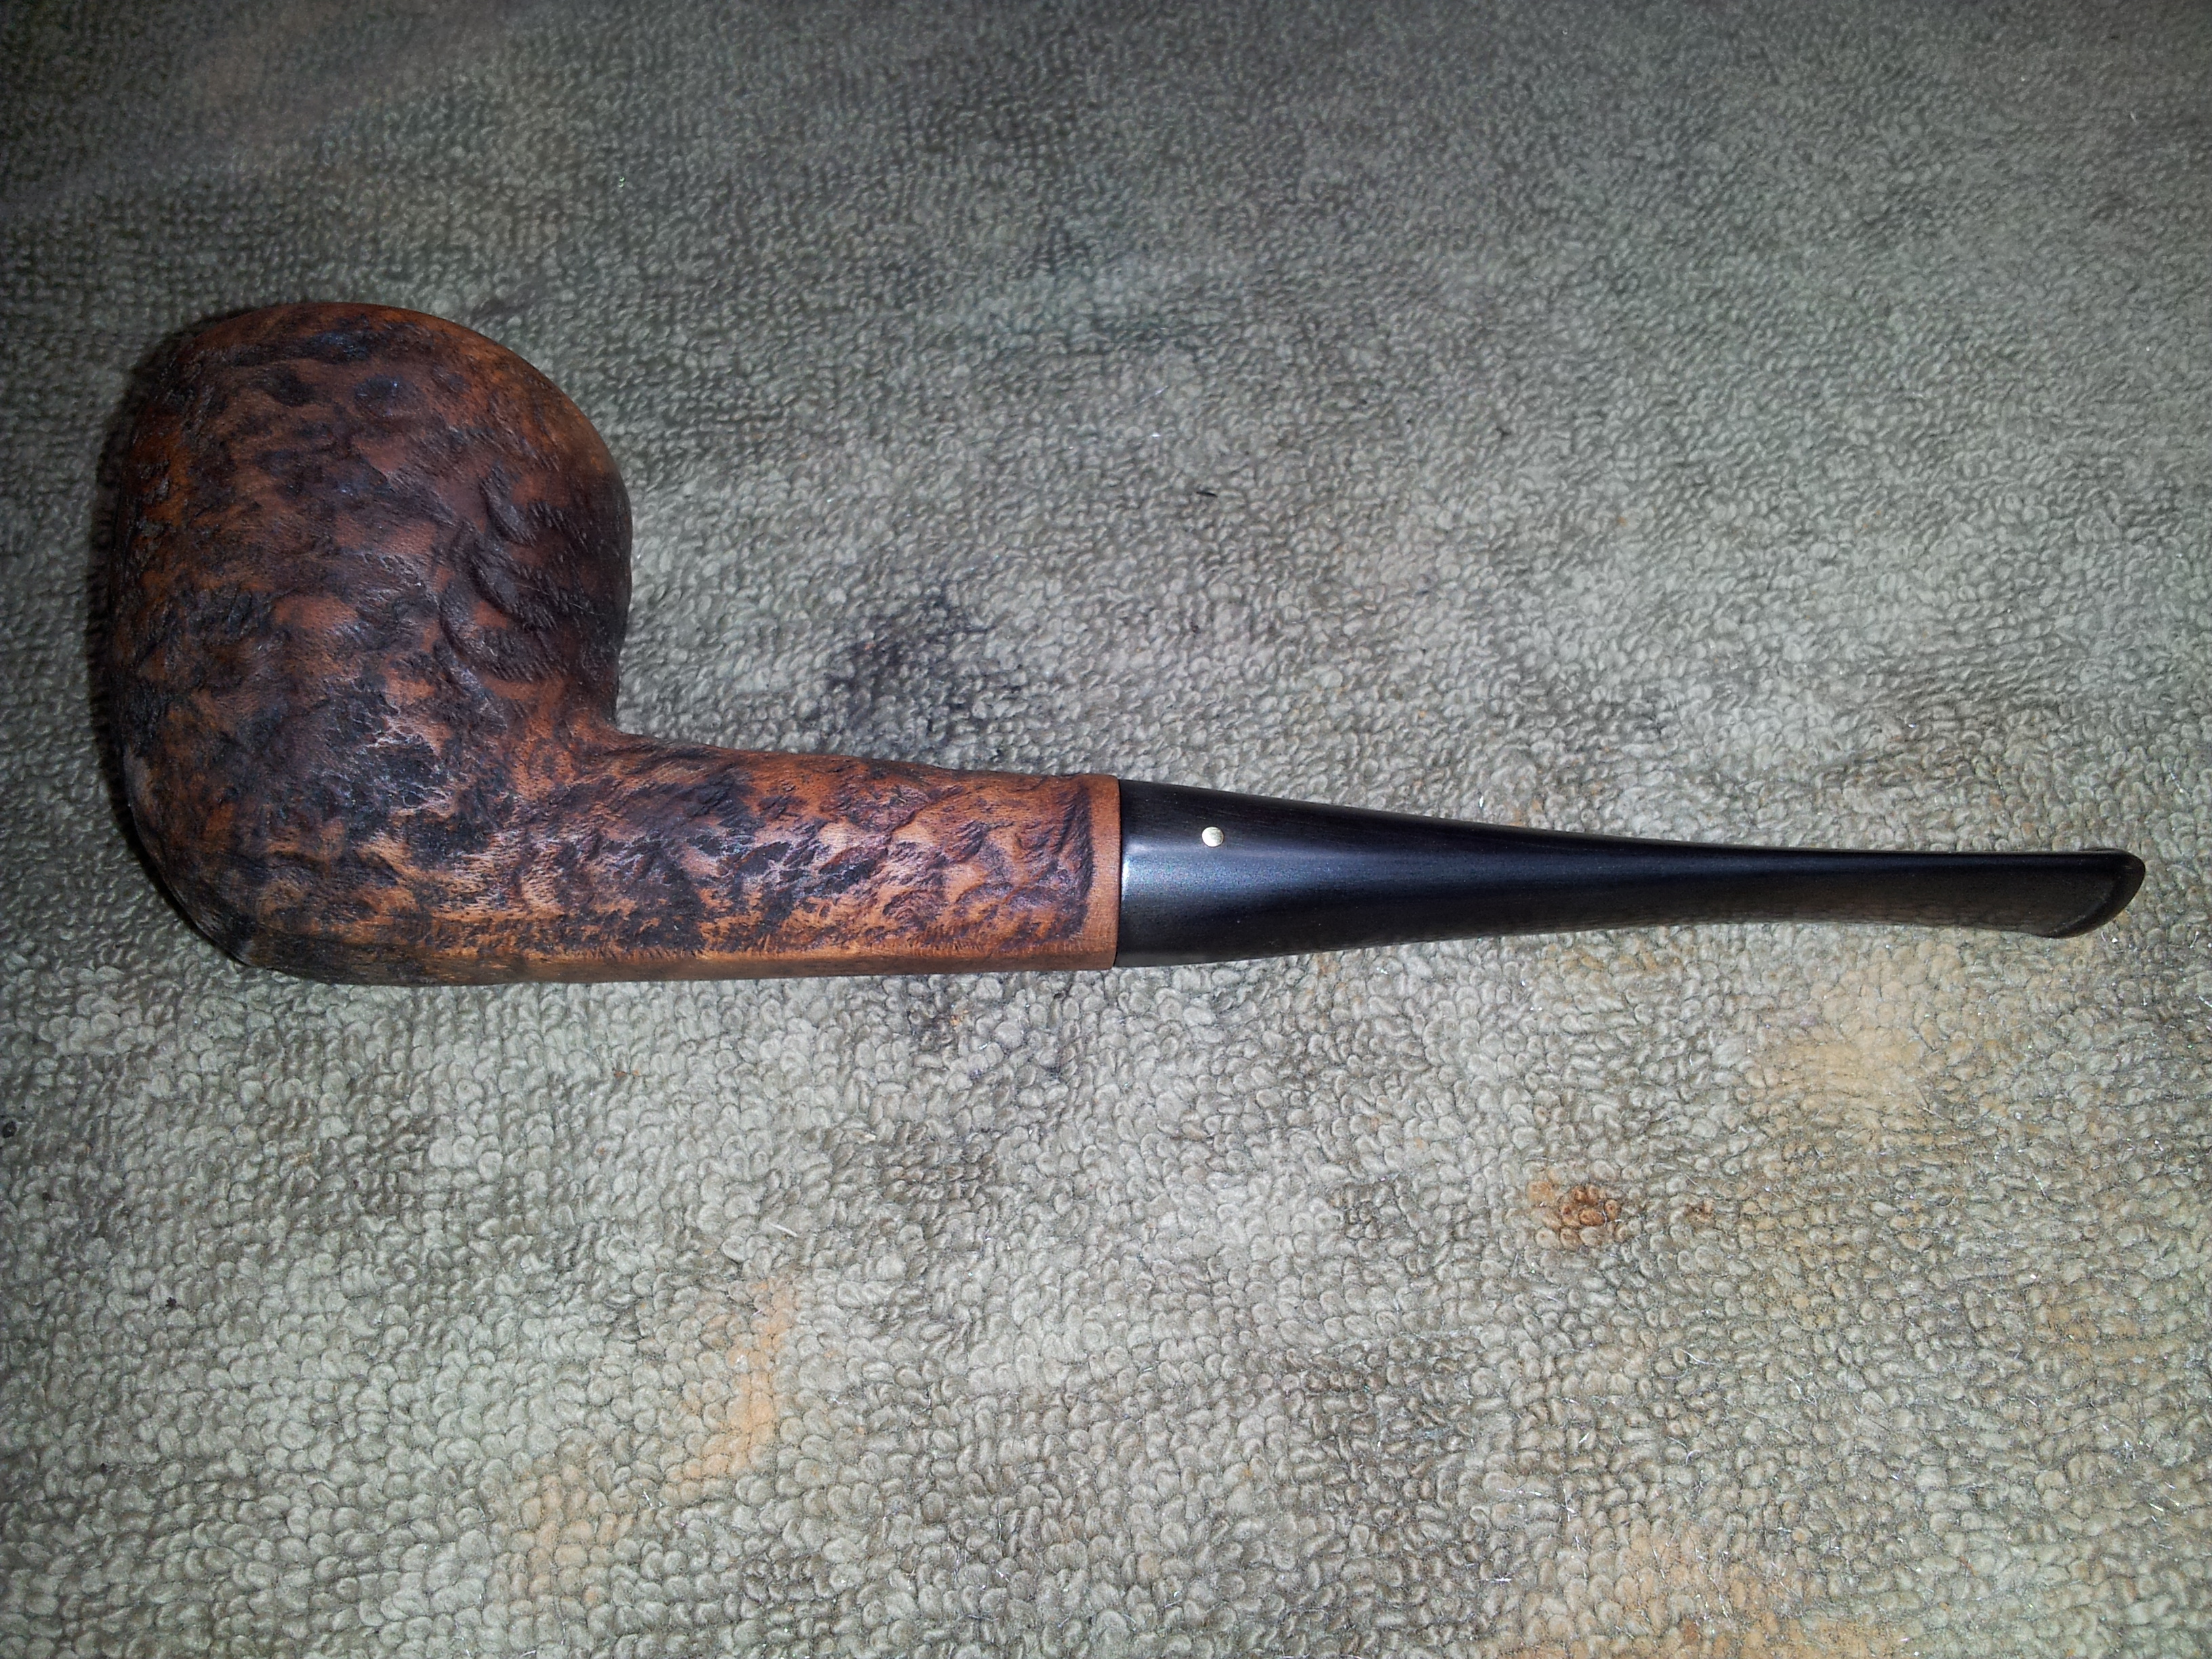
With Devil’s Night fast upon us, I reached into my box of pipes and pulled out a true piper’s horror story. This pipe was so far gone, so neglected, so crusted with I don’t know what that I couldn’t identify it until I managed to remove the stem from the shank. It was only when I saw the aluminum filter holder/tenon that I knew that the poor wretched thing in my hands was, or used to be, a Brigham billiard. I thought the opening quote from Mary Shelley quite appropriate – this Brigham was certainly about to perish through the cowardice of [a] pretended friend, if the friend in question was the previous owner!
The pipe was bleached almost white on the right side and top, while the left side was darker and showed flecks of old stain peeking through the crystallized mineral crust that had grown over most of the briar. I’m guessing it was left in a window somewhere damp and unheated – a barn? a basement? – and the sun bleached the side facing the window while a concrete or stone window sill encouraged a steady supply of damp. The stummel more closely resembled a scrap of driftwood than a pipe, while the stem was heavily oxidized and showed several dents and dings. The Brigham “dot” grading was completely hidden by oxidation and corrosion, but after a good scrub with isopropyl alcohol on a cotton pad, I uncovered a single brass dot on the stem, and a corresponding “110” shape number and “Brigham” over “Canada” stamped into the base of the stummel. These marks, along with the aluminum tenon, identify the pipe as one of the last Brighams to be made in Canada (late 1970’s to early 1990’s vintage), made about an hour away from me in Toronto. Here are a few pics of the pipe as found.


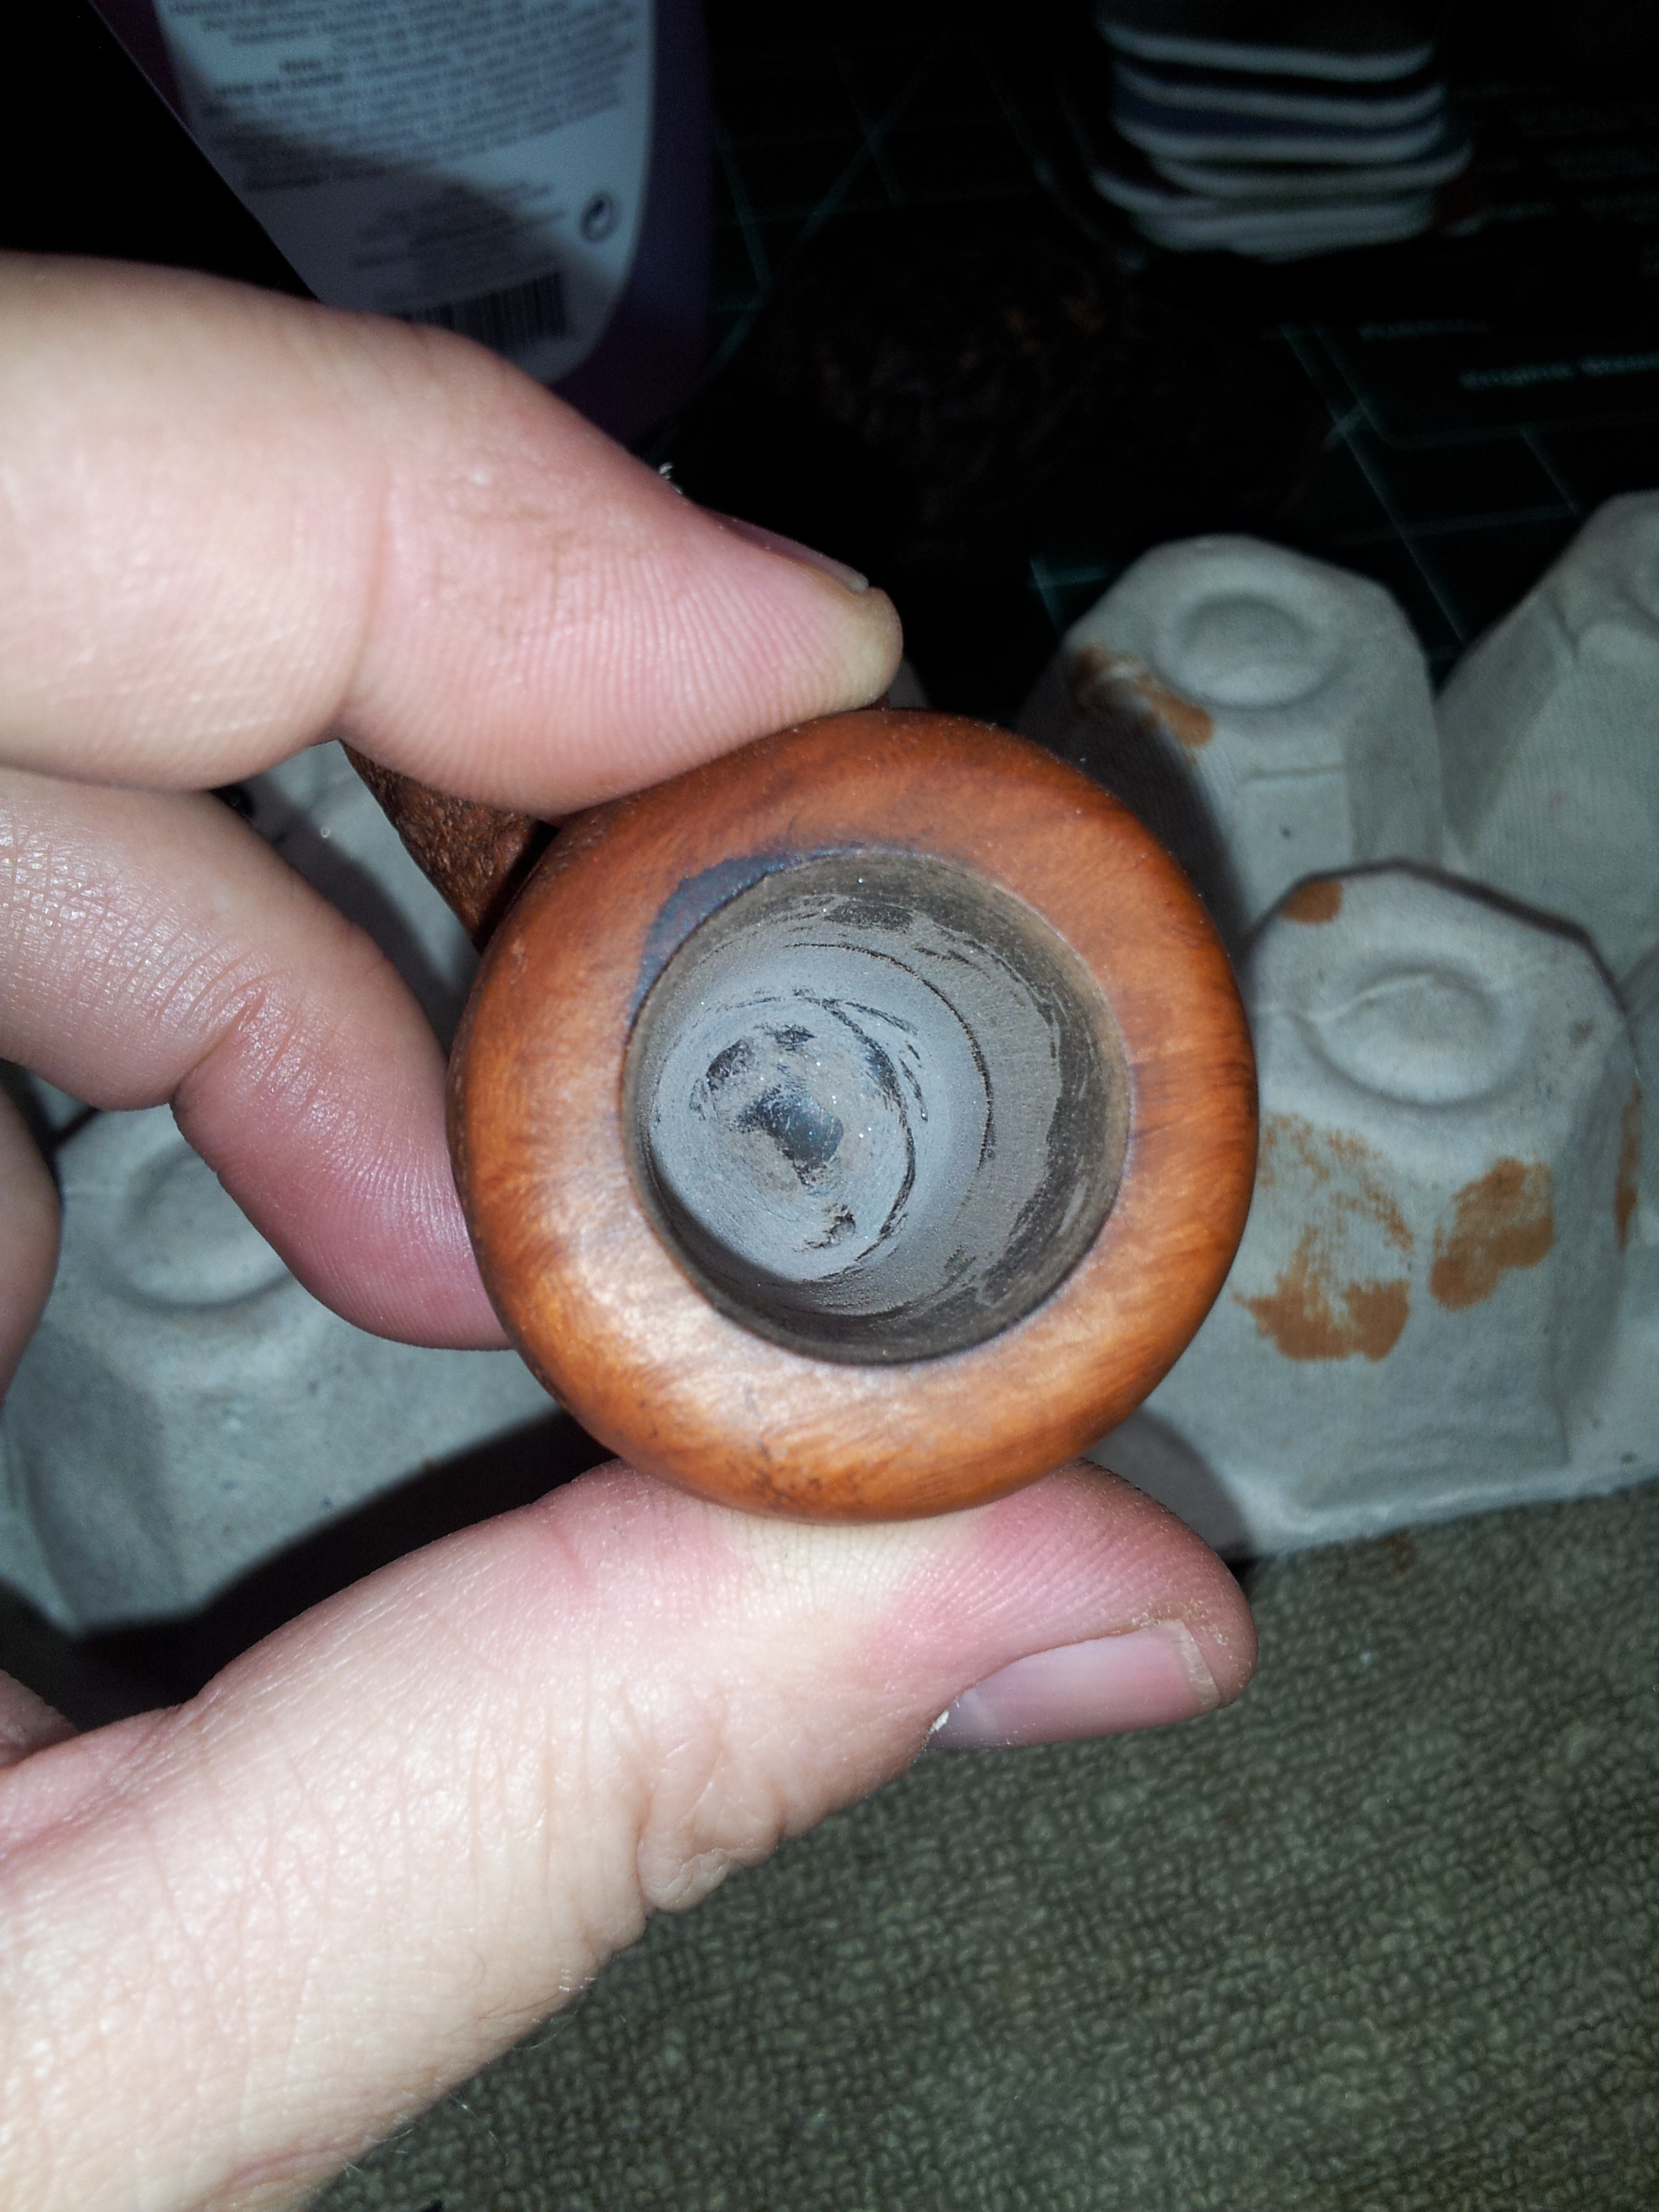
I wasn’t sure if this pipe was even capable of being restored from such a decrepit condition, but I’ve got a soft spot for these Canadian-made pipes, so I was determined to make the attempt. I very gingerly reamed the bowl back to bare wood, all the while expecting the stummel to disintegrate in my hands. Happily, it held together, though the reaming exposed serious damage to the interior walls of the bowl. There was a network of fine to medium cracks spidering across the interior bowl surface, anchored by a patch of burnout about 1/4” tall by 5/8” or so wide and perhaps 5/32” deep. The draft hole was also about 3/32” above the chamber floor, but I couldn’t tell if this was from over-reaming or poor drilling.
“A miserable spectacle of wrecked humanity, pitiable to others and intolerable to myself.”
― Mary Shelley, Frankenstein
With nothing to lose at this point, I dropped the stummel into an alcohol bath and the stem into an Oxyclean bath to try to soak off some of the grime, calcification and other accretions. Again, I fully expected the stummel to fall apart, but I muttered a prayer to the pipe restoration gods and walked away from the work table for an hour or so.
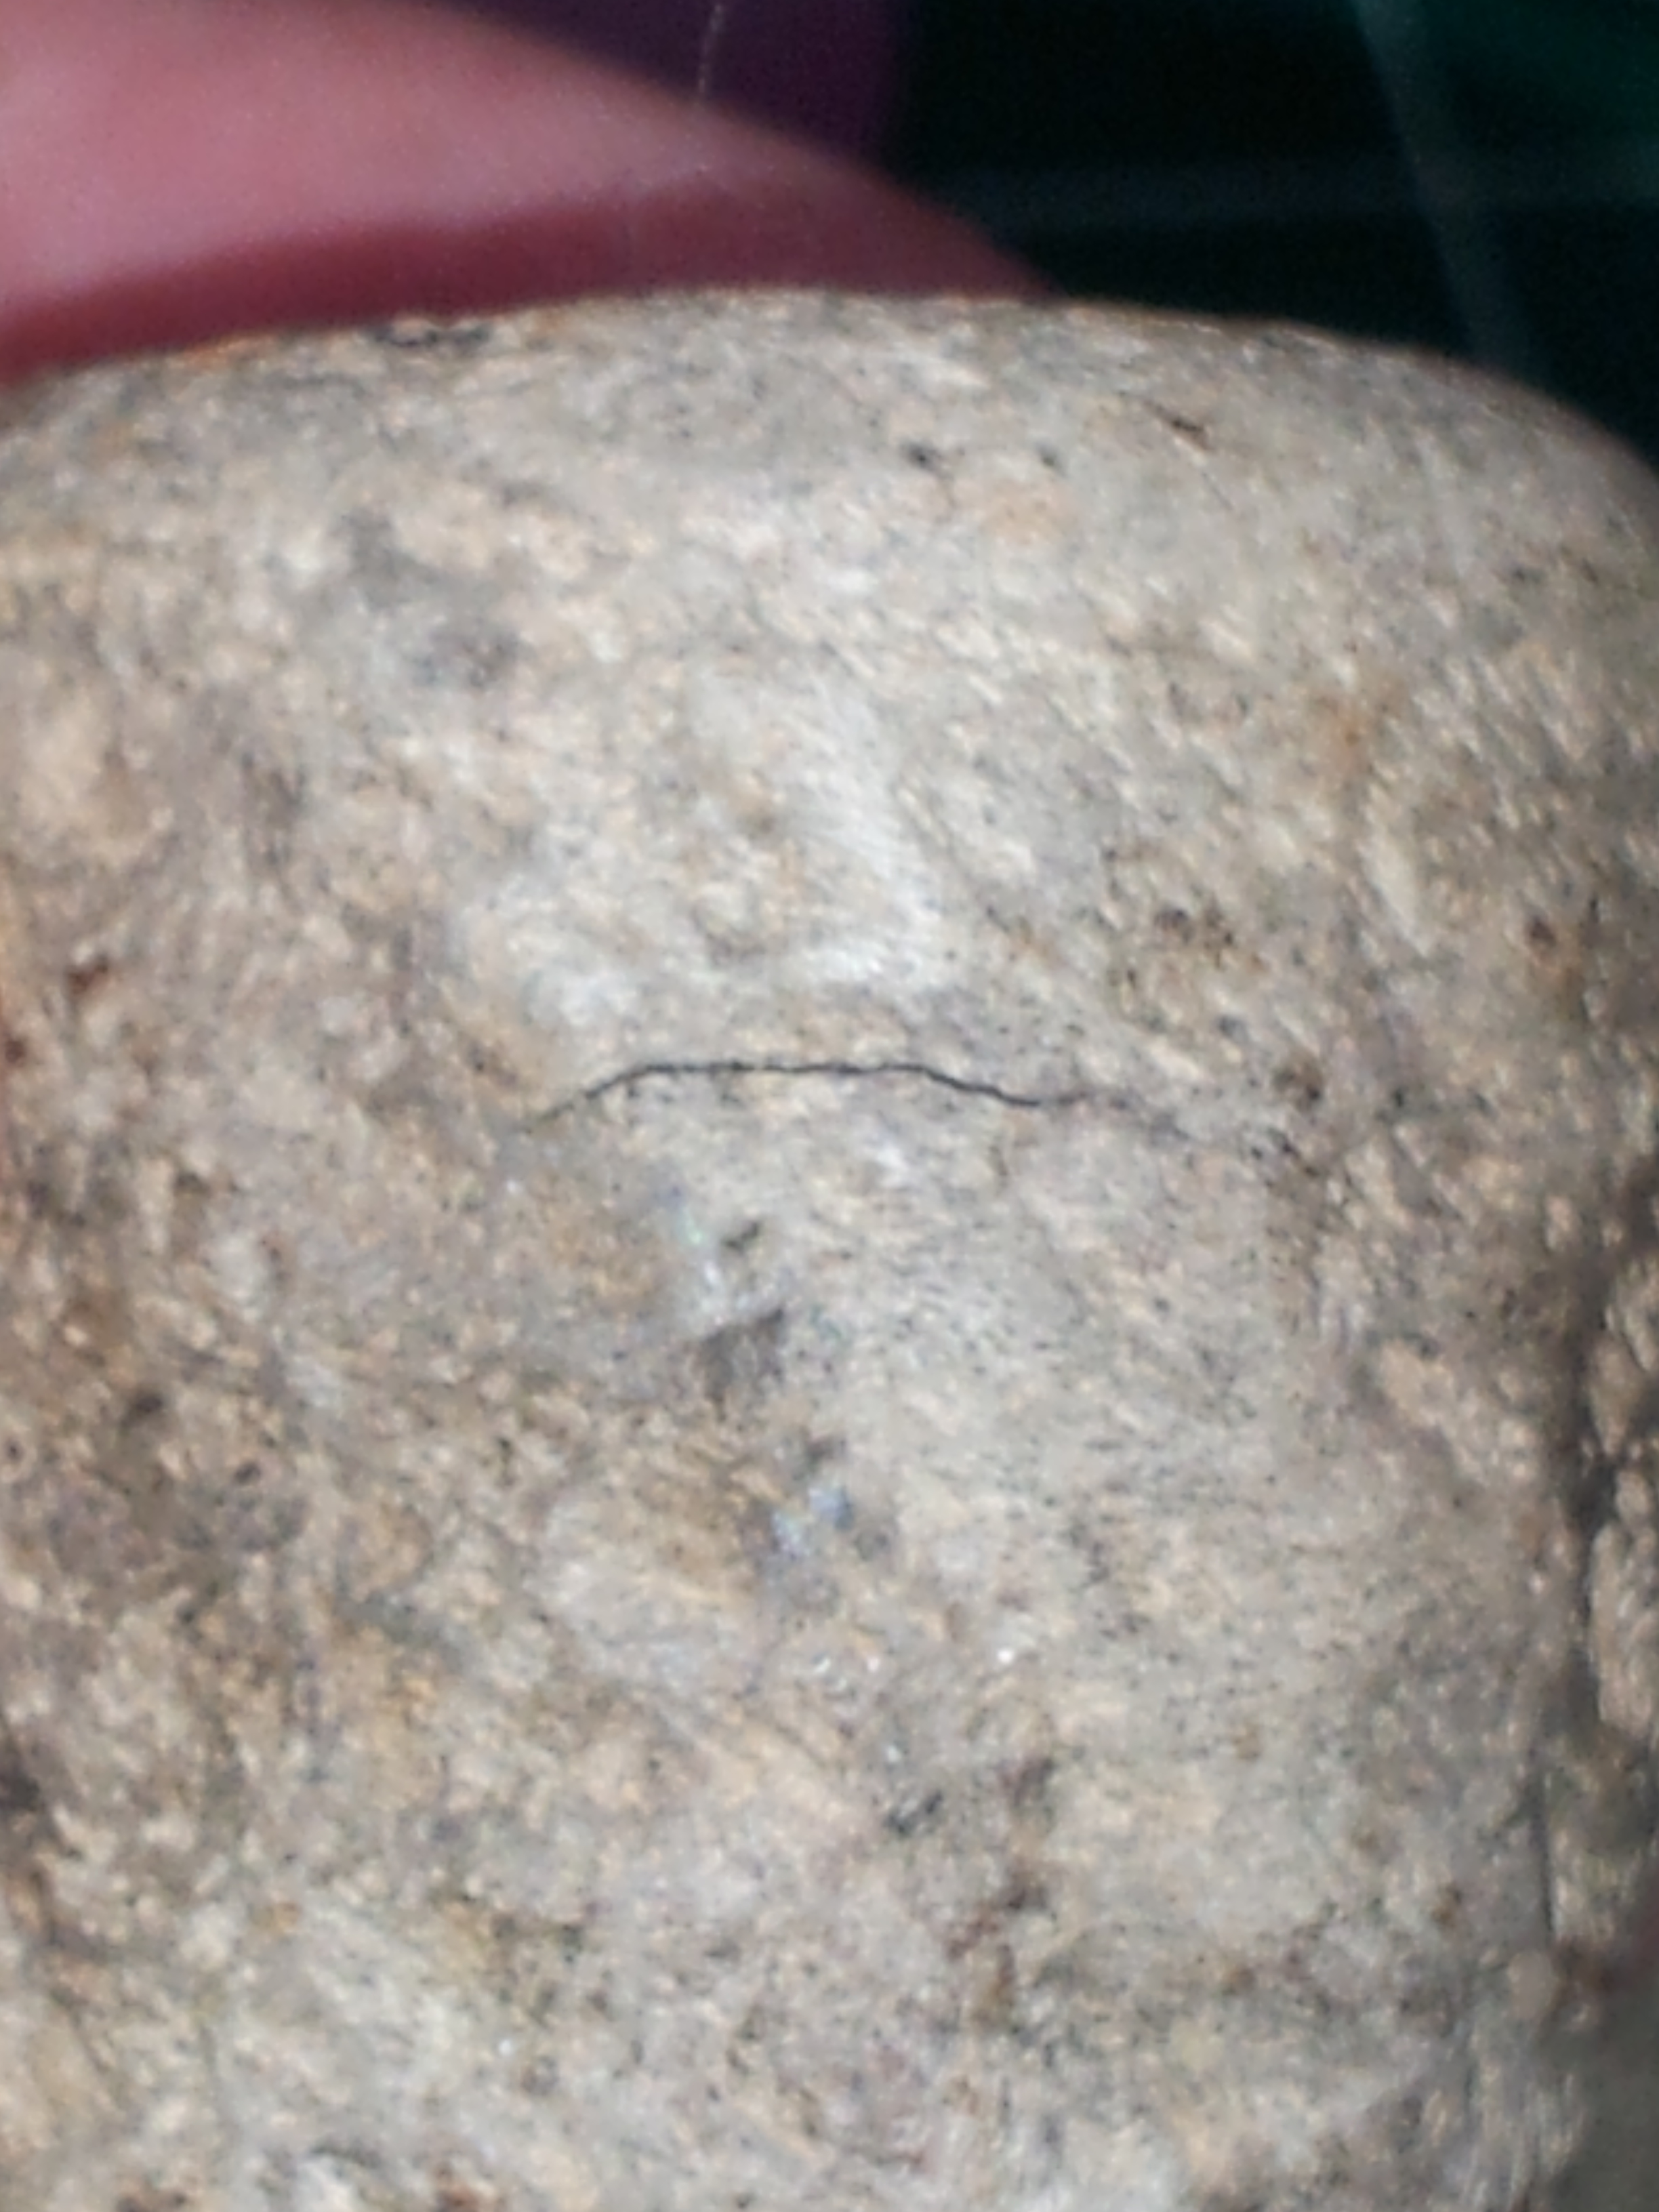
When I came back, I was impressed to discover that the stummel had survived its initial cleansing bath, and that I was now able to get a first good look at the briar that had been hiding under all the grime. I found one hairline crack on the exterior of the bowl, corresponding to the position of the burnout inside the chamber. Here is a pic of the crack and the burnout – I had to wipe the bowl with a bit of alcohol to make the damage stand out.

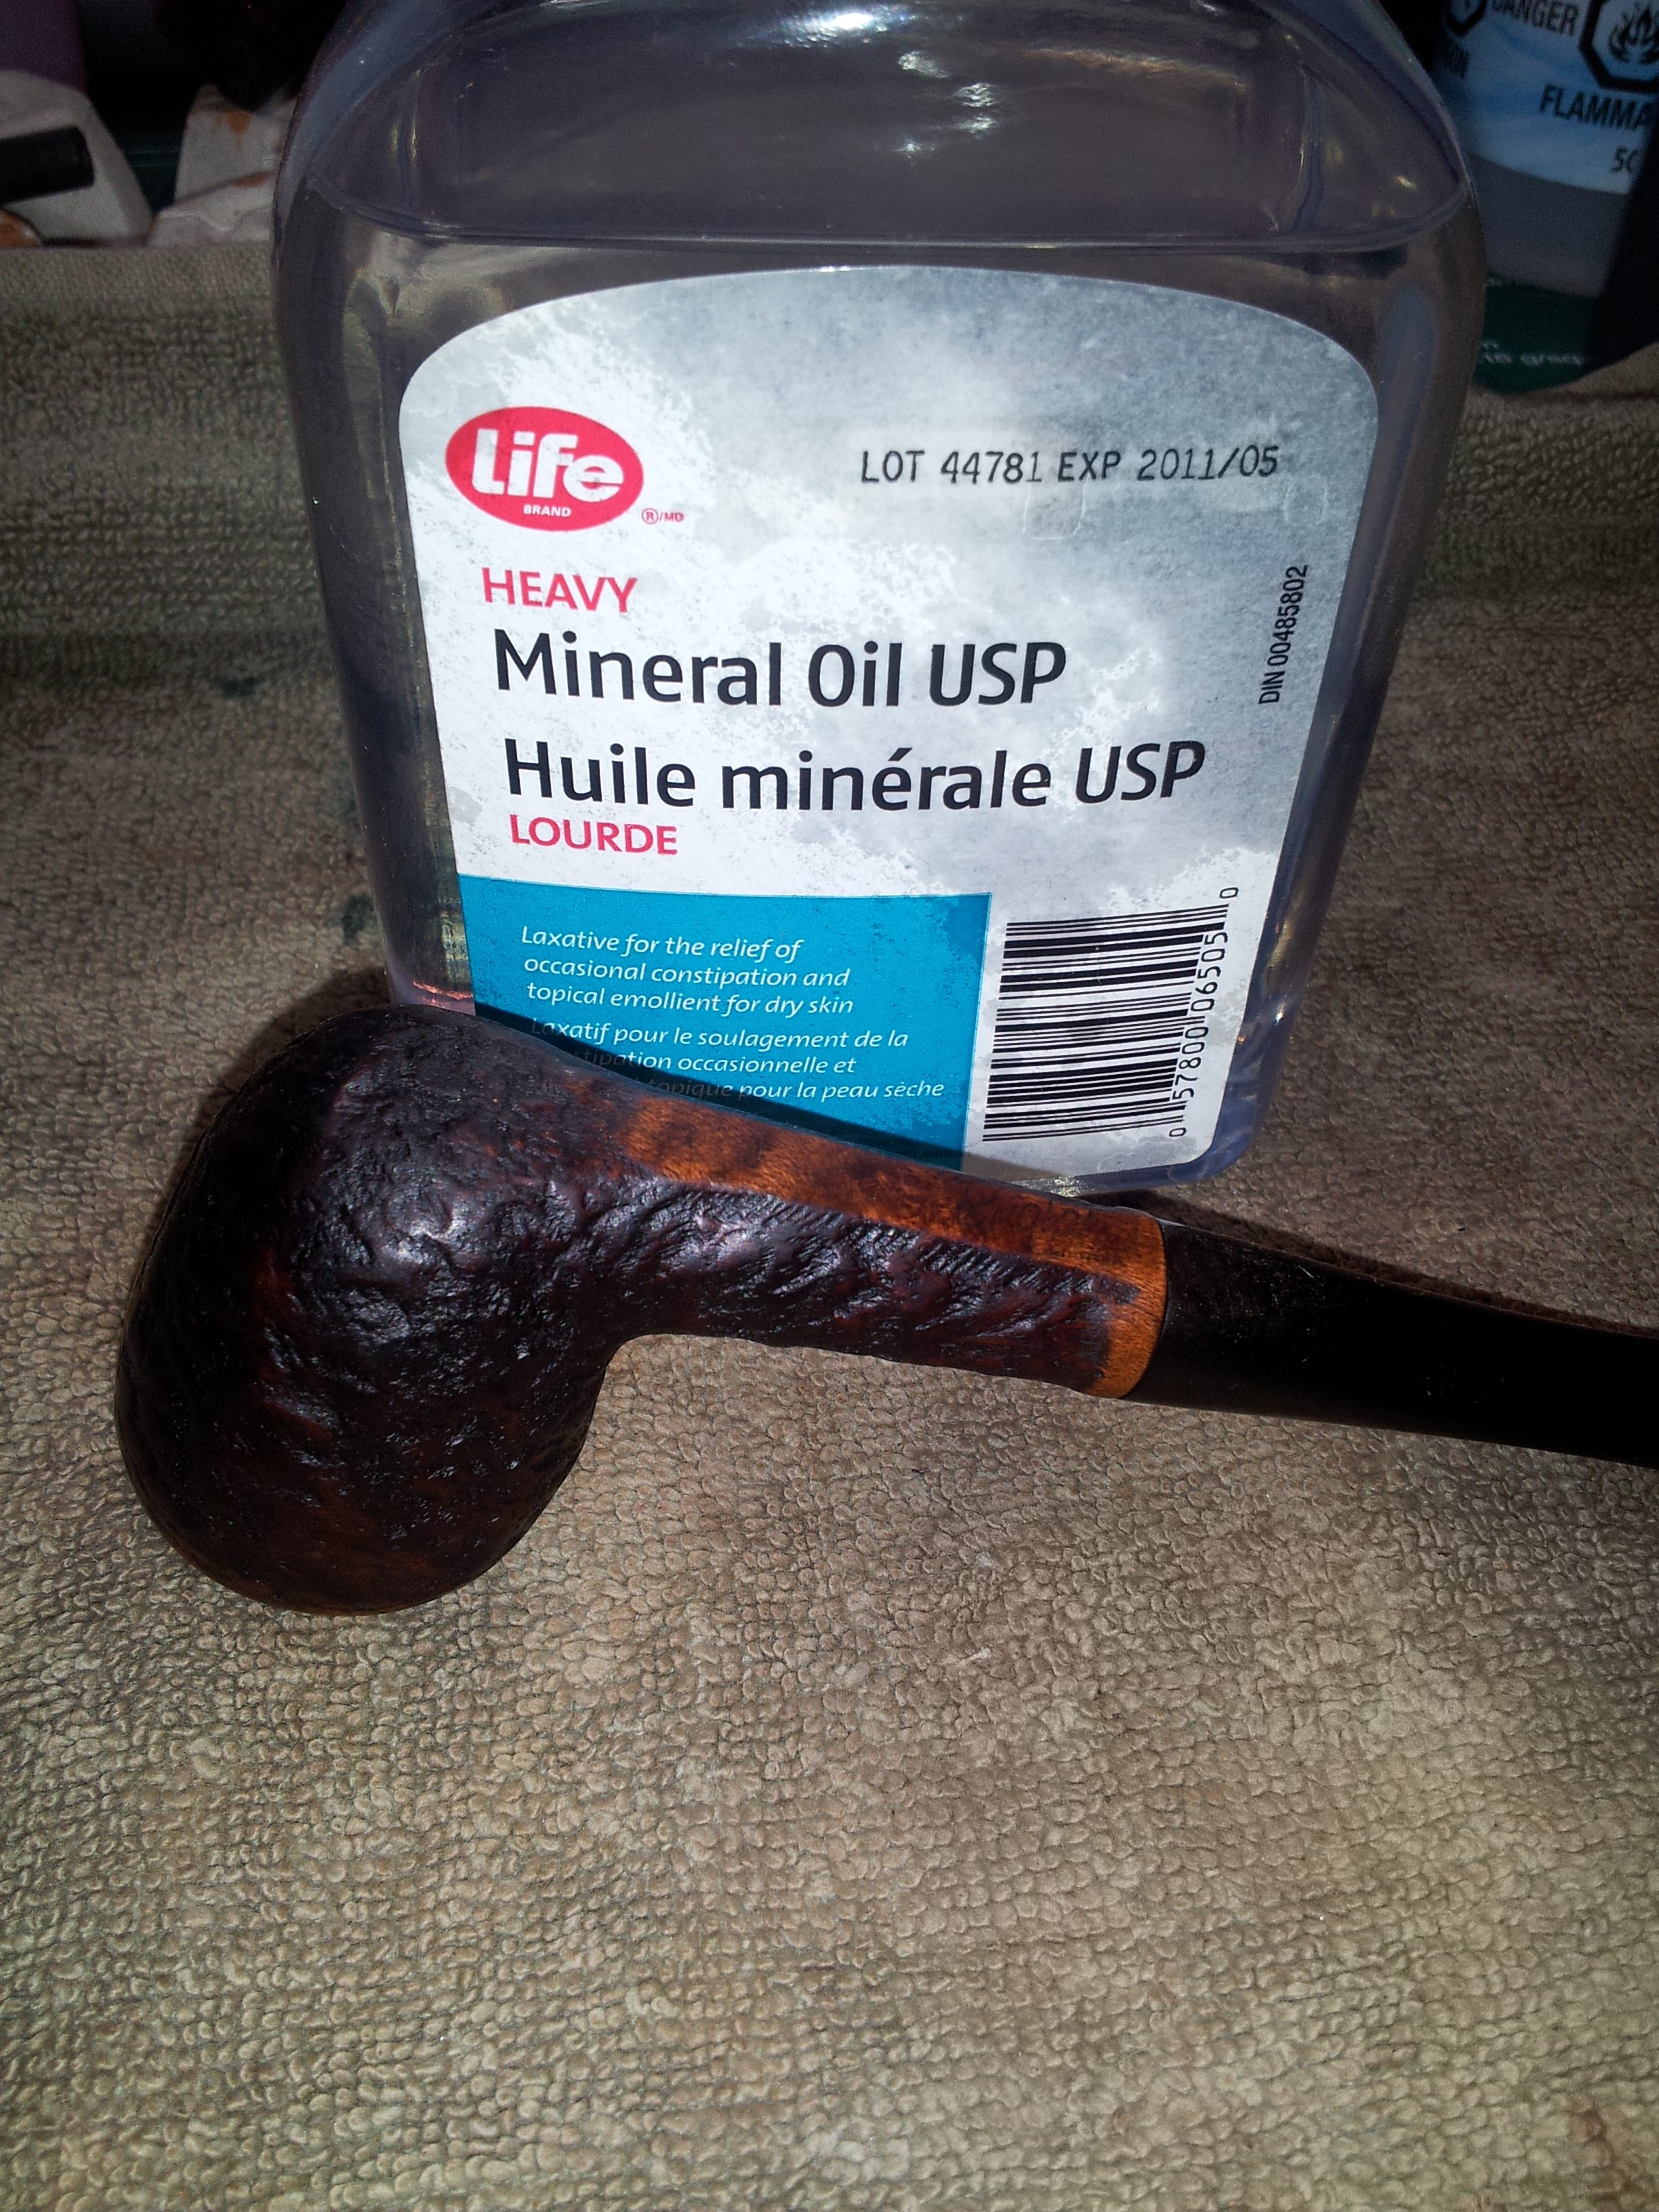
Wanting the wood as clean as possible before going further, I scrubbed the stummel with an old toothbrush and Murphy’s Oil Soap to clean out the rustication and hopefully add a bit of moisture back into the briar. I followed it up with a coat of mineral oil, again to rehydrate things. When the oil was dry, I had another look for cracks but only found the one I’d identified earlier. The crack was tight and did not appear to penetrate to the burned out area inside, so I flowed CA glue into it to fill and seal it before moving on.
The stem likewise enjoyed its bath and the scrub-down with 0000 steel wool and 600-1000 grit wet paper it received after emerging from the Oxyclean. In the end, I only needed a few small drop-fills of CA glue and some judicious sanding to bring the stem back up to par. The aluminum filter holder/tenon got scrubbed with steel wool as well, which removed most, but not all, of the corrosion damage.


On a bit of a roll with the work, I mixed up a small batch of JB-Kwik, the fast-setting version of JB-Weld. This I applied to the inner walls of the tobacco chamber, pressing it into the cracks and the burned out area. I also let some accumulate on the floor of the chamber to bring the floor level up to meet the draft hole. I let the JB cure overnight, then sanded it back to bare briar with 100-grit sandpaper. This left the JB only in the damaged areas while restoring a fresh briar surface to the rest of the bowl. There is still some sanding out left to do in the bowl in the last pic below. For some reason, I forgot to take a pic of the final sanding. To finish up the chamber repair, I re-drilled the draft hole using a 5/32” drill bit turned by hand to cut a new channel to the centre of the bowl. In keeping with the Hallowe’en theme of this post, I purposely did not apply a bowl coating to cover the JB repair. It’s not absolutely necessary to the repair, and it certainly makes the bowl look more ghoulish!


With the structural repairs done, I moved on to the dented and deformed rim. I began with a light topping of the bowl to remove a few surface dents. The rear of the rim was worn almost flat from being knocked to remove dottle (why do people do this?!?), but without seriously reshaping the bowl, there wasn’t much to be done except to smooth out the briar that remained. This left the rear of the bowl looking somewhat hunchbacked in profile, but perhaps that is fitting for a Hallowe’en story. Either way, it’s not particularly noticeable unless you really get close, so I settled for a smooth, if slightly lopsided rim.
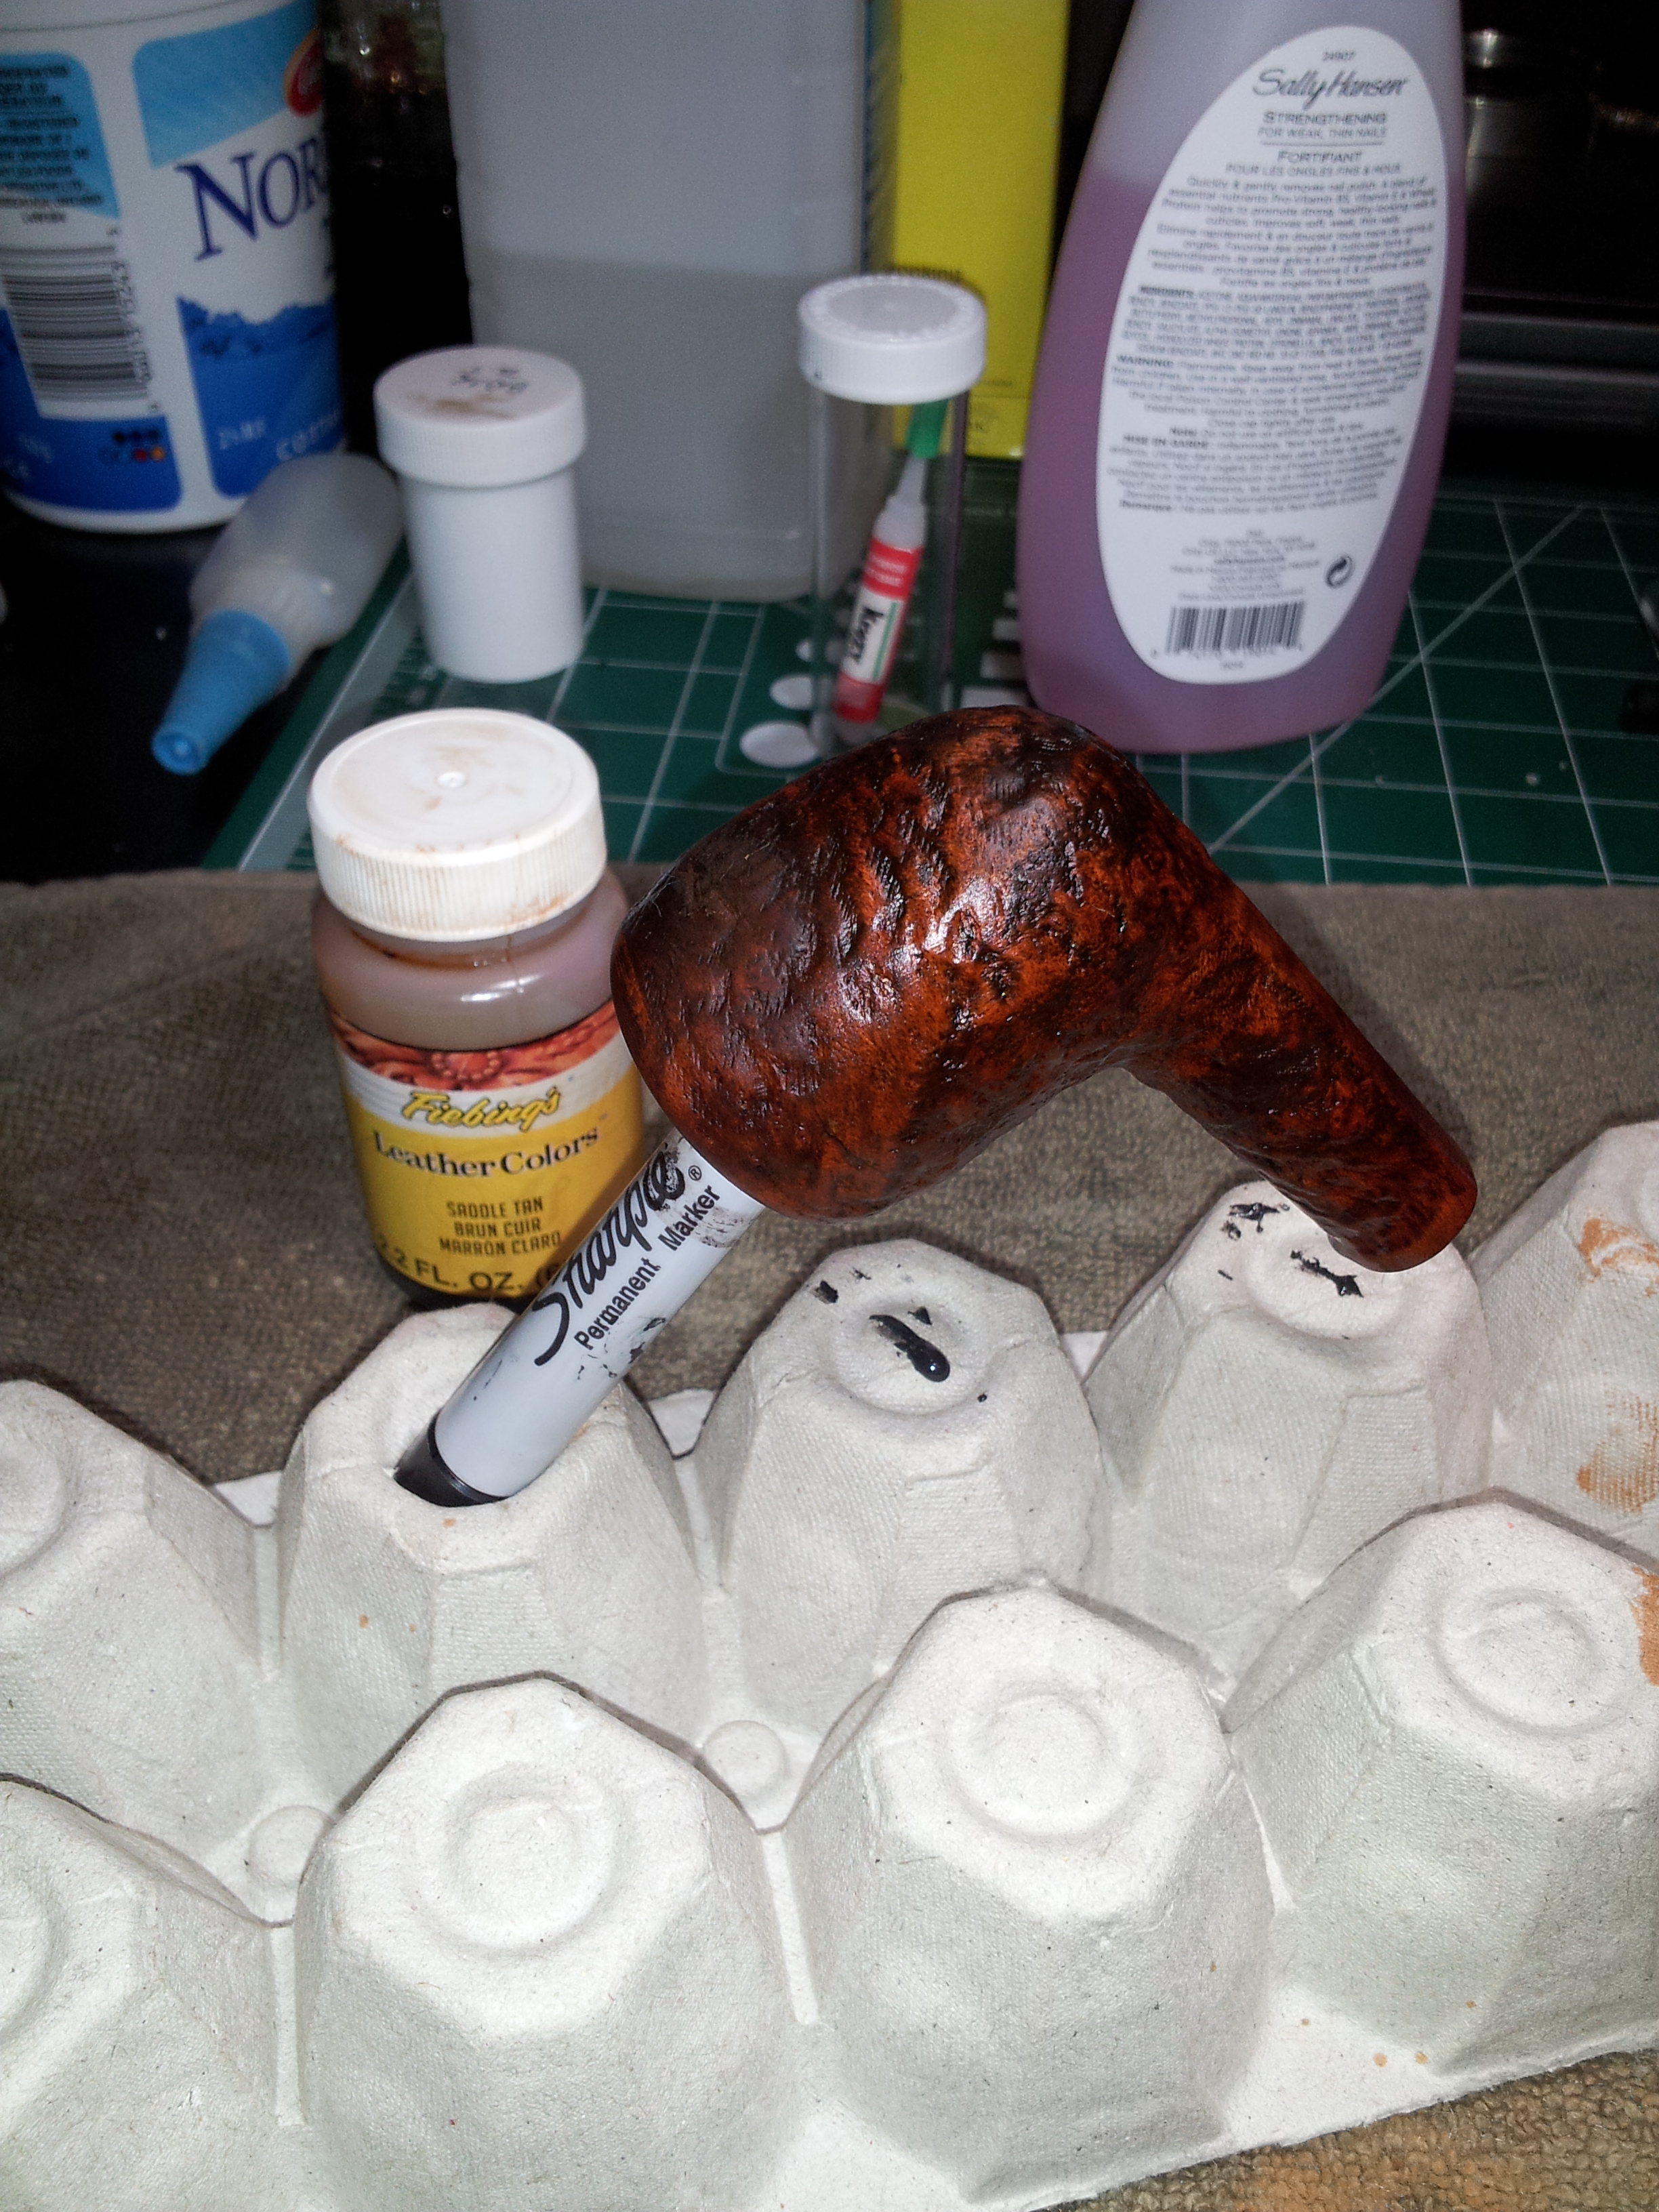
The bleached out briar’s colouring evened out a bit through the cleaning process, but would still need refinishing to look like a proper Brigham again. Taking inspiration from several Brigham pipes in my collection, I started by applying a good heavy coat of Fiebing’s Saddle Tan, full strength. I let it dry overnight (I use the water-based dye, so flaming it isn’t an option), then gave the pipe a gentle buff with an old terry towel to remove any excess dye. I followed the Tan with a coat of Dark Brown stain applied only to the rusticated areas of the pipe. Again, I let the stain dry overnight and then gave the stummel a liberal wipe with mineral oil. The patchy old finish shone through the dark brown stain, giving the pipe a somewhat sickly appearance, so I gave it another coat of Dark Brown followed by more mineral oil. This second coat of stain subdued the shine-through and gave the pipe a much more homogeneous colour, while still allowing flashes of tans, reds and blacks to show through the brown.

I was a bit worried that buffing on the wheel would remove too much of the new stain, so I limited myself to a very light pass with White Diamond compound before applying several coats of Carnauba Wax. Looking at this restoration – or perhaps “resurrection” is a better term – I experienced a tiny bit of the emotions Dr. Frankenstein must have felt at that fateful moment in his laboratory.
“It was on a dreary night of November that I beheld the accomplishment of my toils. With an anxiety that almost amounted to agony, I collected the instruments of life around me, that I might infuse a spark of being into the lifeless thing that lay at my feet. It was already one in the morning; the rain pattered dismally against the panes, and my candle was nearly burnt out, when, by the glimmer of the half-extinguished light, I saw the dull yellow eye of the creature open; it breathed hard, and a convulsive motion agitated its limbs.” – Mary Shelley, Frankenstein
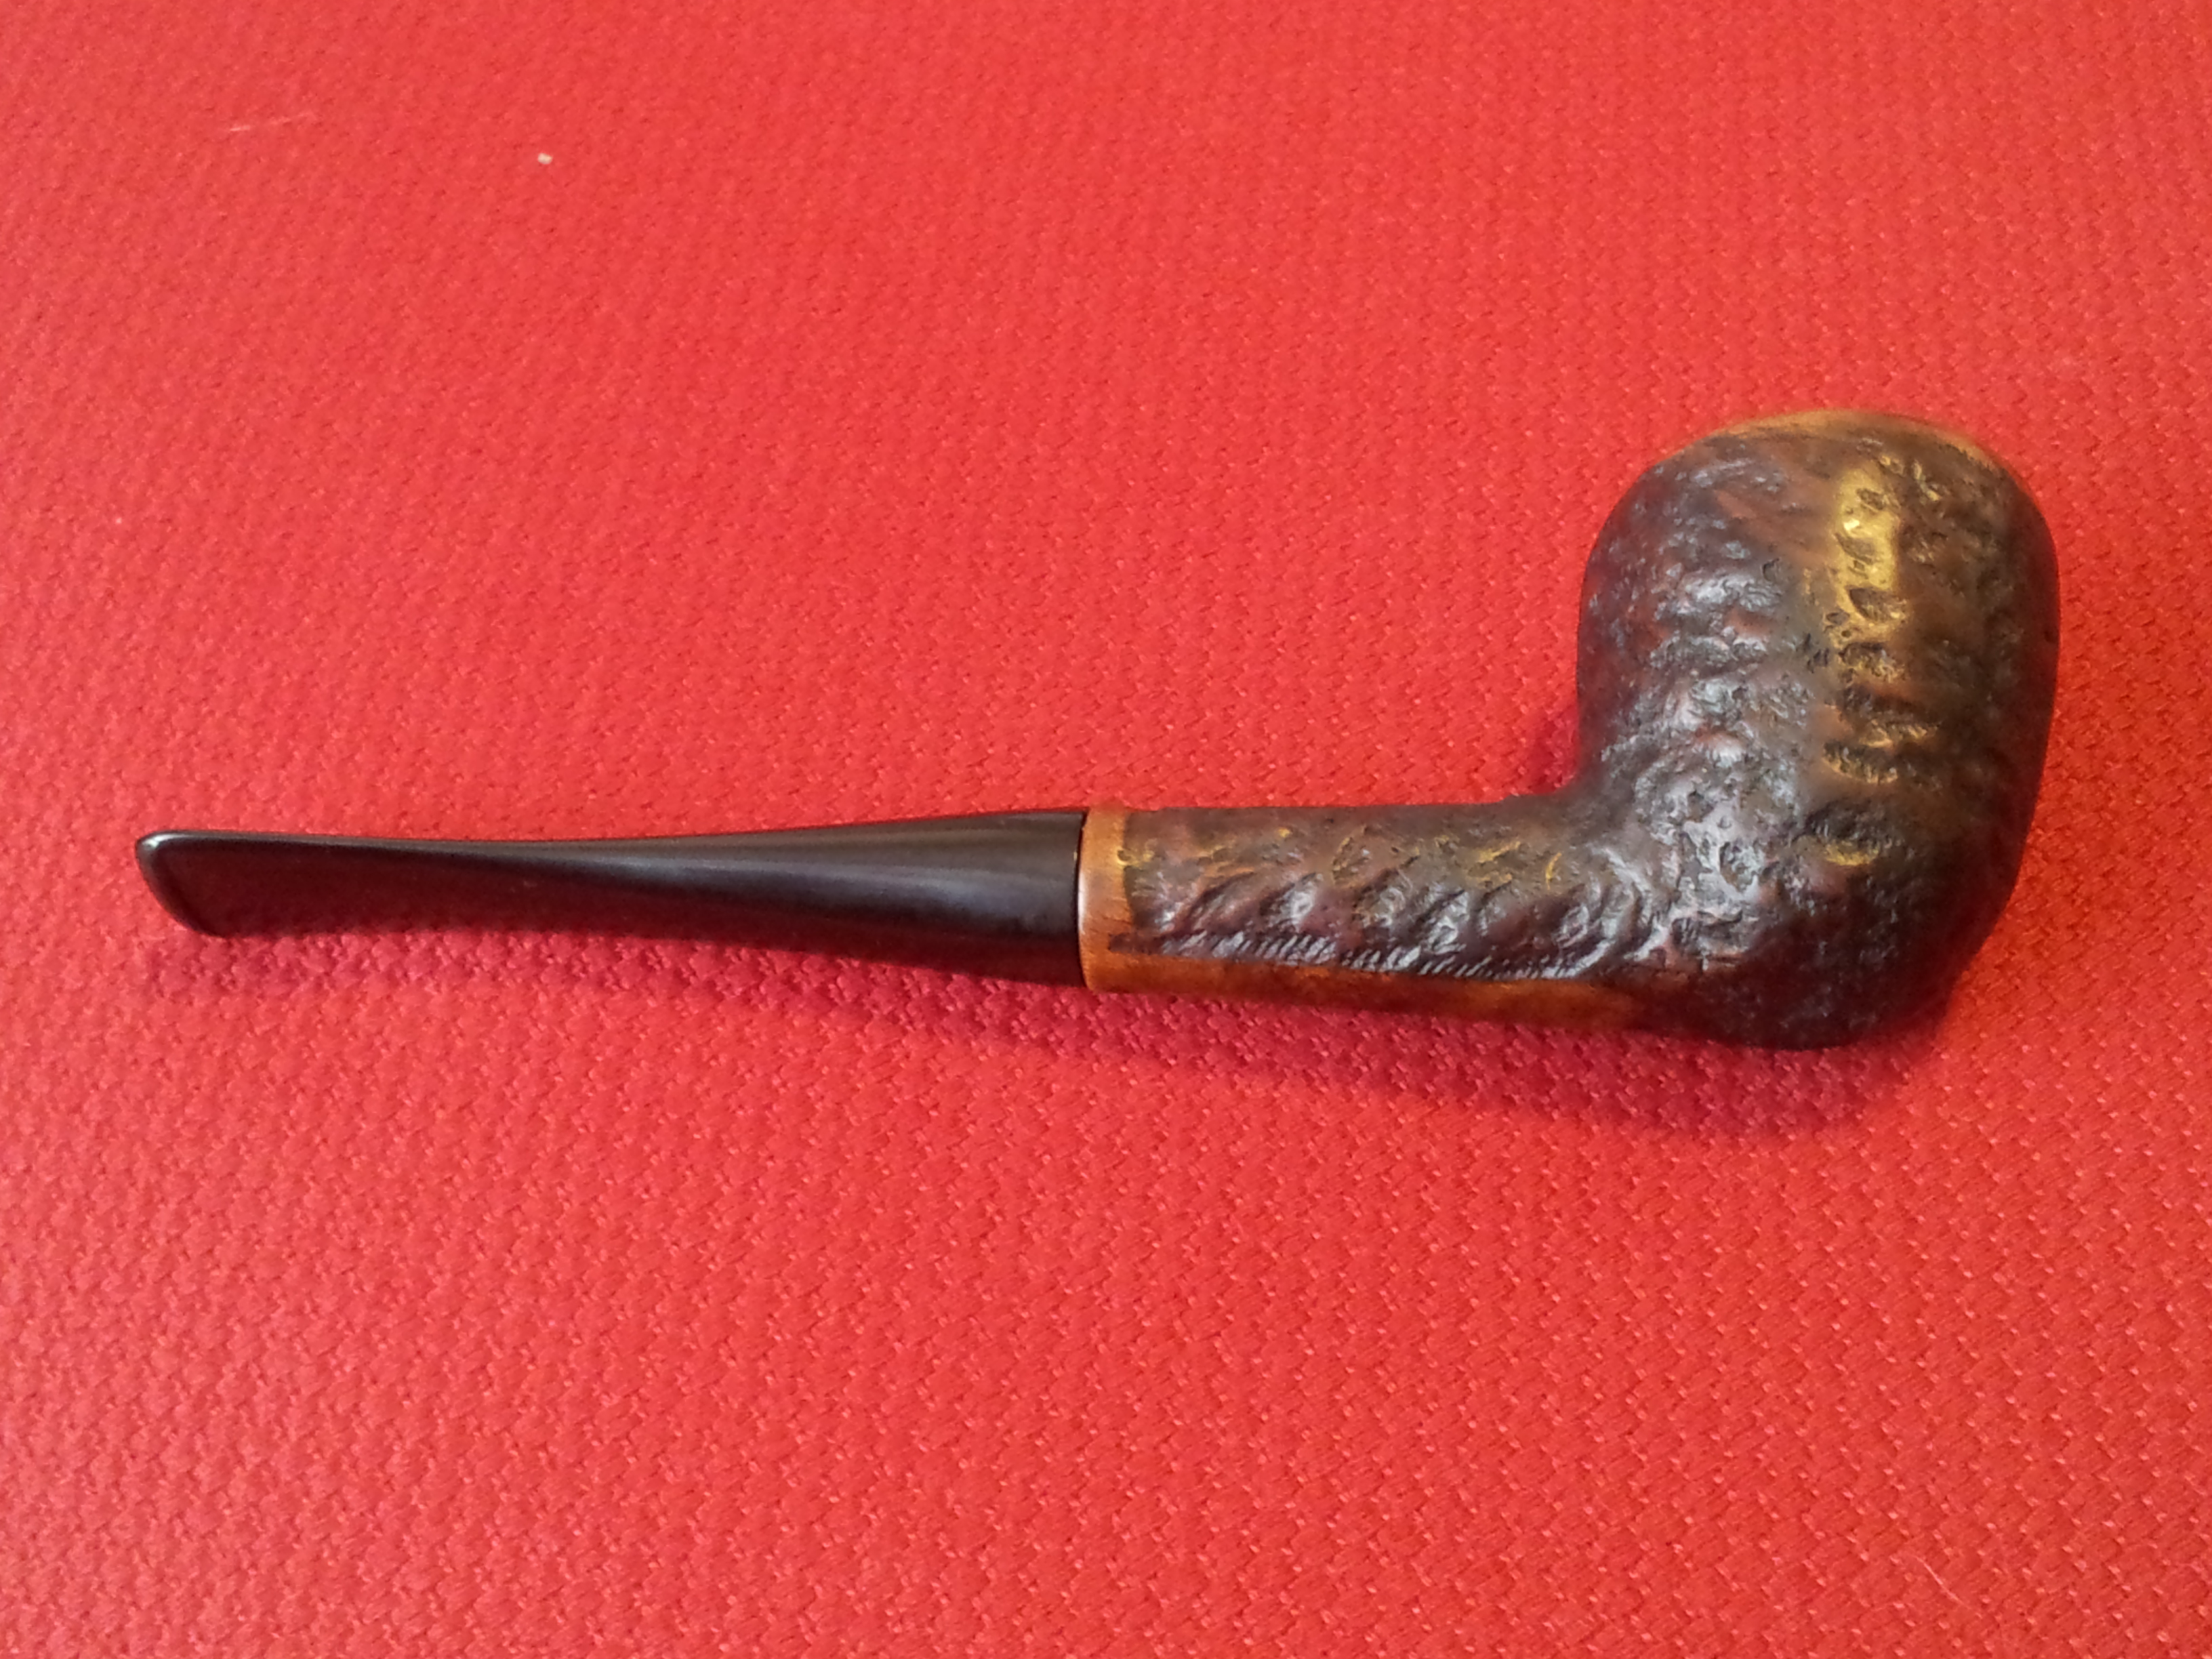
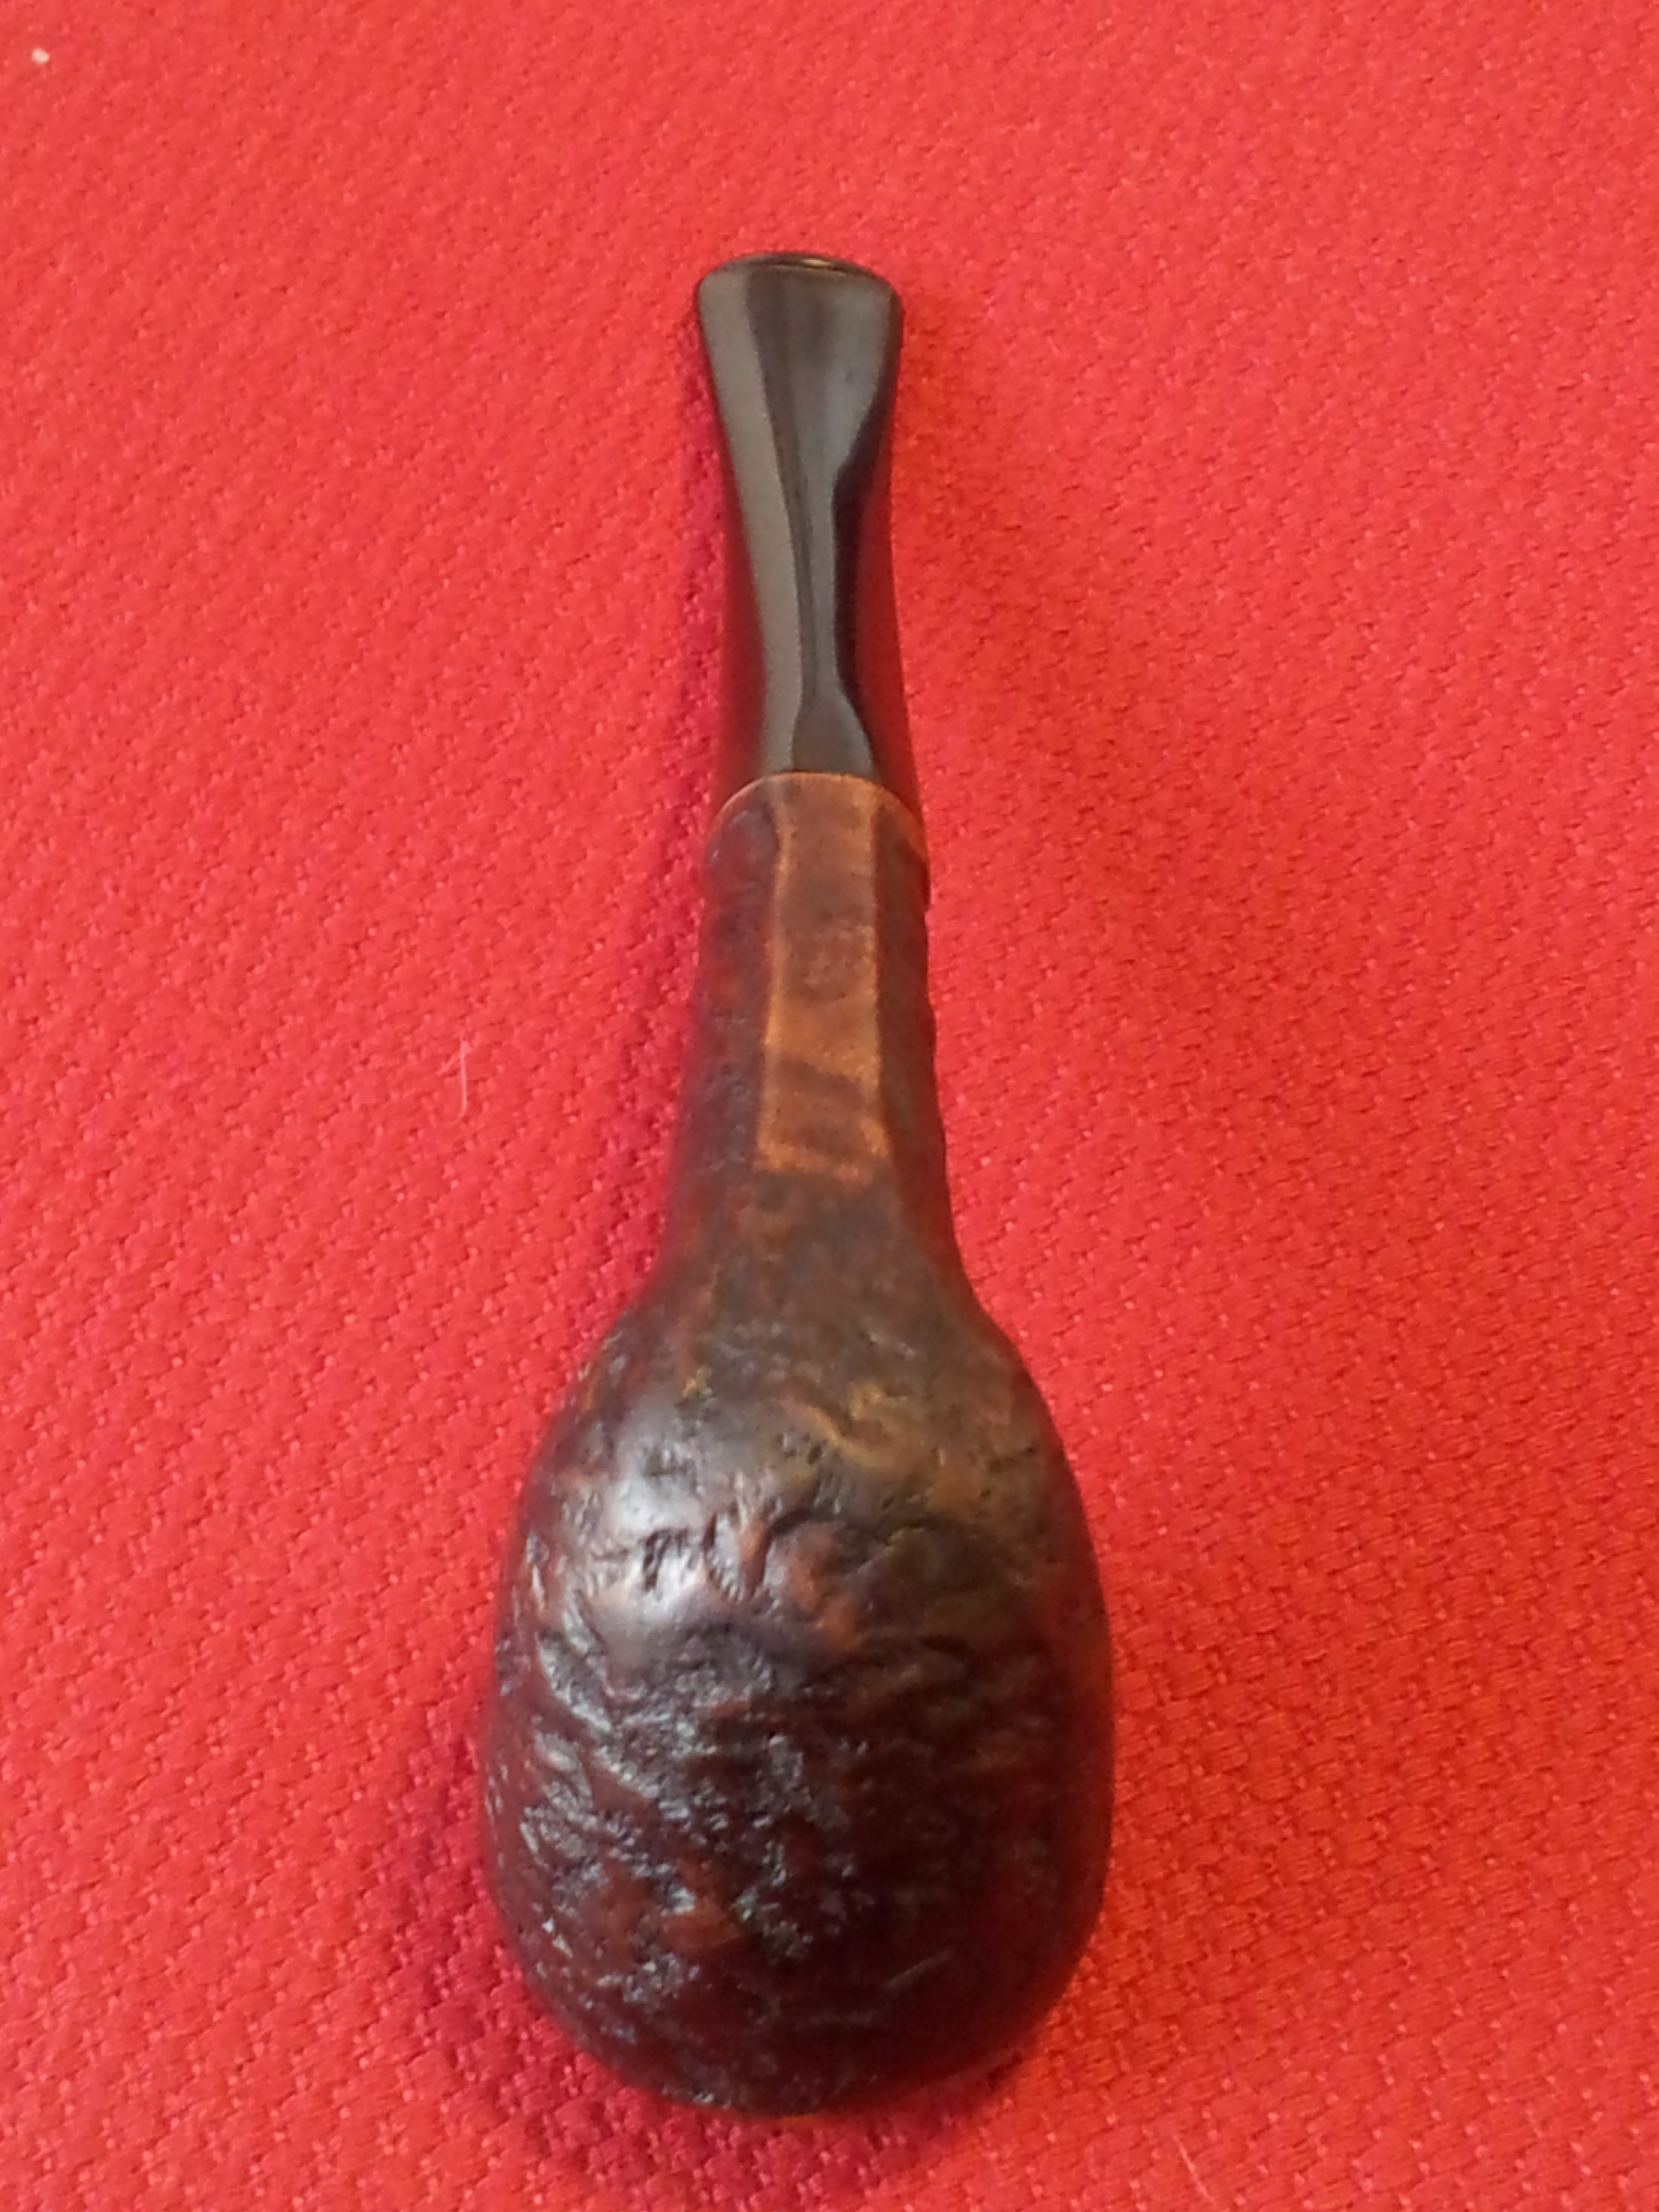
Unlike the ill-fated doctor, however, I have reasonable hopes that the subject of my labours will not turn against its creator any time soon. I rather suspect that this Brigham will cherish its new lease on life by providing its piper with many peaceful, contemplative hours measured out by the bowl. Here is the finished pipe.


Nice, an amazing recovery!
LikeLiked by 1 person
Thanks This one was a squeaker – I expected it to implode every time I picked it up!
I’m happy to report that it smokes just fine. 🙂
LikeLike
Great restoration! Great write up! Bringing that monster to life seemed like it would have taken nothing short of a miracle! However, “What can stop the determined heart and resolved will of man?” (Mary Shelley, Frankenstein)
LikeLiked by 1 person
Well played, sir! 😀 And thanks.
LikeLike
What a monster! Looks like you tamed it though. Nicely done and happy Halloween!
LikeLiked by 1 person