
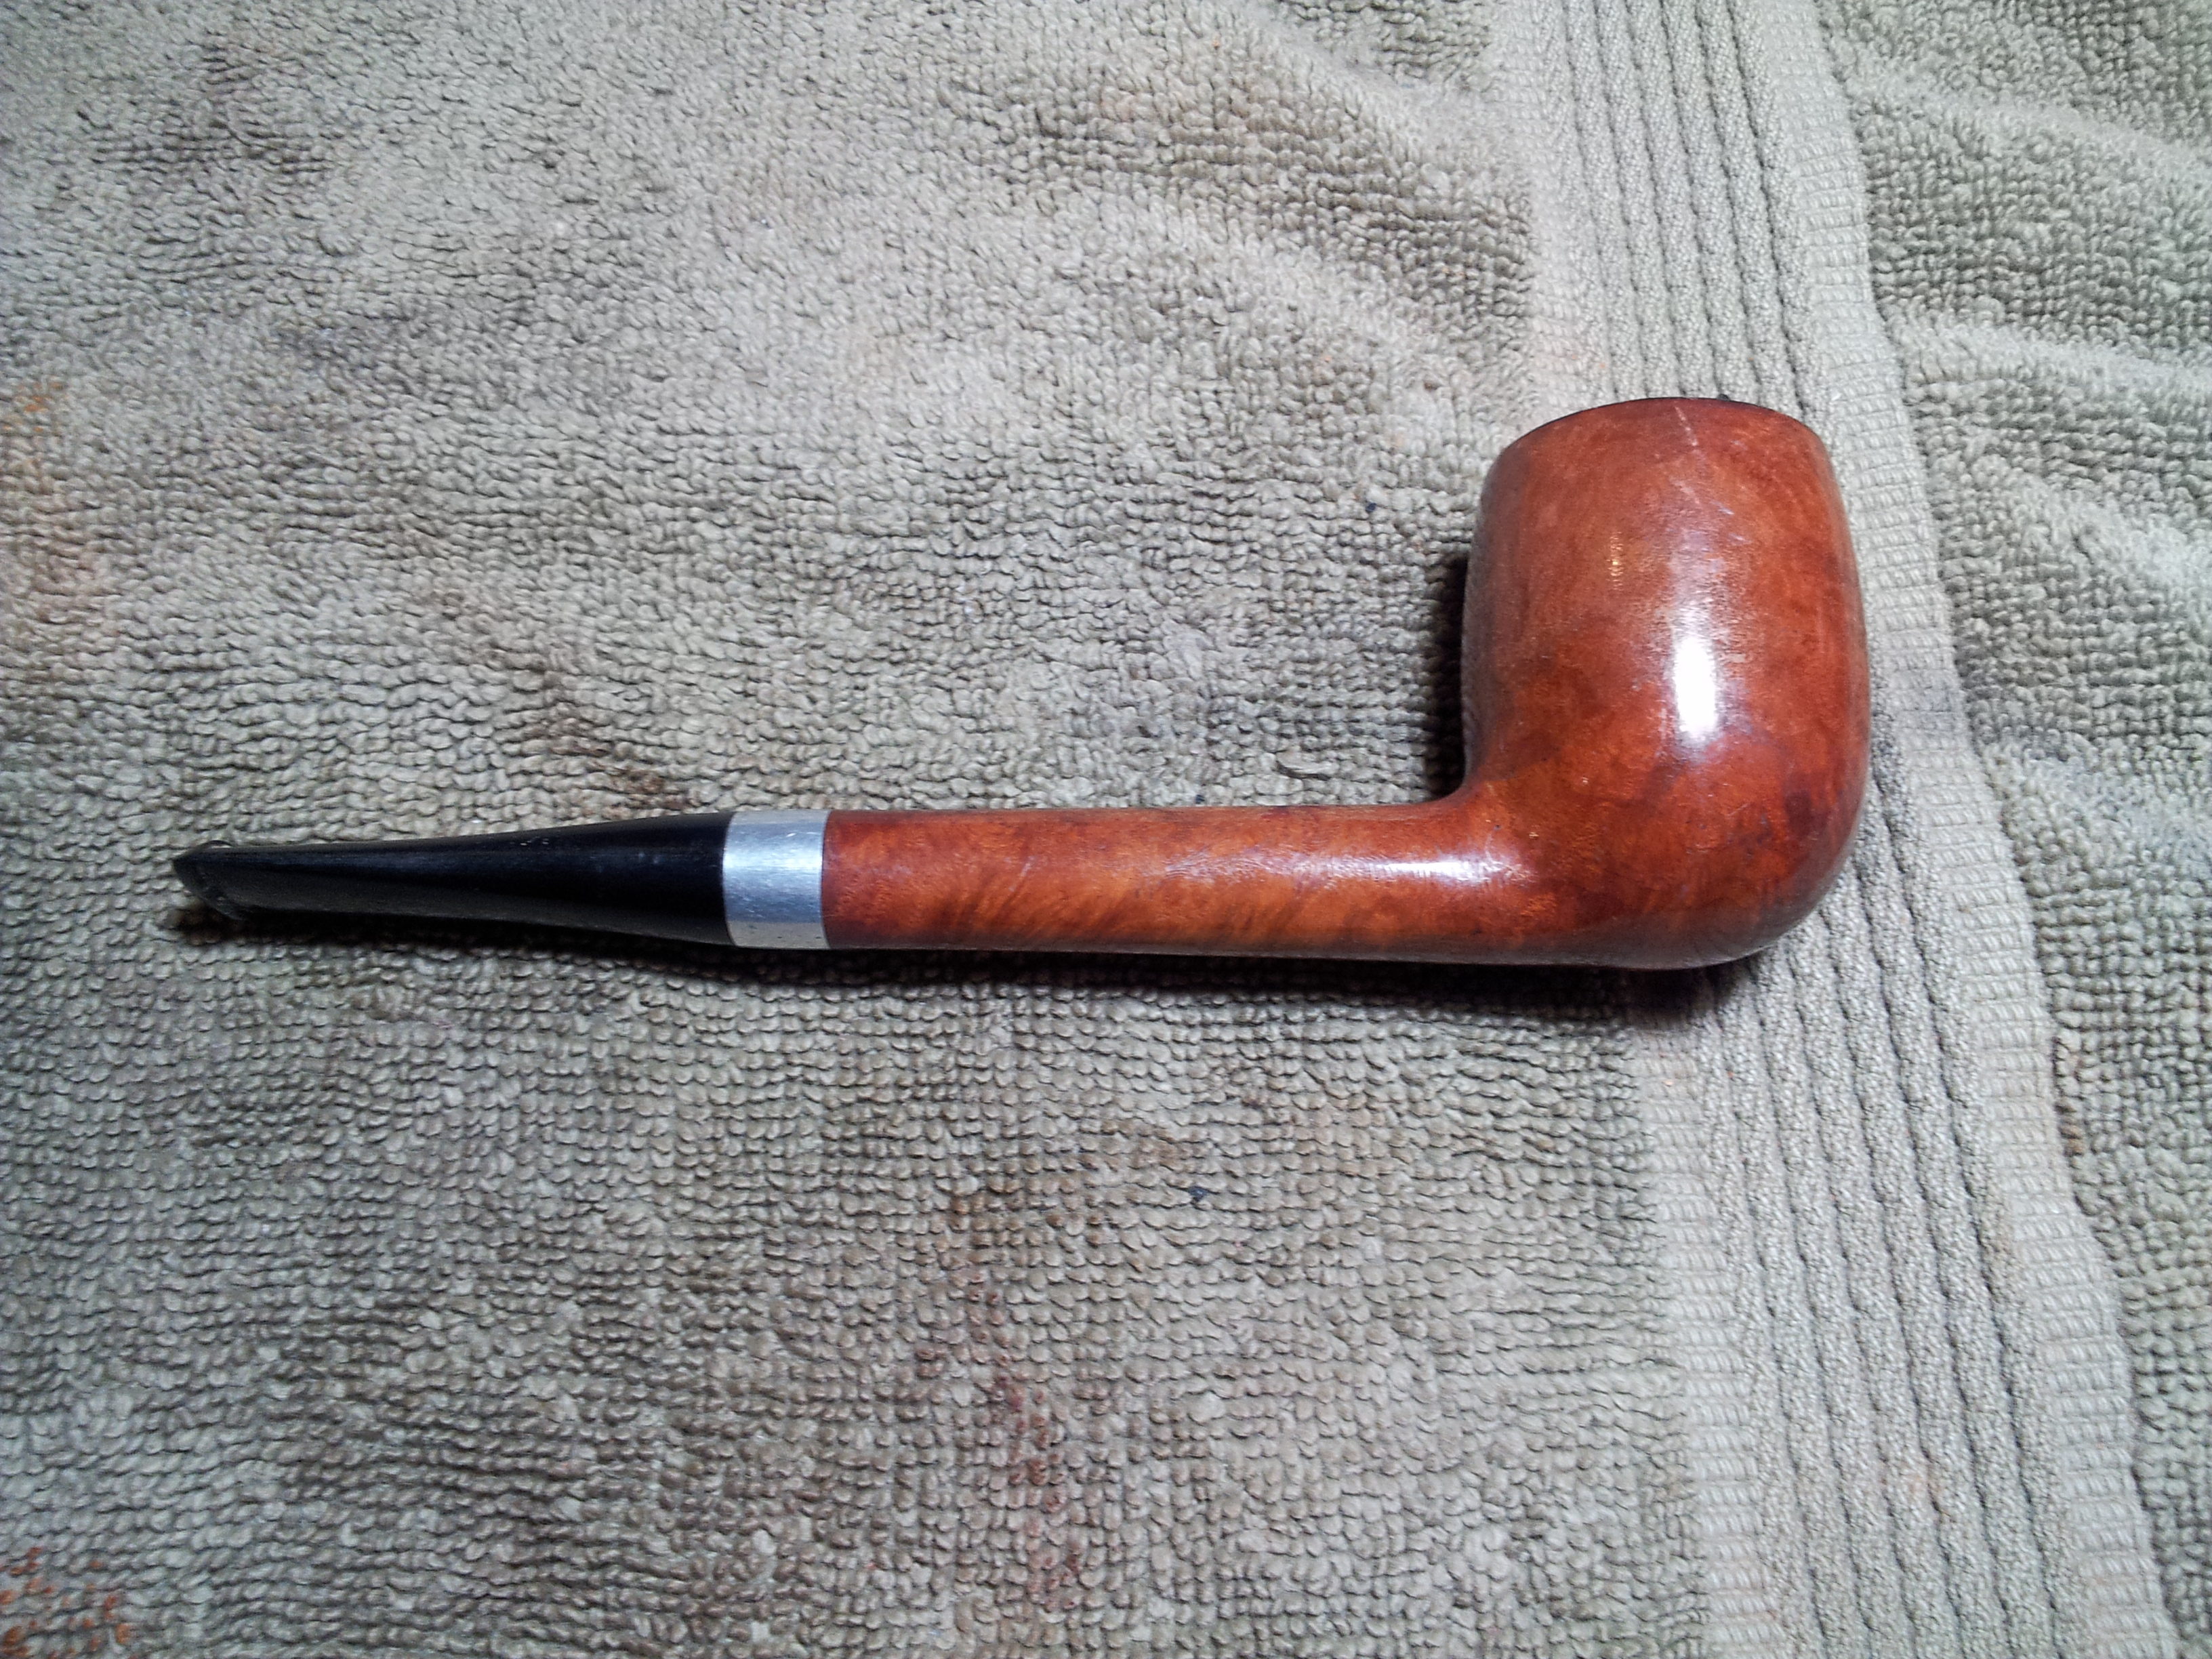
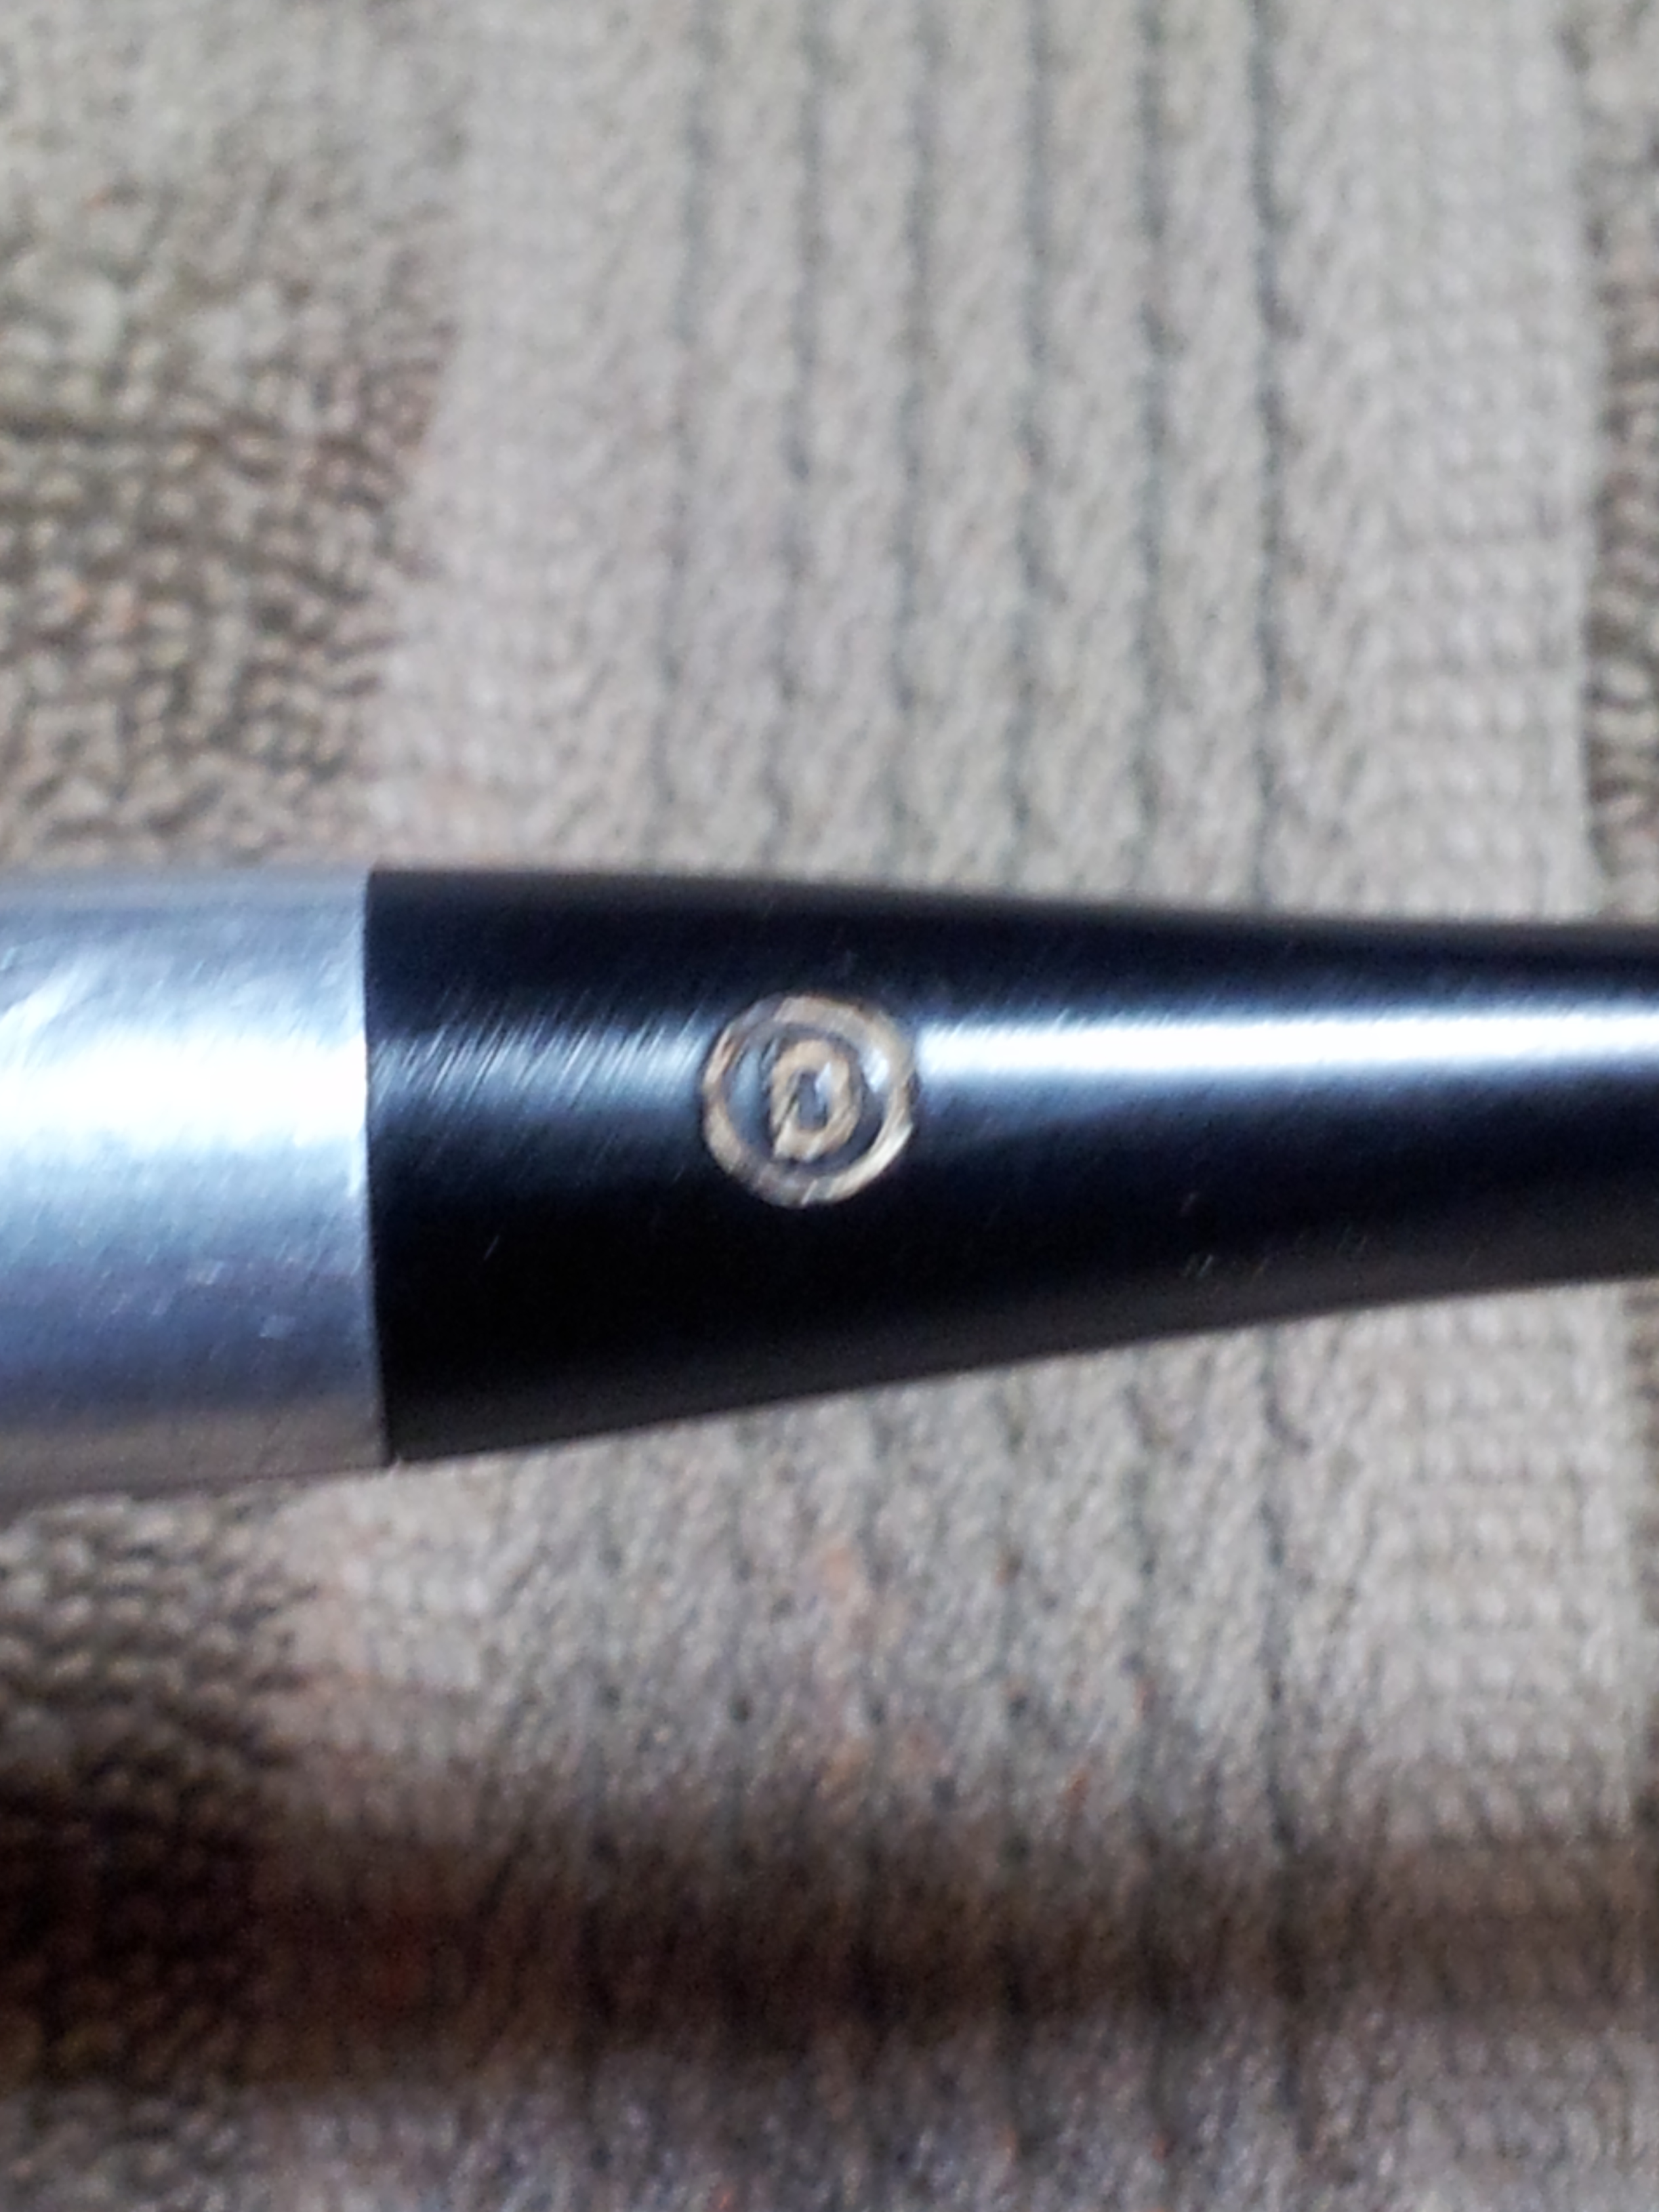
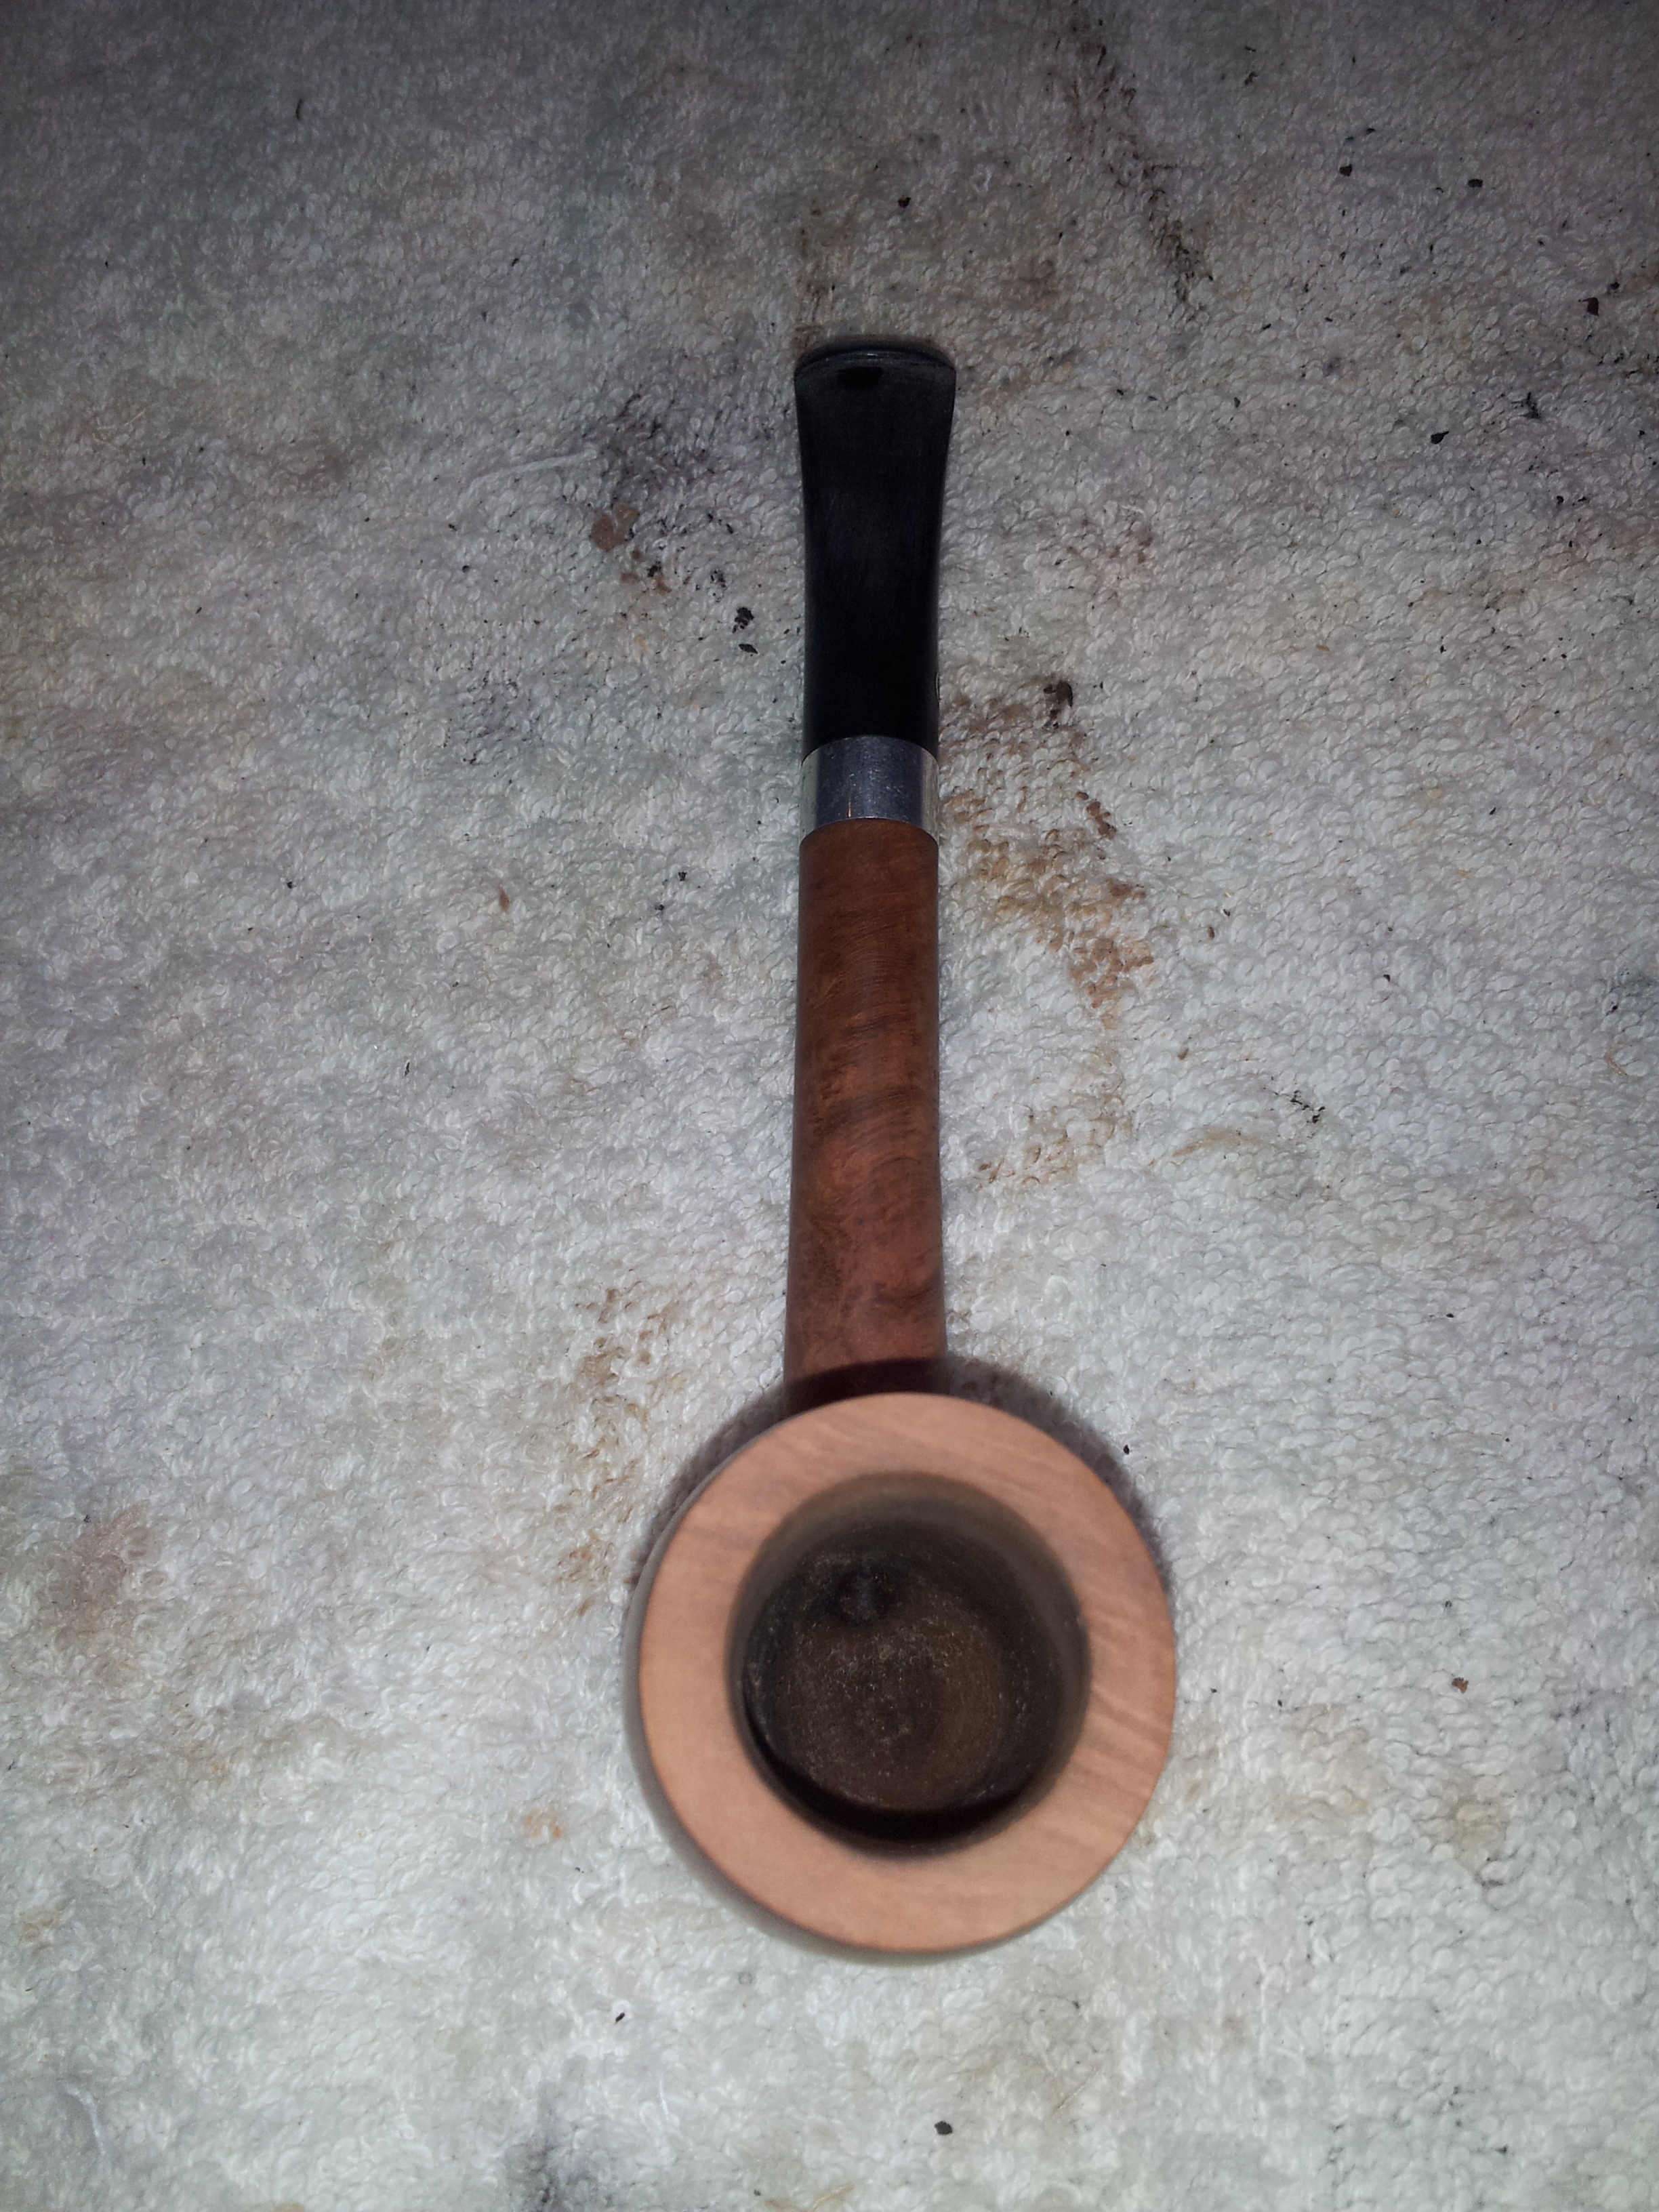
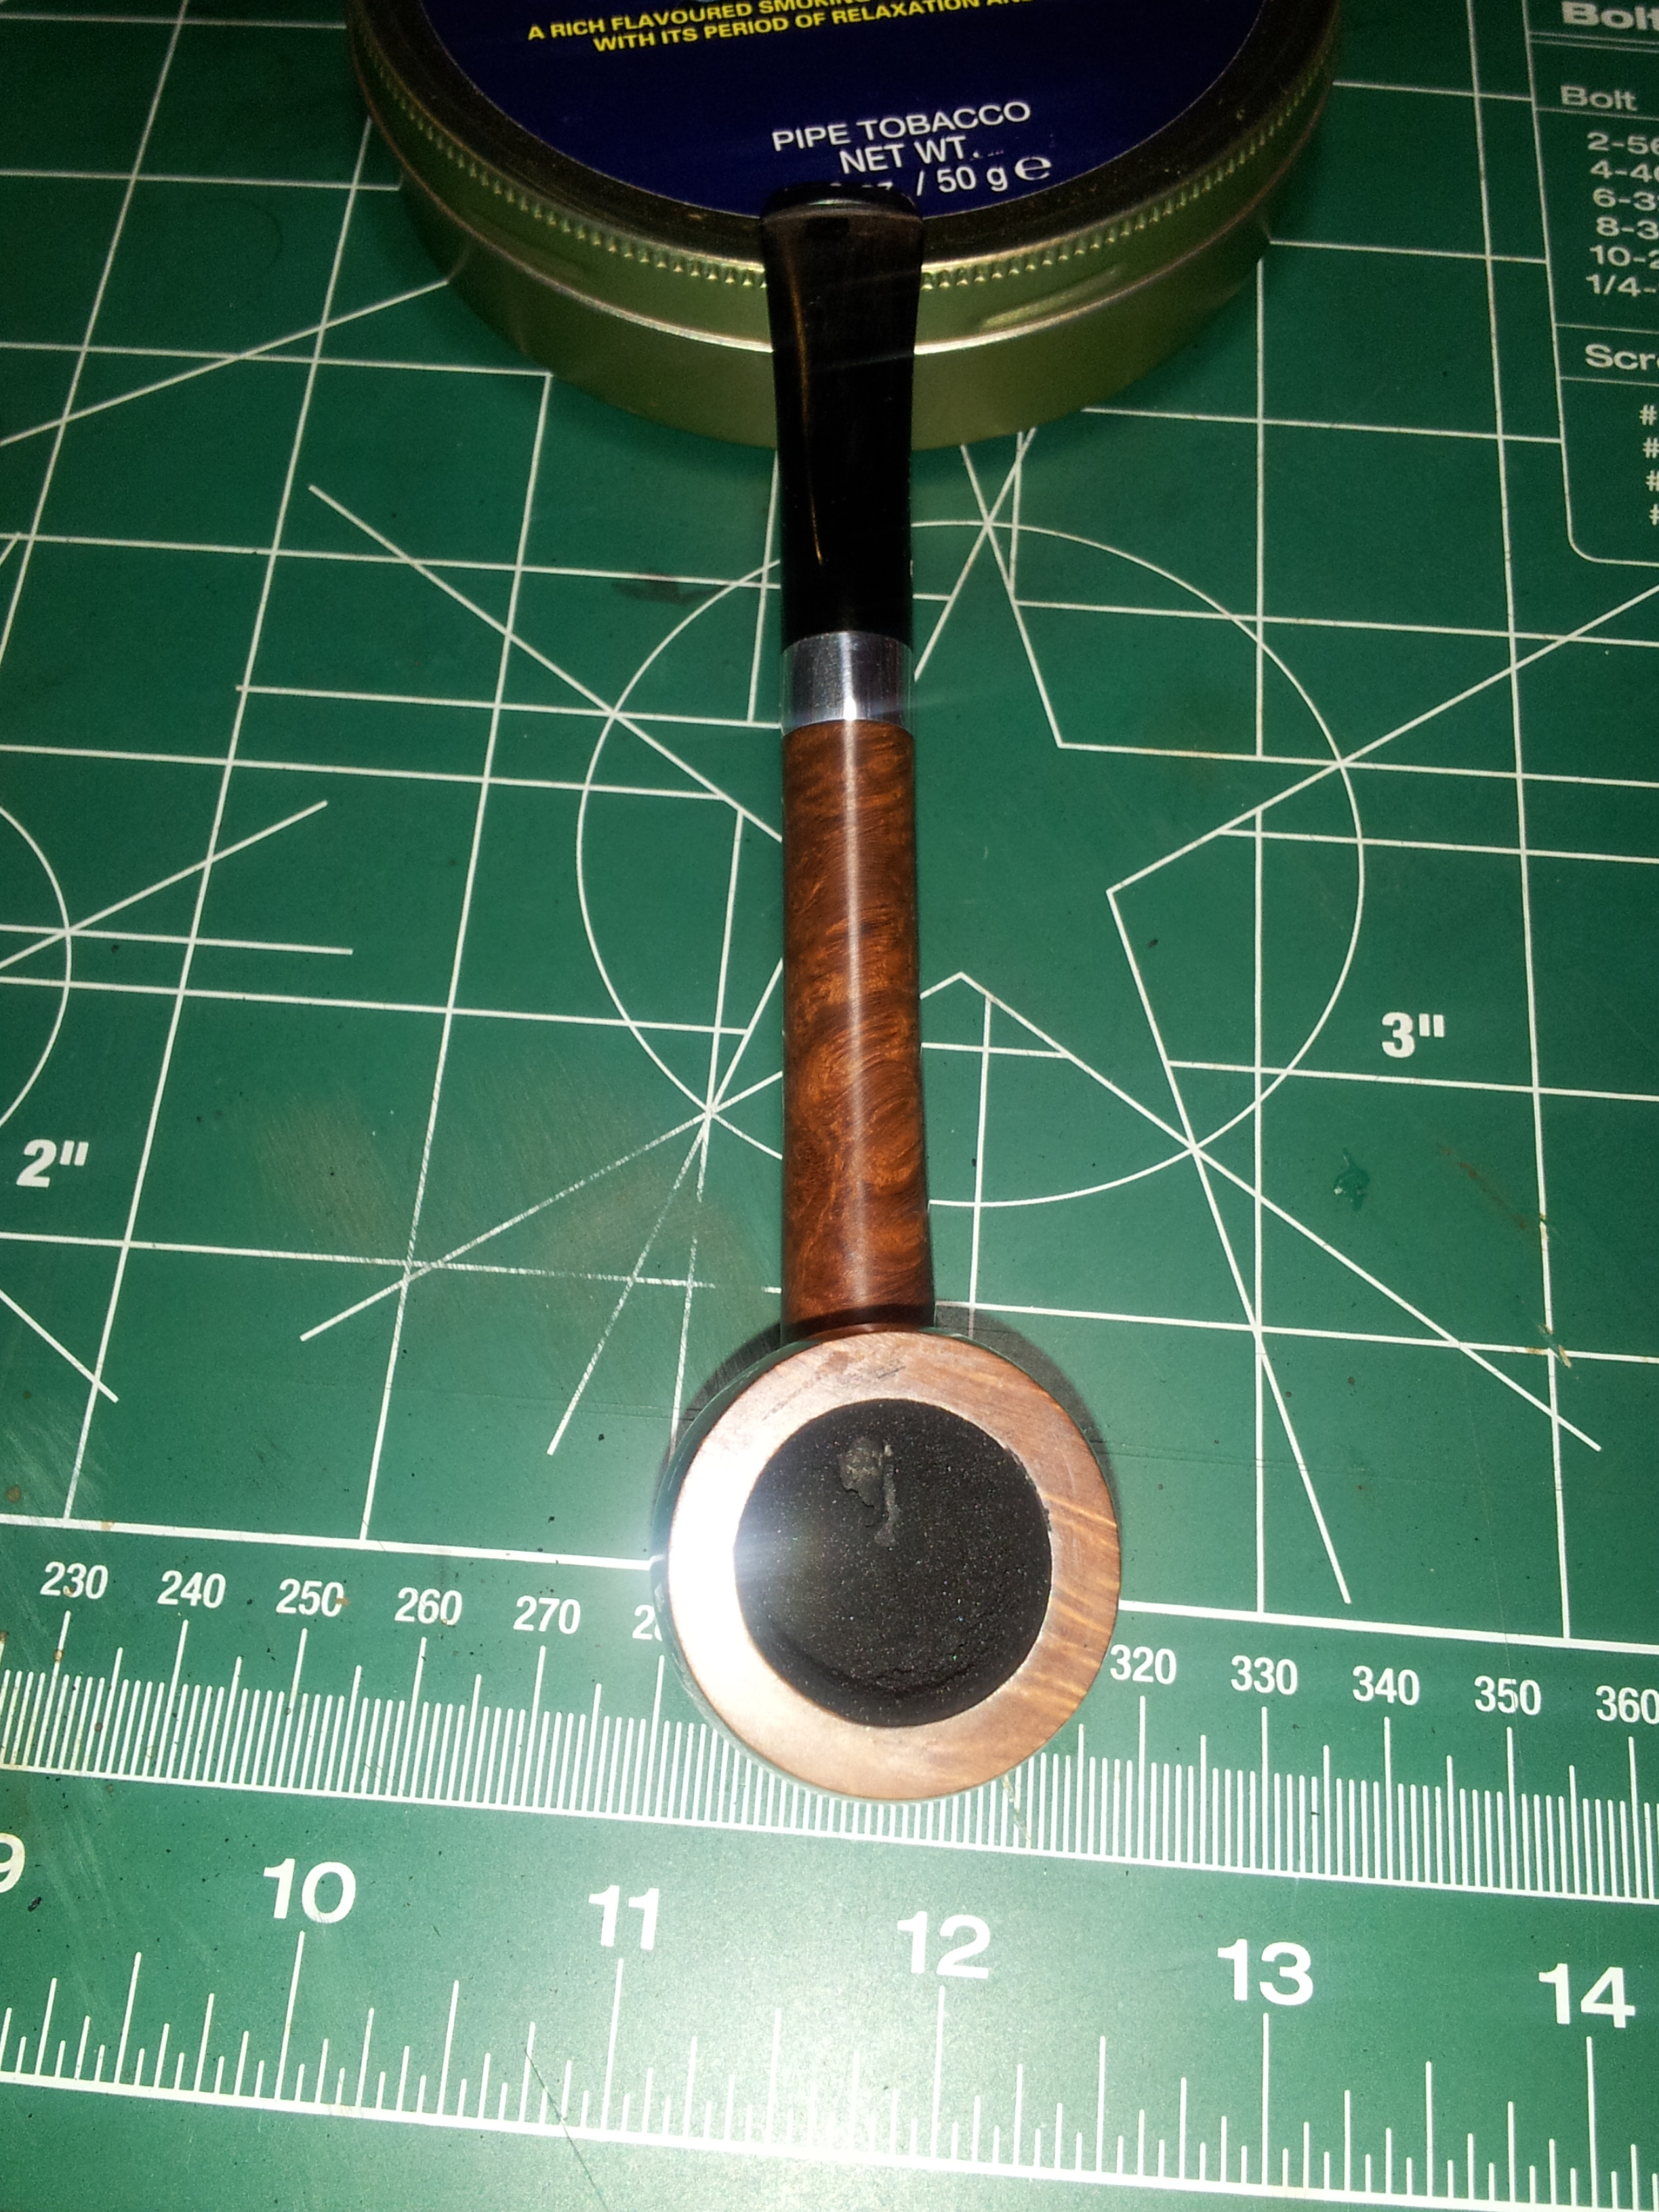
This is another pipe I picked up on a recent wander through my local antique mall – a Yello-Bole Duo-Lined in a classic Lumberman shape. It was in relatively good condition on the outside, with a bit of rim tar and a few flakes of original lacquer finish missing. The stem was original and still bore the D in a circle stamping that paired with the “Yello-Bole” over “Duo-Lined” over “Imported Briar” stamped into the left shank. The bowl had some fairly thick, though even, cake. It had obviously been a favourite of the previous owner, who had devoted a decent bit of care to the pipe’s maintenance.


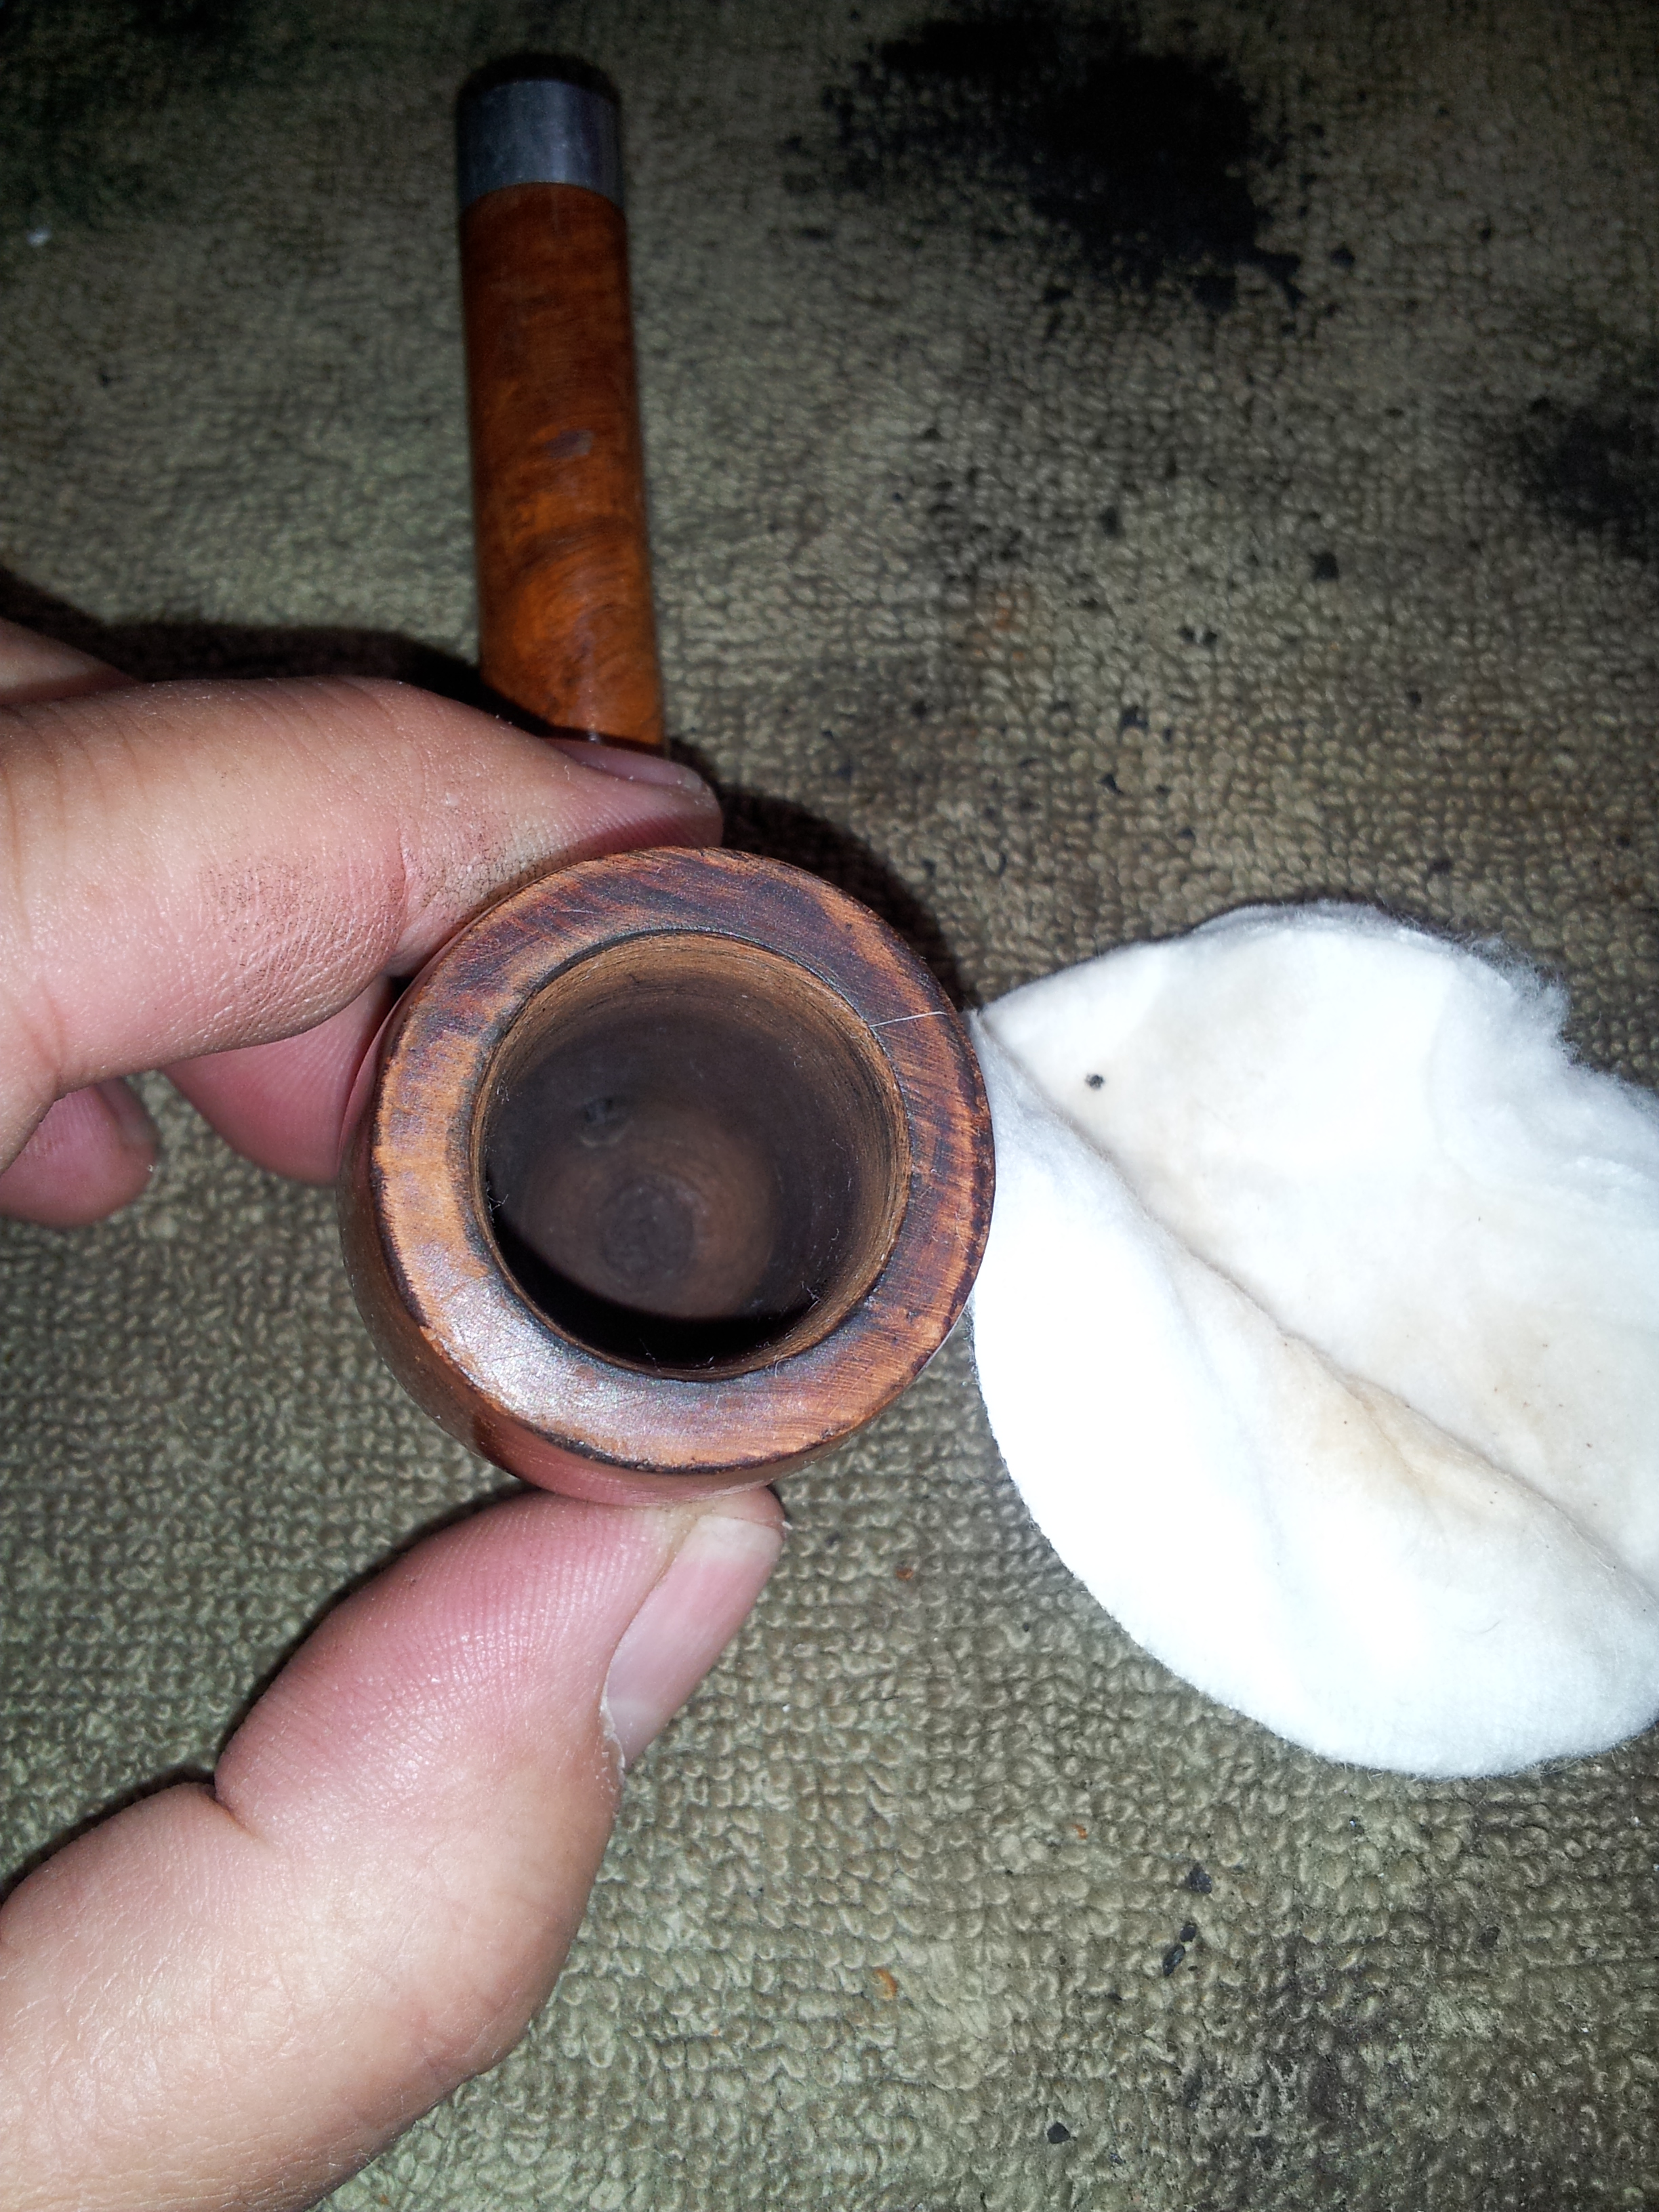
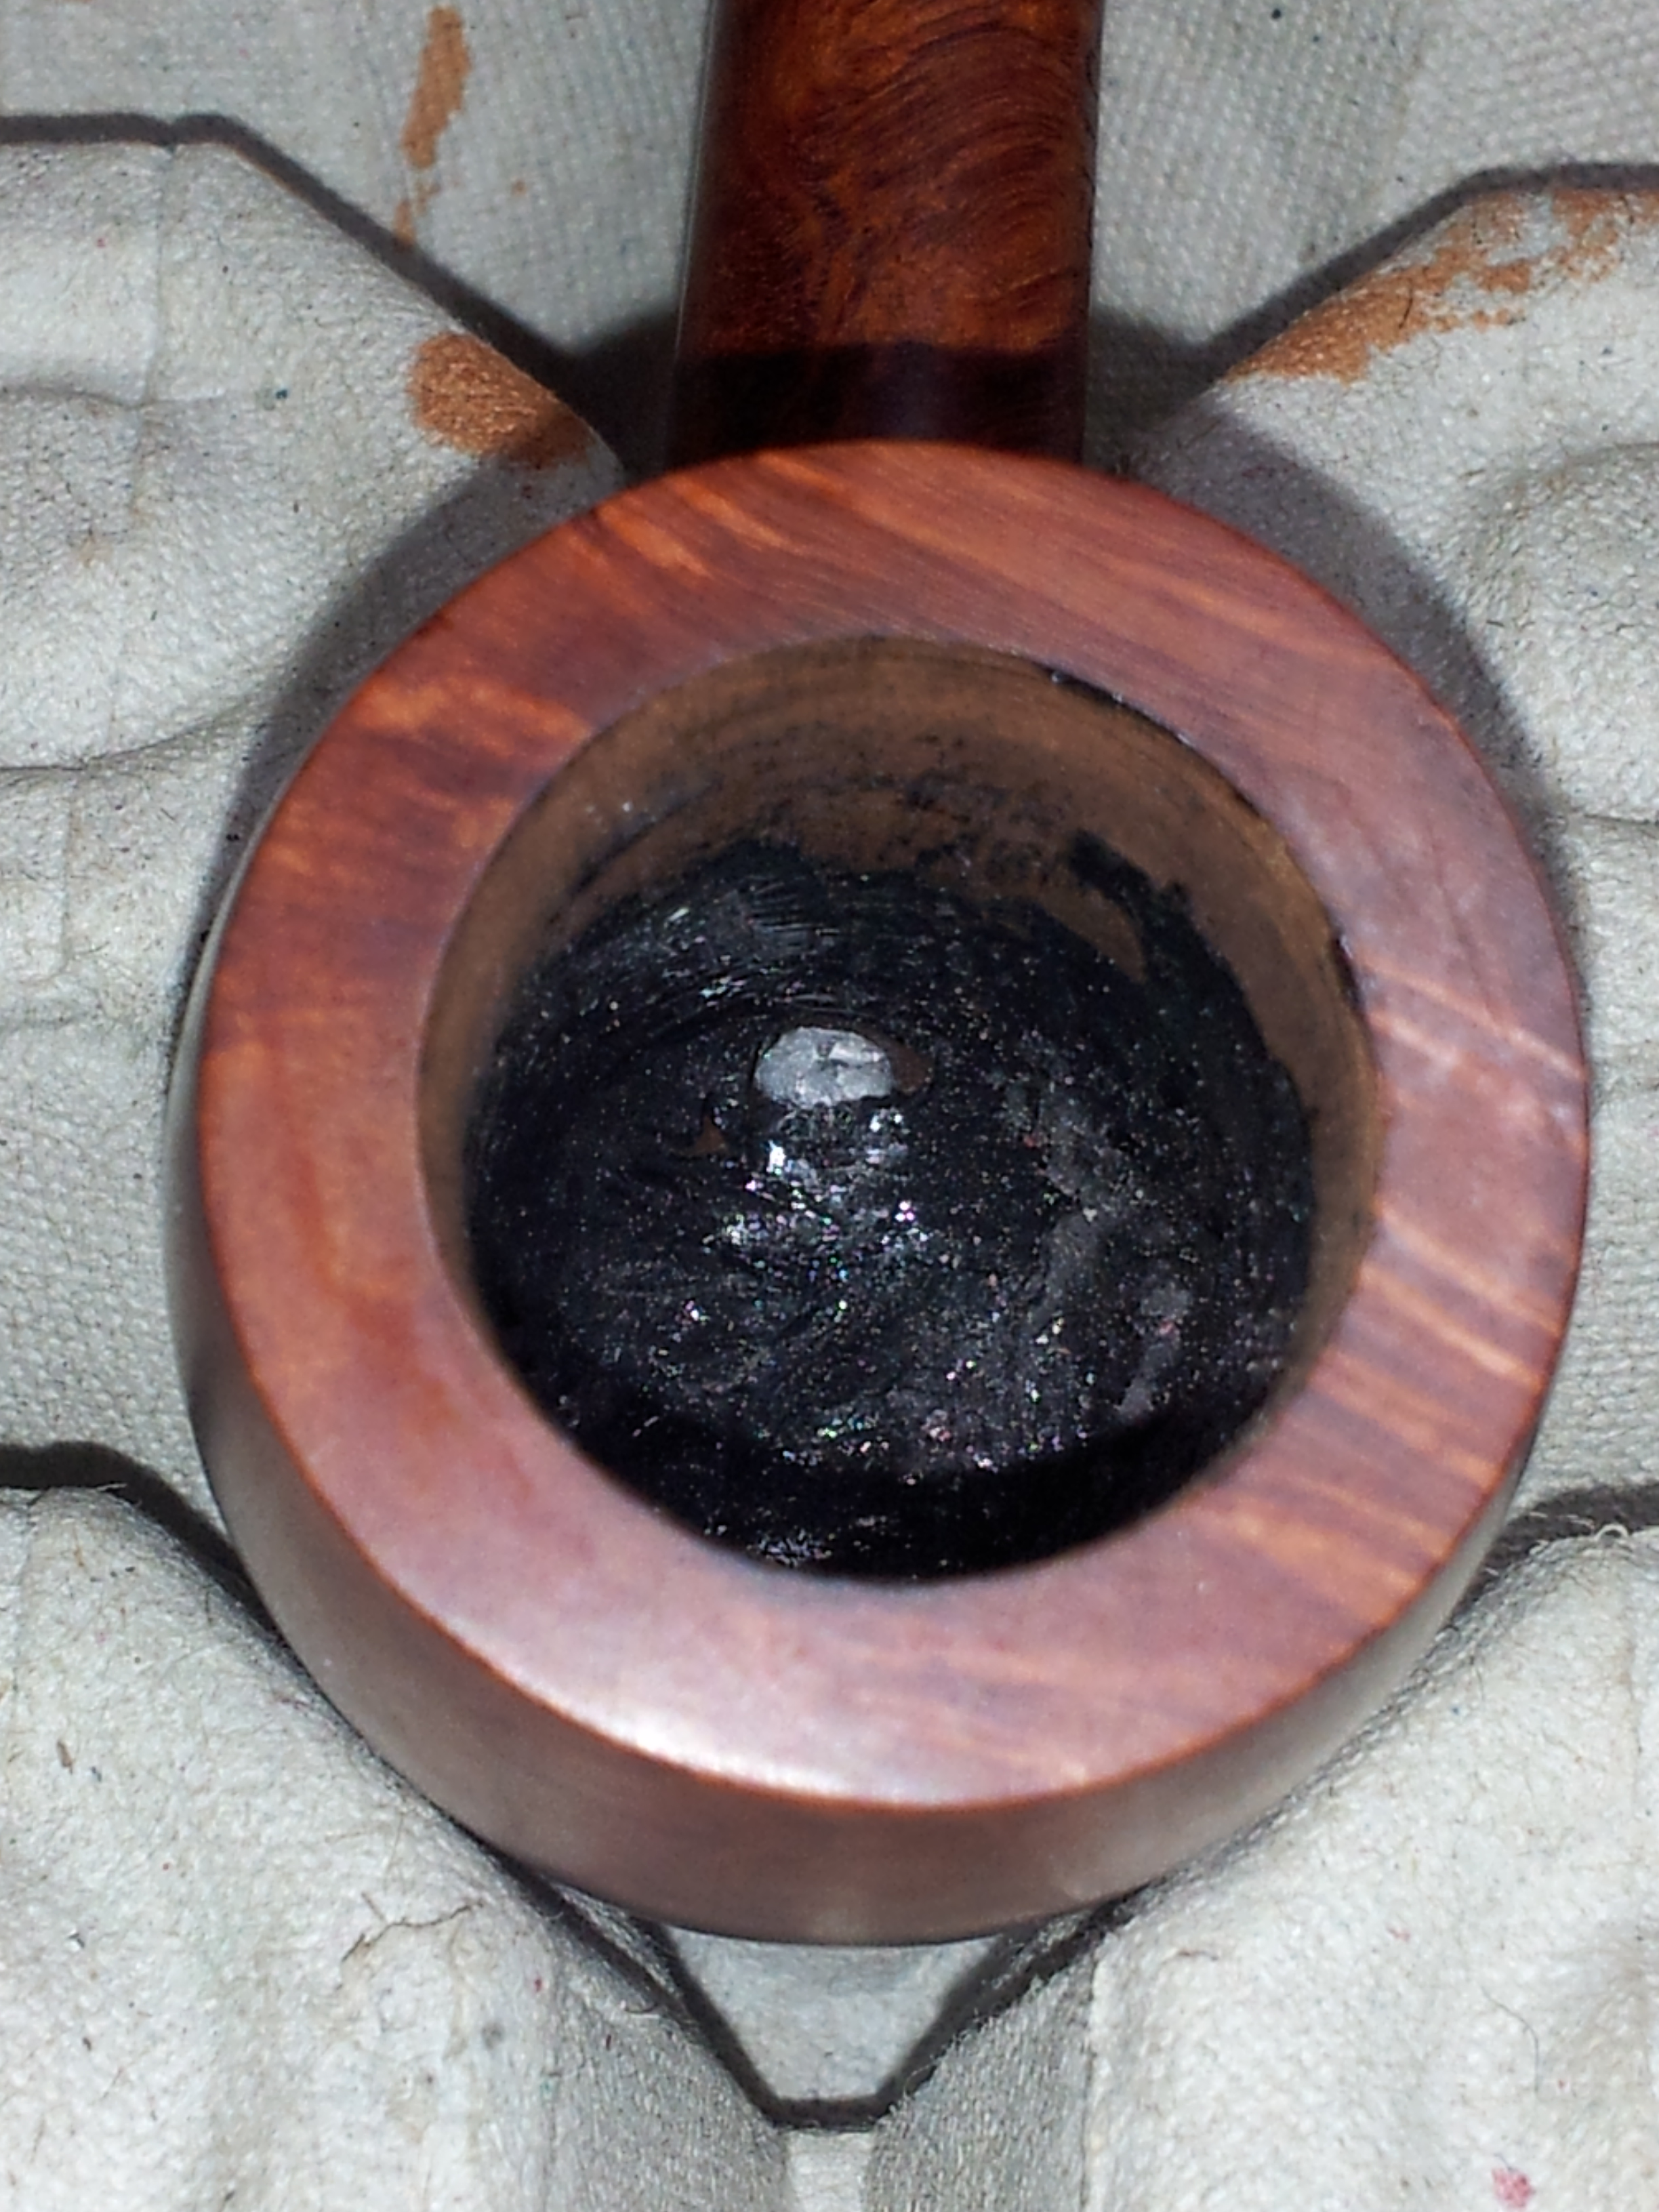
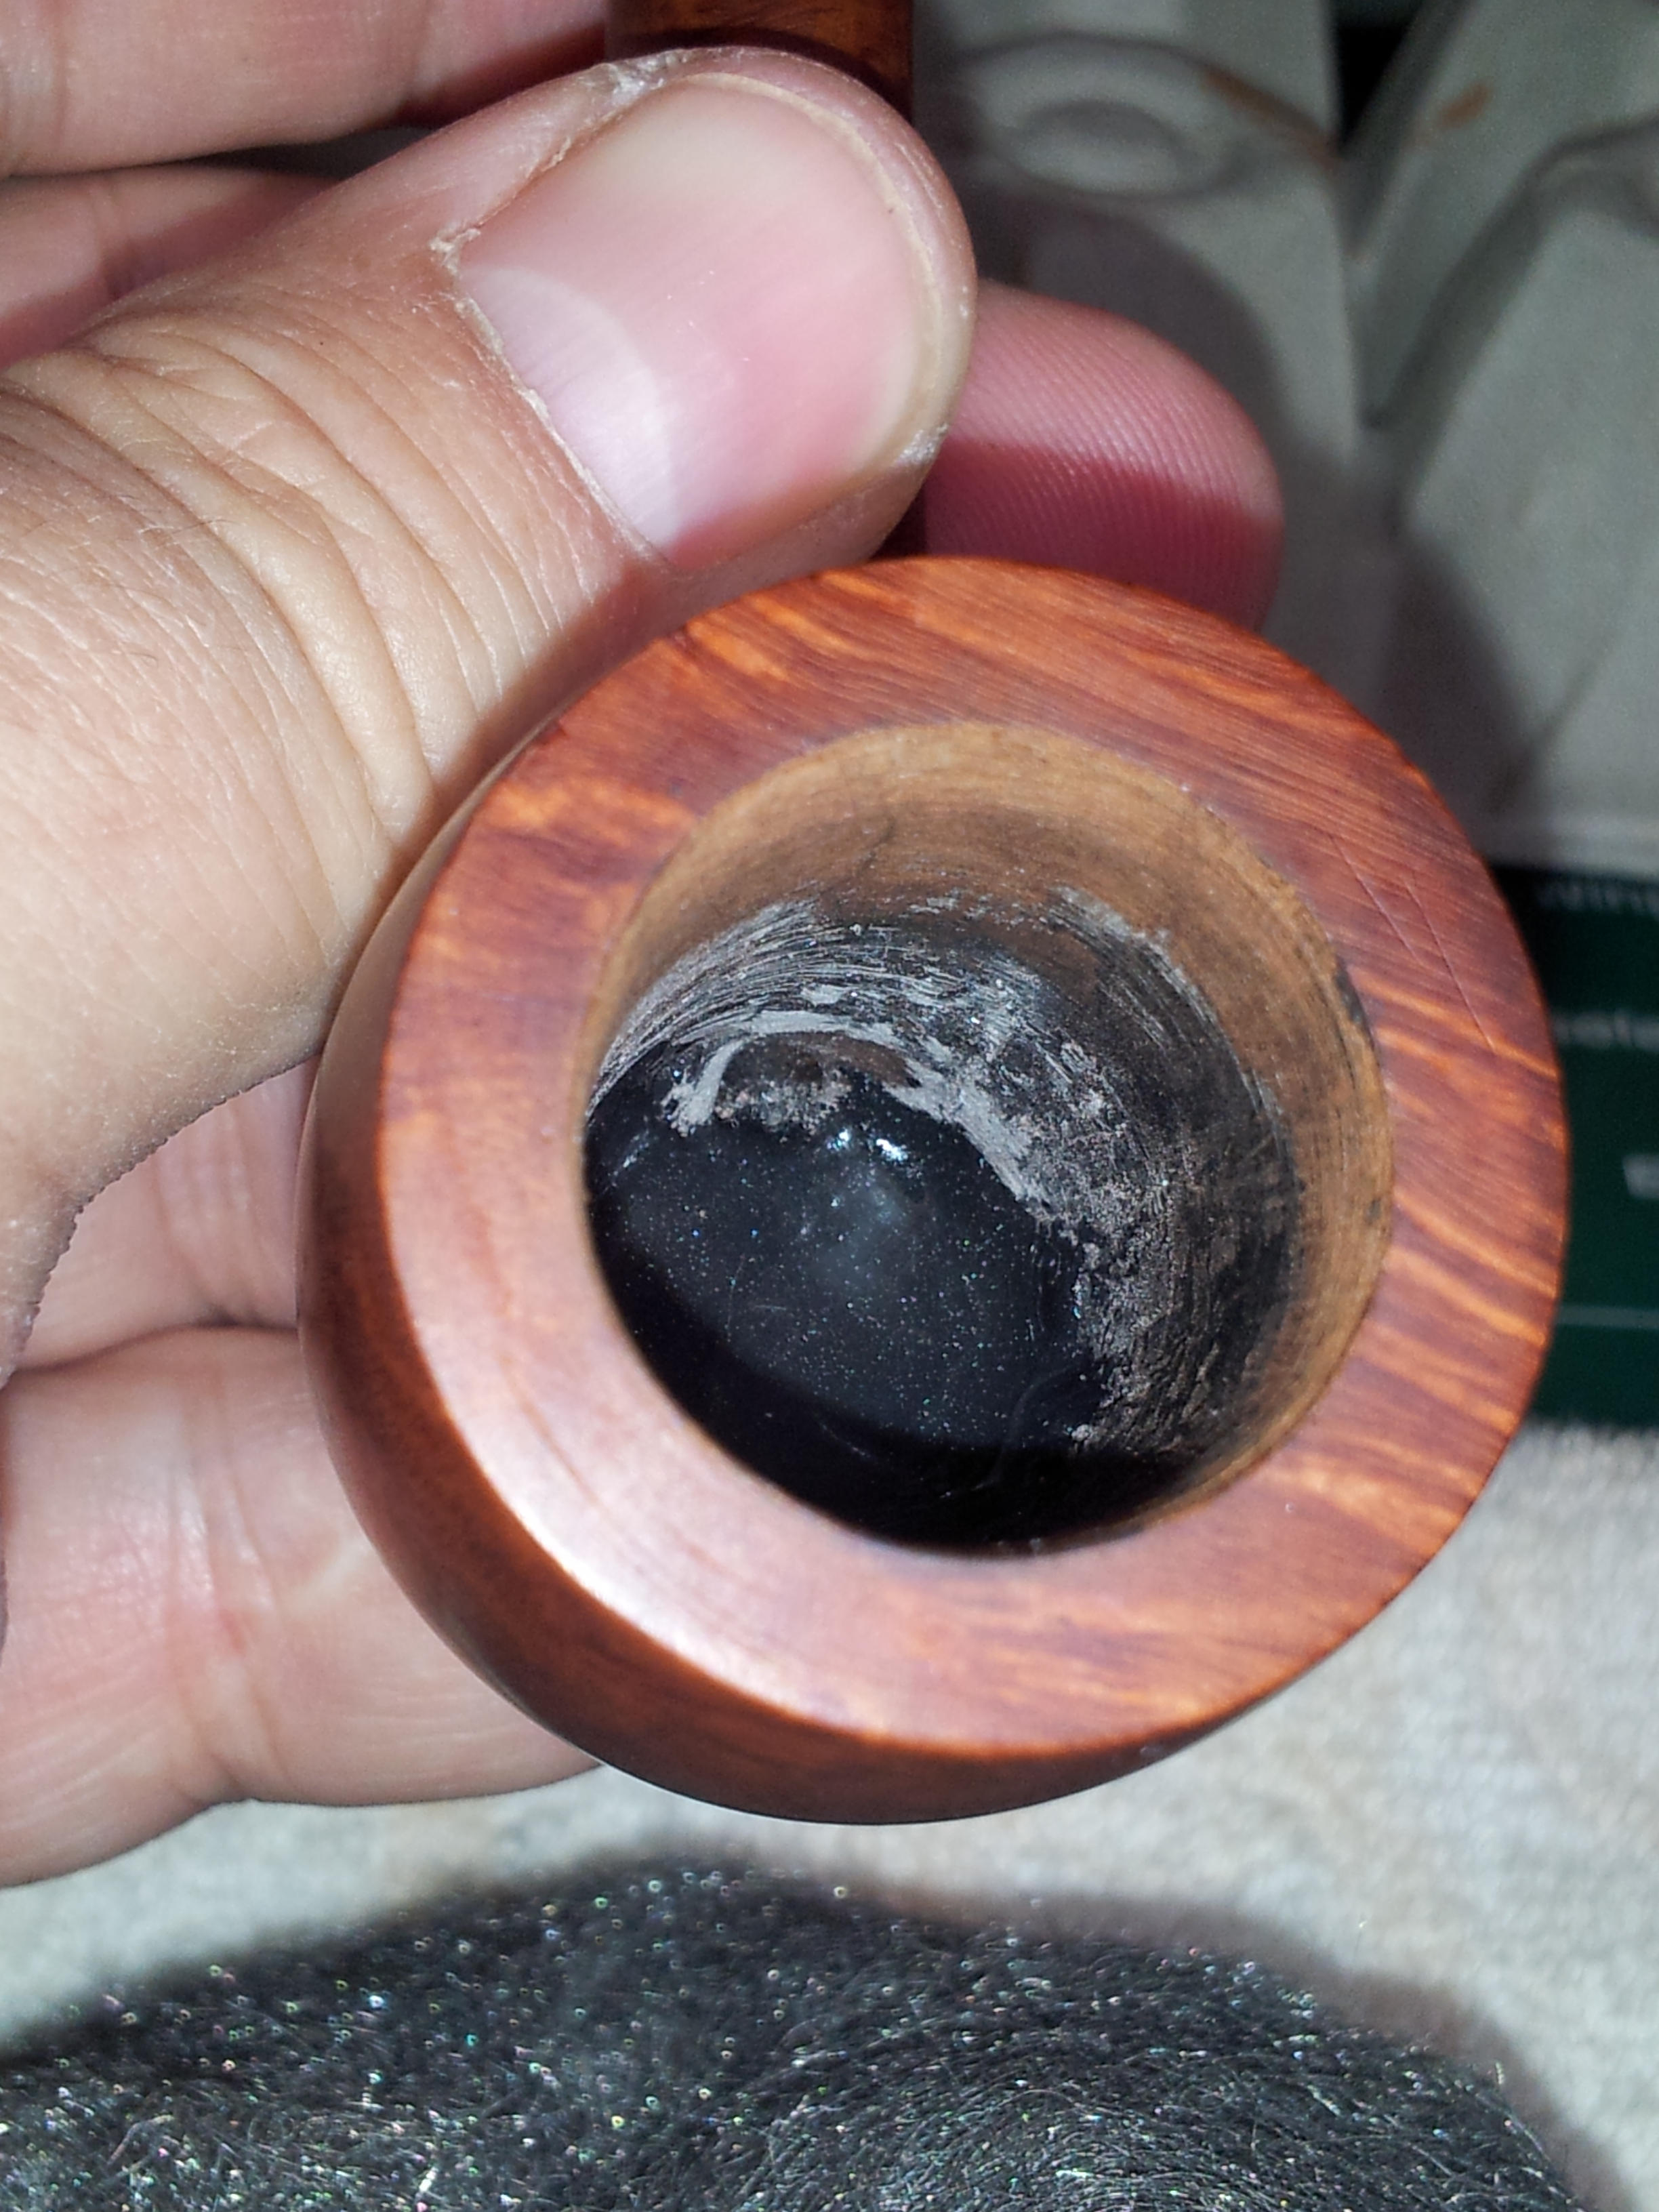
My first action on this refurb was to ream the bowl back to briar and clean the tars off the rim. This led to the discovery of a few decent dents in the rim that had been hiding under the tars, and, more seriously, a significantly over-reamed bowl. The bottom of the bowl was a full 1/4” below the draft hole – a burn-out waiting to happen!
I dropped the stummel into the alcohol bath to dissolve the old lacquer finish and soften up any remaining tars and other gunk in the briar’s airway. While it soaked, I turned my attention to the stem, which turned out to be made of a cheap-feeling plastic. It was also completely plugged with bits of tobacco and old tars. Yay! So out came a succession of drill bits and a 1/8” round needle file, which I used to both clear the blockage and widen the stem’s airway, which, at a measley 3/32” diameter, was simply too constricted. I spent quite a bit of time on this, but eventually I had a smoothly tapered airway running from 3/32” at the bit to 5/32” at the tenon. Air flow was significantly improved and the stem no longer emitted a high-pitched whistle when I blew through it. A few final runs with pipe cleaners and alcohol finished things up nicely.

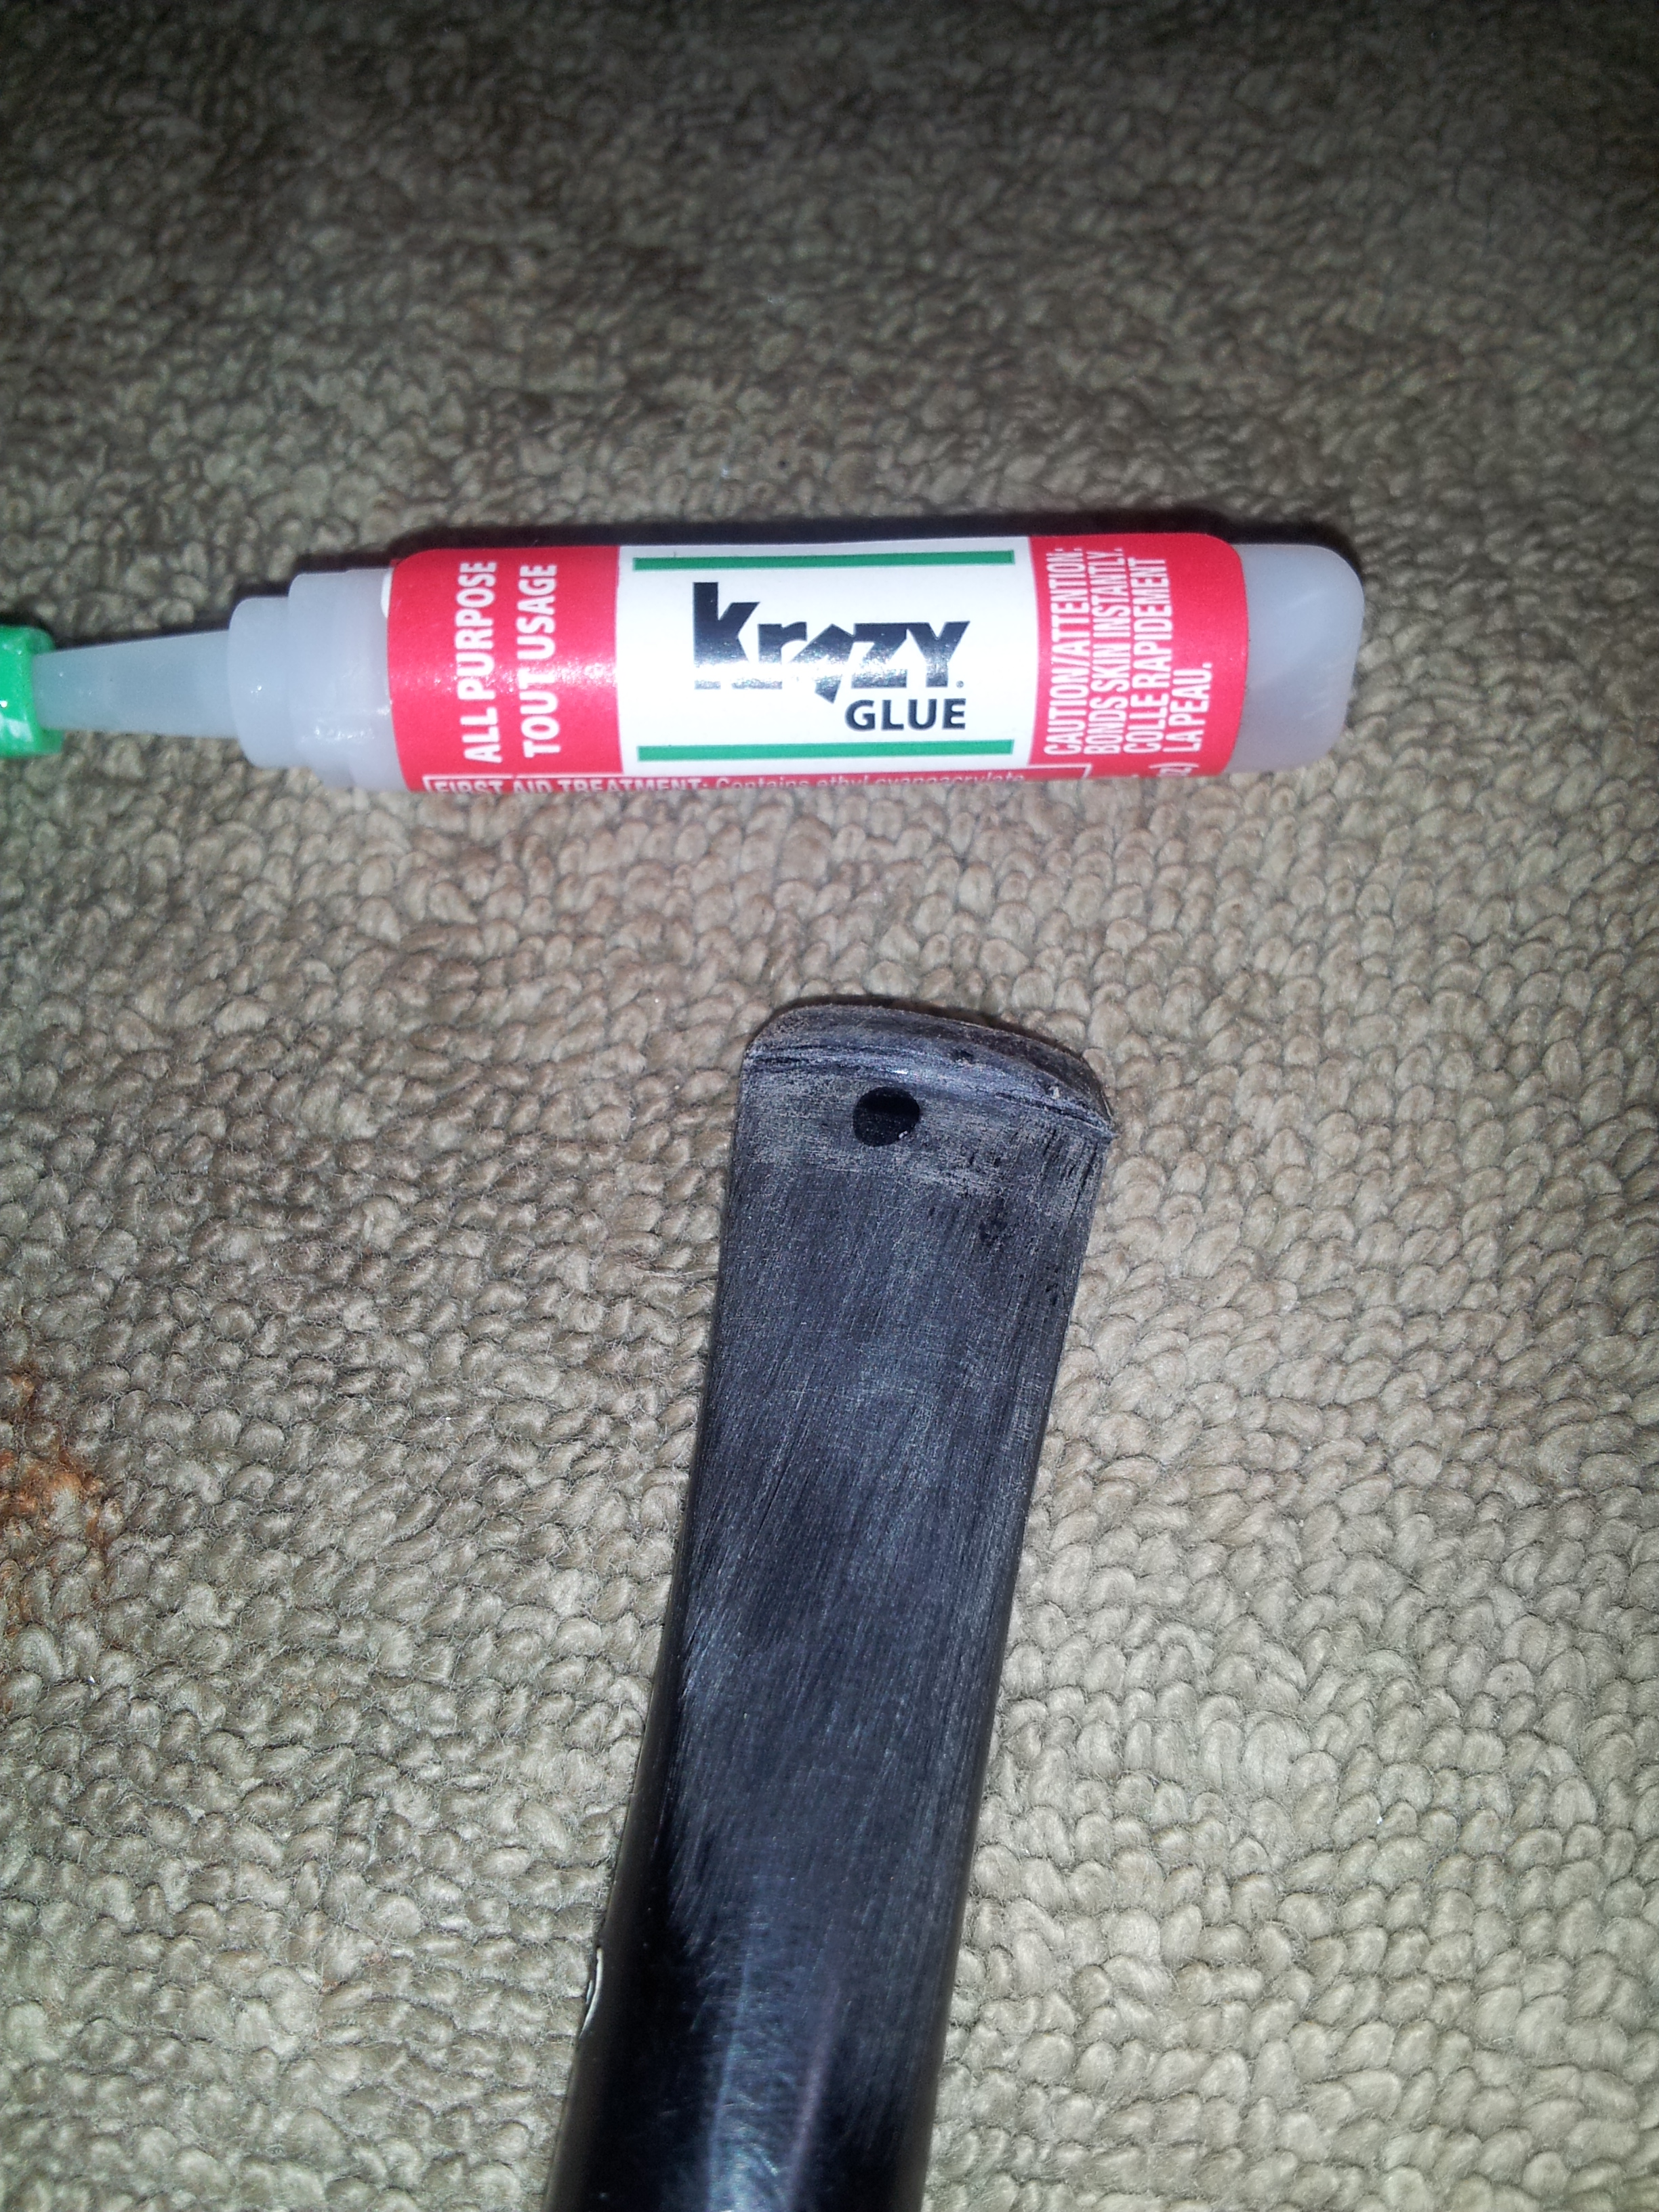
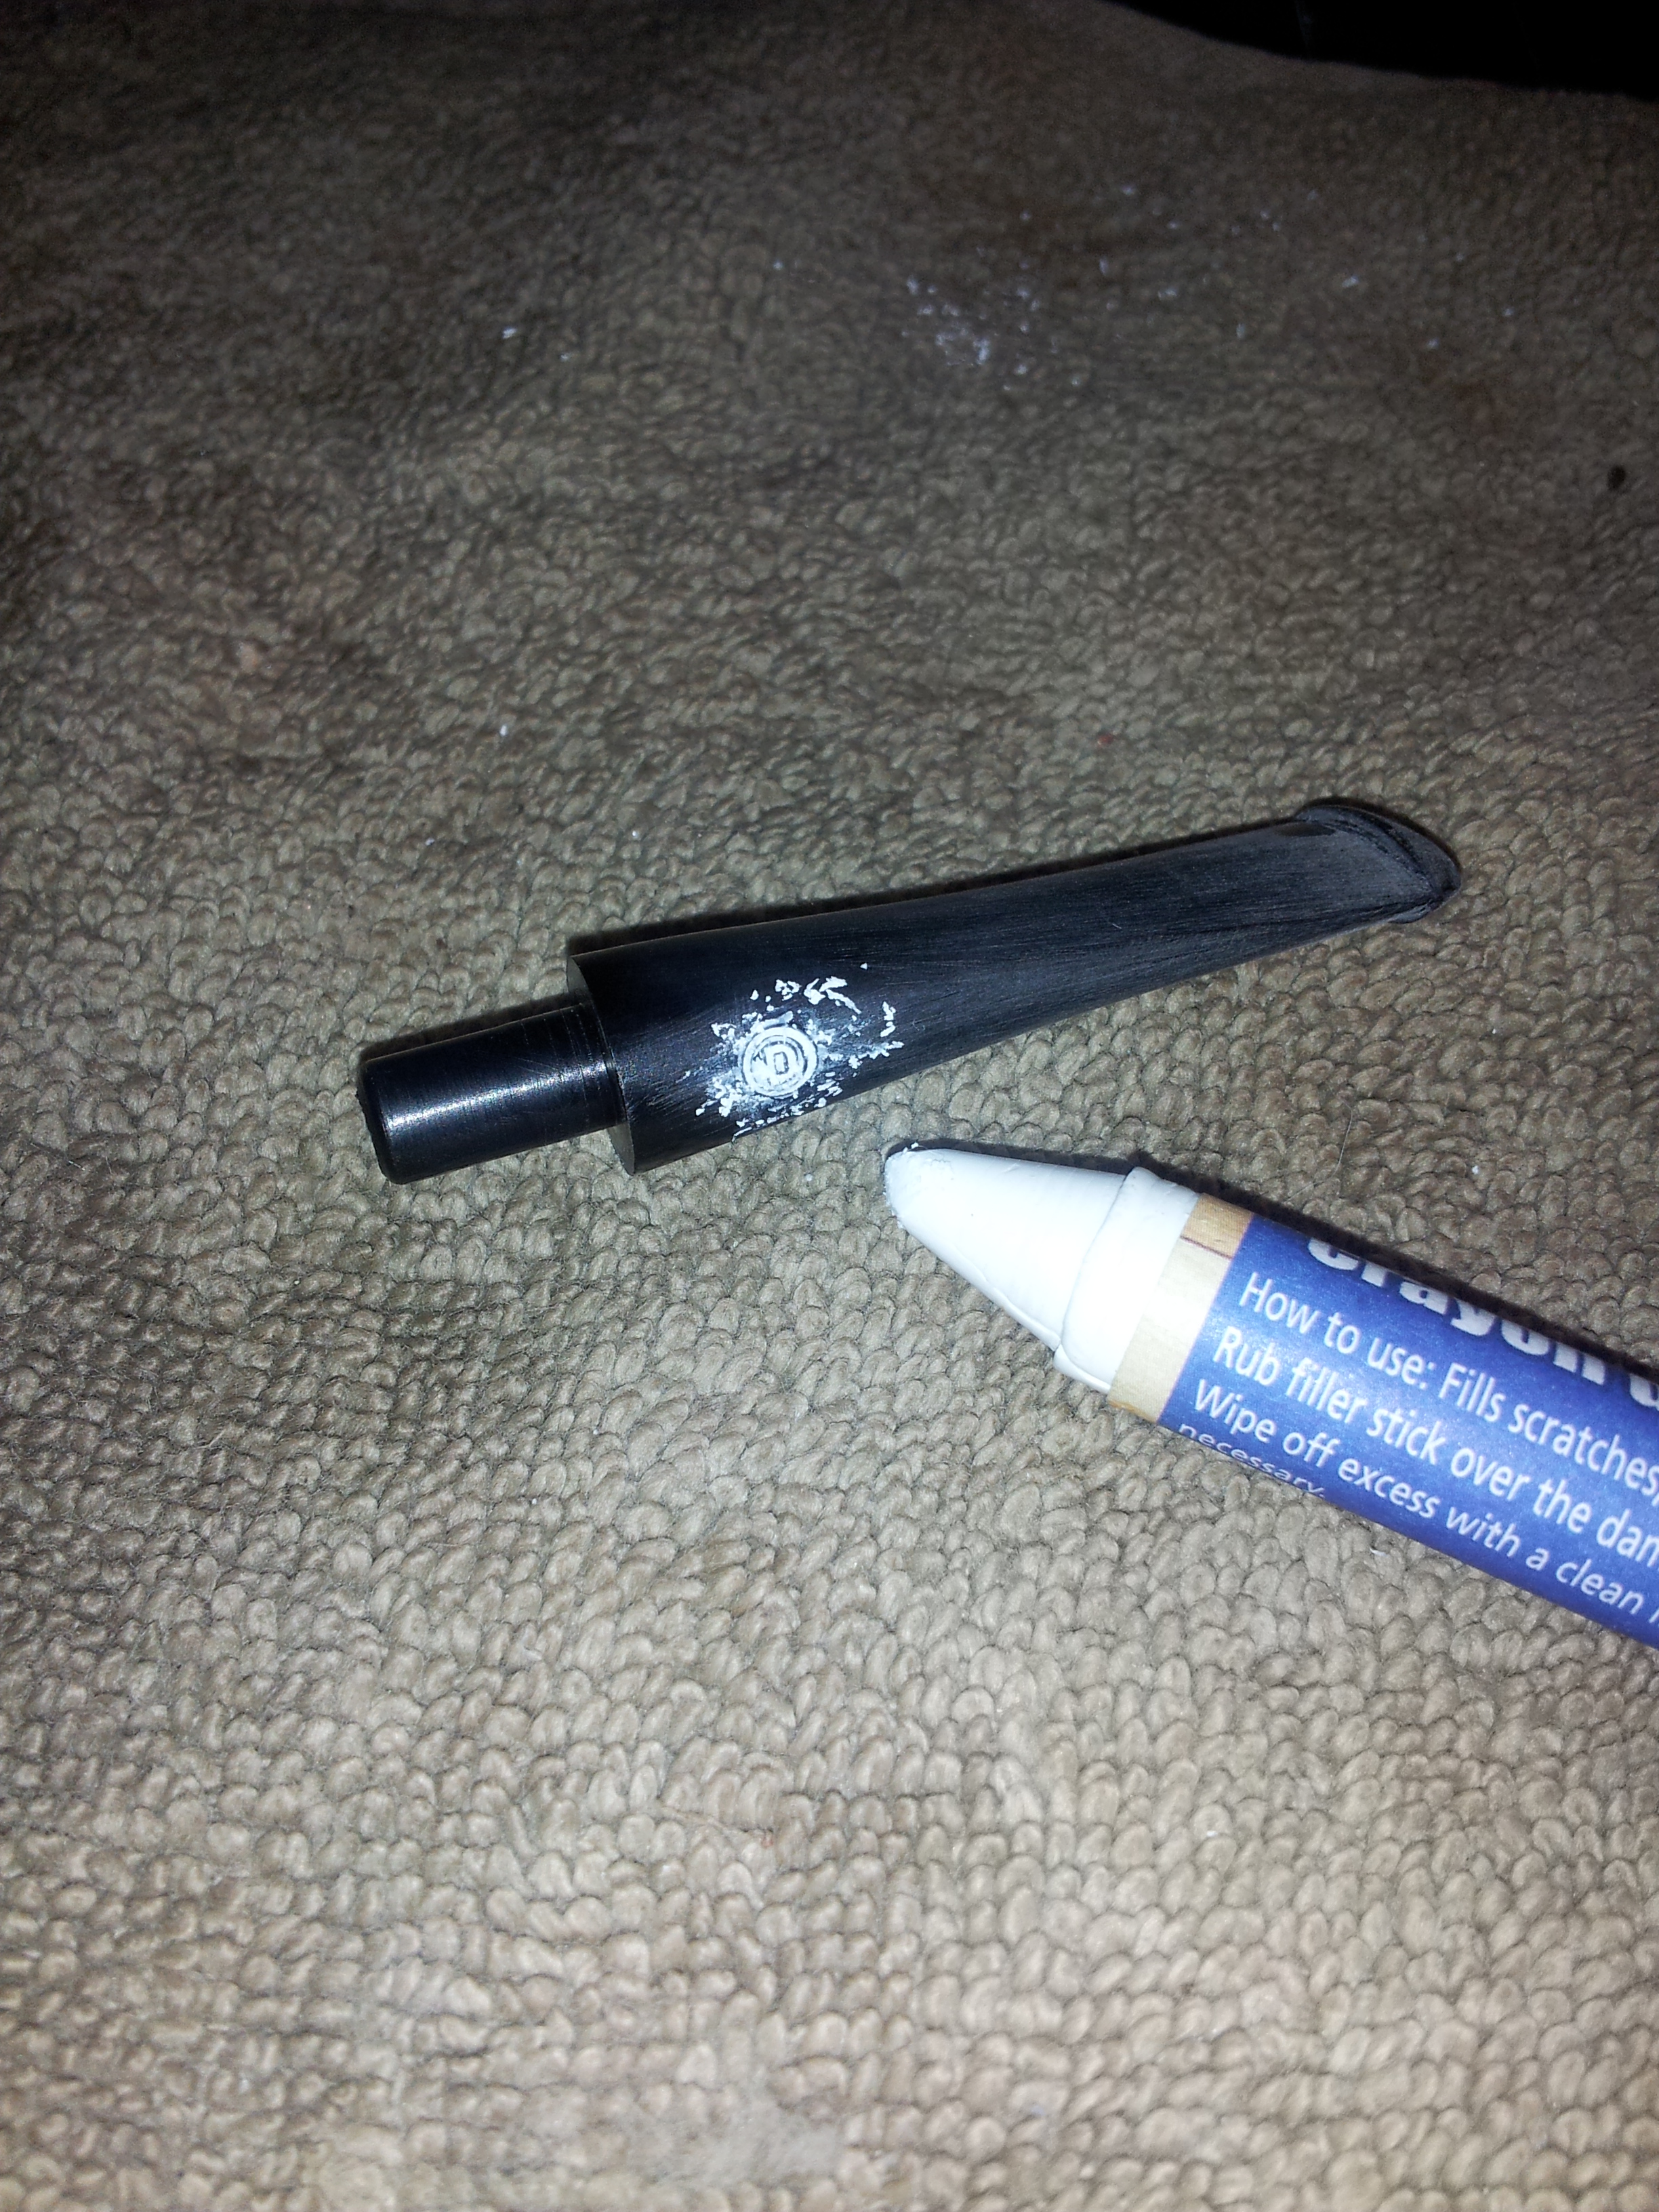
I dropped a bit of clear CA glue into the one larger tooth dent in the stem, then used 220 and 320-grit paper to remove tooth chatter and to tidy up the button.
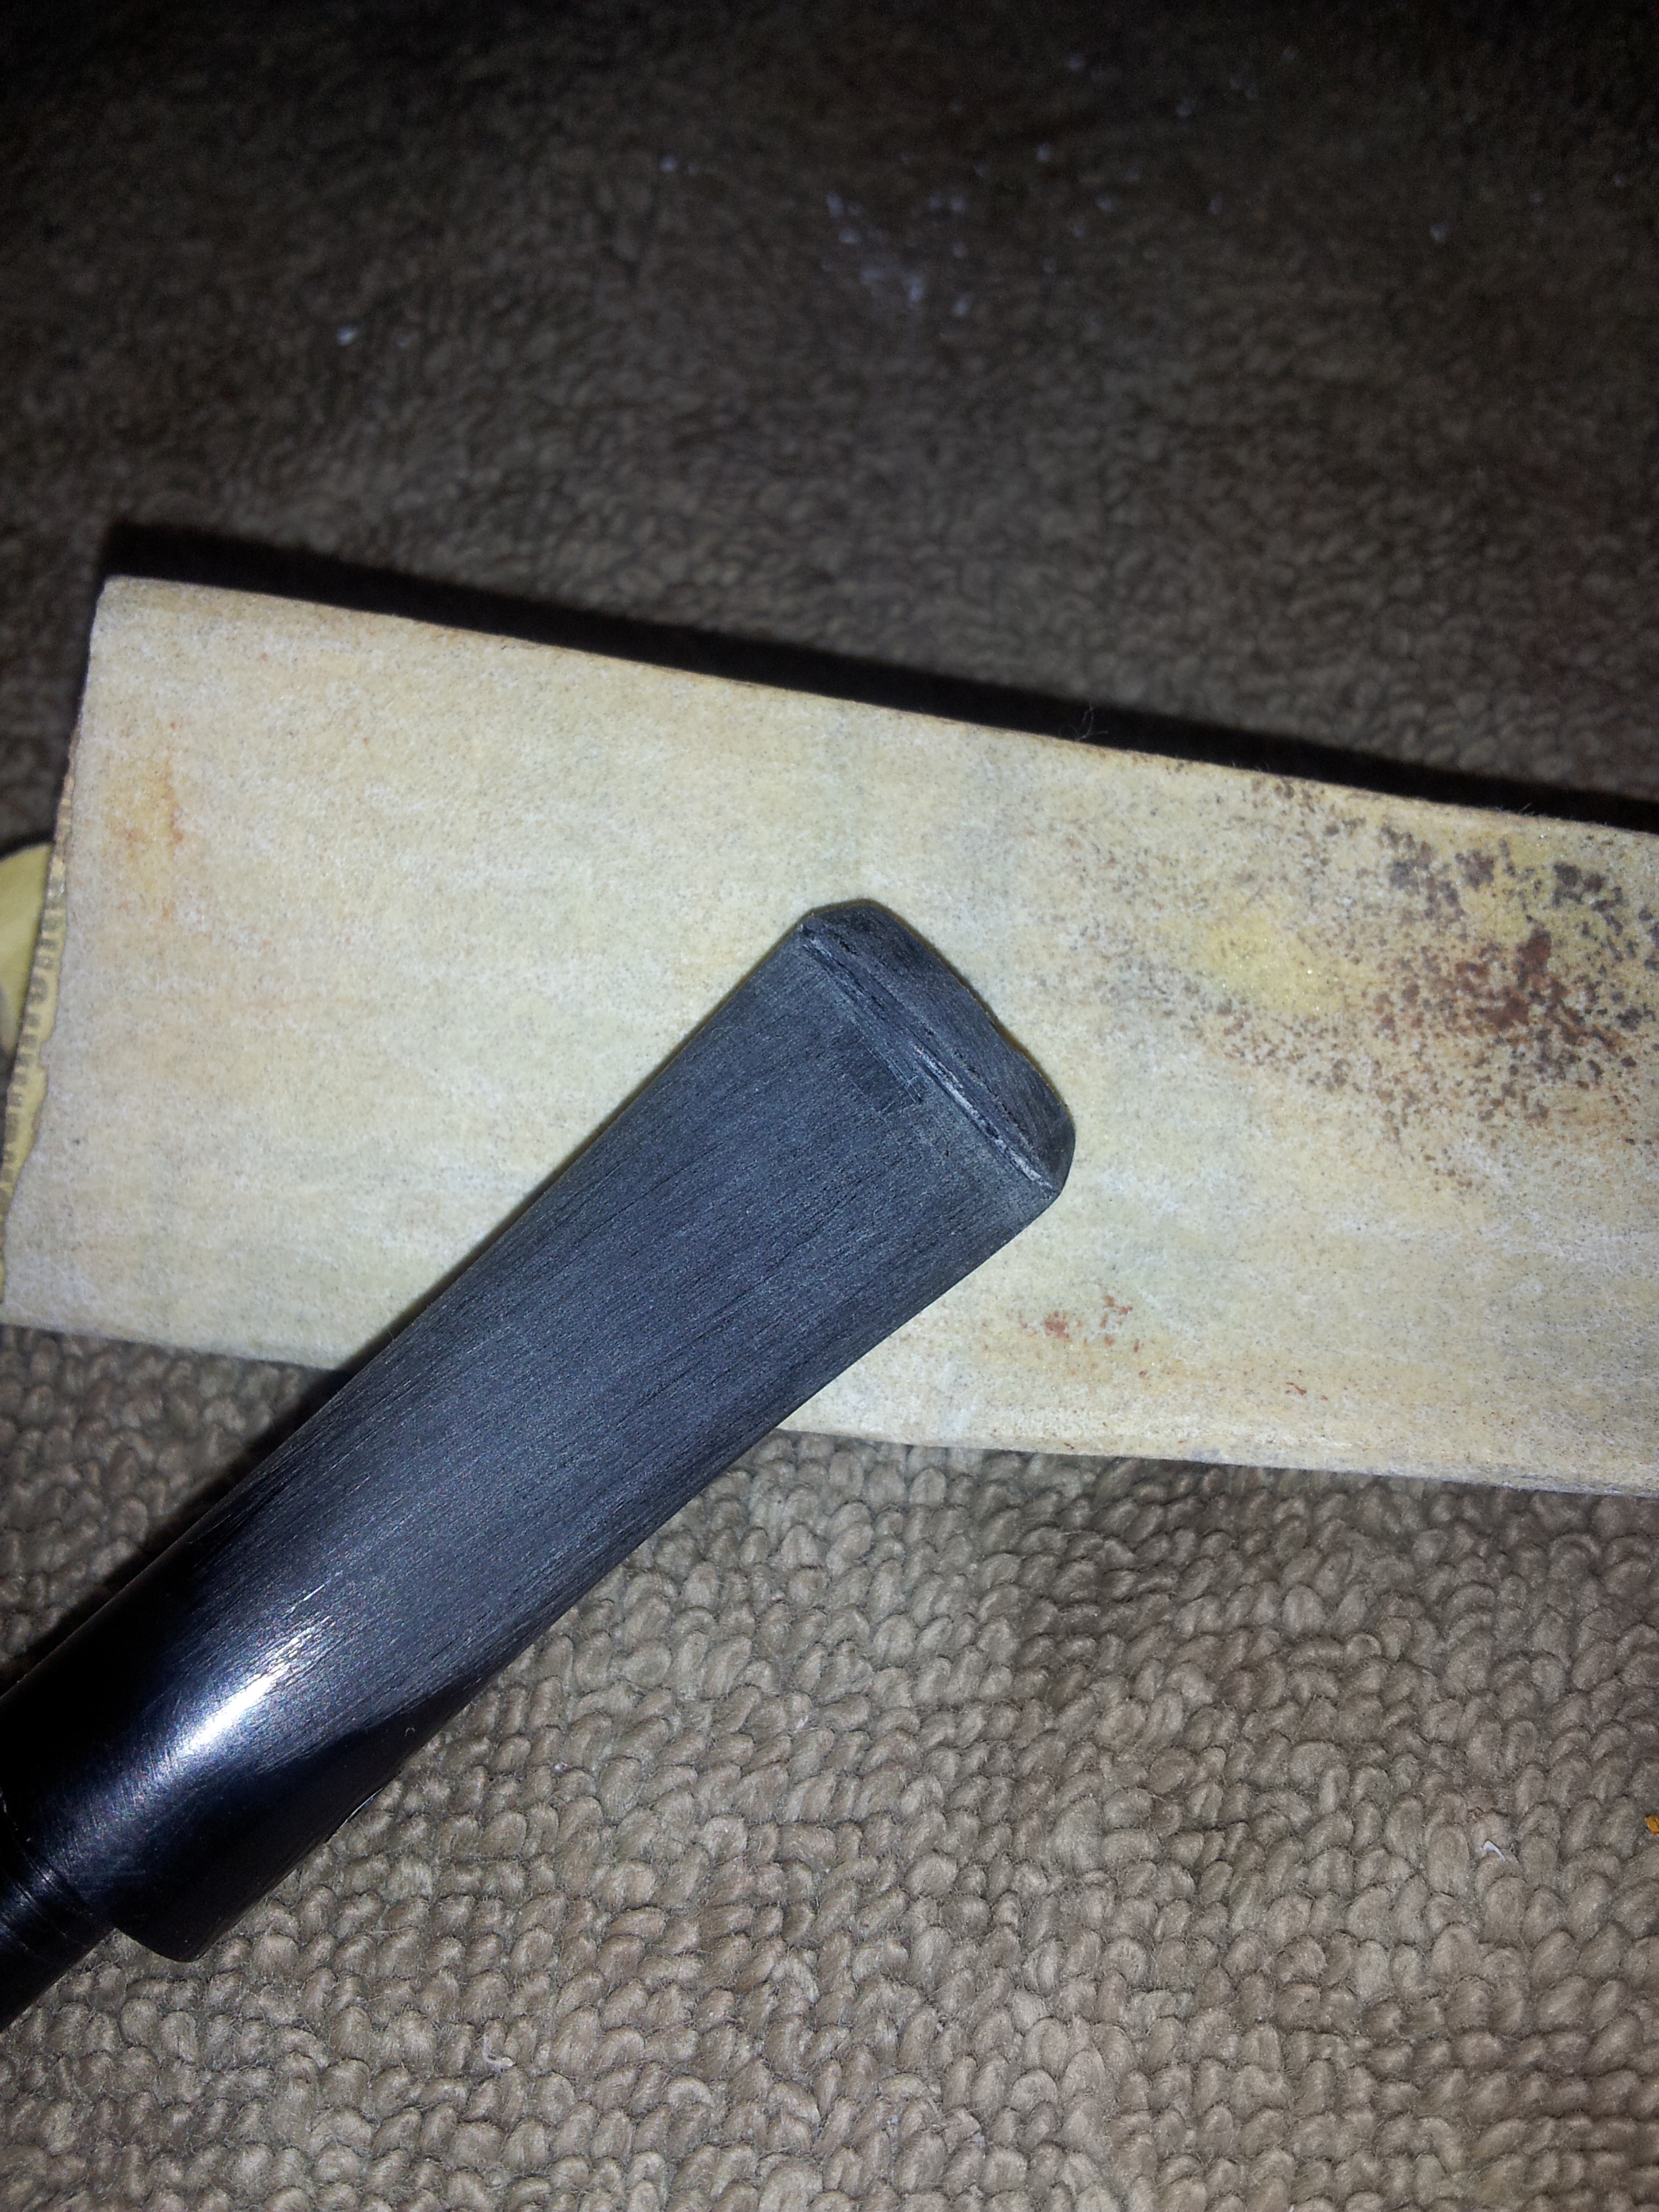

I also gently sanded the stem stamping to remove tiny bits of excess plastic hanging onto the edges, then renewed the stamp with a quick rub of a white wax filler stick.

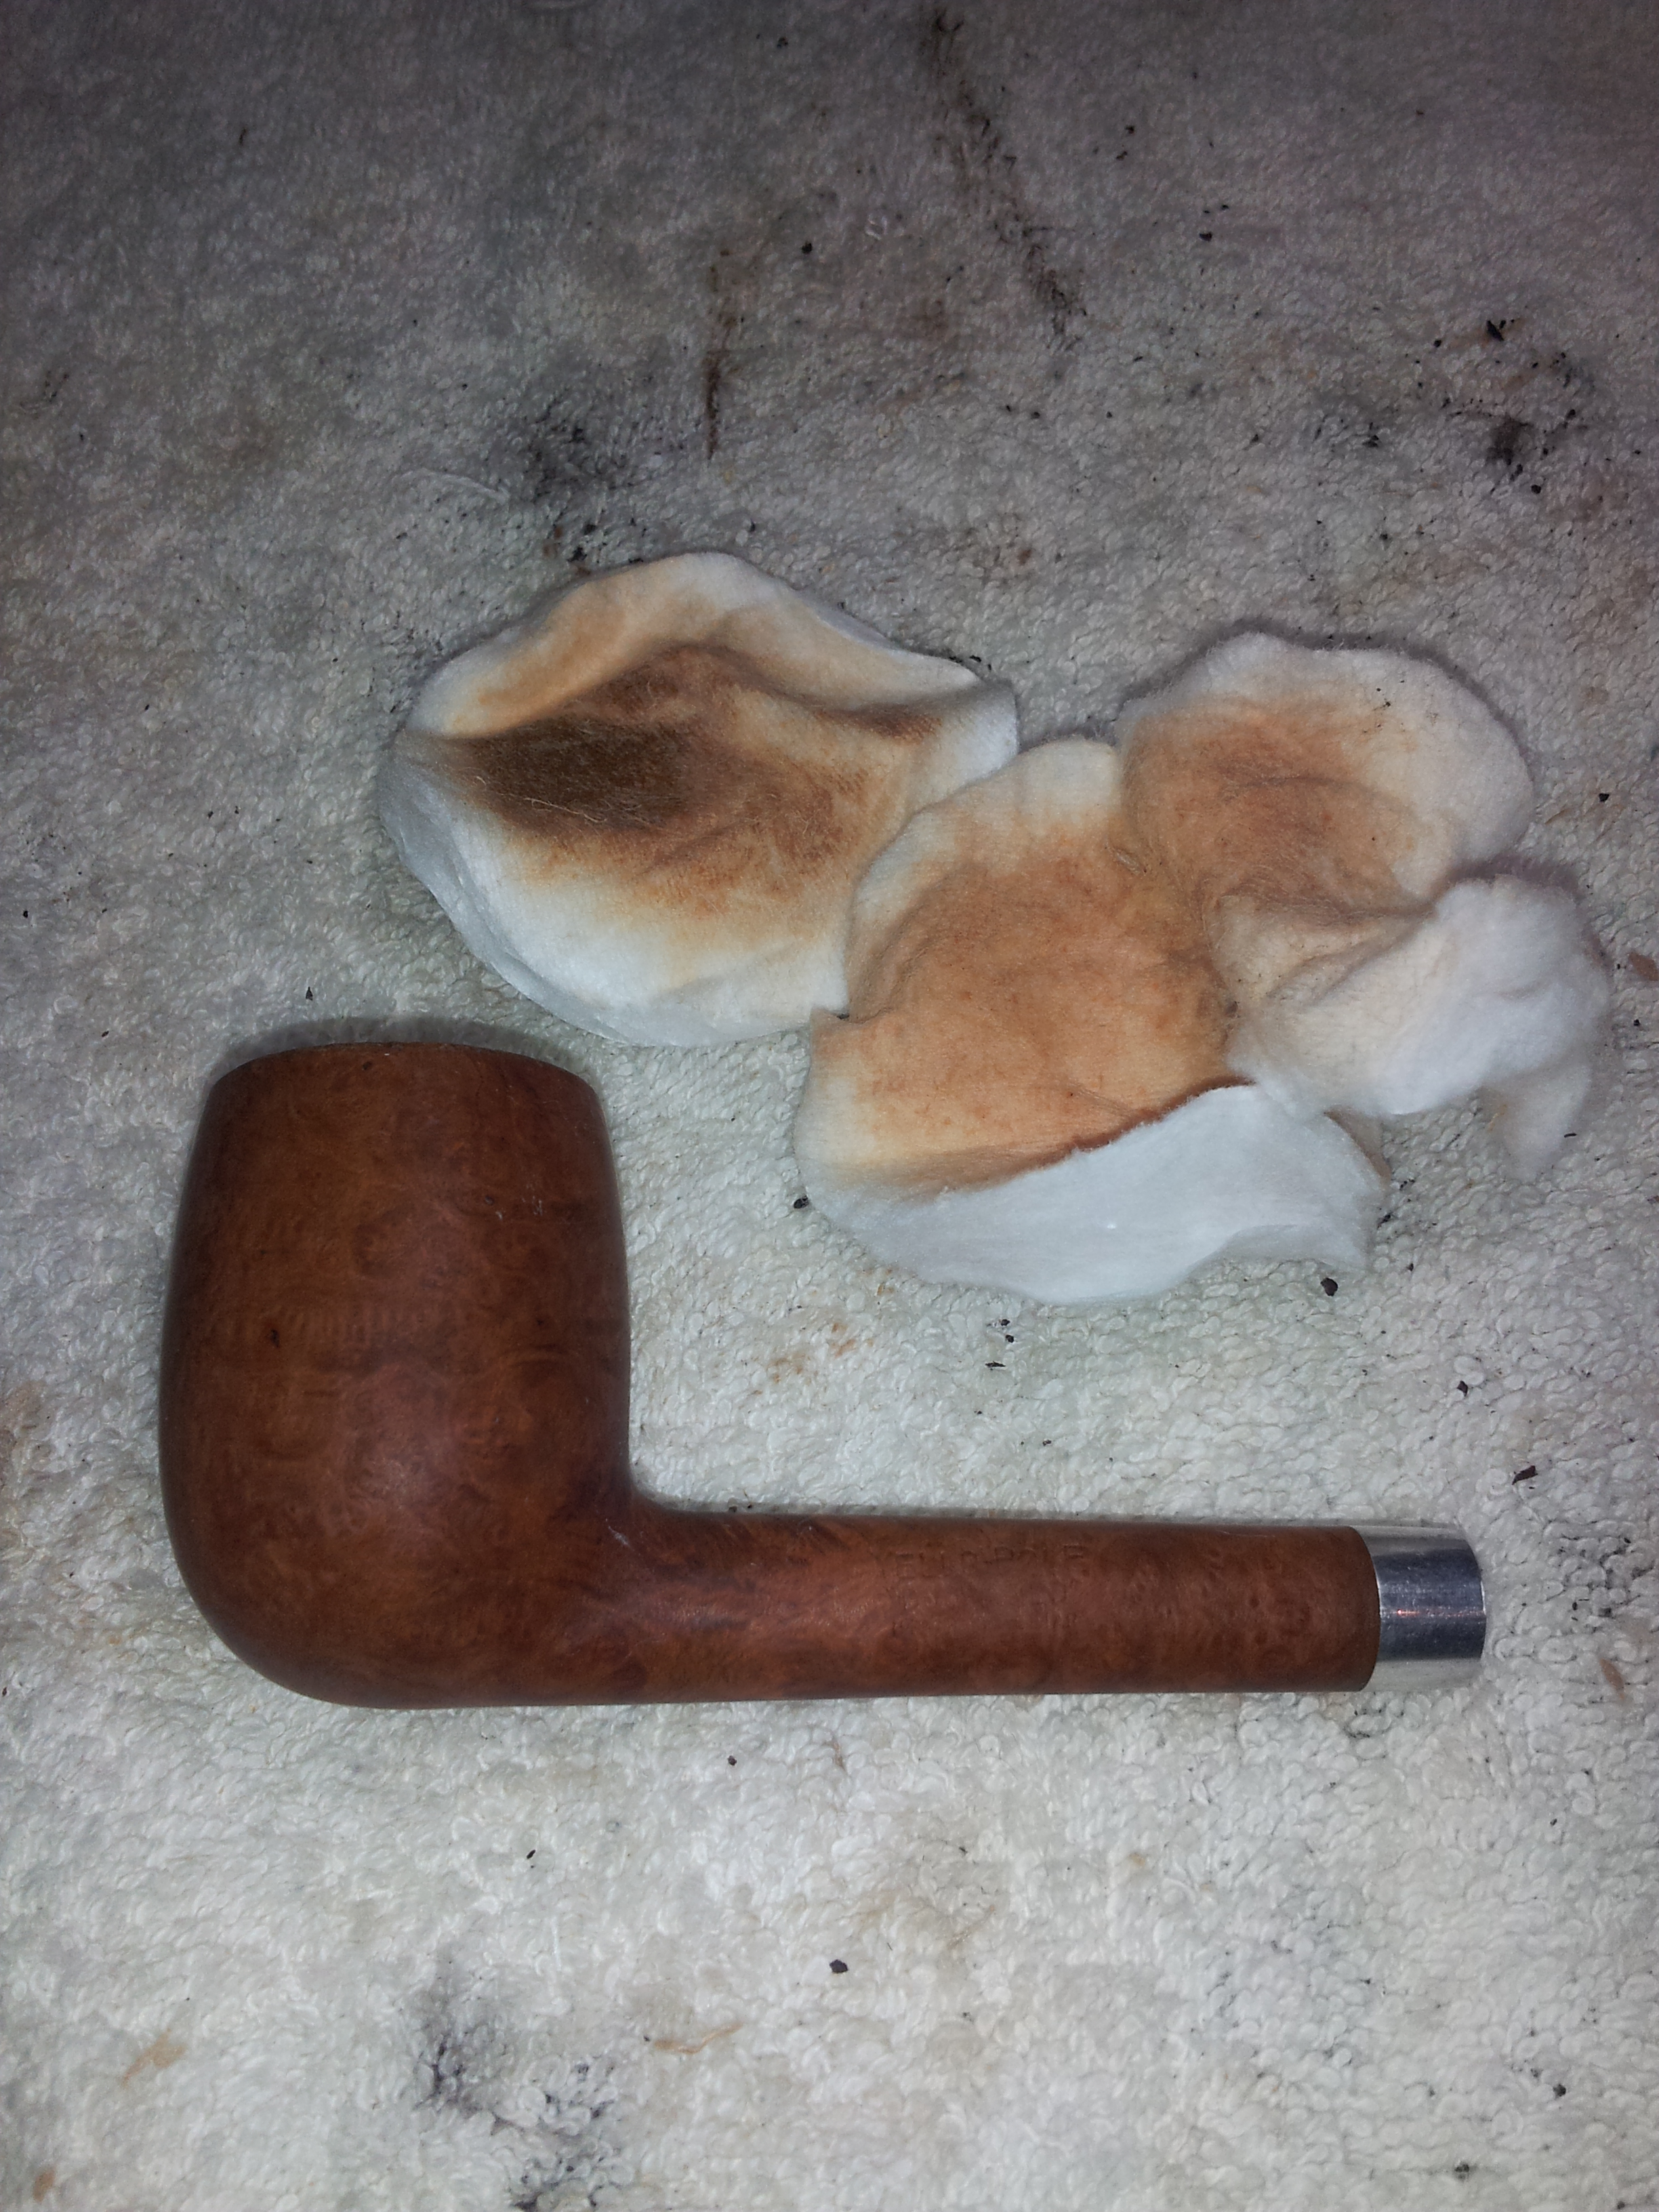
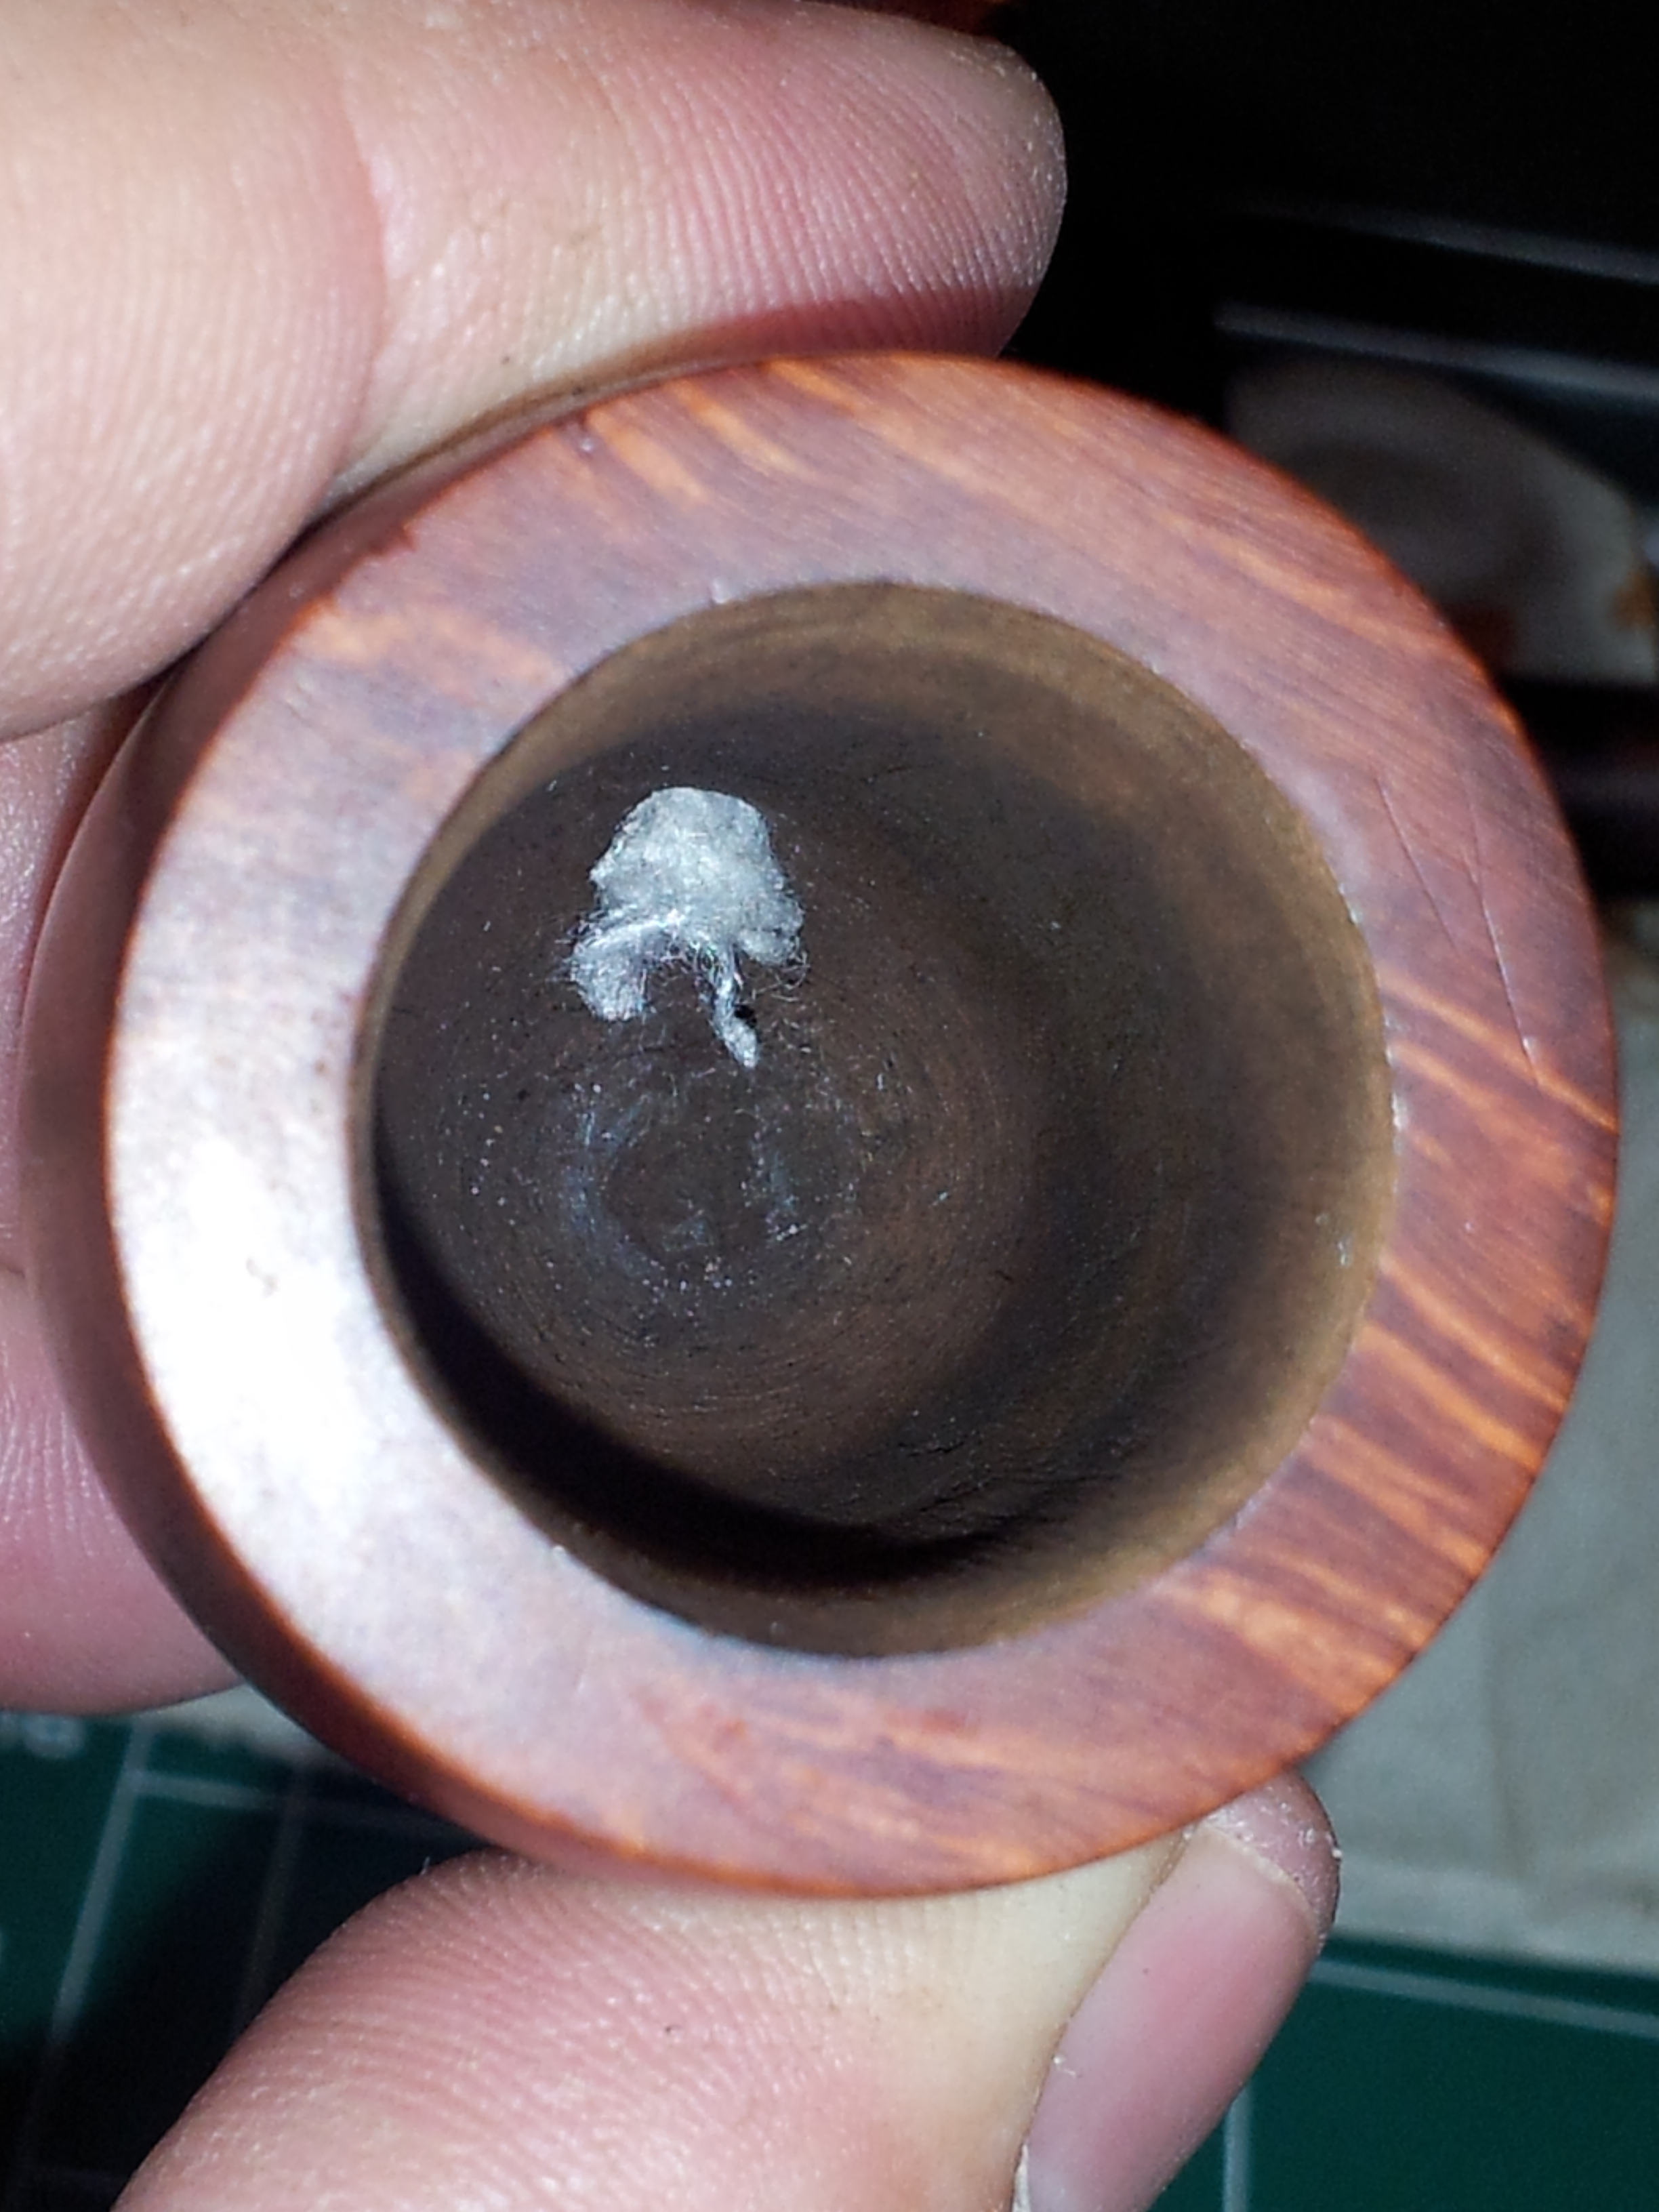
The following morning, I pulled the stummel from the alcohol bath and gave it a quick rub-down with an old terry towel to remove surface dirt. Knowing the original condition of the stem, it was hardly surprising to find the airway through the stummel was also blocked up solid. Out again with the drill bits! Turning the bits by hand, I carefully reamed the shank with 3/32” through 5/32” drill bits. A few alcohol-dipped pipe cleaners finished up the shank cleaning.


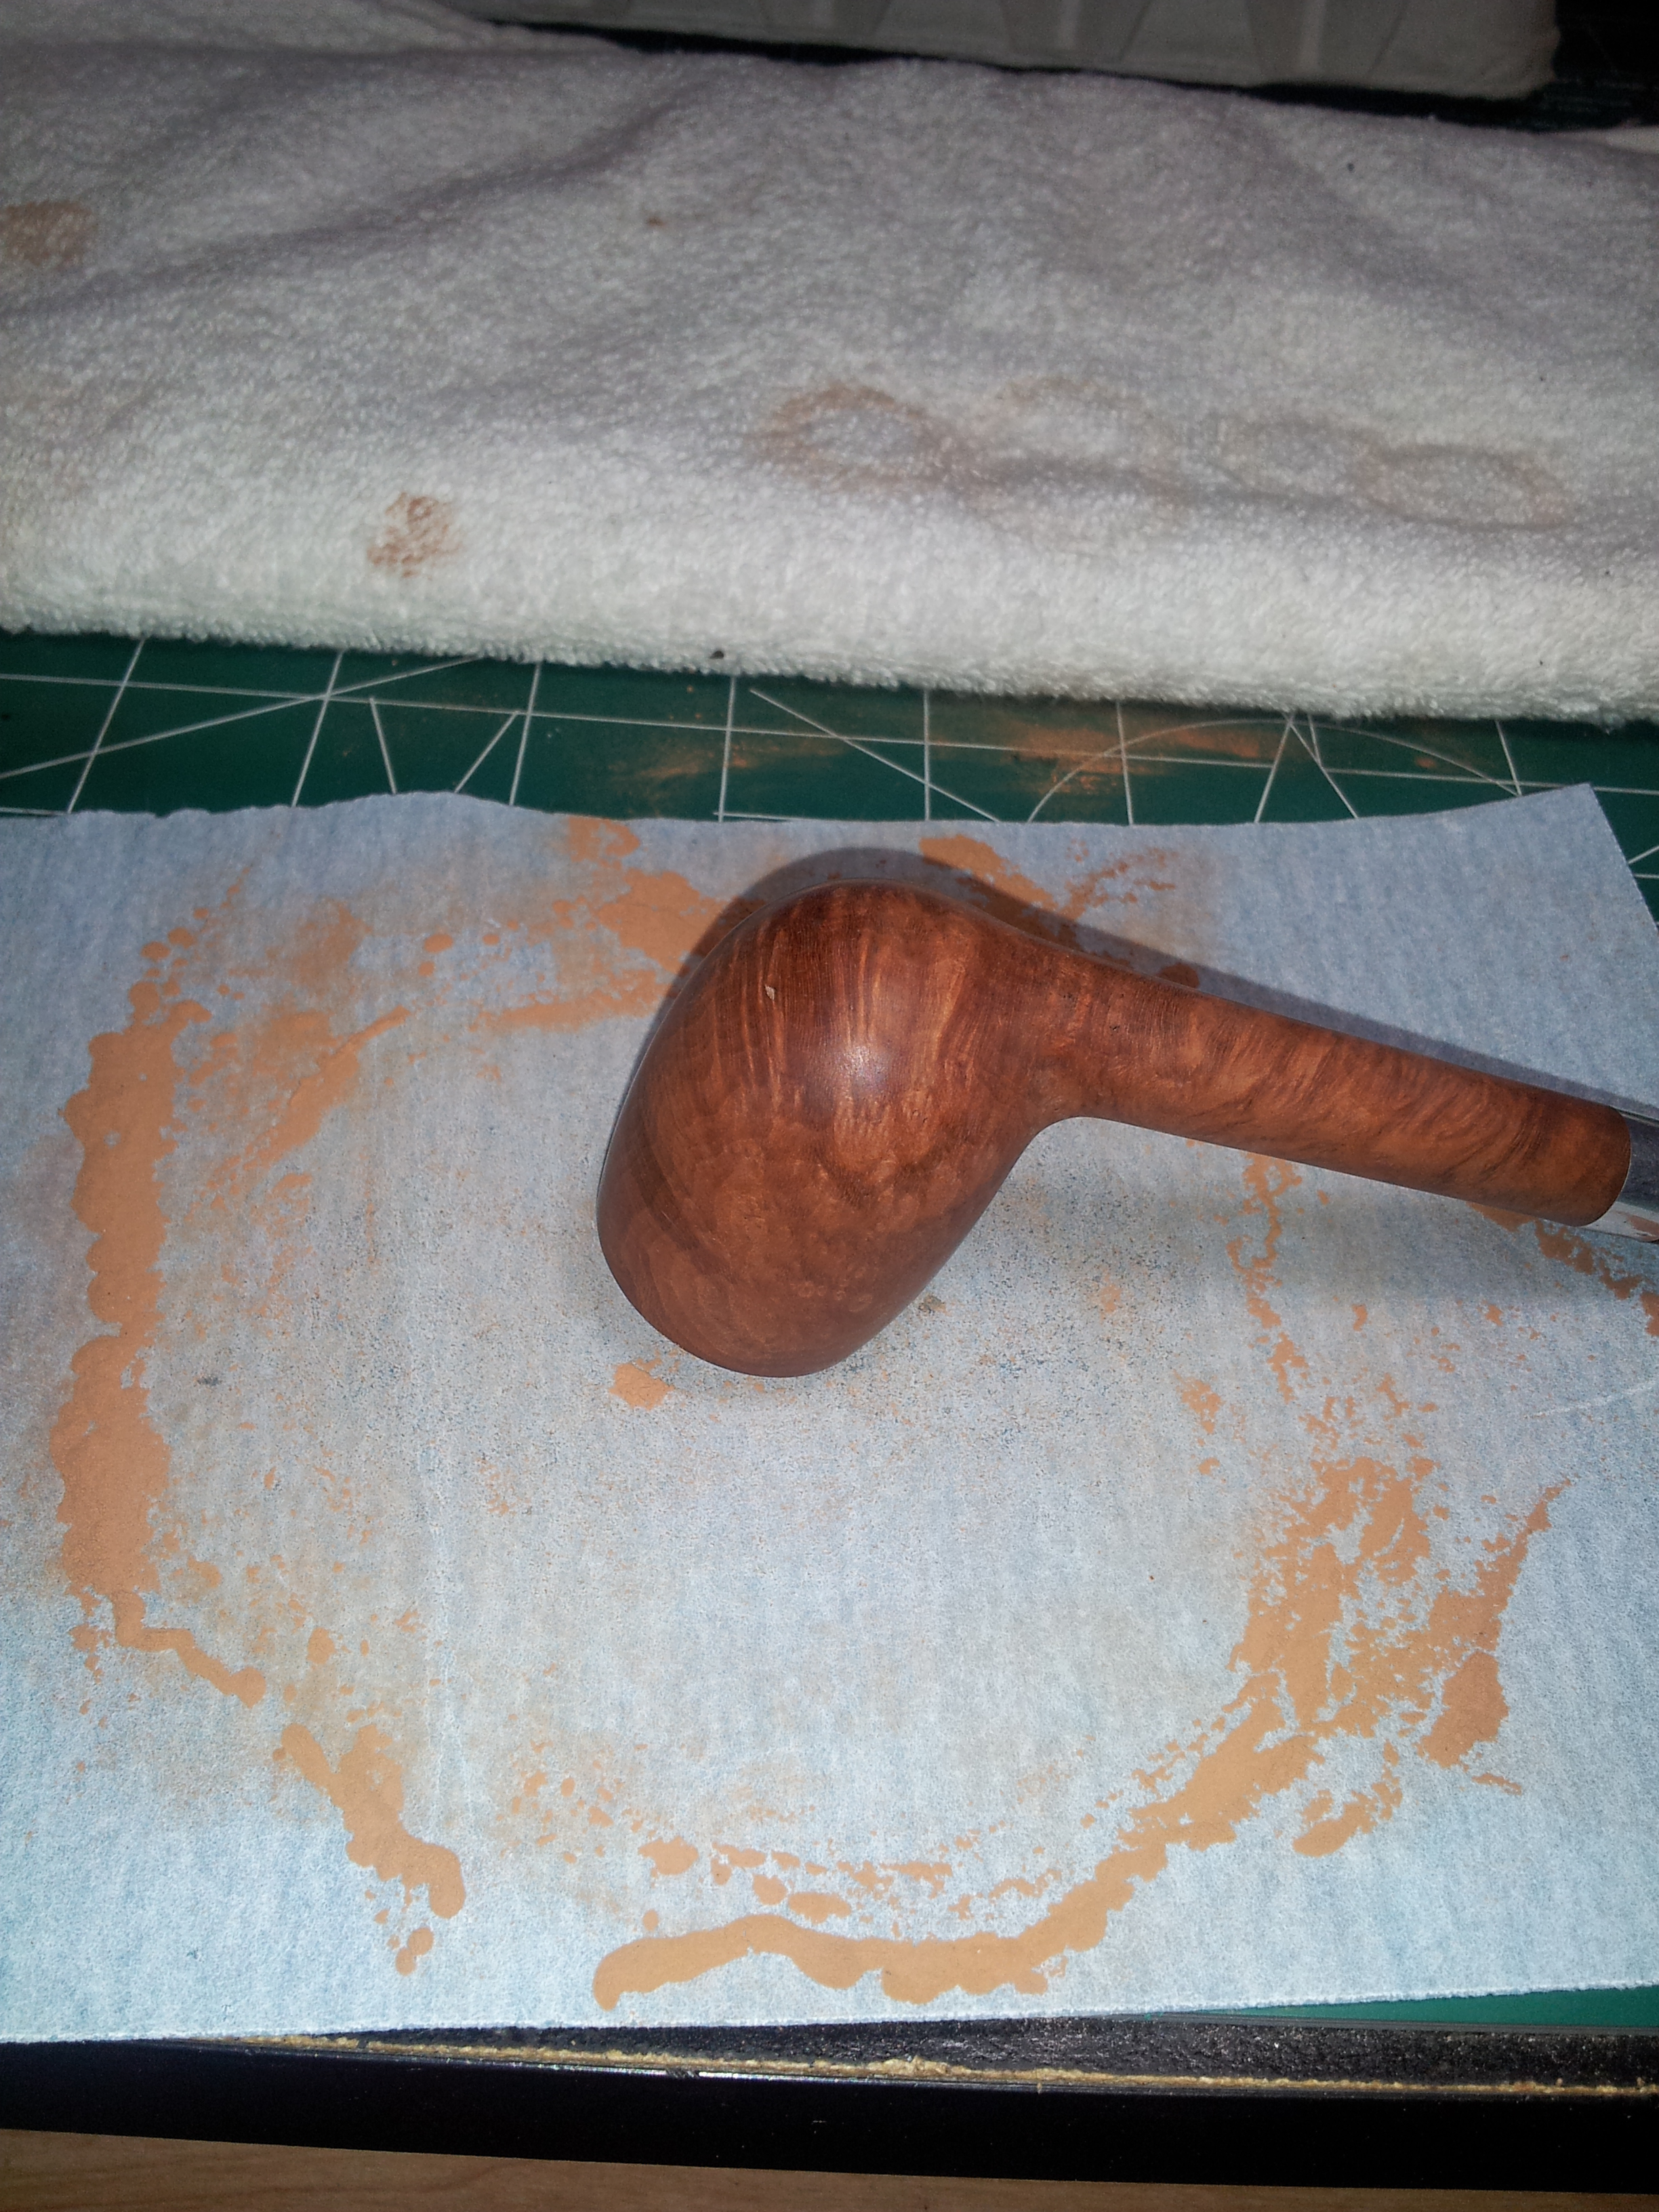
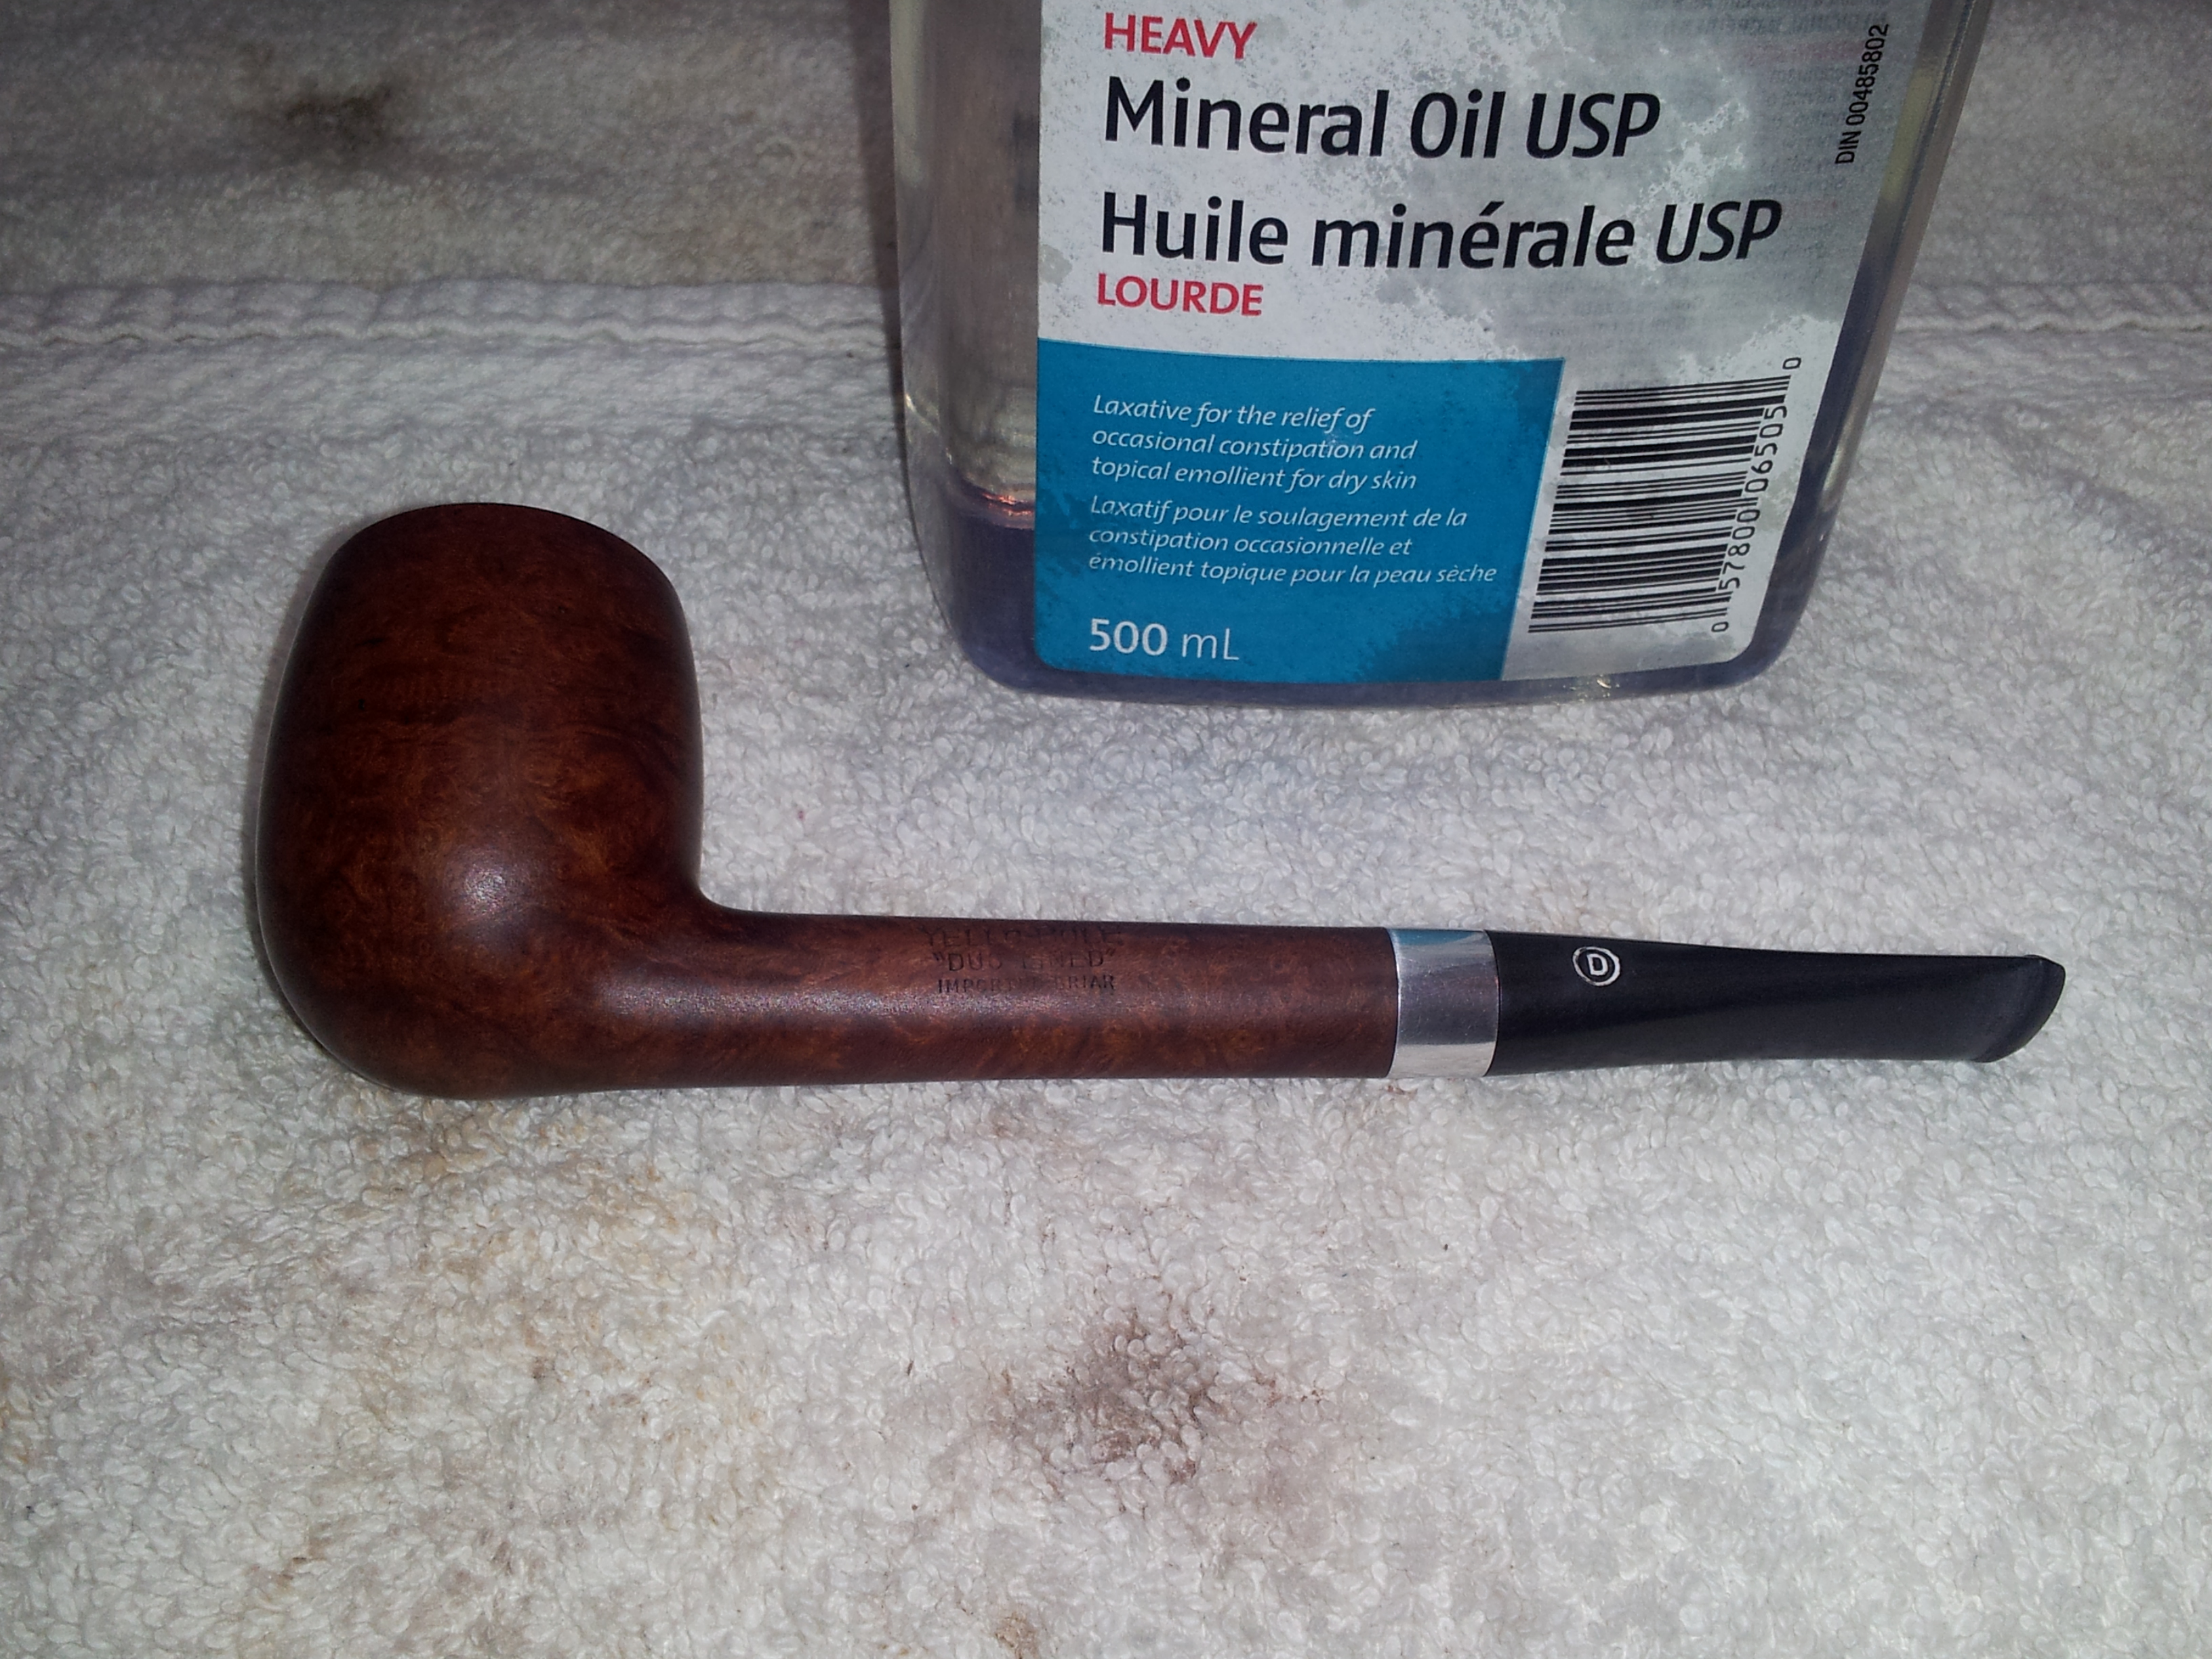
I wiped down the exterior of the stummel with nail polish remover and cotton pads to remove the last of the factory lacquer finish, then topped the bowl lightly to remove a few edge dents. The final pic below shows the entire pipe at this point in the refurbishment.

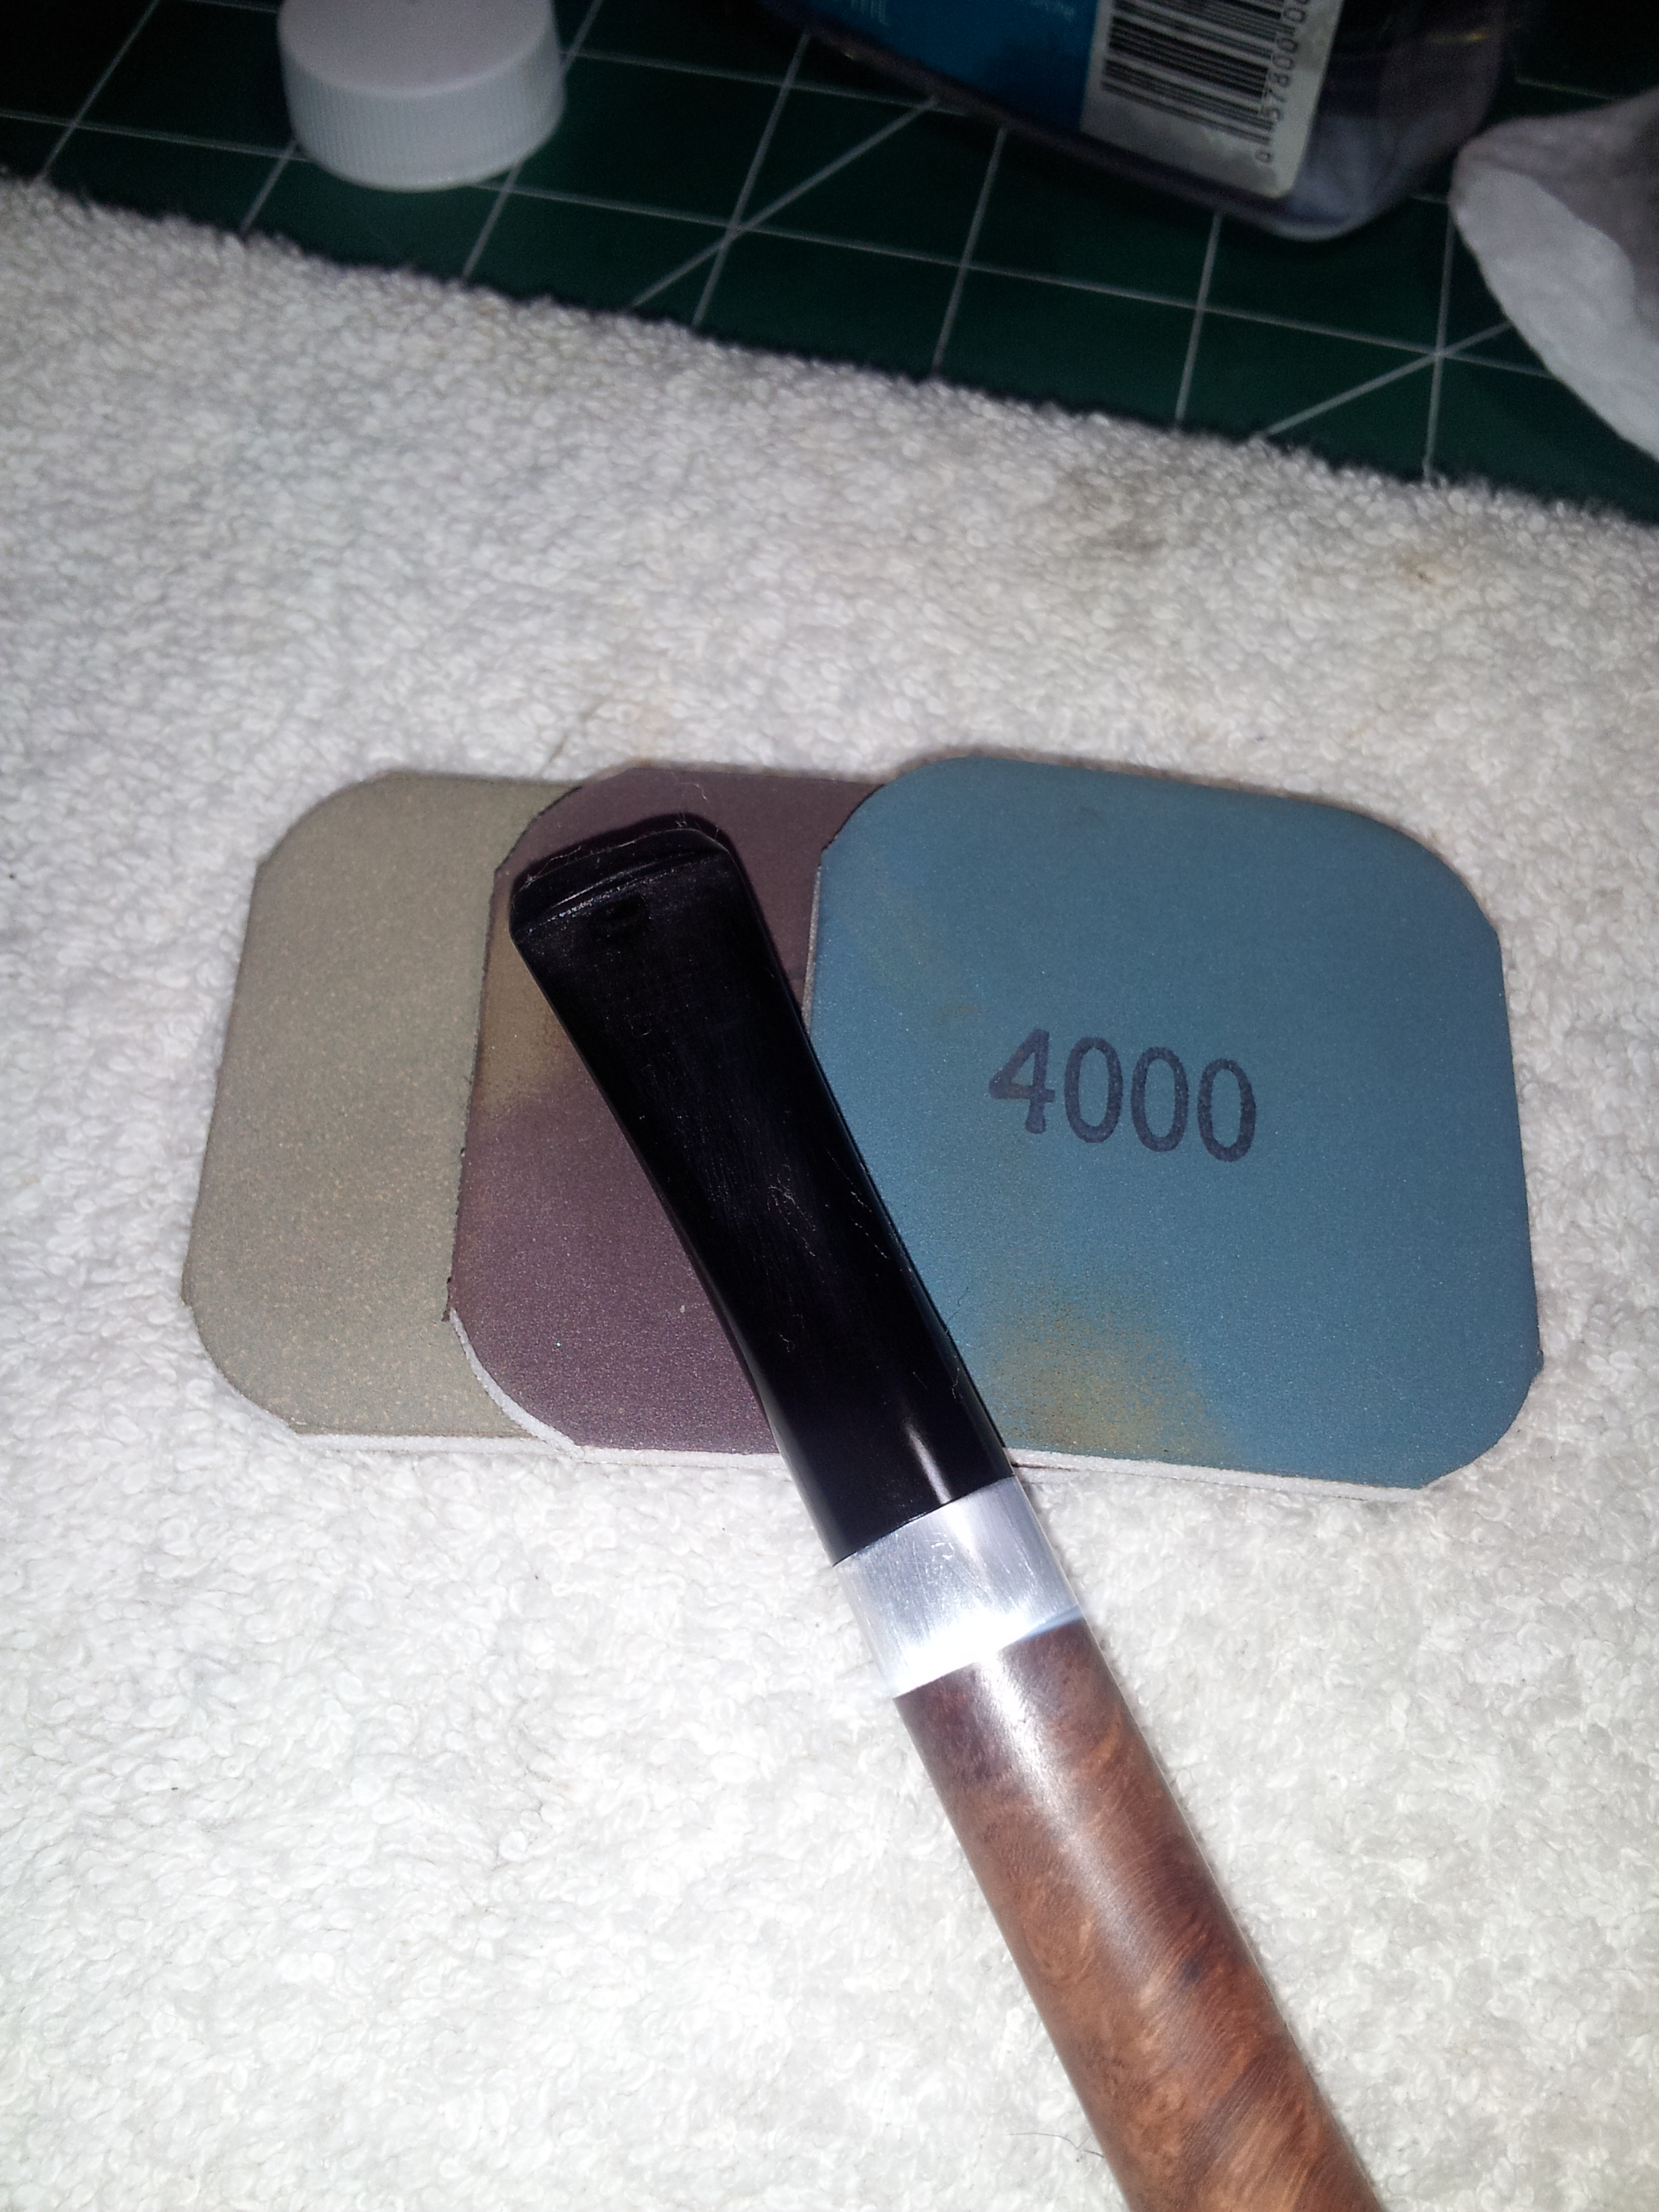
I moved back to the stem, this time with the Micro Mesh pads. I sanded the stem in sets of three pads until I had worked my way through the entire 1500 – 12000 grit lineup.


I touched up the stain on the rim with a stain pen, then wiped the pipe down with mineral oil to liven up the grain.

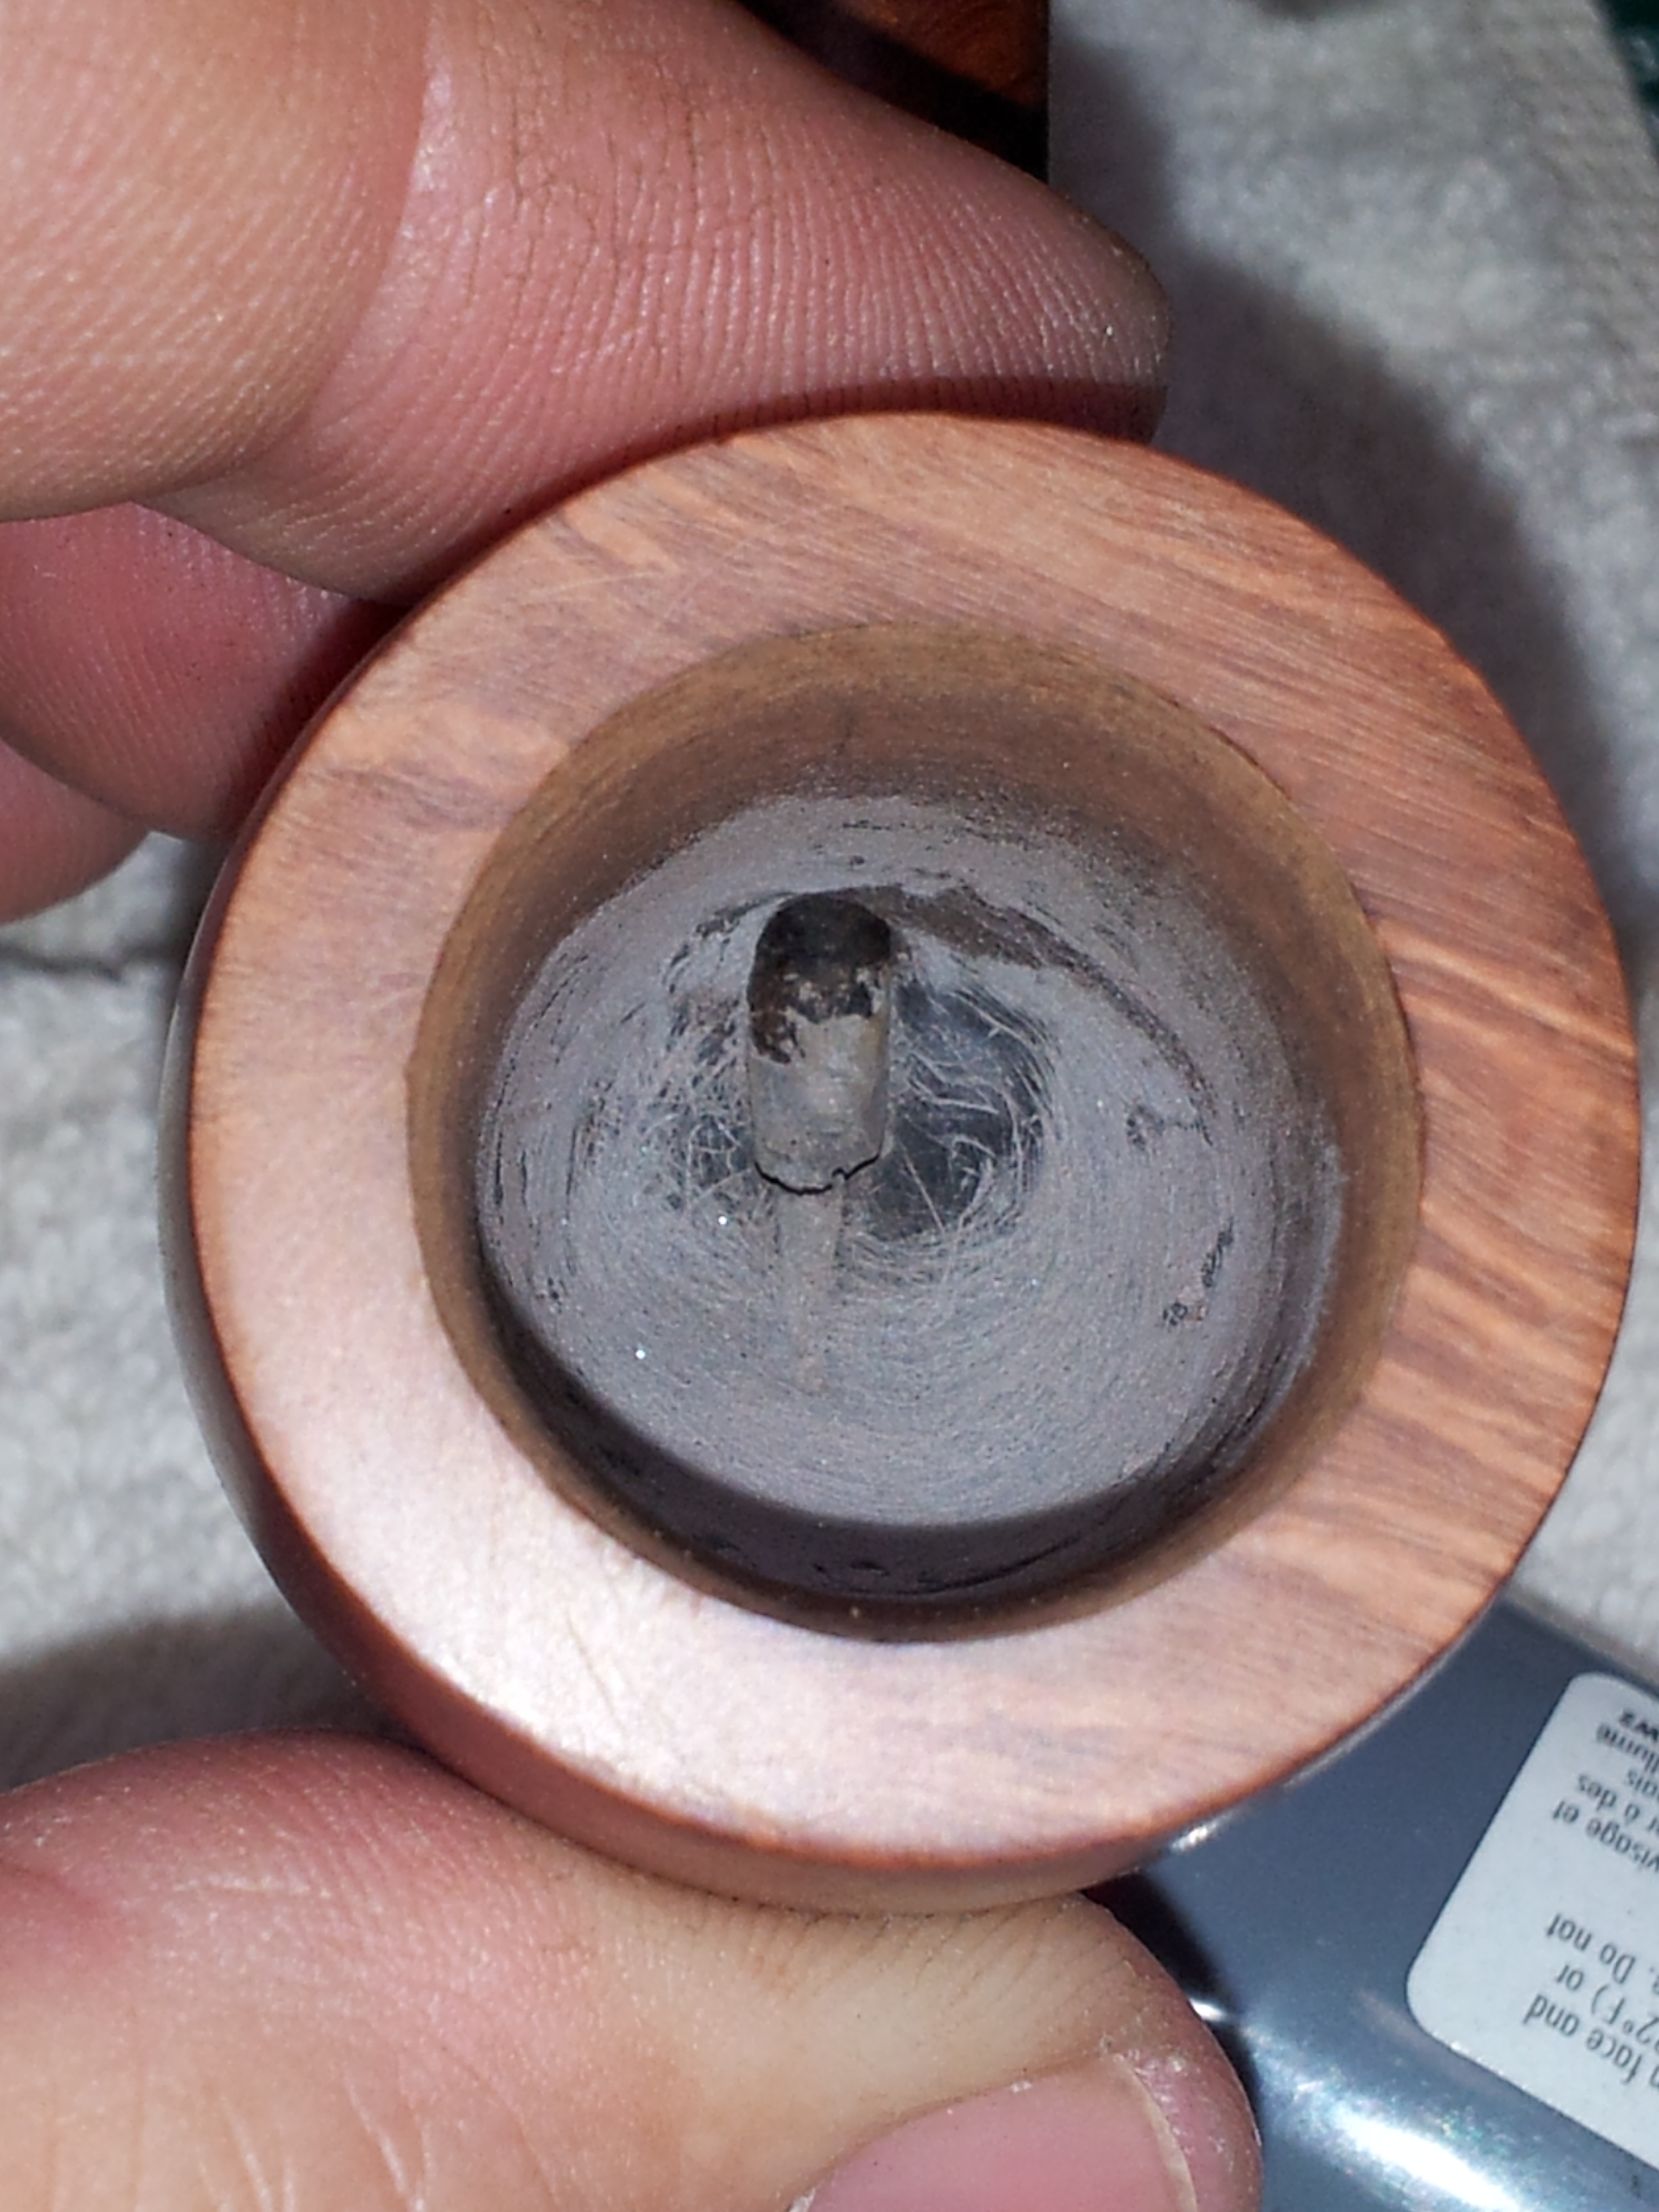
It was now time to address the over-reamed bowl, a task which, if I’m being honest, I had been putting off until the last possible moment. Given the amount by which the bowl floor needed to be raised, I decided against using traditional pipe mud made from cigar ash and water. I was afraid that pipe mud that thick would crack and fail as it dried; instead, I opted to use JB-Weld. JB-Weld is a steel-reinforced epoxy that dries hard without excessive shrinkage, and is exceptionally heat-resistant. It also cured to a stable, inert compound, and so is safe to use inside the bowl of a pipe.
The next series of pictures shows the process of mixing and applying the JB-Weld to the bottom of the bowl. I inserted a pipe cleaner through the shank until it just entered the bowl. This would help keep the draft hole open. I then applied two layers of JB, allowing the first to cure, and giving it a rough sanding, before adding the second layer. As you can see in the pics, the first hit of JB brought the level of the bowl floor up significantly, while the second flowed across the first layer, leaving a smooth bowl floor. The repair was finished by re-drilling the draft hole and sanding the JB patch to blend it smoothly into the walls of the tobacco chamber.
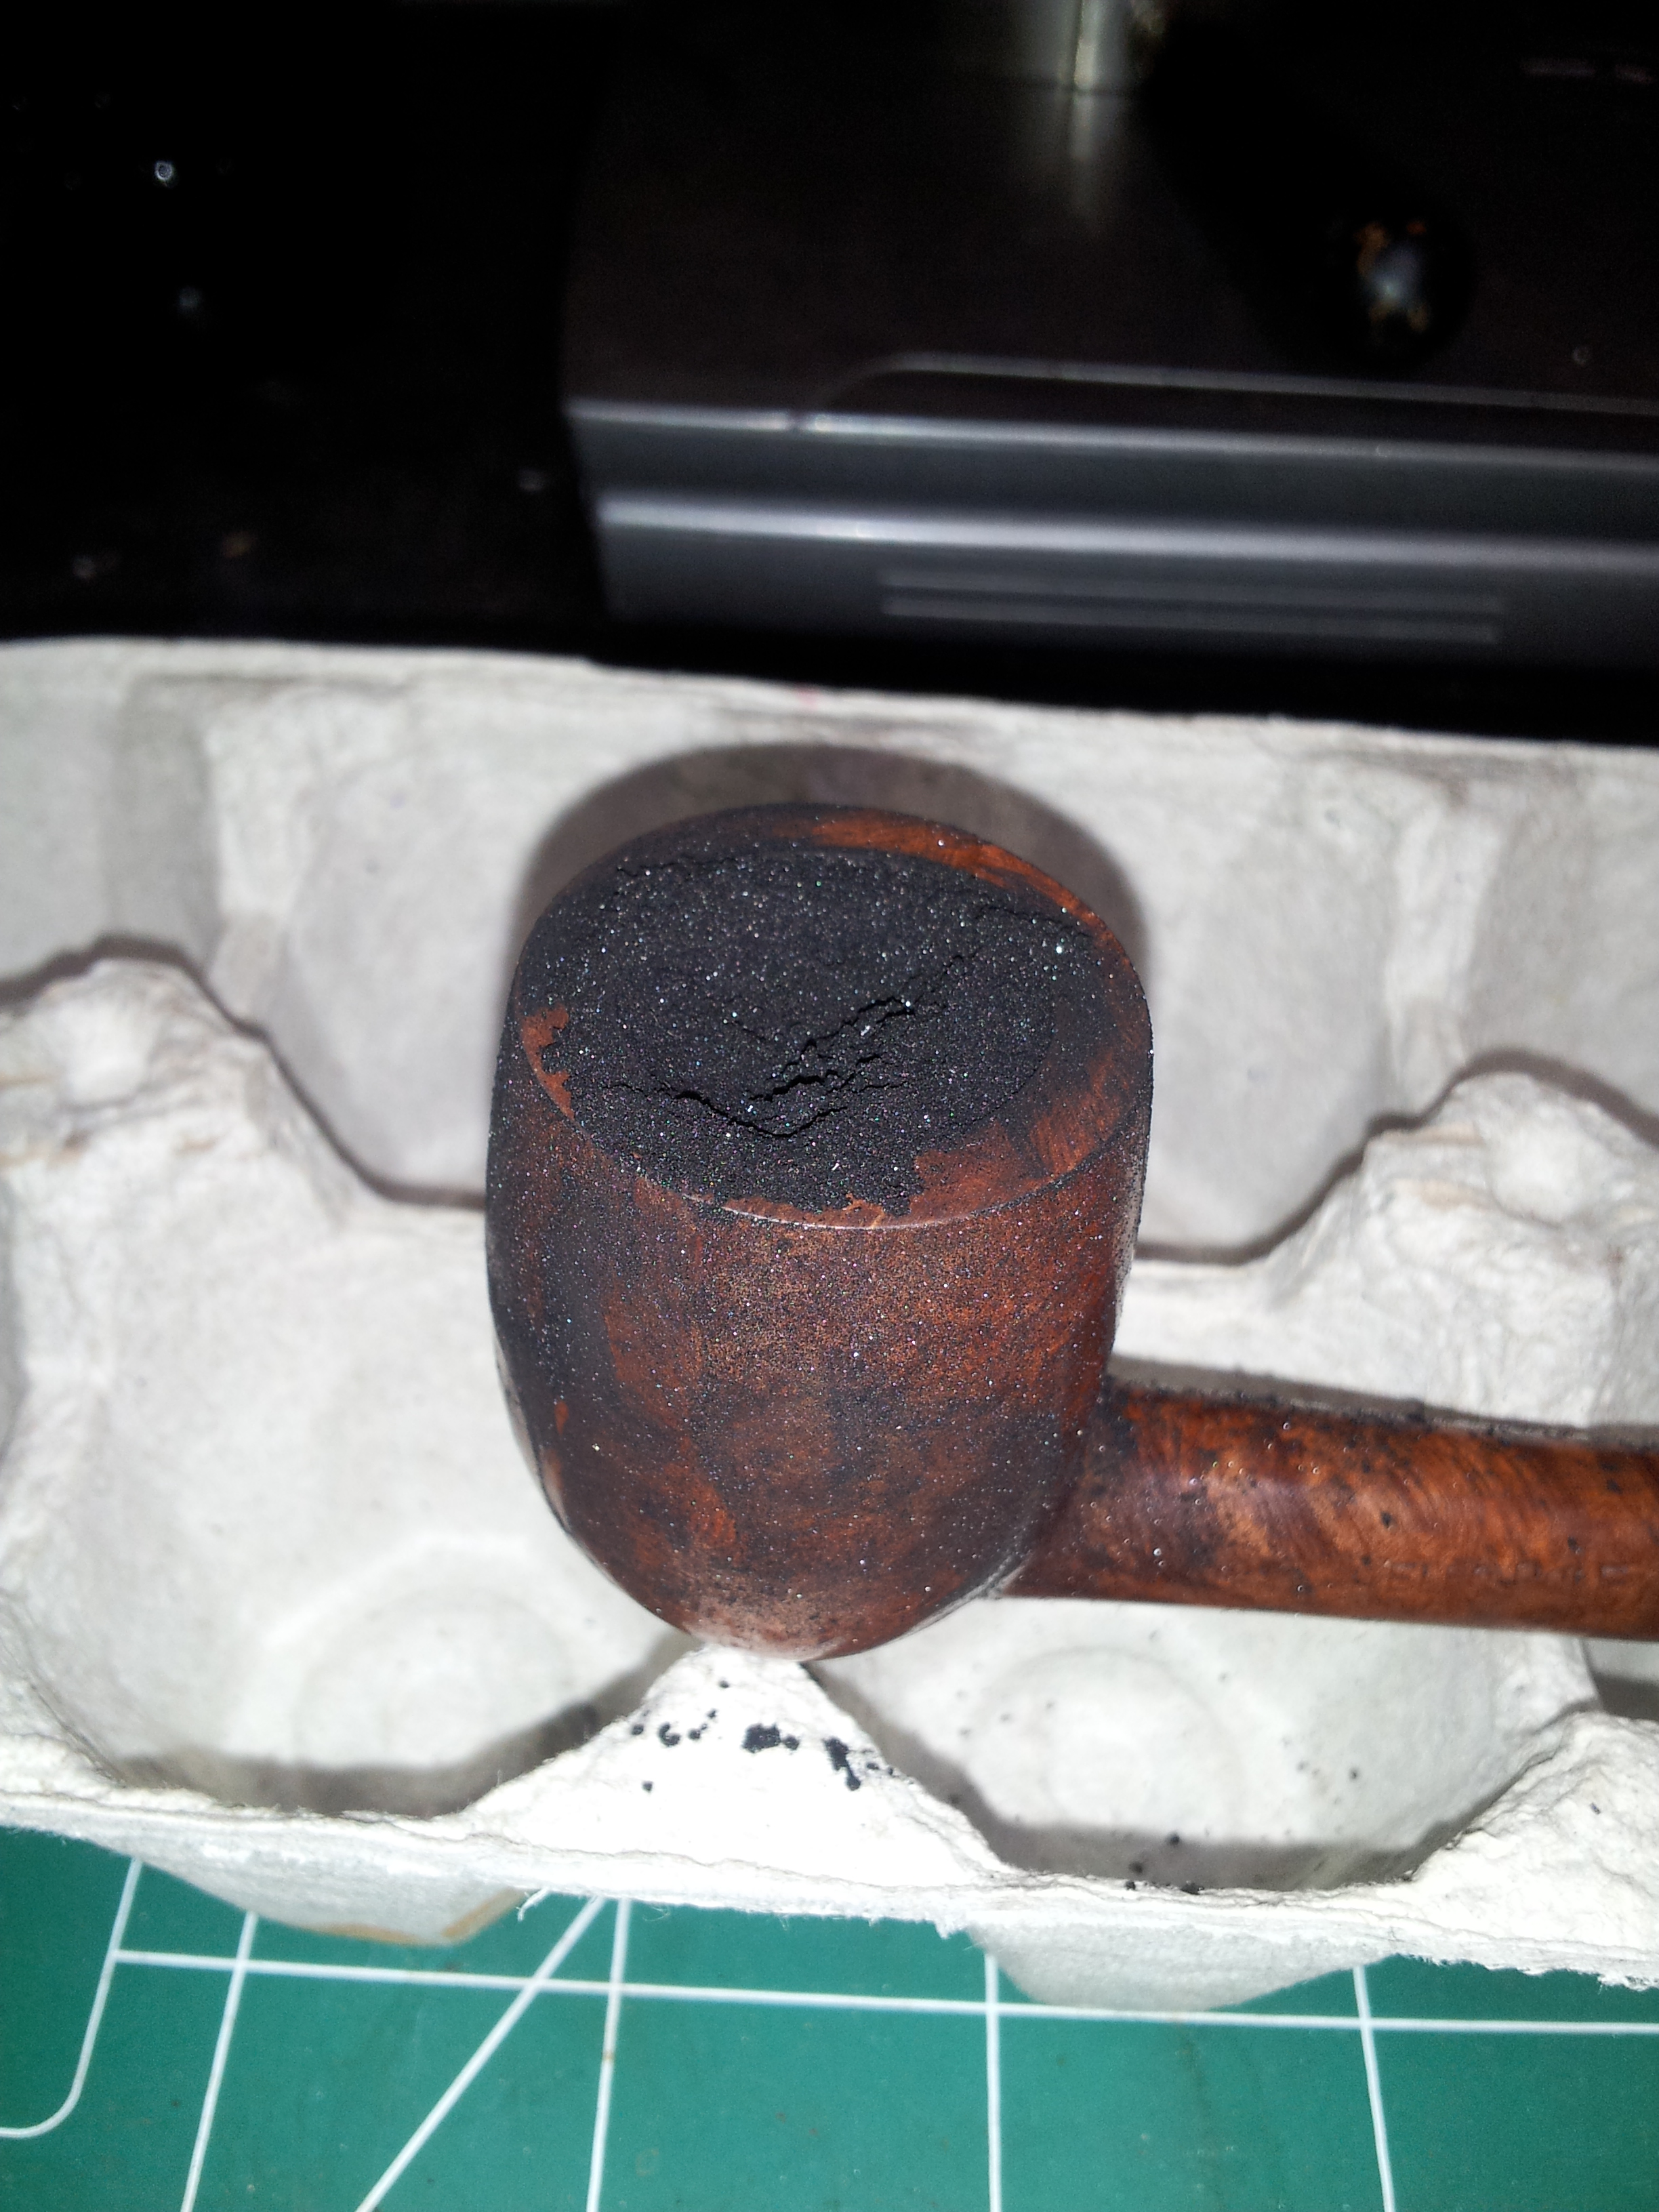
I buffed the entire pipe with my usual Red Tripoli and White Diamond compounds and gave it several coats of Carnauba wax before applying a bowl coating of maple syrup and activated charcoal powder. I have described this process in detail in THIS POST, so won’t get into the details again here. I will remind readers to let the fresh bowl coating cure for a WEEK before smoking the pipe again. This time allows the charcoal to be absorbed fully into the maple syrup, which in turn will dry with exposure to air. This forms the hard, black bowl coating that will both hide the grey JB-Weld and provide a firm yet breathable surface onto which new cake can form.


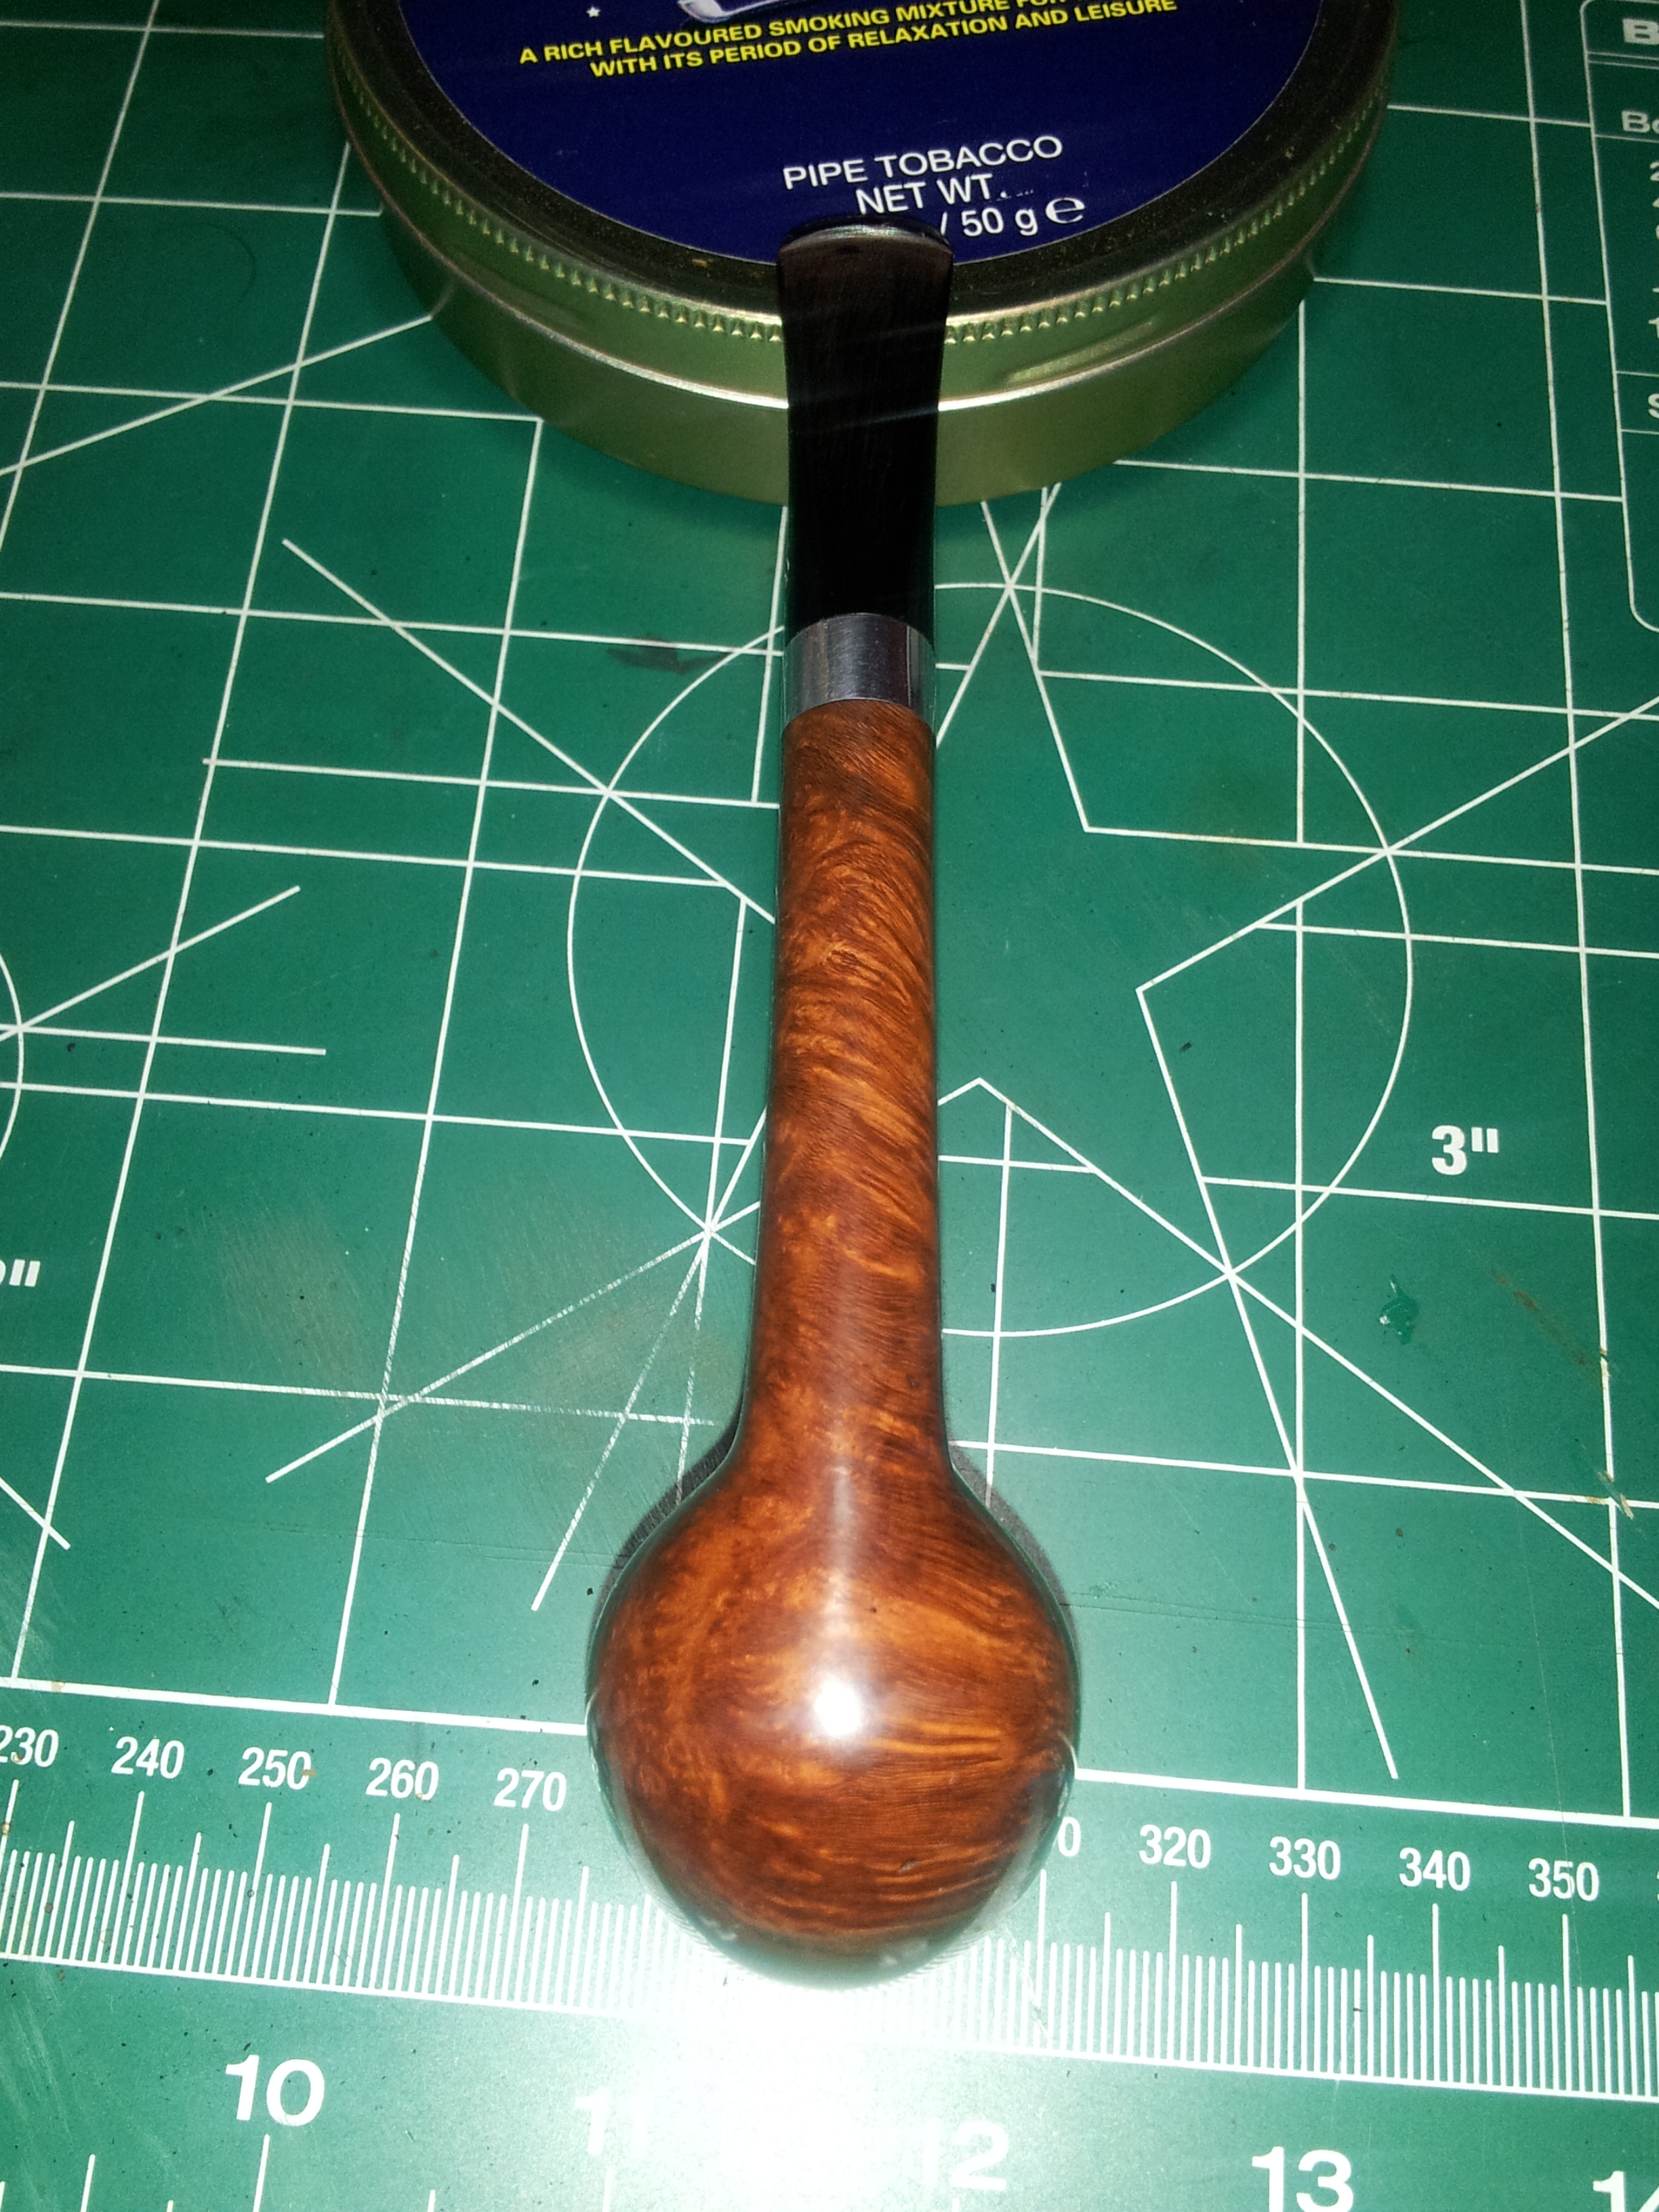
One week later, here is the finished pipe, ready to go. Though I could do without the cheap plastic stem, this pipe is one of my favourite shapes. The large bowl, long, slender shank and short stem come together to create an elegant, classically masculine pipe that should serve very well for years to come.


Great work on that one.
LikeLike
Nice save and sweet Yello Bole. It looks gorgeous.
I love my Yello Boles , best bang for the buck pipe there is and very underrated.
Ill argue with anyone that my old Yello Bole Canadians smoke as well as any pipe, period!
LikeLiked by 1 person
Reblogged this on rebornpipes and commented:
Interesting use of JB Weld to raise the bowl bottom. I have not tried that. The bowl coating is fascinating both in terms of materials and application. Worth a read. Let us know your thoughts gents. Pipe looks great.
LikeLiked by 1 person
Thanks Steve. The maple syrup in my bowl coating plays the same role as the sour cream in yours – makes me wonder if I could simply mix the charcoal into the syrup directly and then apply it to the bowl. Hmm…. 🙂
LikeLike
I was wondering the same thing. I almost wrote that but did not.
LikeLiked by 1 person
Sounds like experiment time!
LikeLike
Very well done! That is an absolutely excellent chamber repair.
LikeLike
Thanks, Anthony. This pipe took a fair bit of time & effort for an estate that was in pretty good cosmetic condition to start with. It looked like an easy refurb until the bowl was clear of cake & the damage was uncovered.
LikeLike
Nice restoration of the bowl, and overall on the pipe. I learned something new with regard to filling the chamber bottom with JB Weld and the maple syrup and charcoal coating. I will give that a try. One little trick I’ve used is to make a thick syrup of table sugar and a small amount of water and then add the charcoal. It dries overnight and is not sticky at all.
LikeLiked by 2 people
Great tip, Al! Thanks.
LikeLike
Thanks for all of the great tips in this article. Please let us know how the JB Weld performs. I have several pipes that could benefit from this remedy.
LikeLike
Will do. Thanks
LikeLike
Great write up again! As others mentioned, the JB Weld idea sounds terrific; no residual odors/tastes from it? I used to use fireplace mortar but some brands leave an awful aftertaste and I can never recall which when. I need to buy it LOL
LikeLike
What an amazing well executed restore job ! I read your posts on a daily basis and learn so much .
For a personal reason they also give me comfort and distraction 🙂
I need to raise the floor of a stunning, old Charatan Supreme pipe and do not wish to spoil the parrty.
What instrument or tool do you grab for to bring the JB Weld down into the mine ?
Best wishes,
Roland
LikeLike
Thanks! I’m glad you find these posts helpful.
I use a thin bamboo skewer to mix and apply the JB-Weld. A steady hand also helps a lot 🙂 You may want to mask off the rest of the pipe to protect it from drips.
LikeLike
Thank you. But how do you apply the mud on the bottom with a skewer ? Would a bent teaspoon do the job ?
LikeLike
In this case I dropped a blob of JB into the bottom of the bowl using the skewer and let it self-level. Just about any small tool that fits in the bowl will work for tamping/shaping – the wide head of a roofing nail, a length of dowel, your bent teaspoon, etc. Then sand it smooth when cured.
LikeLike