
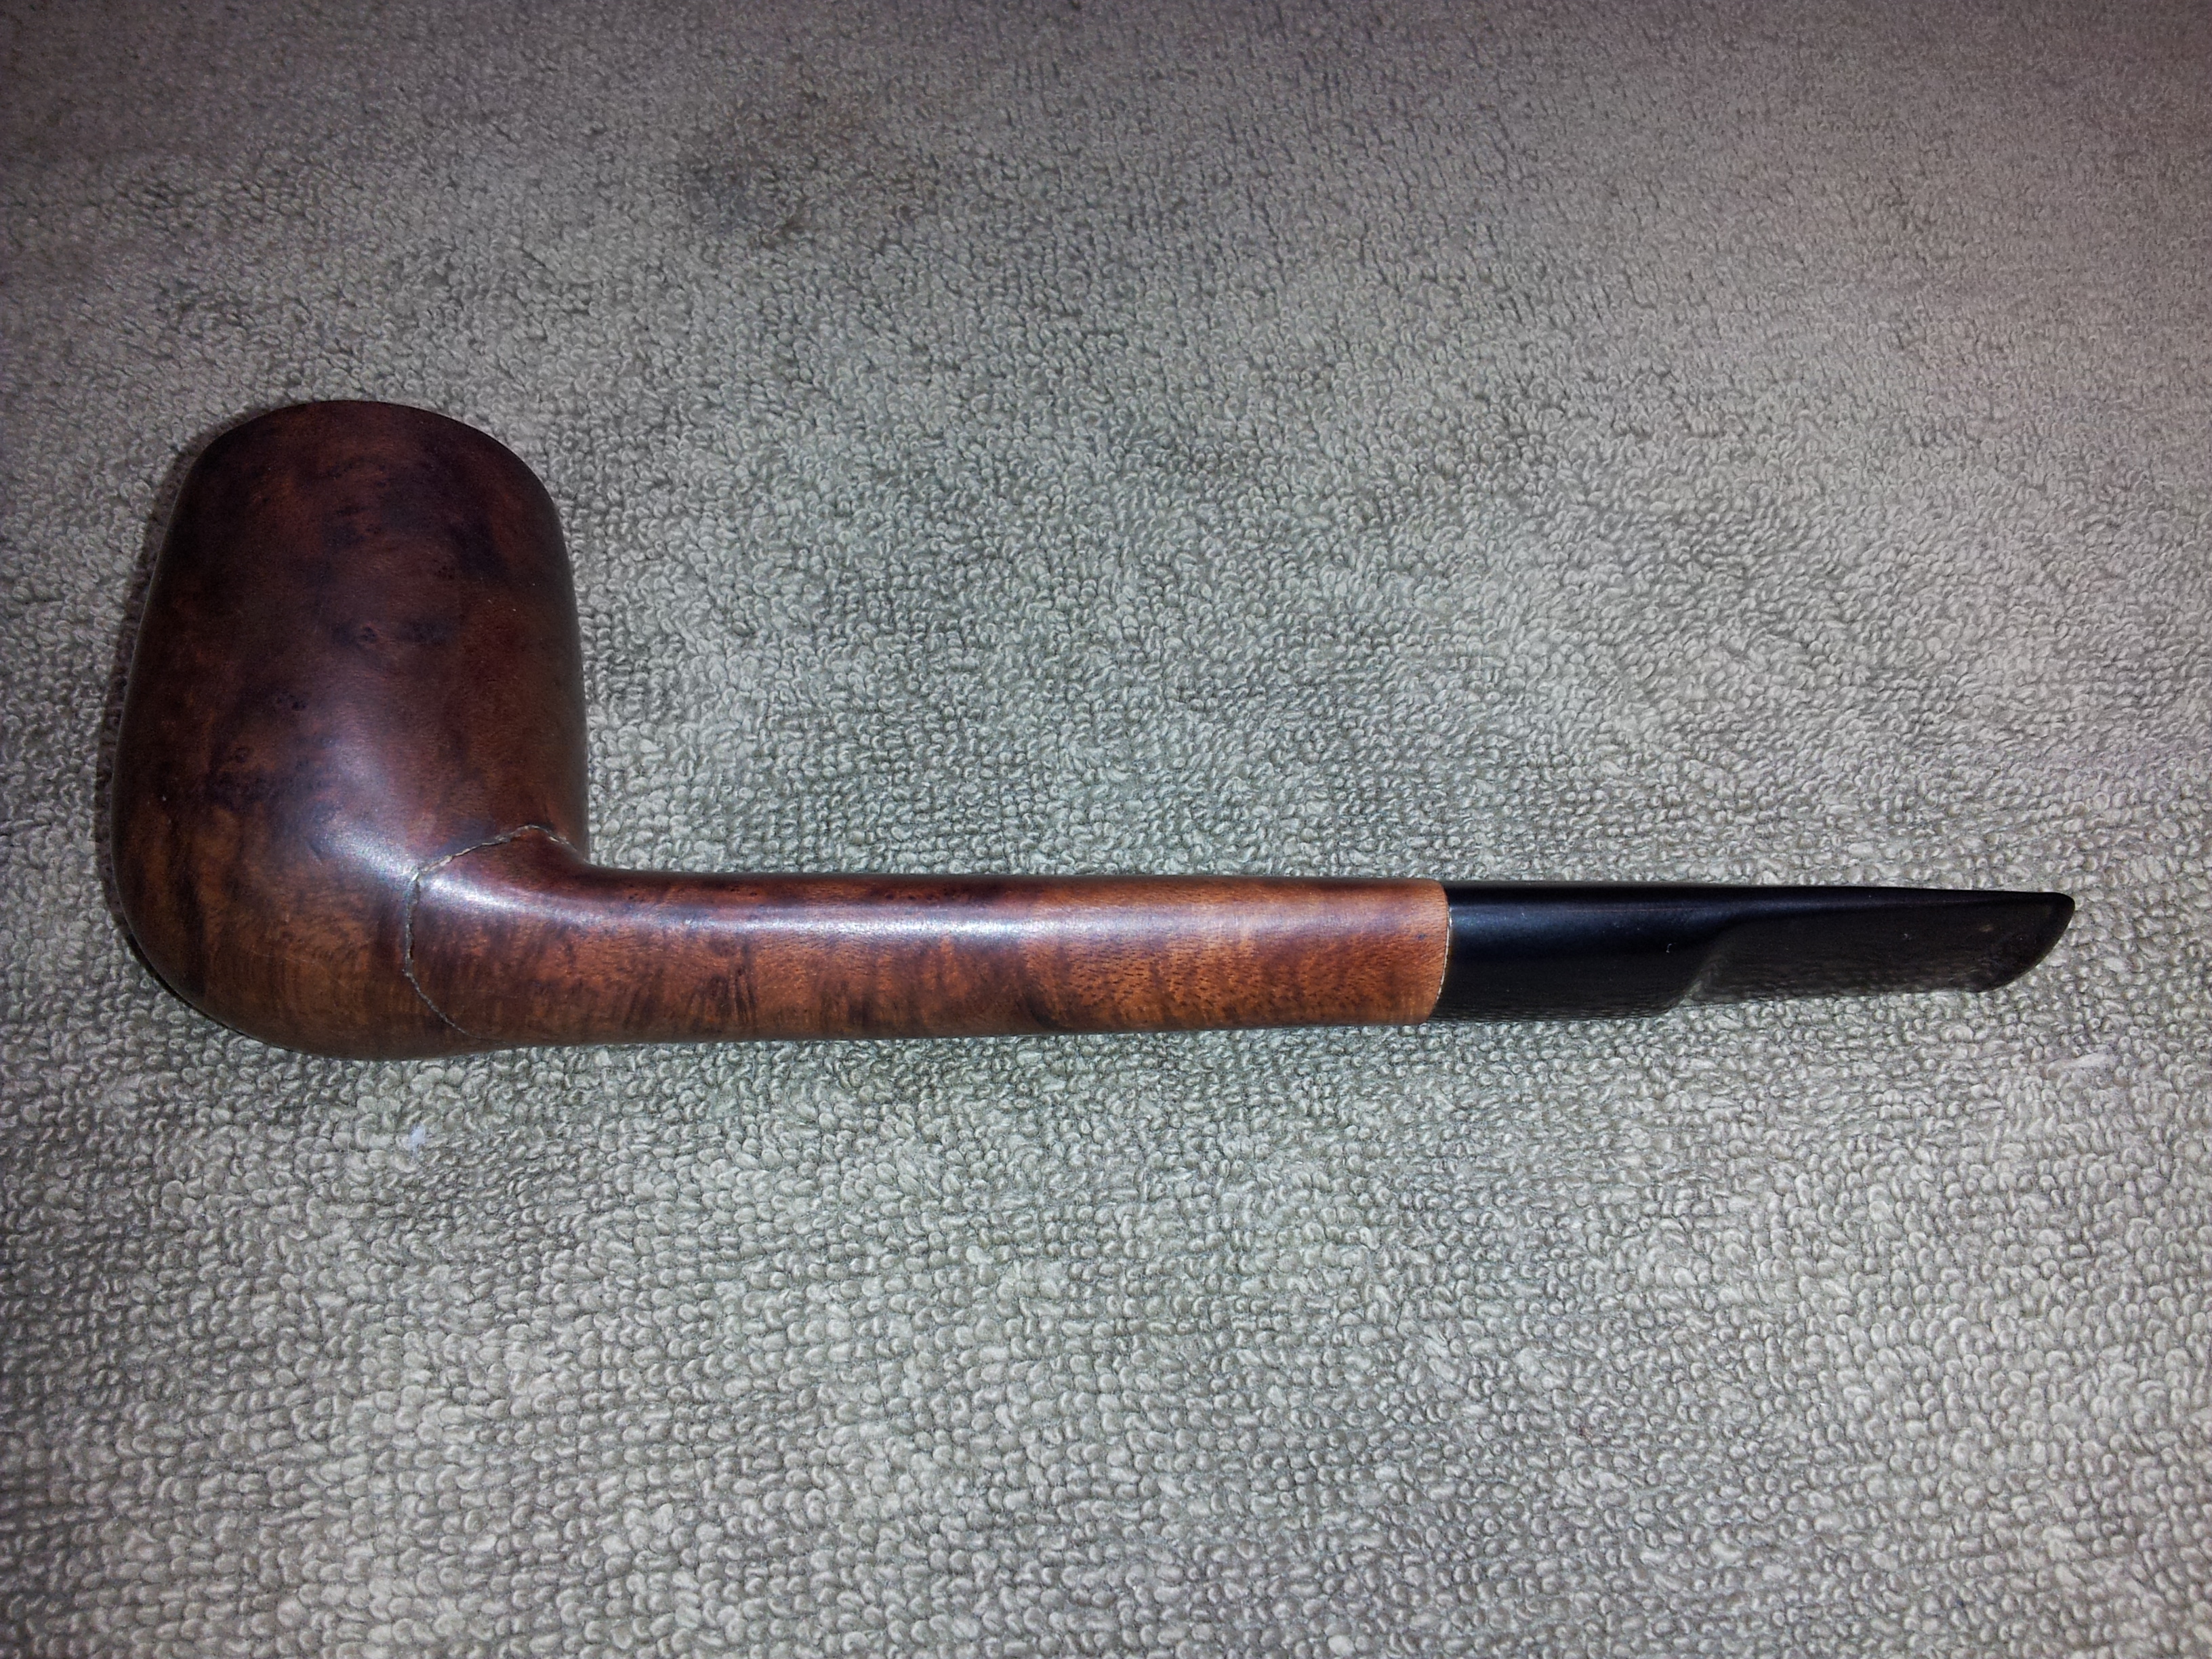
This pipe immediately caught my attention when I first unpacked the auction lot. Pictured in the top left corner of the pipe lot pic below, this Butz-Choquin Supermate Major struck me by its elegant simplicity. No fuss, nothing fancy, just good grain, clean lines and a classic Lumberman shape characterized by its long, pinched-oval shank and saddle bit.

Unlike many of its brethren in this lot, the Supermate was relatively clean with only a bit of grease & grime on the exterior, minor cake build-up in the bowl and a few small nicks on the rim. The stem had only minor oxidation but had other issues: the BC logo I assume used to be in the circle on top of the stem was long gone, and the button was worn down nearly flat and showed the remains of old tooth dents.
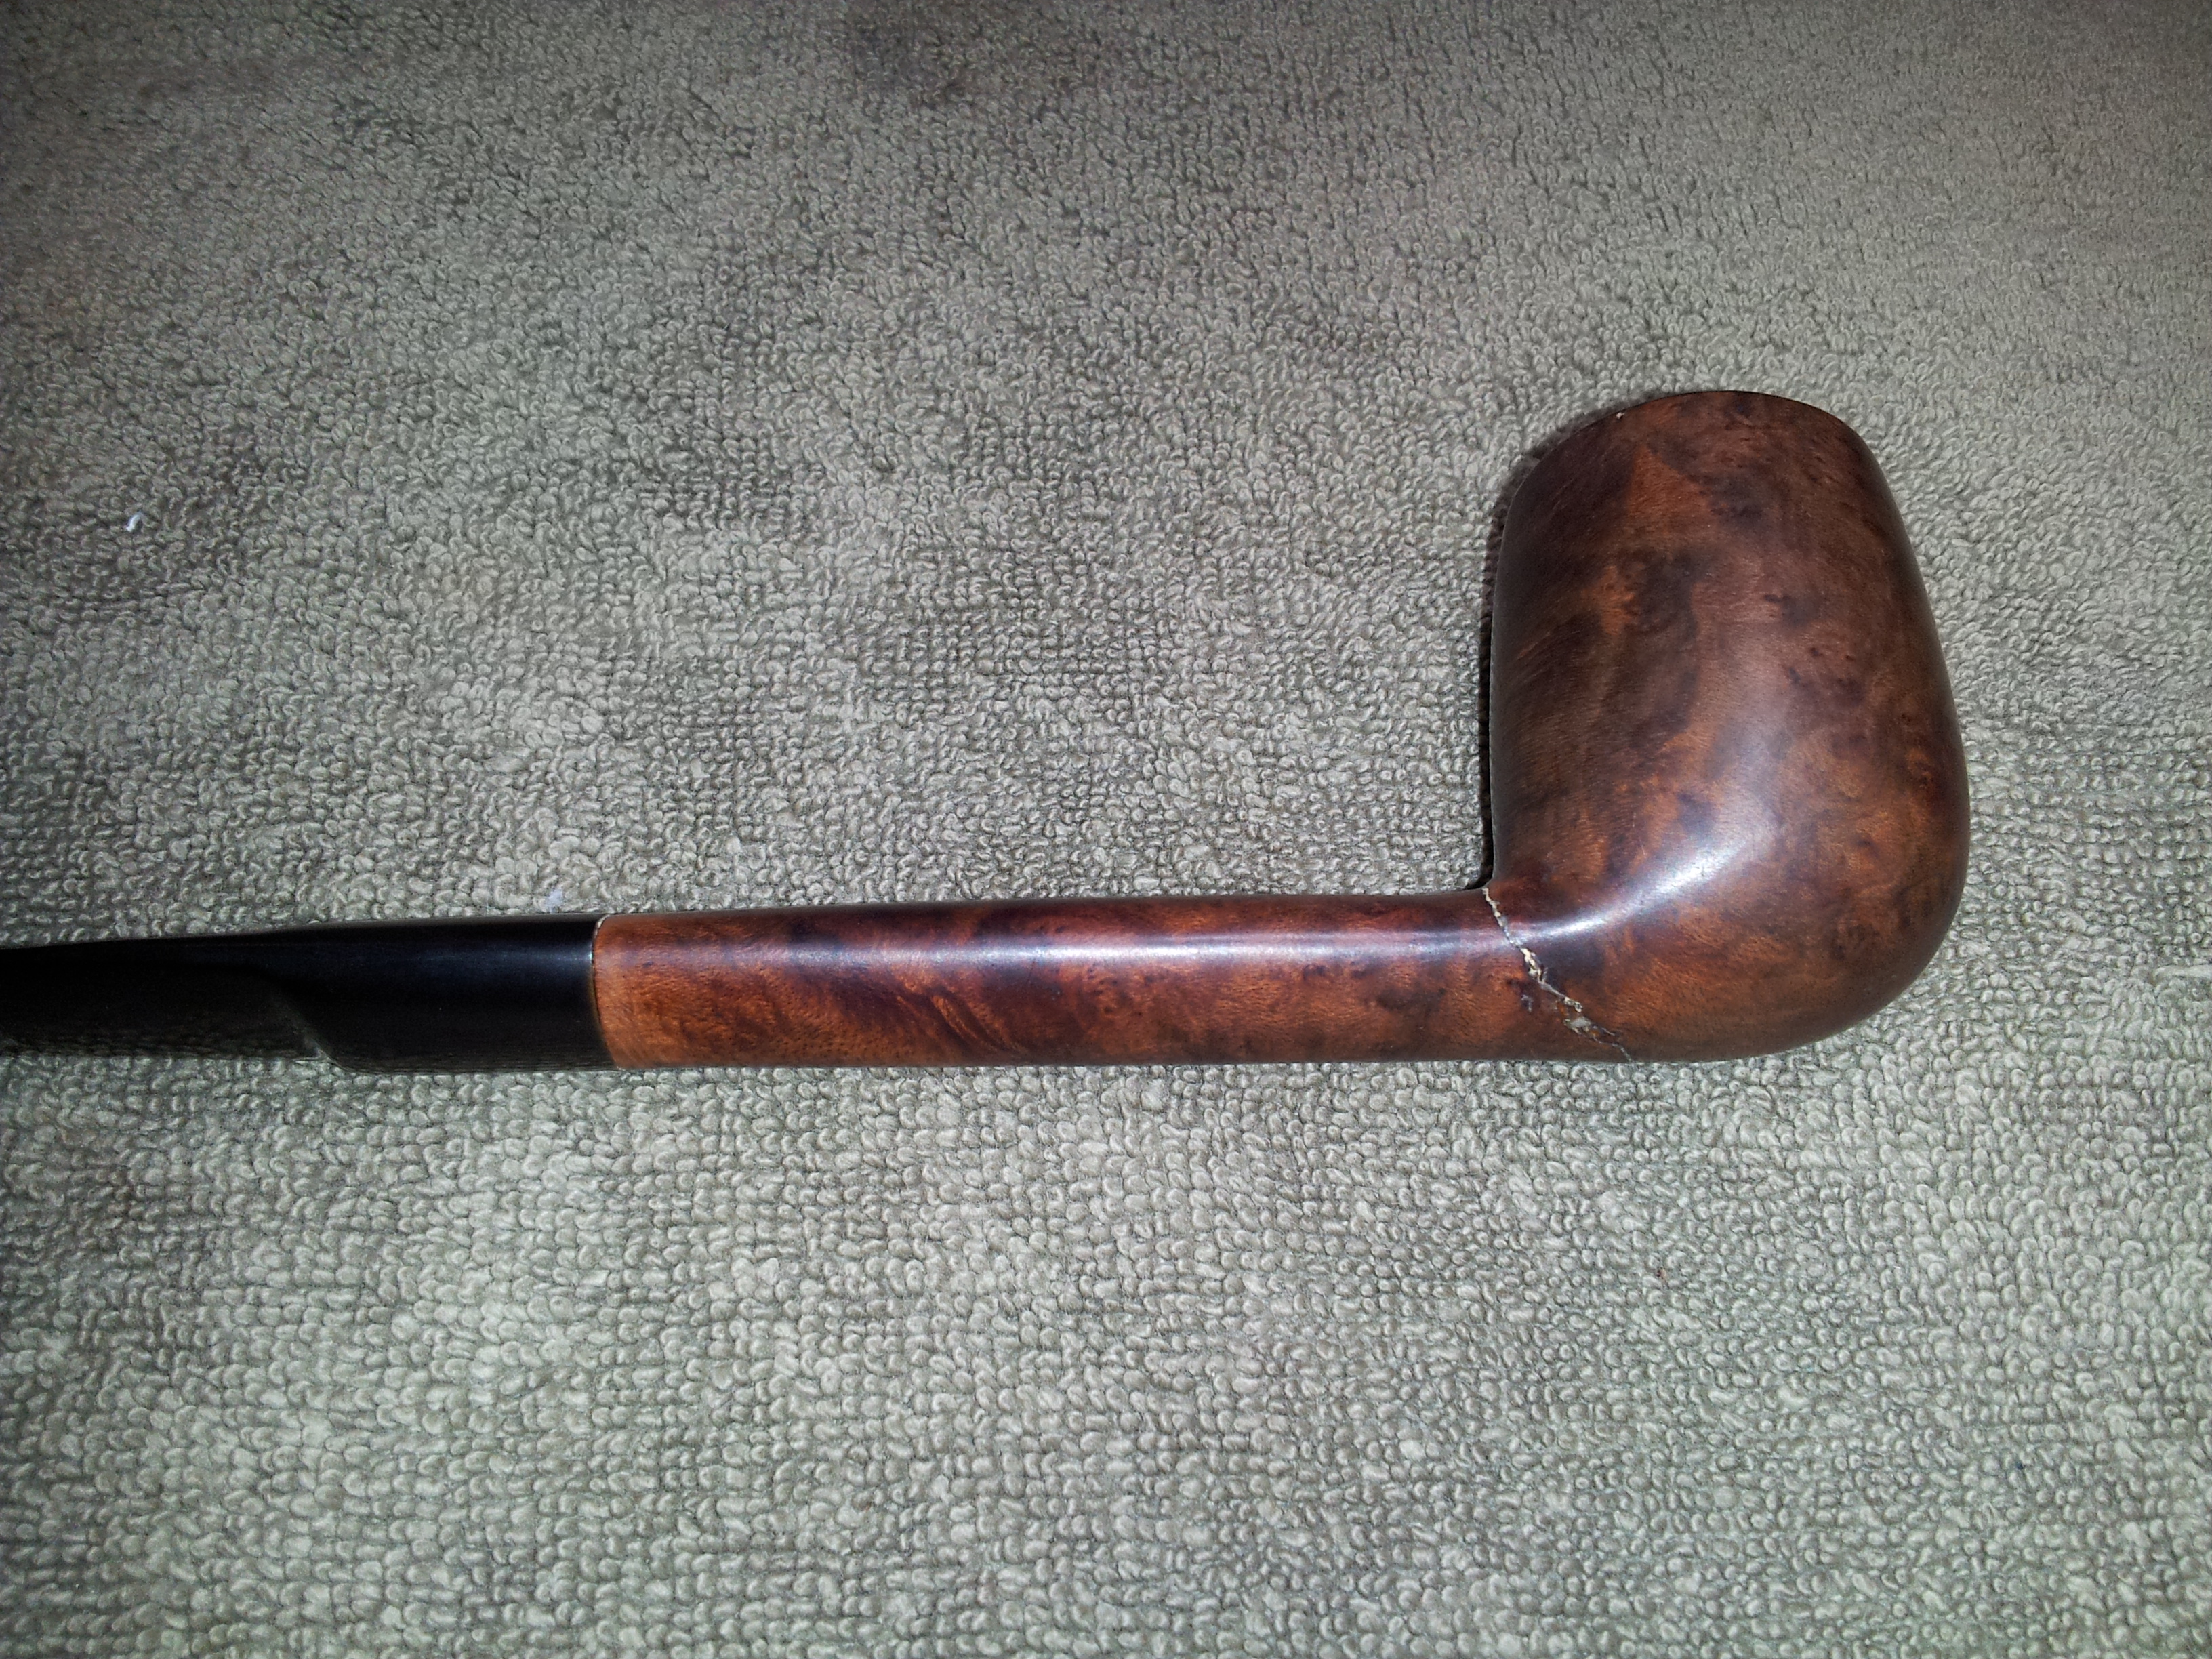
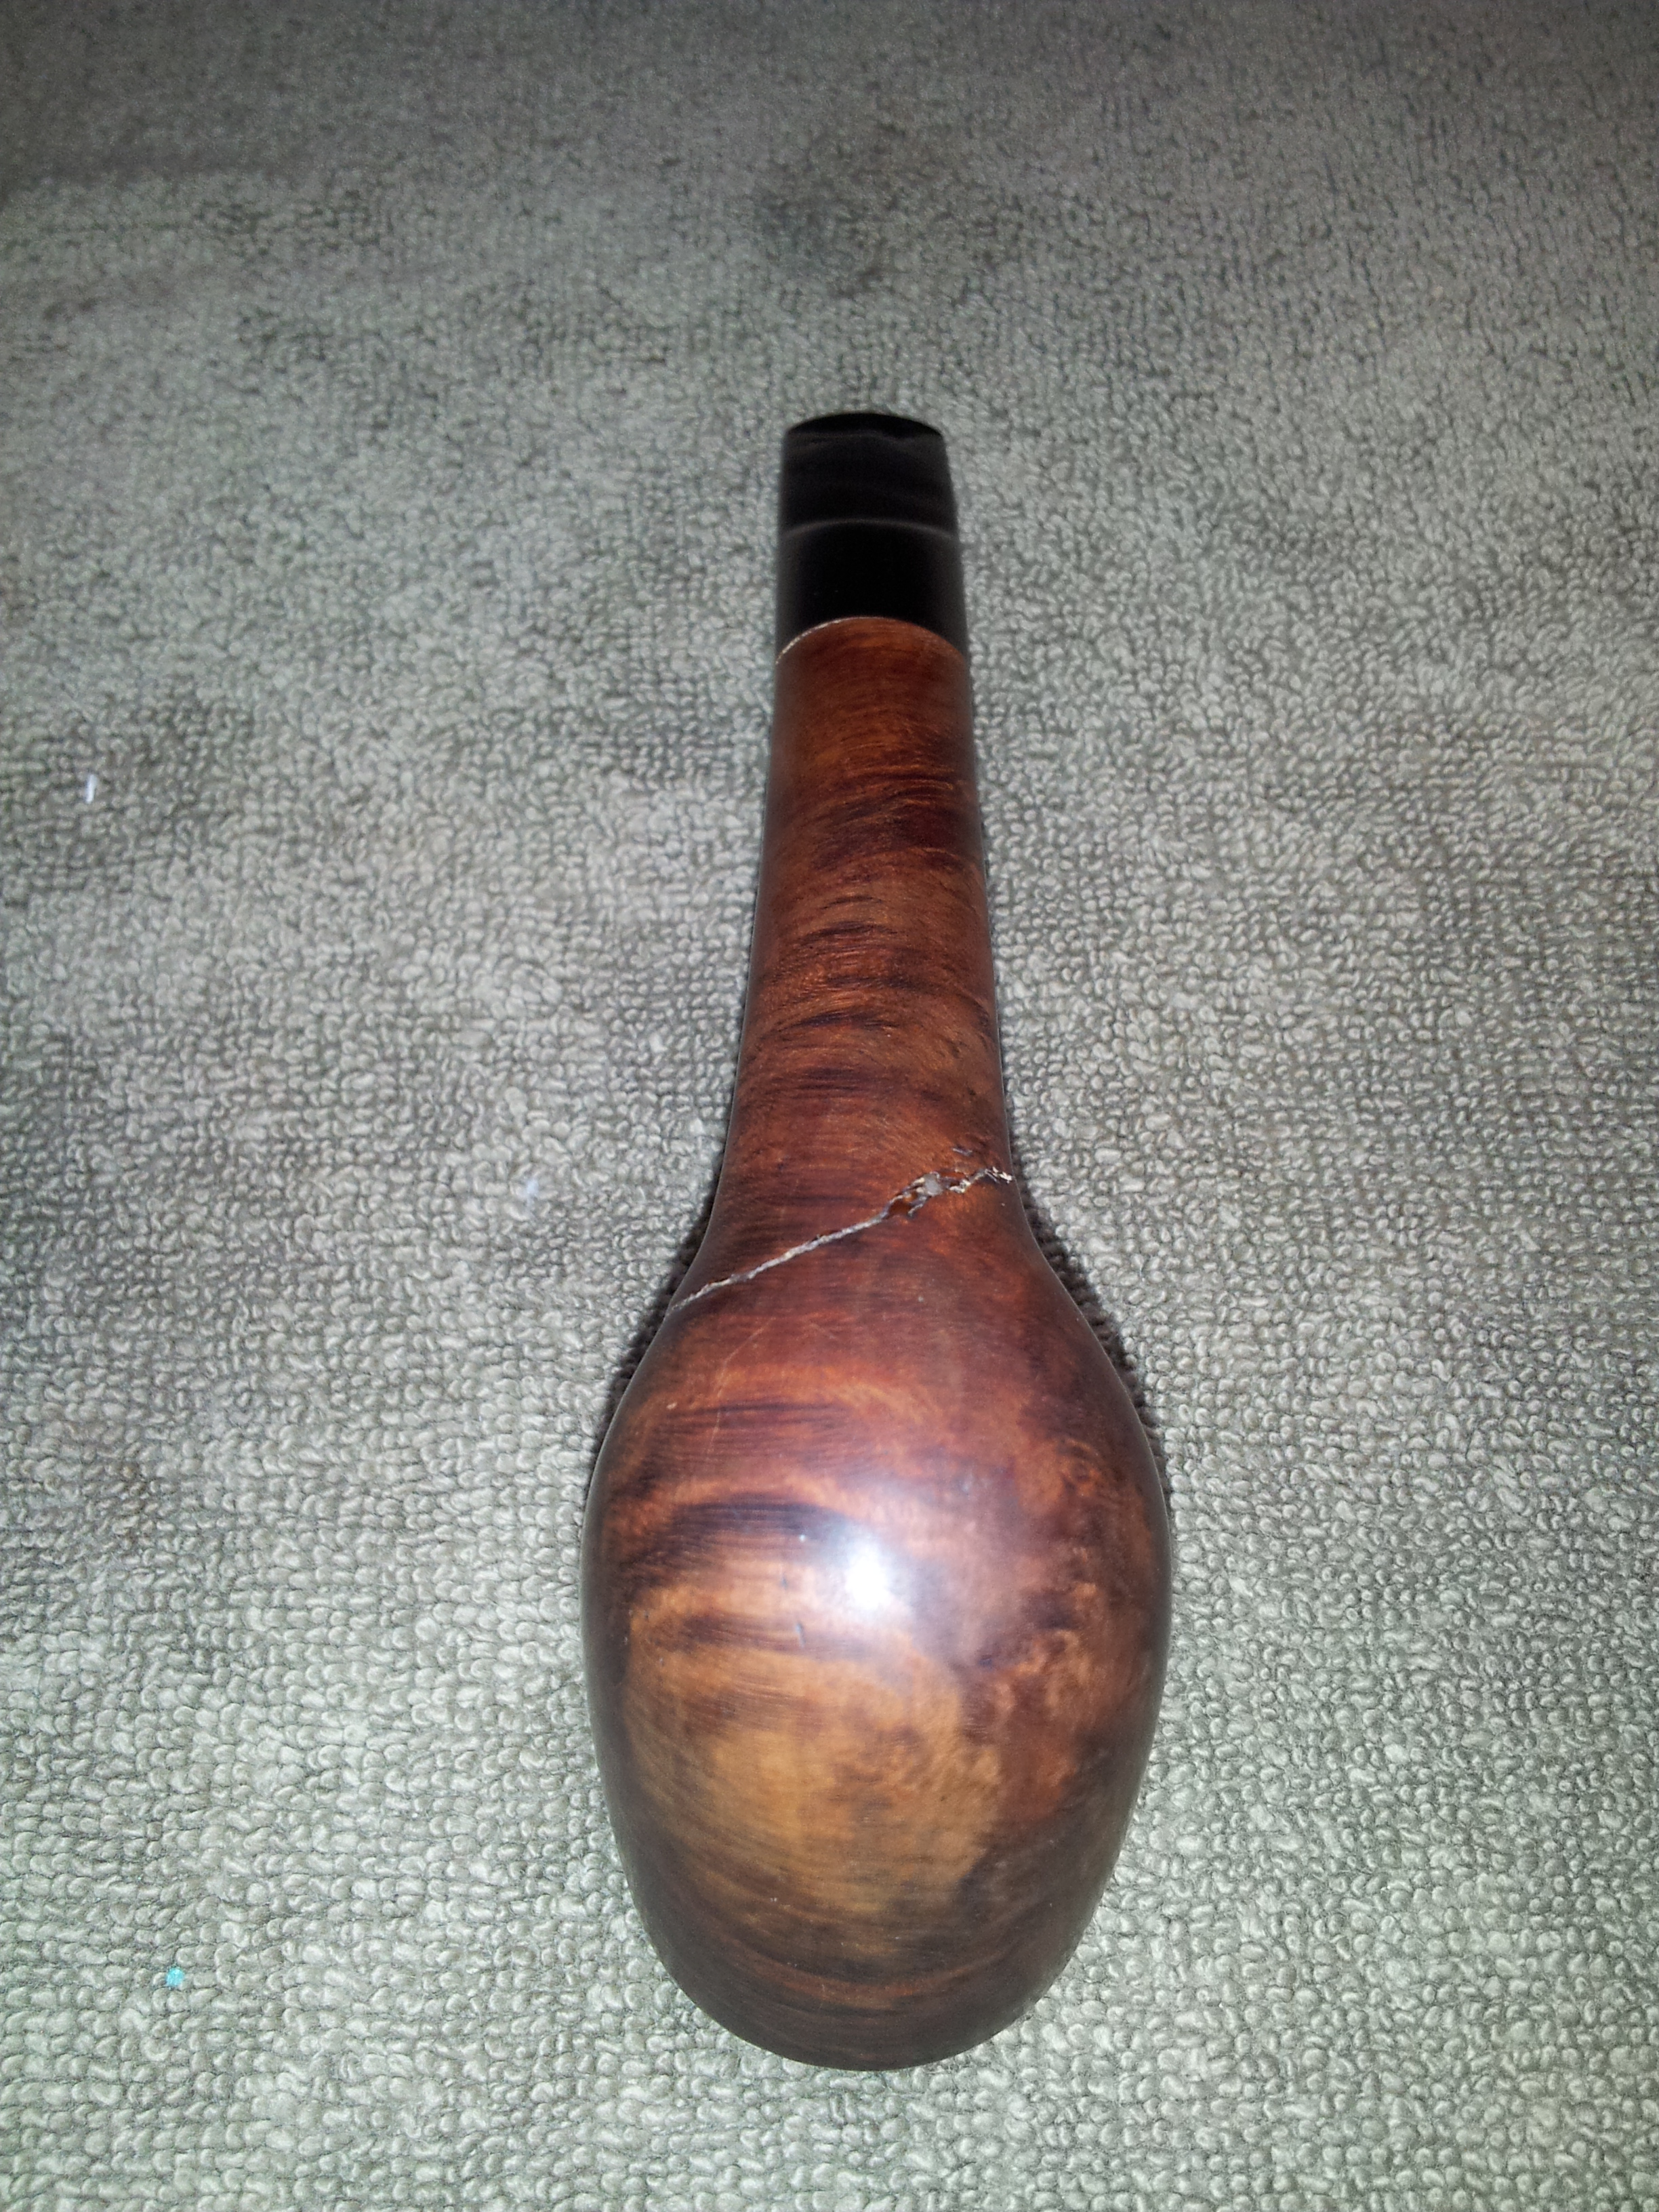
The flattened button and the poor condition of the shank stampings are, I believe, indications of over-buffing. The upper shank is stamped “Butz-Choquin” in script, over “Supermate”. The word “Major” is stamped at an angle below and to the right of the main stampings. On the underside of the shank, legible more by feel than by eye, are the remains of “France” over “1656”. There may have been a “St-Claude” over “France” at one point, but there’s nothing left to let me say for sure.
The most evident issue with this pipe, was not, however, the over-buffing; rather it was the obvious and somewhat crude repair on the stummel. At some point in the past, the shank had broken off completely, right at the junction with the bowl. It appeared to have been glued with CA glue, though the repair was clumsy, with excess glue and low spots very much in evidence. A home repair to save a favourite pipe, perhaps?


First things first. Time to get the pipe cleaned up to allow a thorough examination and decide on a course of action. The stummel was gently reamed to remove the cake and then treated to an isopropyl alcohol bath, while the stem went into an Oxyclean bath. After soaking overnight, the stummel was scrubbed down with a Magic Eraser followed by a light wet sanding using 600-2000 grit papers. The stem was cleaned up with 0000 steel wool and then the same wet-sanding process to clear off the oxidation and accumulated grime.
With the exteriors clean, it was on to the insides. Both stummel and stem were cleaned with pipe cleaners and isopropyl alcohol until the pipe cleaners came out white.

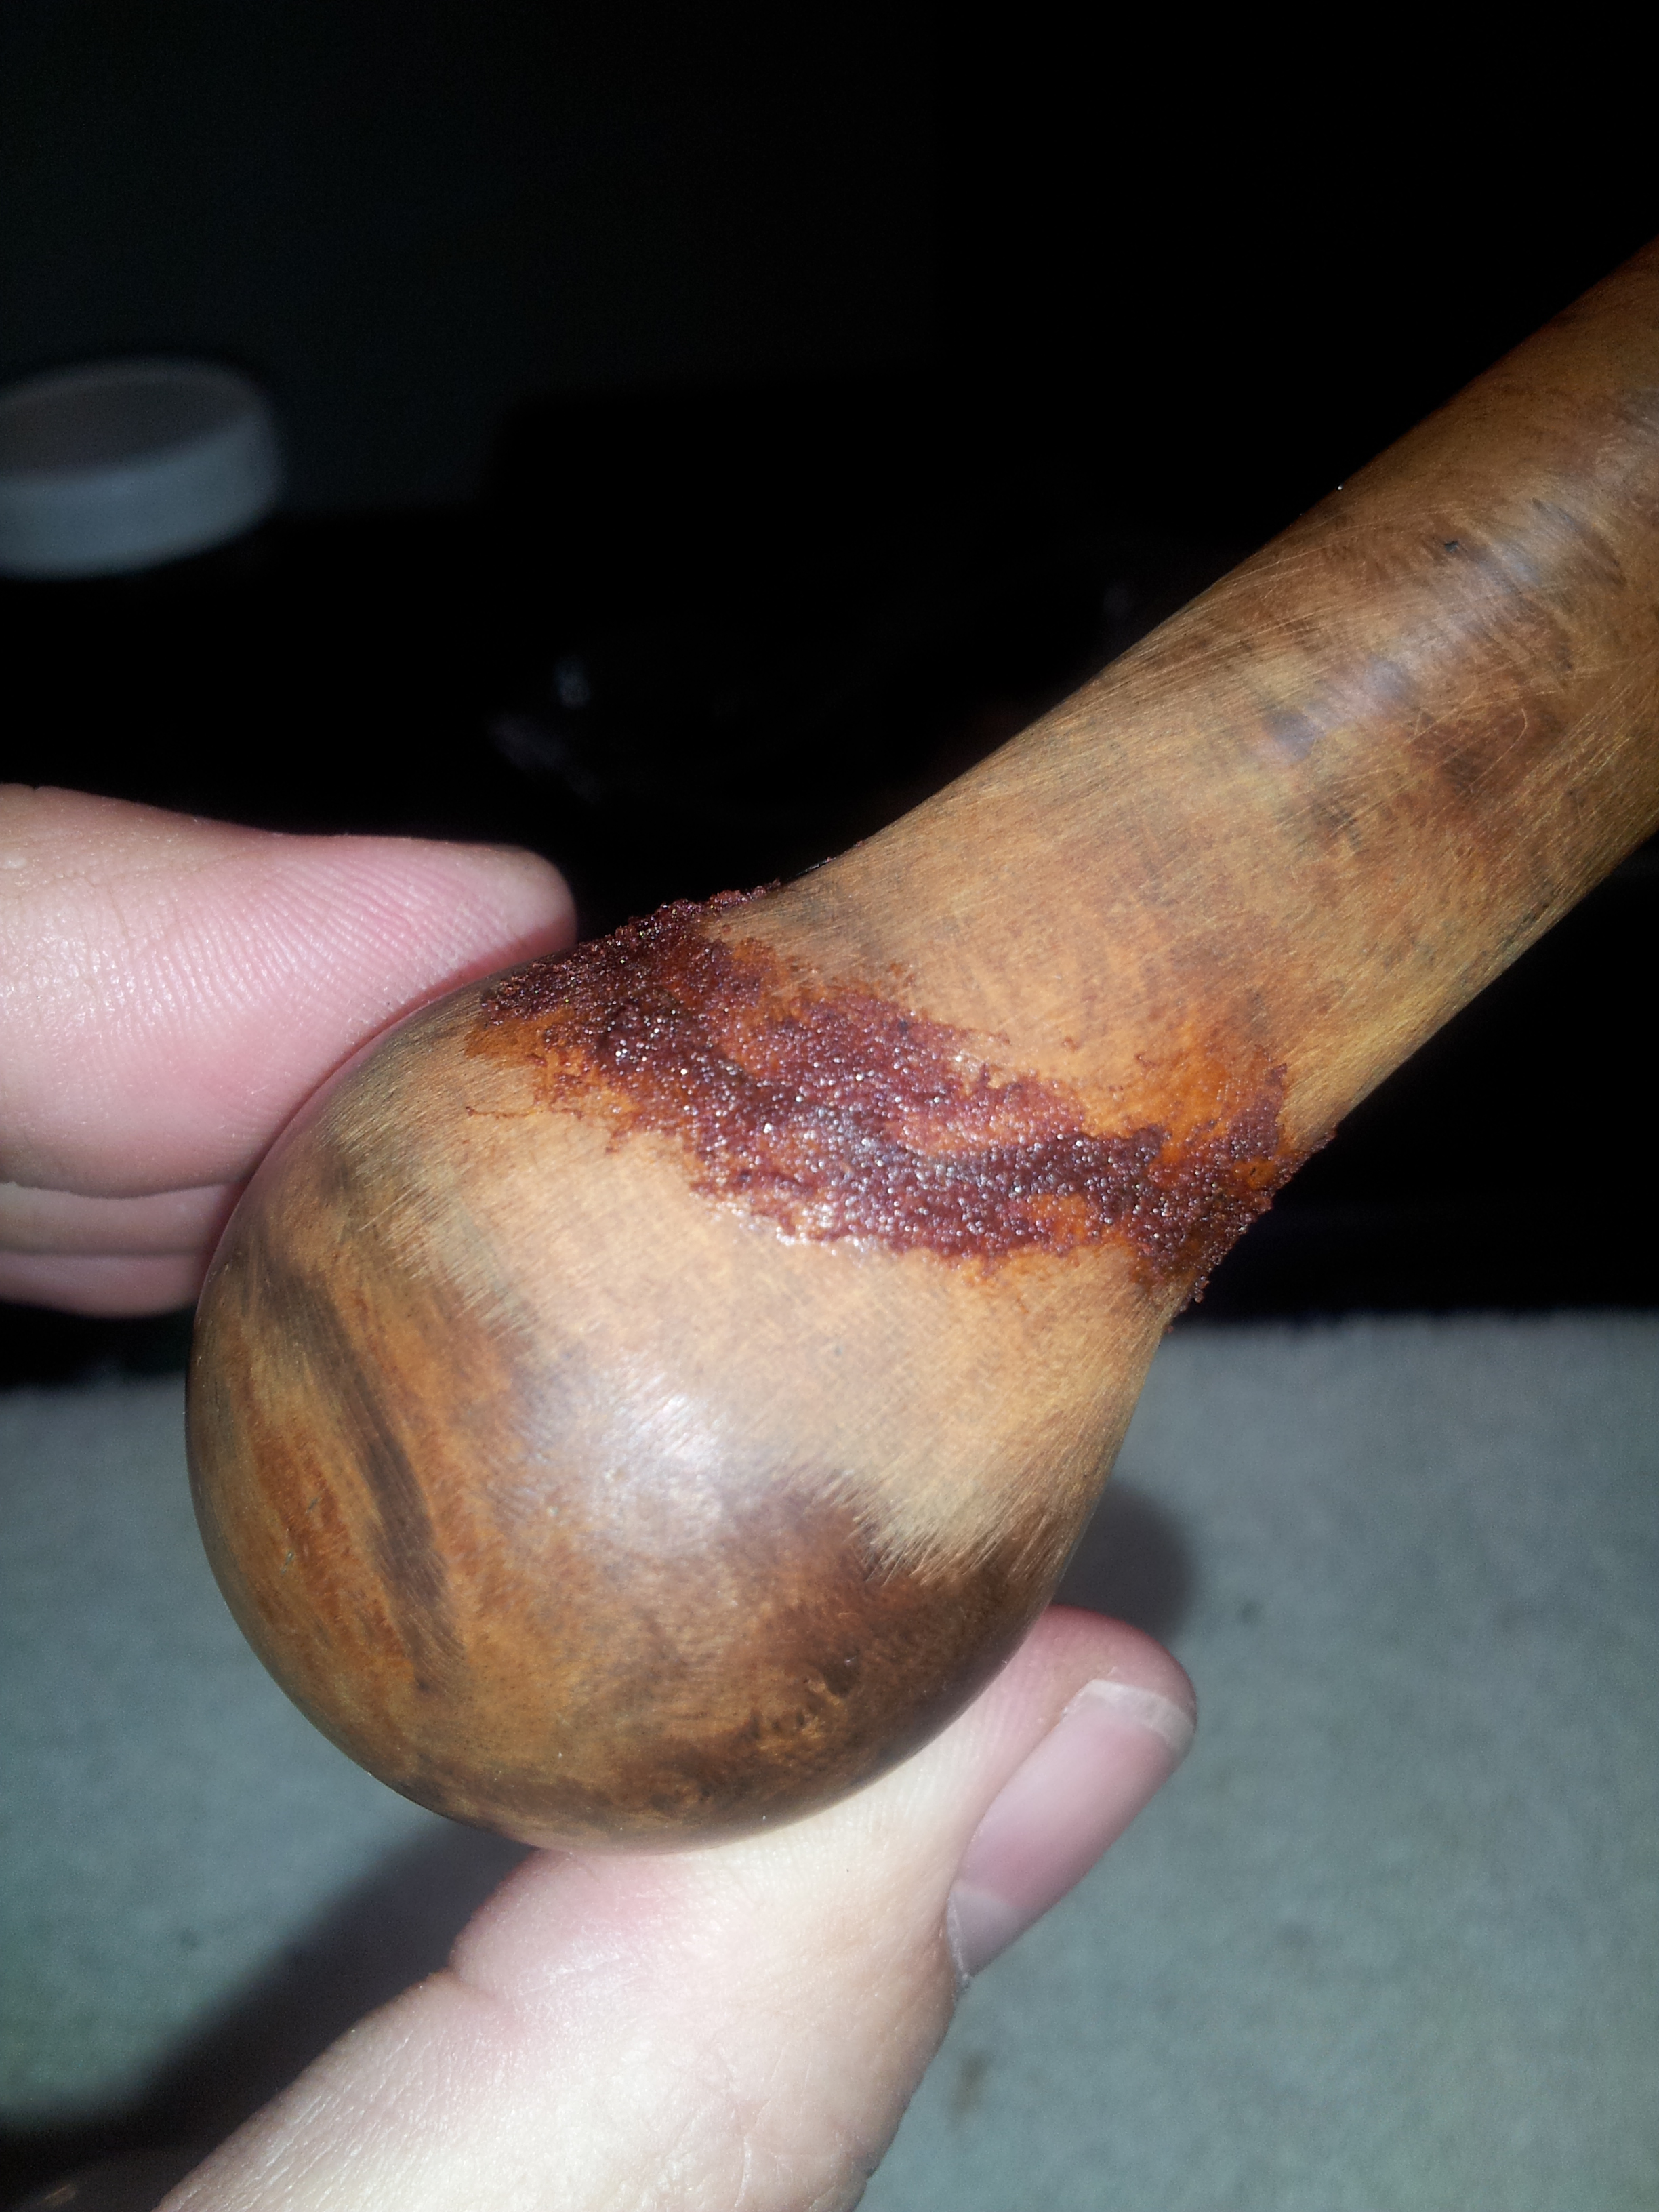
Now it was time to address the cracked shank. The old repair seemed quite solid – the overnight alcohol soak hadn’t weakened the old glue at all – so I thought I’d top-dress the old repair with briar dust and CA glue and sand it out smooth before restaining. Quick and easy, right? Here’s where Karma stepped in to remind me that nothing is certain in this life, especially not pipe repairs. Despite several attempts, I could not get the briar dust and CA glue fill mixture to stick in the crack of the old repair – very puzzling in an academic sense, and very frustrating in practice! I could apply the fill, smooth it out and let it cure, but once I started sanding, out it came. I realized I needed to rethink things after the third attempt, as I was inadvertently starting to sand a hollow in the pipe shank over the glued crack. Yikes!
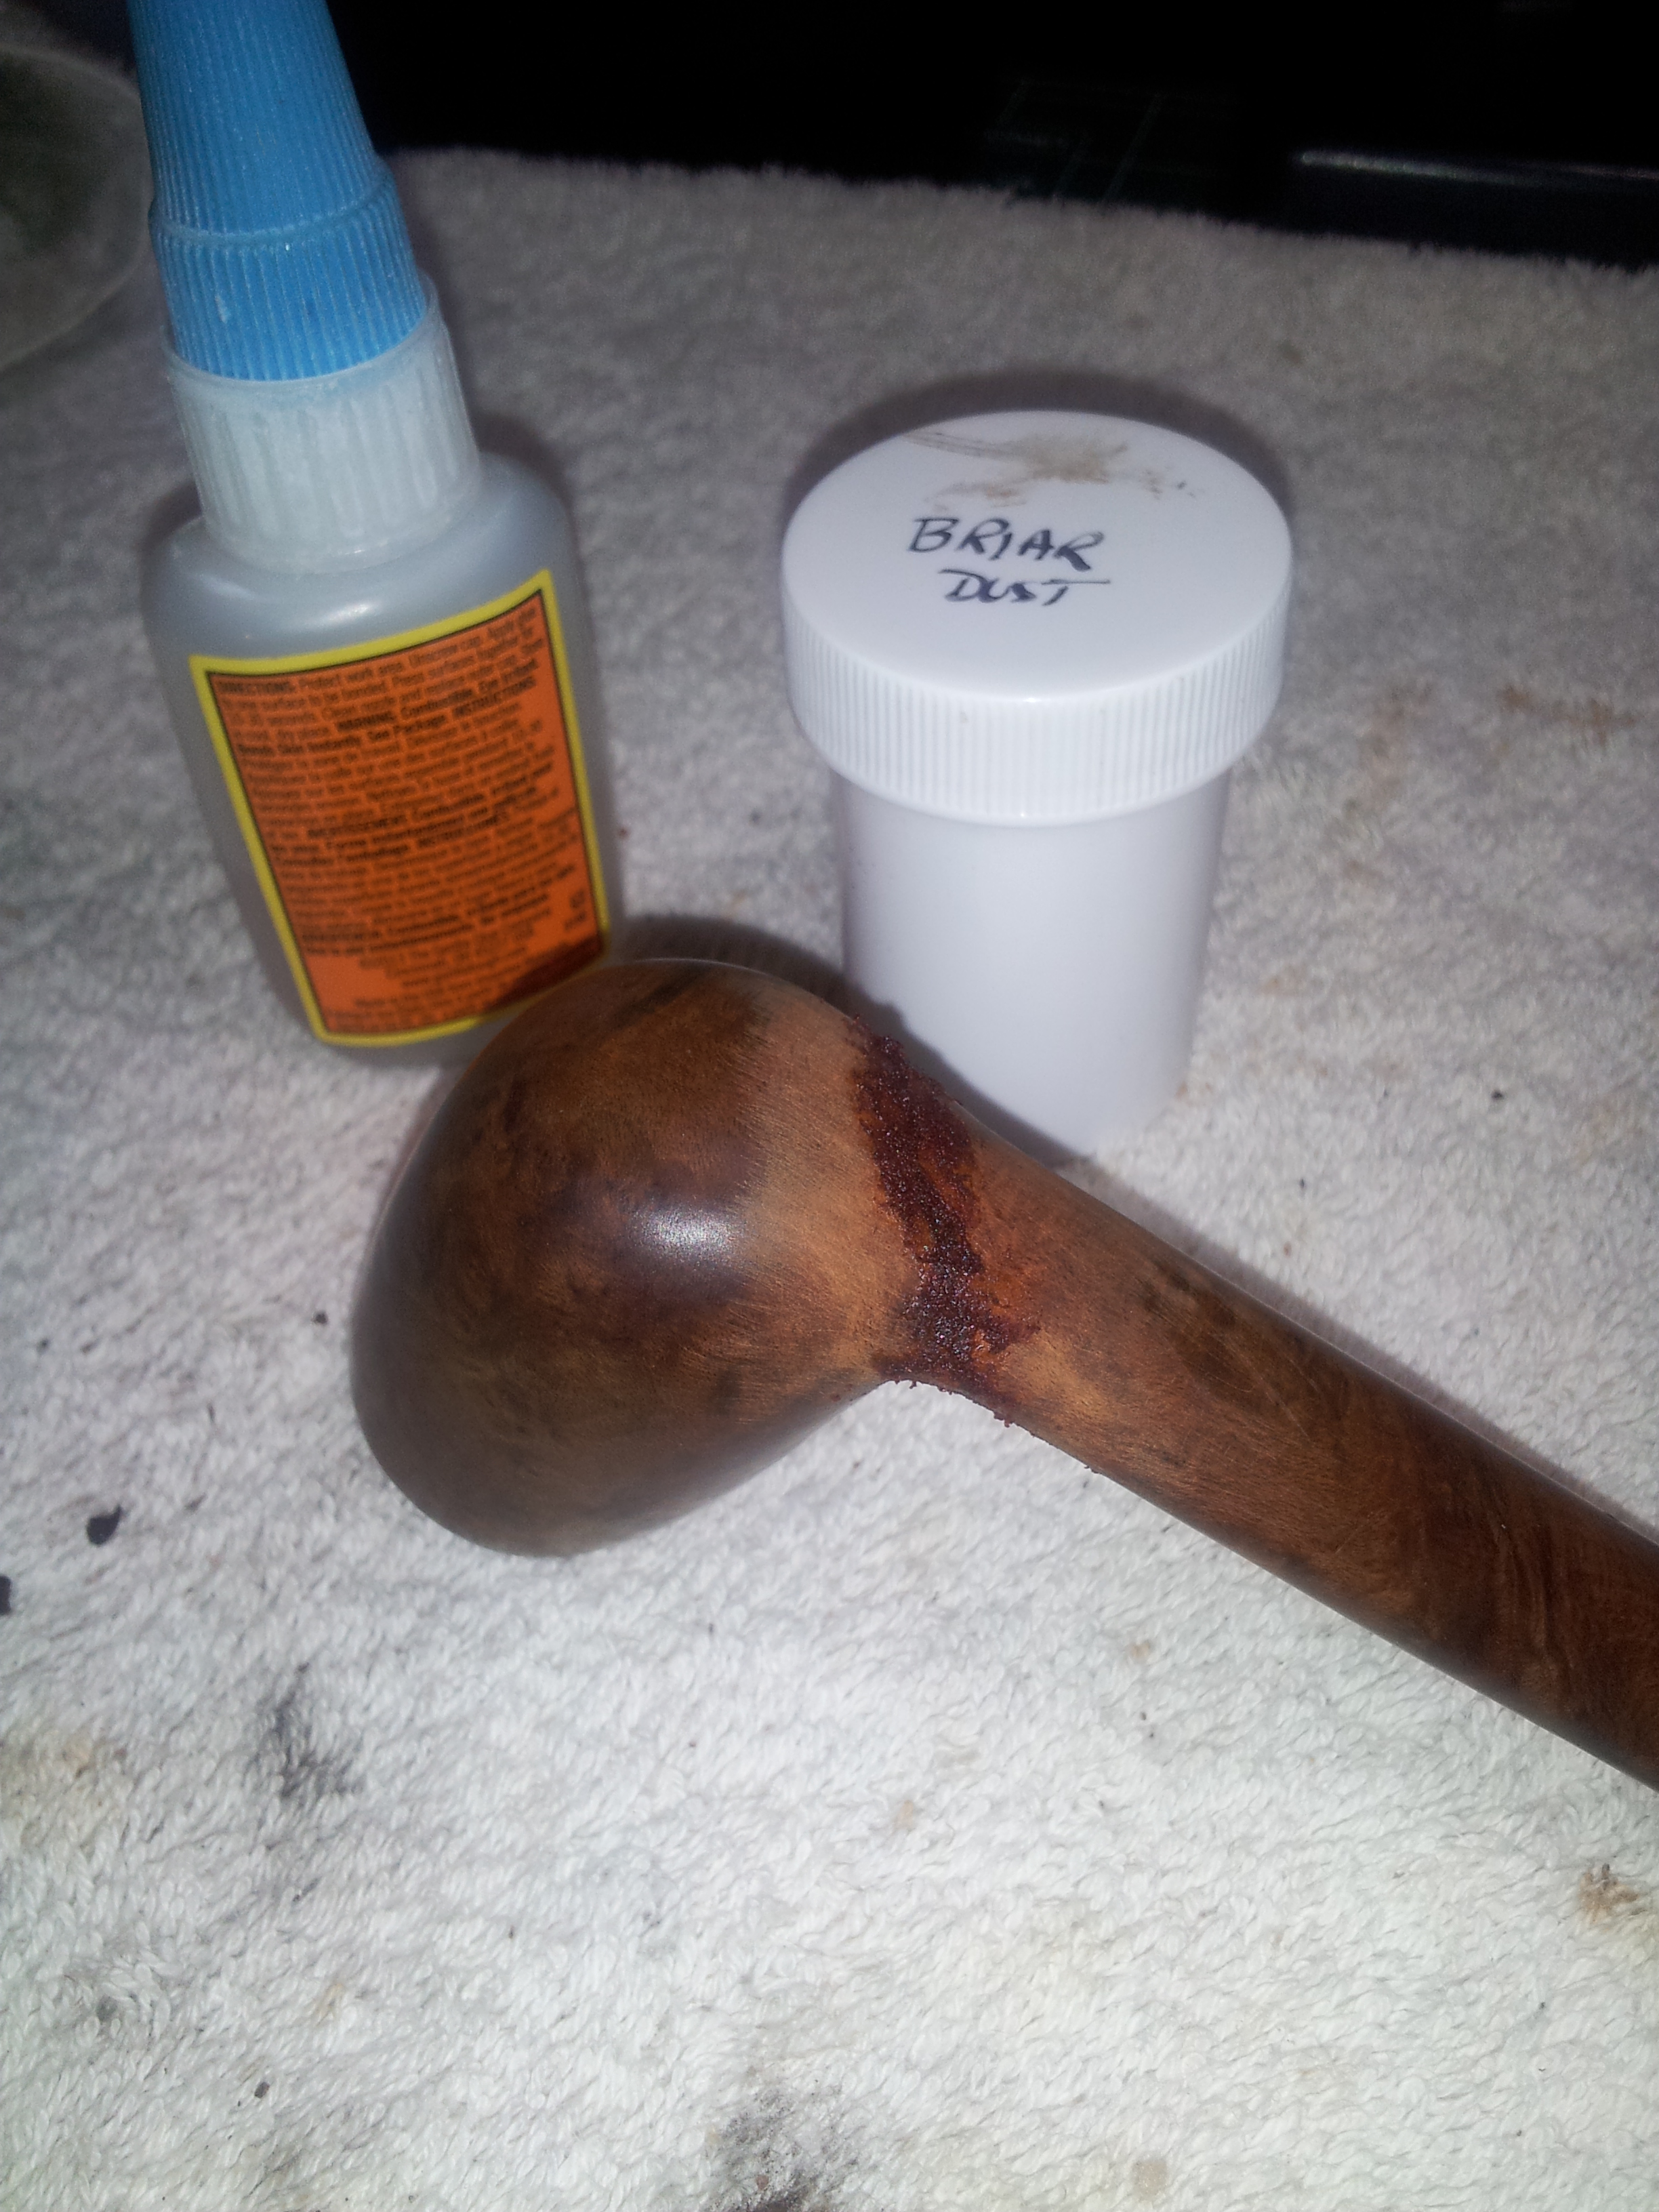


I let the shank repair conundrum percolate in the back of my mind for a while. Rushing a refurb is generally not a good idea, in my experience. During this off-time, I sanded out the minor dents and scratches in the bowl before leaving the whole pipe alone overnight. When I came back to it, I decided that, if I couldn’t achieve a factory-original smooth finish, I could bury the repair in the nooks and crannies of rustication.
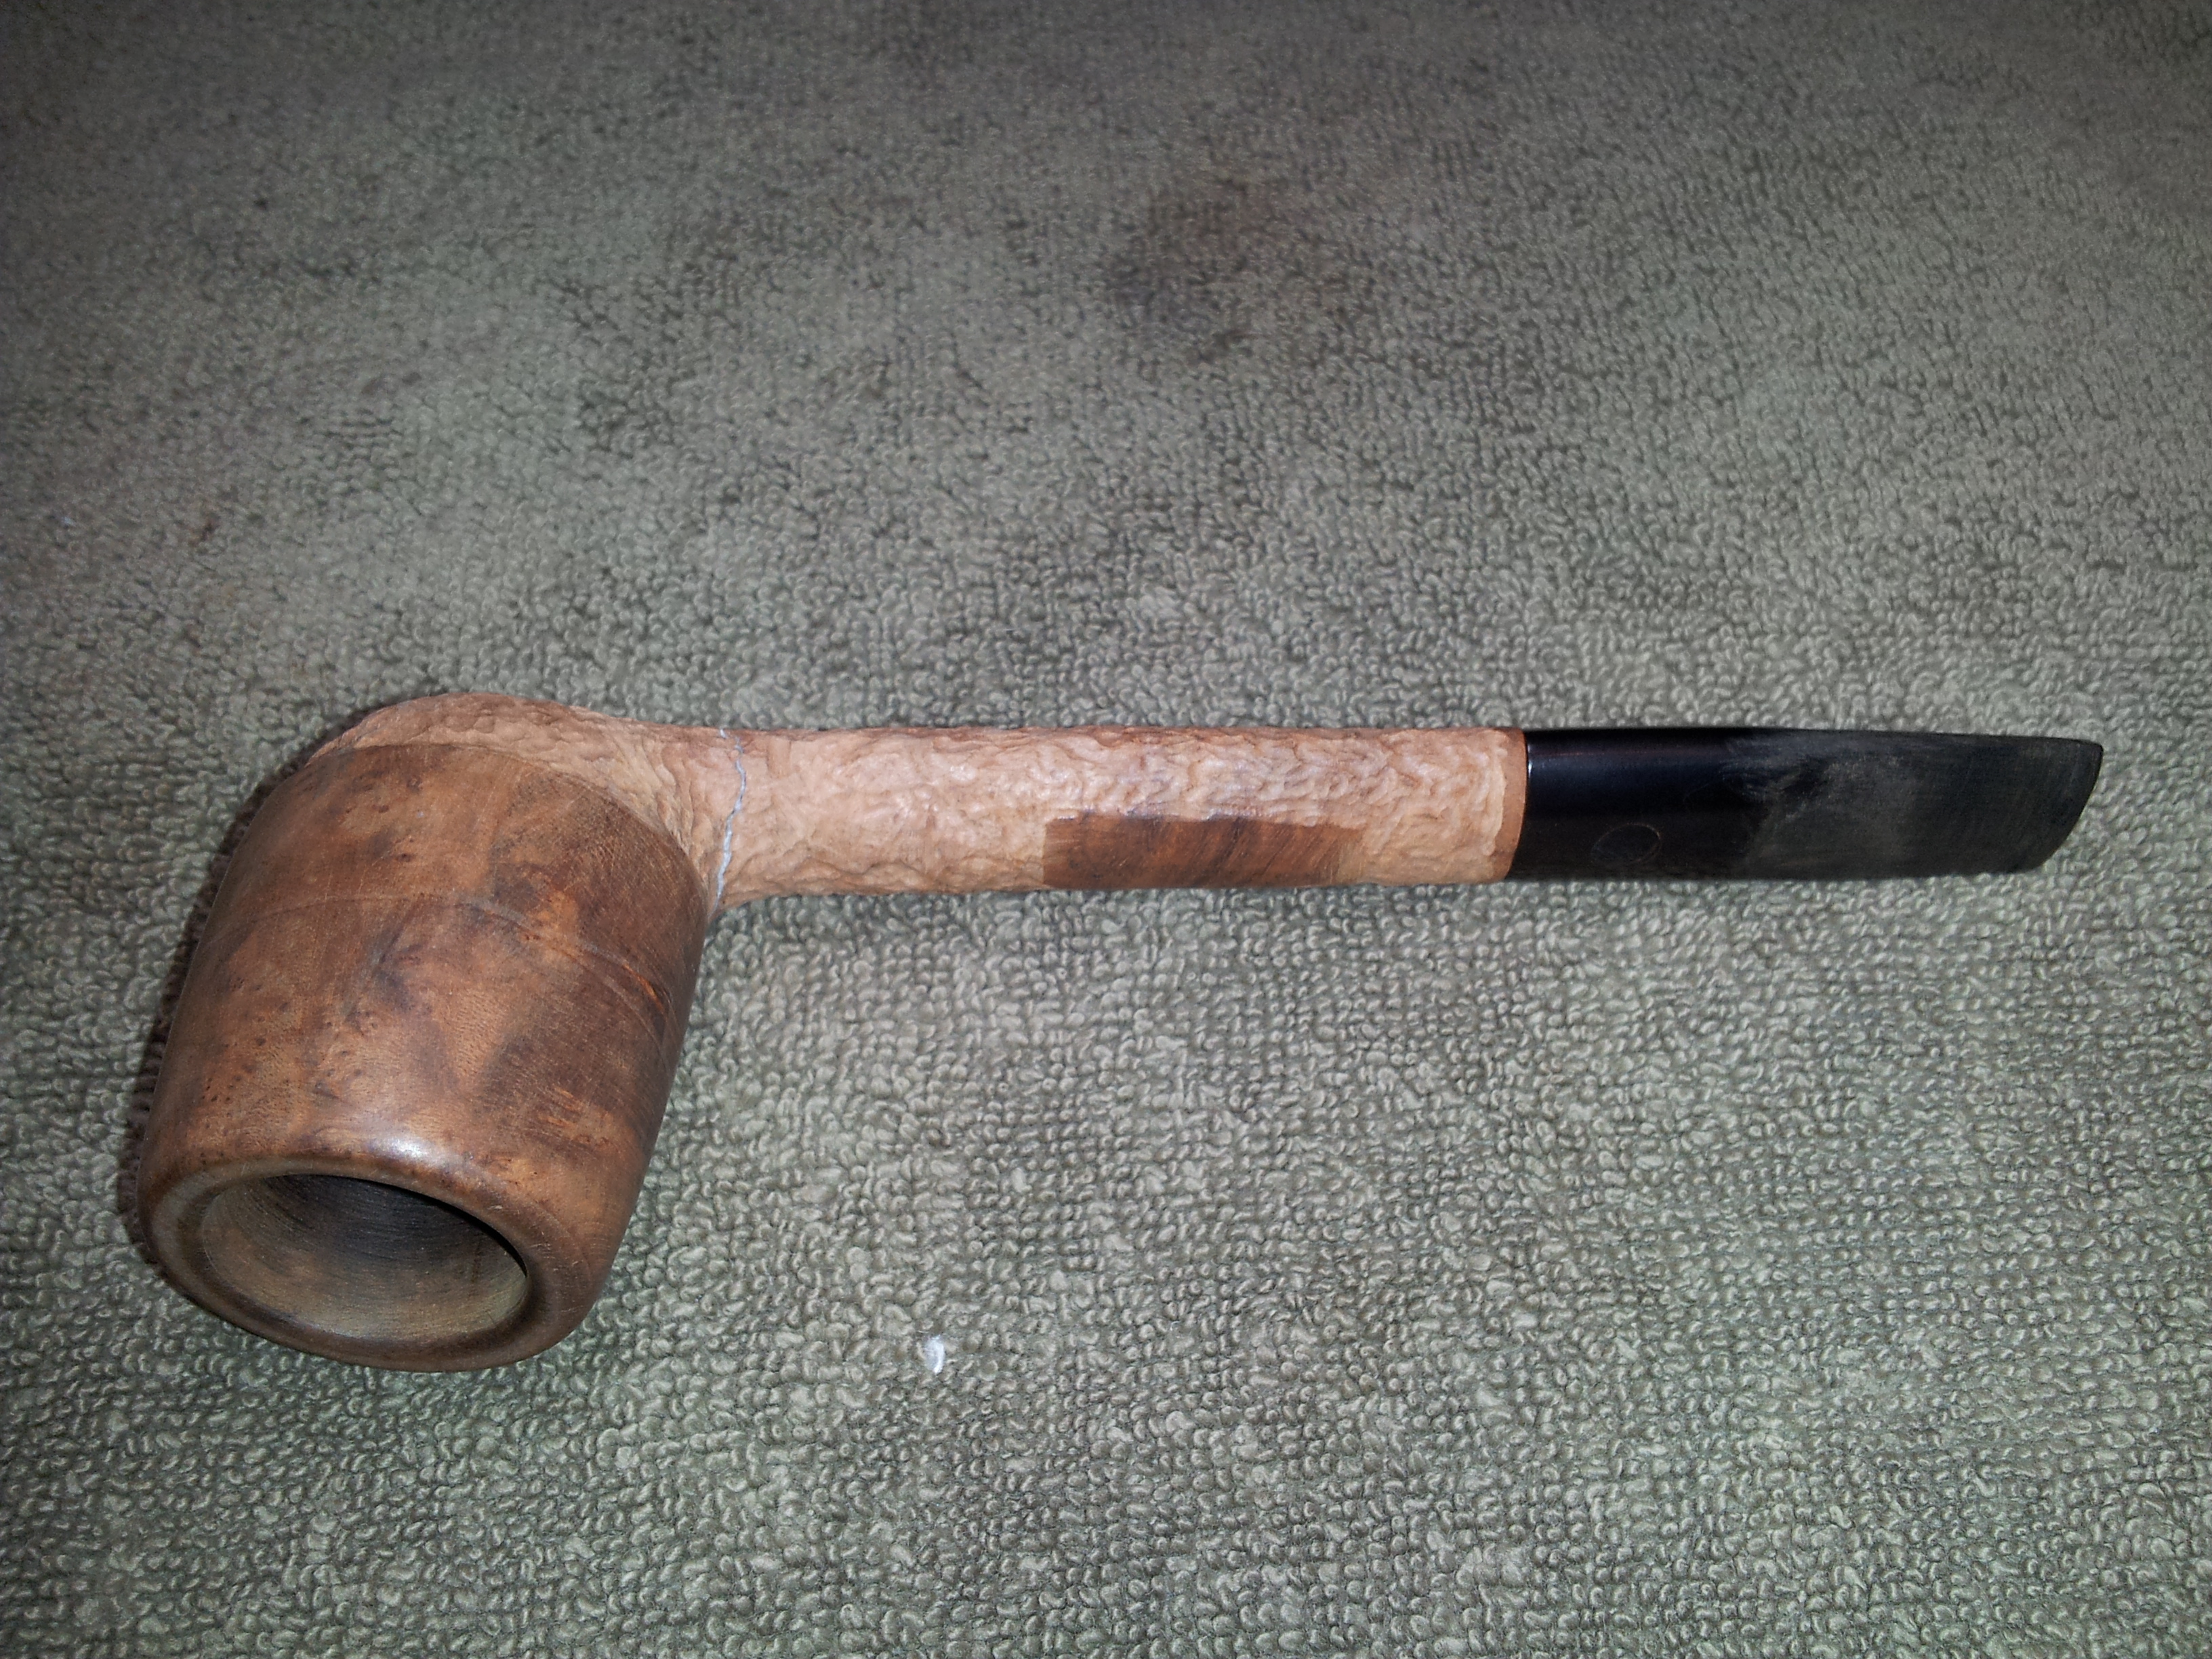
For this, I prepped the stummel carefully by taping off the areas I wanted to stay smooth with several layers of electrical tape. Rusticating with a Dremel can be tricky – if the tool gets away from you, it can very quickly gouge out the briar where you least want it. I used a small round carving bit in the rotary tool to roughen the stem and bottom fifth or so of the bowl, paying careful attention to my taped-off boundaries and the factory stampings. Here is the pipe immediately after rustication.


Time now to stain! I mixed Fiebing’s leather dyes in Saddle Tan and Dark Brown to produce a rich-looking red/brown colour which I applied to the entire pipe. I let it dry completely before buffing off the excess stain with an old terry towel. I then applied two coats of Dark Brown full-strength over just the rusticated area. I used an old craft paintbrush to get the stain into the dips and hollows of the rusticated briar while avoiding the smooth areas on the bowl and shank.

After the stain had dried thoroughly, I buffed the excess off with a terry towl. This rubbed quite a lot of the dark brown colour off the high spots on the rustication, giving a nice two-tone effect. I then applied a coat of mineral oil to the stummel. This gives the finish a depth and “pop” that really brings the contrast stain up a notch. Nice!

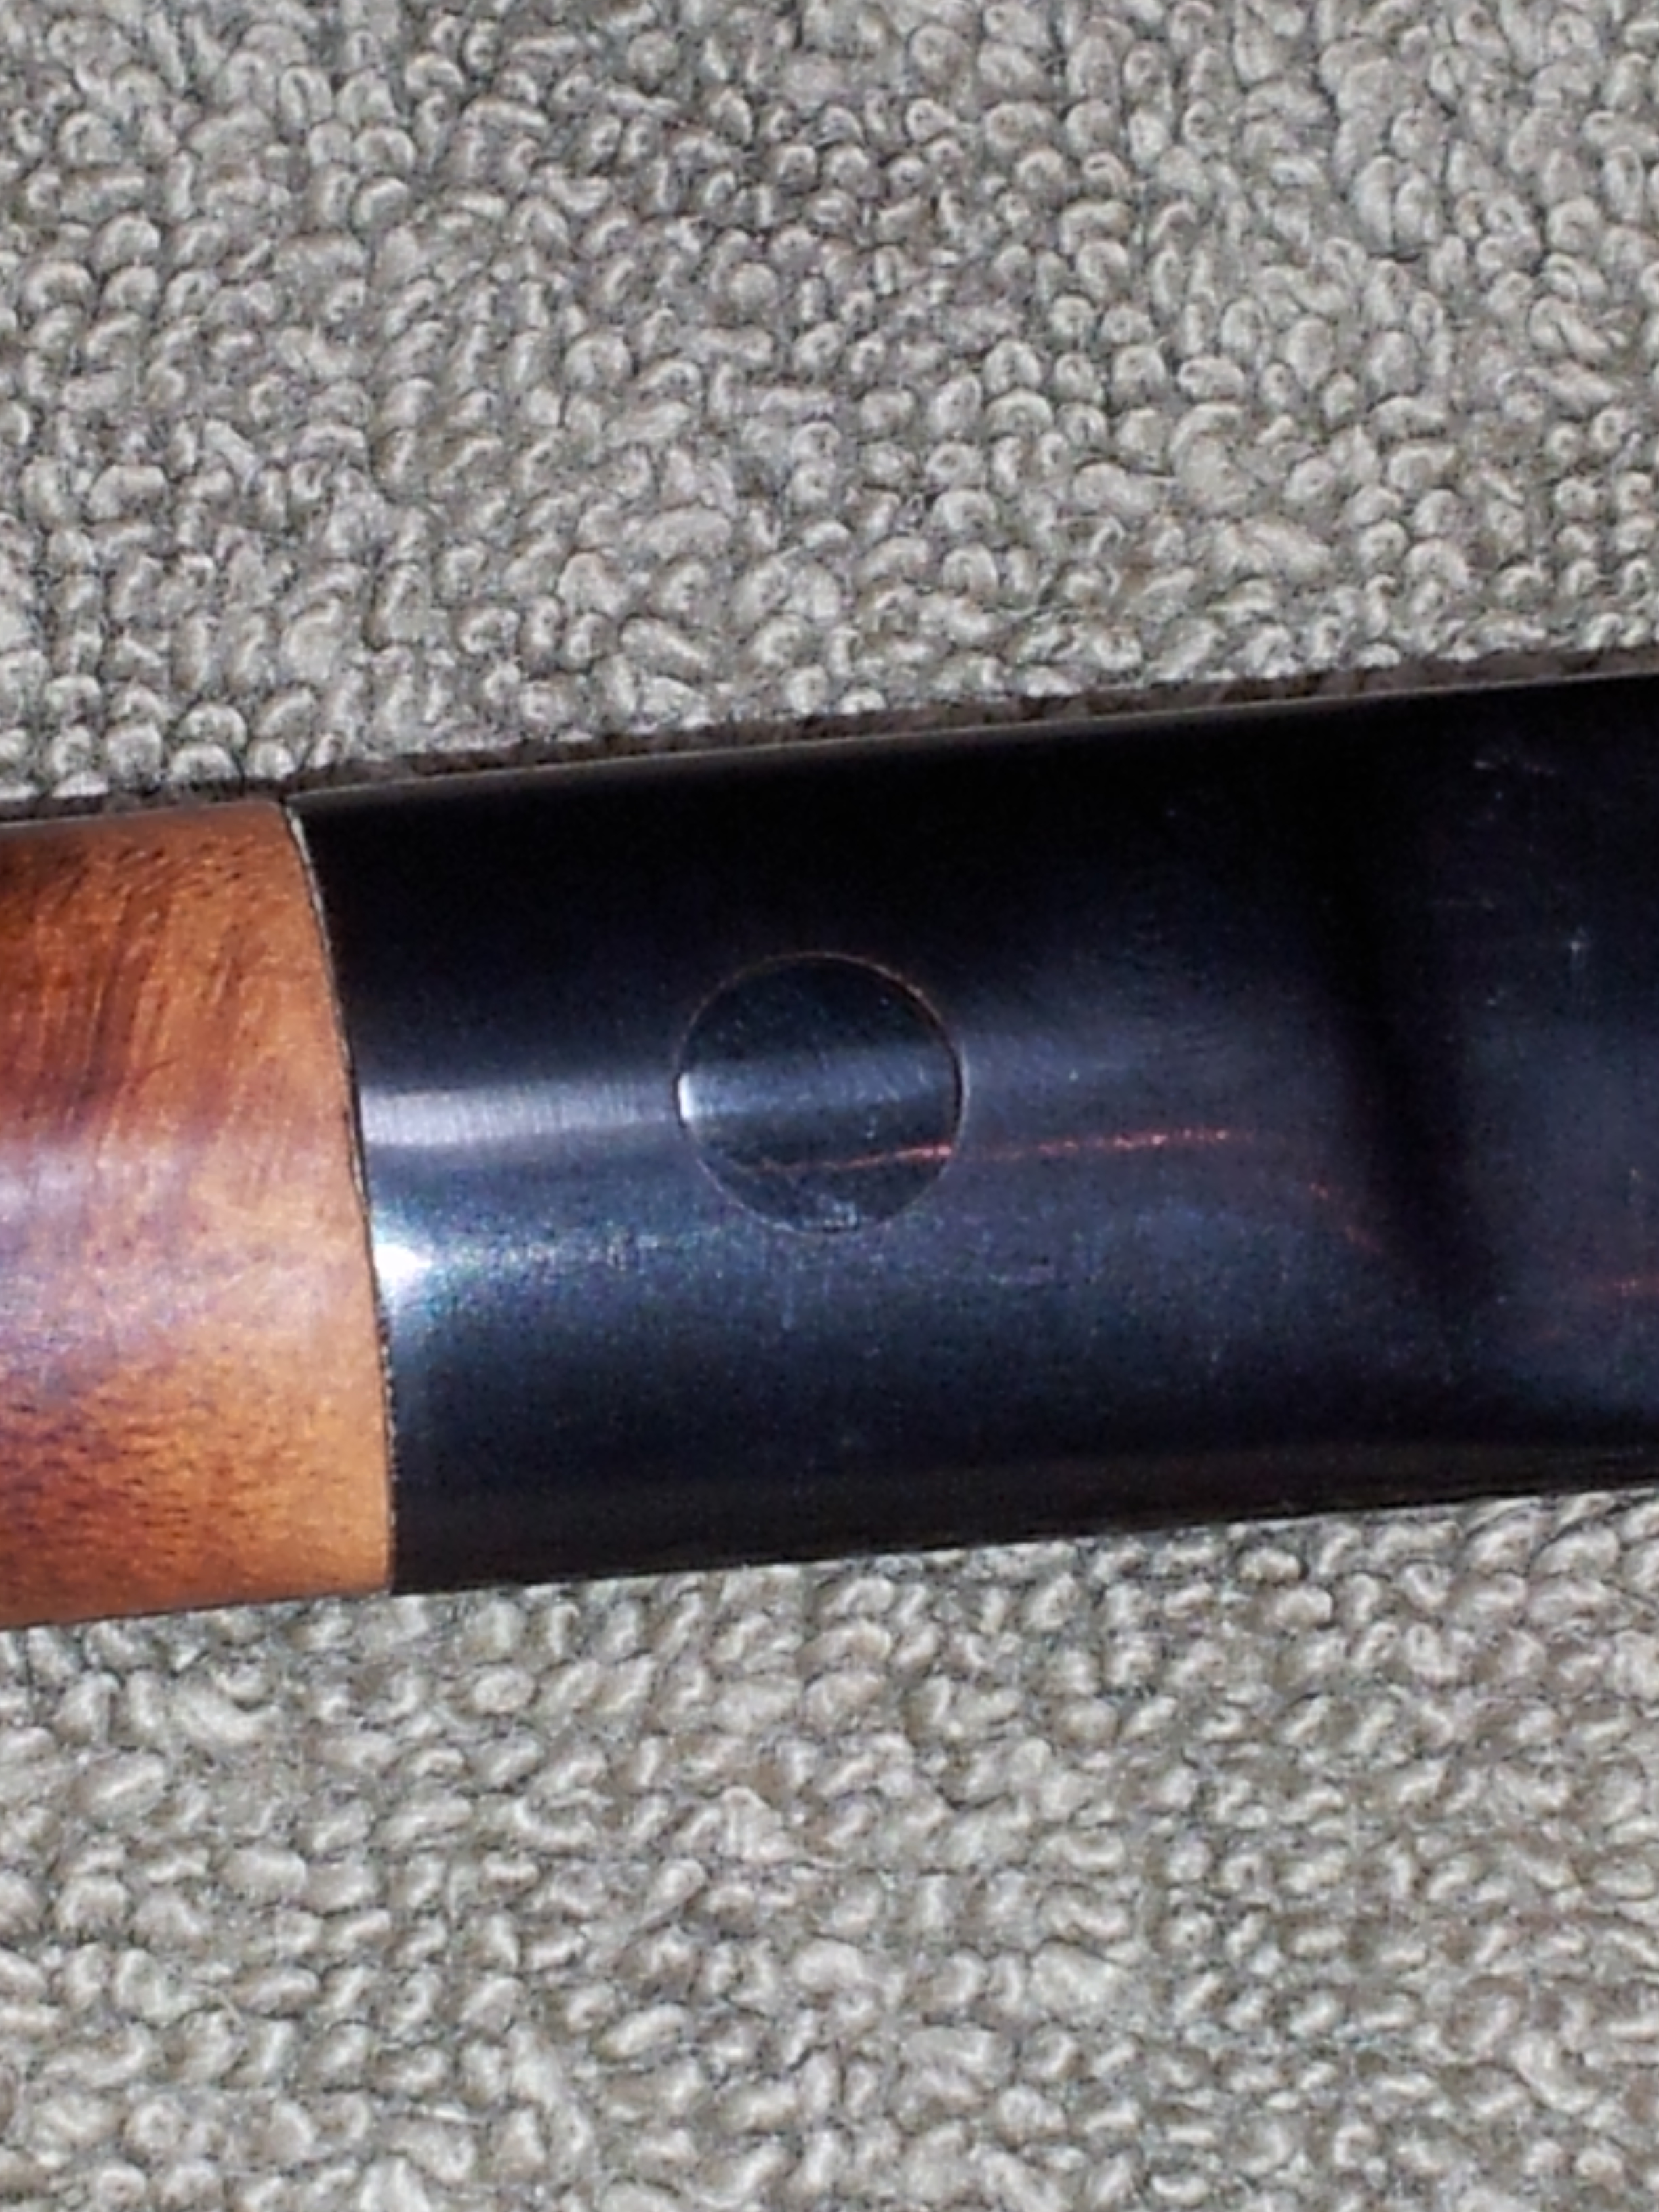
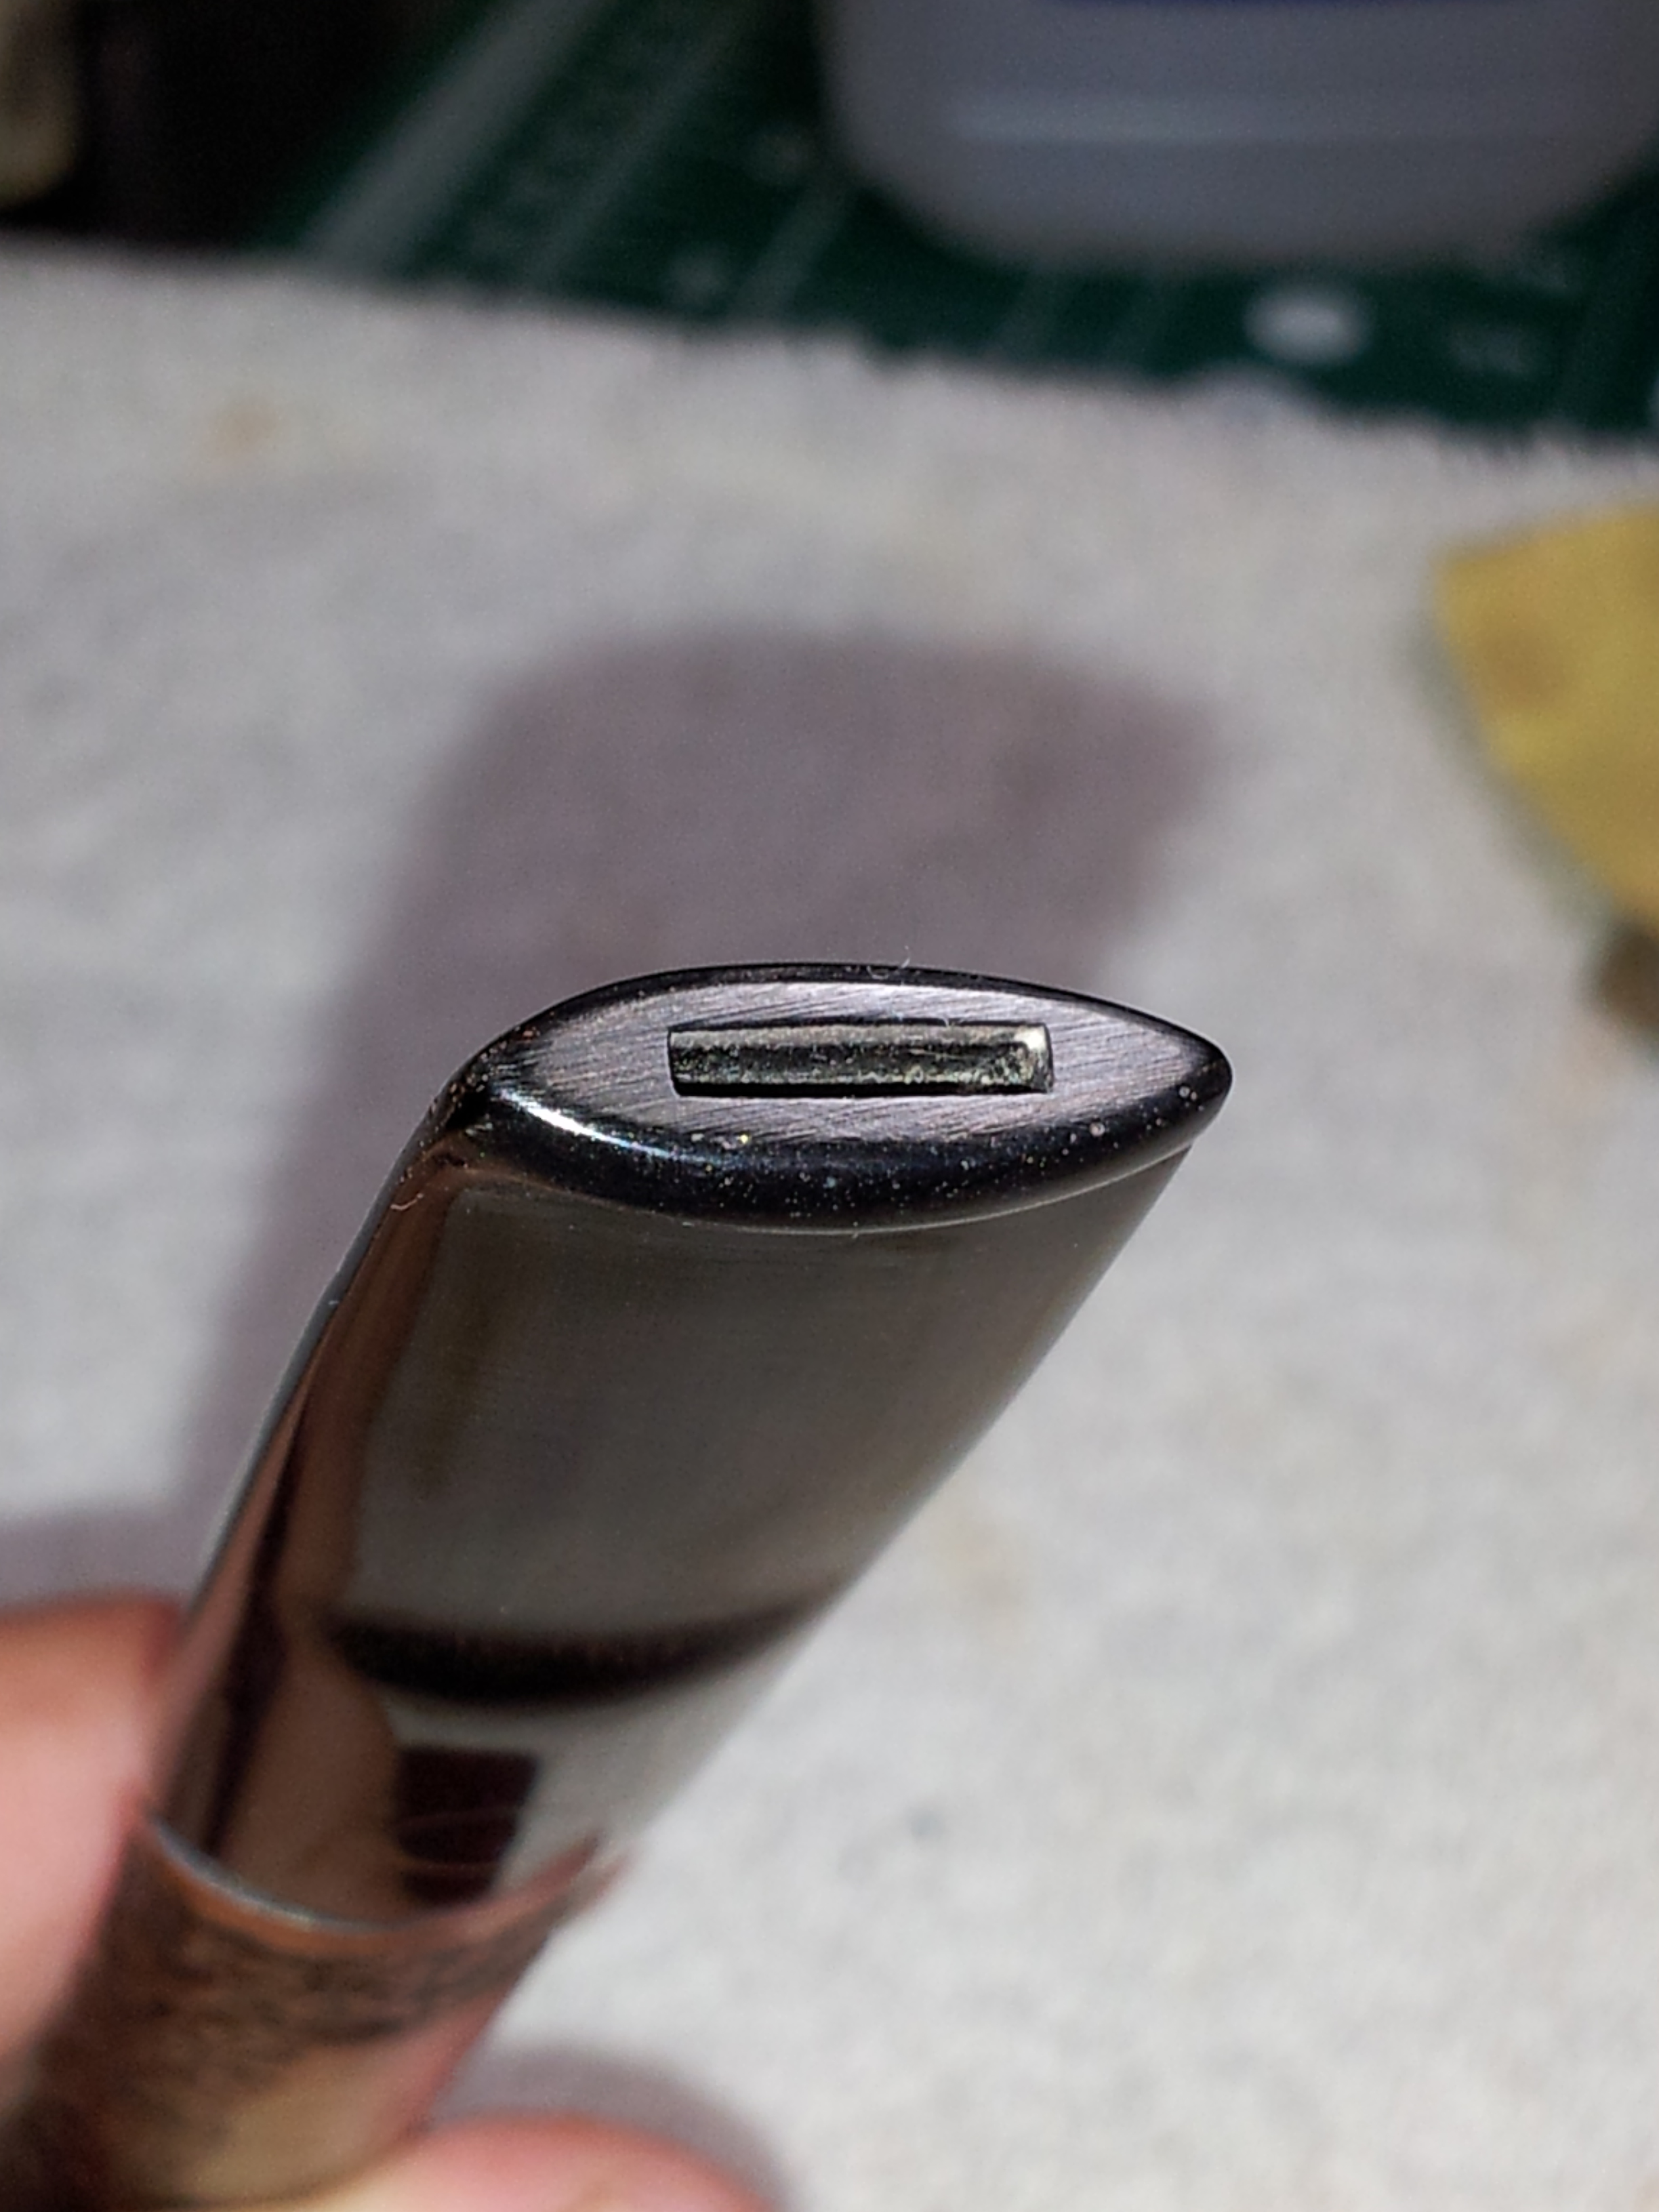
This old Supermate was smokable at this point, but the just-barely-there button made it rather tricky to keep between the teeth. To remedy this, the button had to be built back up using a mixture of CA glue and activated charcoal powder. I use the thicker gel-style CA glue for this as it mixes more easily for me, though I find it sets faster the more charcoal you mix in. It can be tricky finding a balance. Don’t do this when the dog or the significant other wants your attention.
I sanded the button area with 220-grit paper then wiped it clean. I applied the CA glue/charcoal mix as evenly and as quickly as I could before it set. I applied several thin layers to build up the necessary depth of material top and bottom. After it cured, I used a series of files and sandpapers to shape and smooth the new button. This series of pics shows progress from rough shaping to finished button.


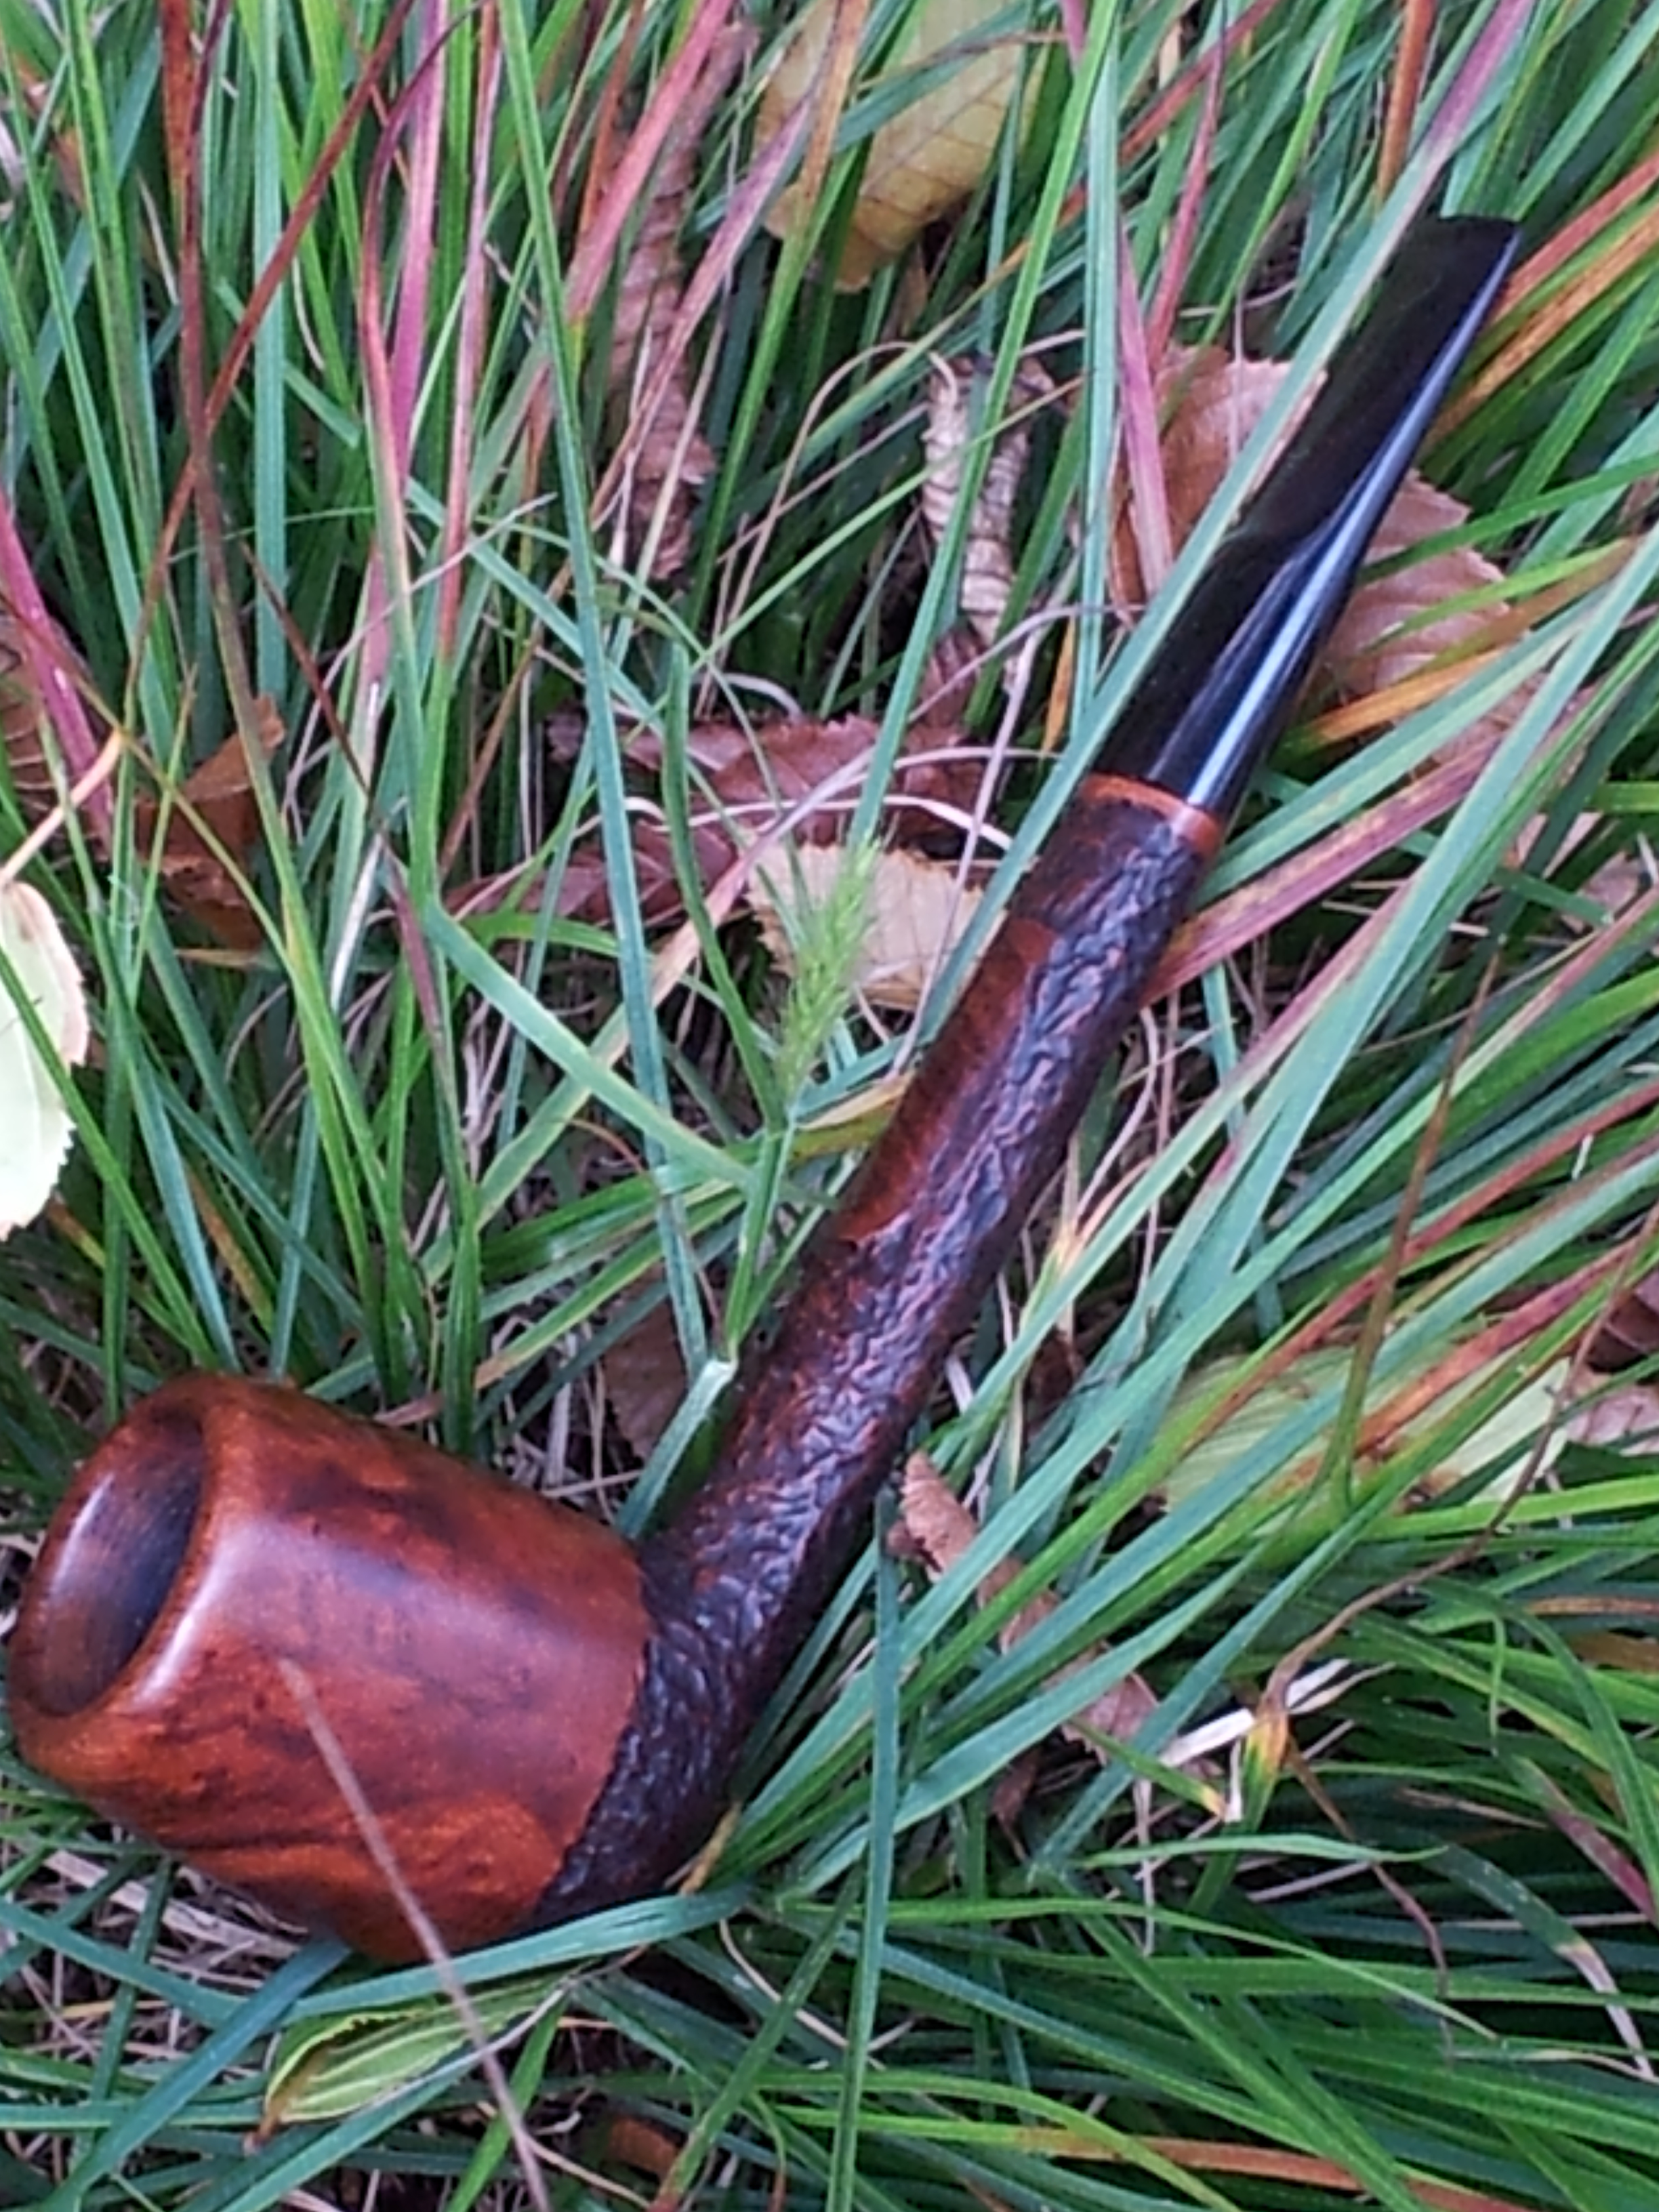
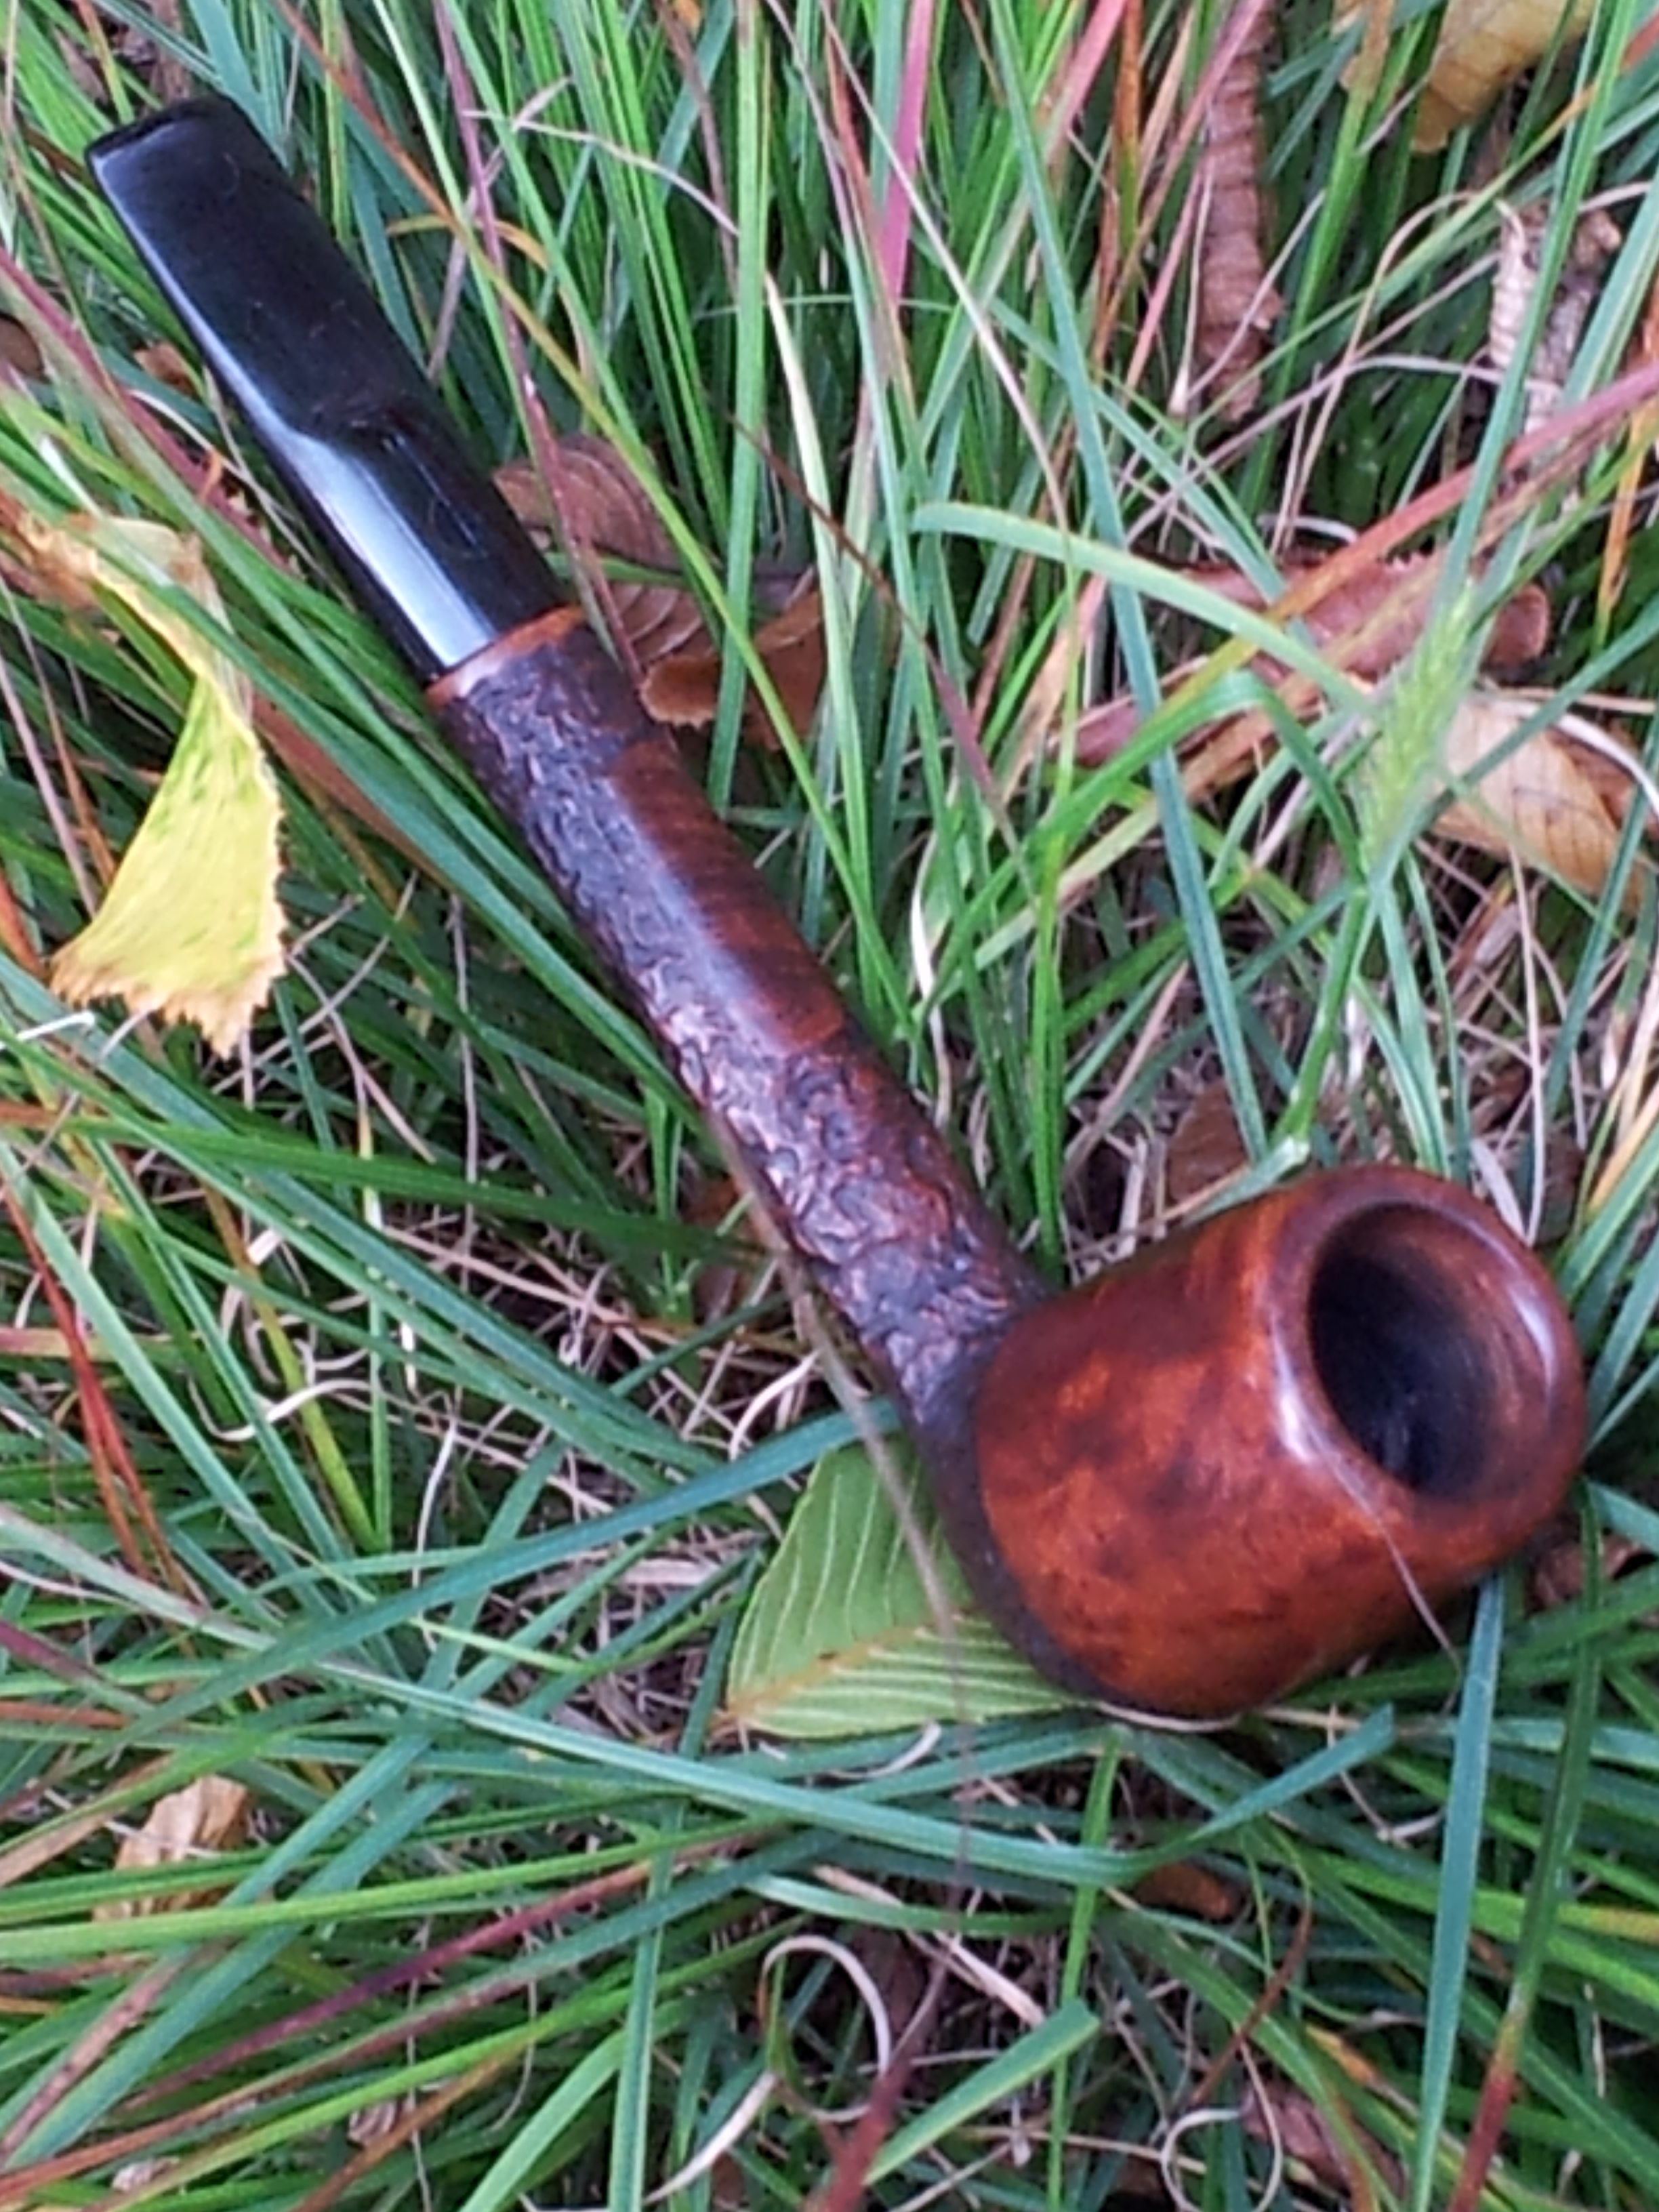
The pipe was then reassembled and brought to the buffer for a run on the Red Tripoli and White Diamond wheels before getting several coats of wax. The finished pipe is shown below. It’s not quite what the craftsmen at Butz-Choquin had in mind, but I quite like the partial rustication on this Supermate Major. The new finish came out nicely, in my opinion, and even I have to look closely to find the repair to the shank. As a bonus, the dark stain actually helped bring out the faded stampings, so a win all around.


Reblogged this on rebornpipes and commented:
Nice job on rusticating and blending in the repaired shank. Did you ever figure out why the fills you were doing would not stick? That is curious.
LikeLike
The fills not sticking remains a mystery. I imagine it has something to do with glue incompatibilities, though I haven’t heard of CA glue NOT sticking to anything. A head-scratcher for sure. I even went so far as to pick out the top layer of old glue to create a trough for the CA glue/briar dust fills. Should have worked in theory, but…. 😉 Keeps things interesting!
LikeLike
Nice save on that old warhorse ! The rustication looks excellent.
LikeLike
Thanks, Troy. The Dremel is a great tool.
LikeLike
I like the pipe much more with your partial restoration than before. That Dremel works wonders in good hands. I got the flexible extension the other day which is easier on my arthritic hands. One day I’ll try the mineral oil treatment most of those here seem to use. Really does make the wood glow.
LikeLike
Thanks, Al. I hope the flex extension works for you.
LikeLike
Another great looking pipe, now. I like the looks of your rustication style. Nicely done stem work also.
LikeLike
Thanks Wayne. I’m getting more comfortable with the Dremel each time. This is my most consistent rustication so far. Baby steps!
LikeLike