
I thought I’d squeeze in another post before heading out for a late-summer camping trip before back-to-school activities take over.

This no-name Oom Paul pipe came to me in a recent auction lot purchase (second row from the bottom, centre column in the pic). It was in pretty good shape when it arrived. Compared to many pipes in the lot, this one had not seen a great deal of use. There was a light cake in the bowl, and only a small amount of oxidation on the stem. Even the original stinger was intact. The only real issue was a scraped up rim; it looked almost as if someone had attempted to clean tars from the rim with a dull knife, and had taken off more rim than tars.


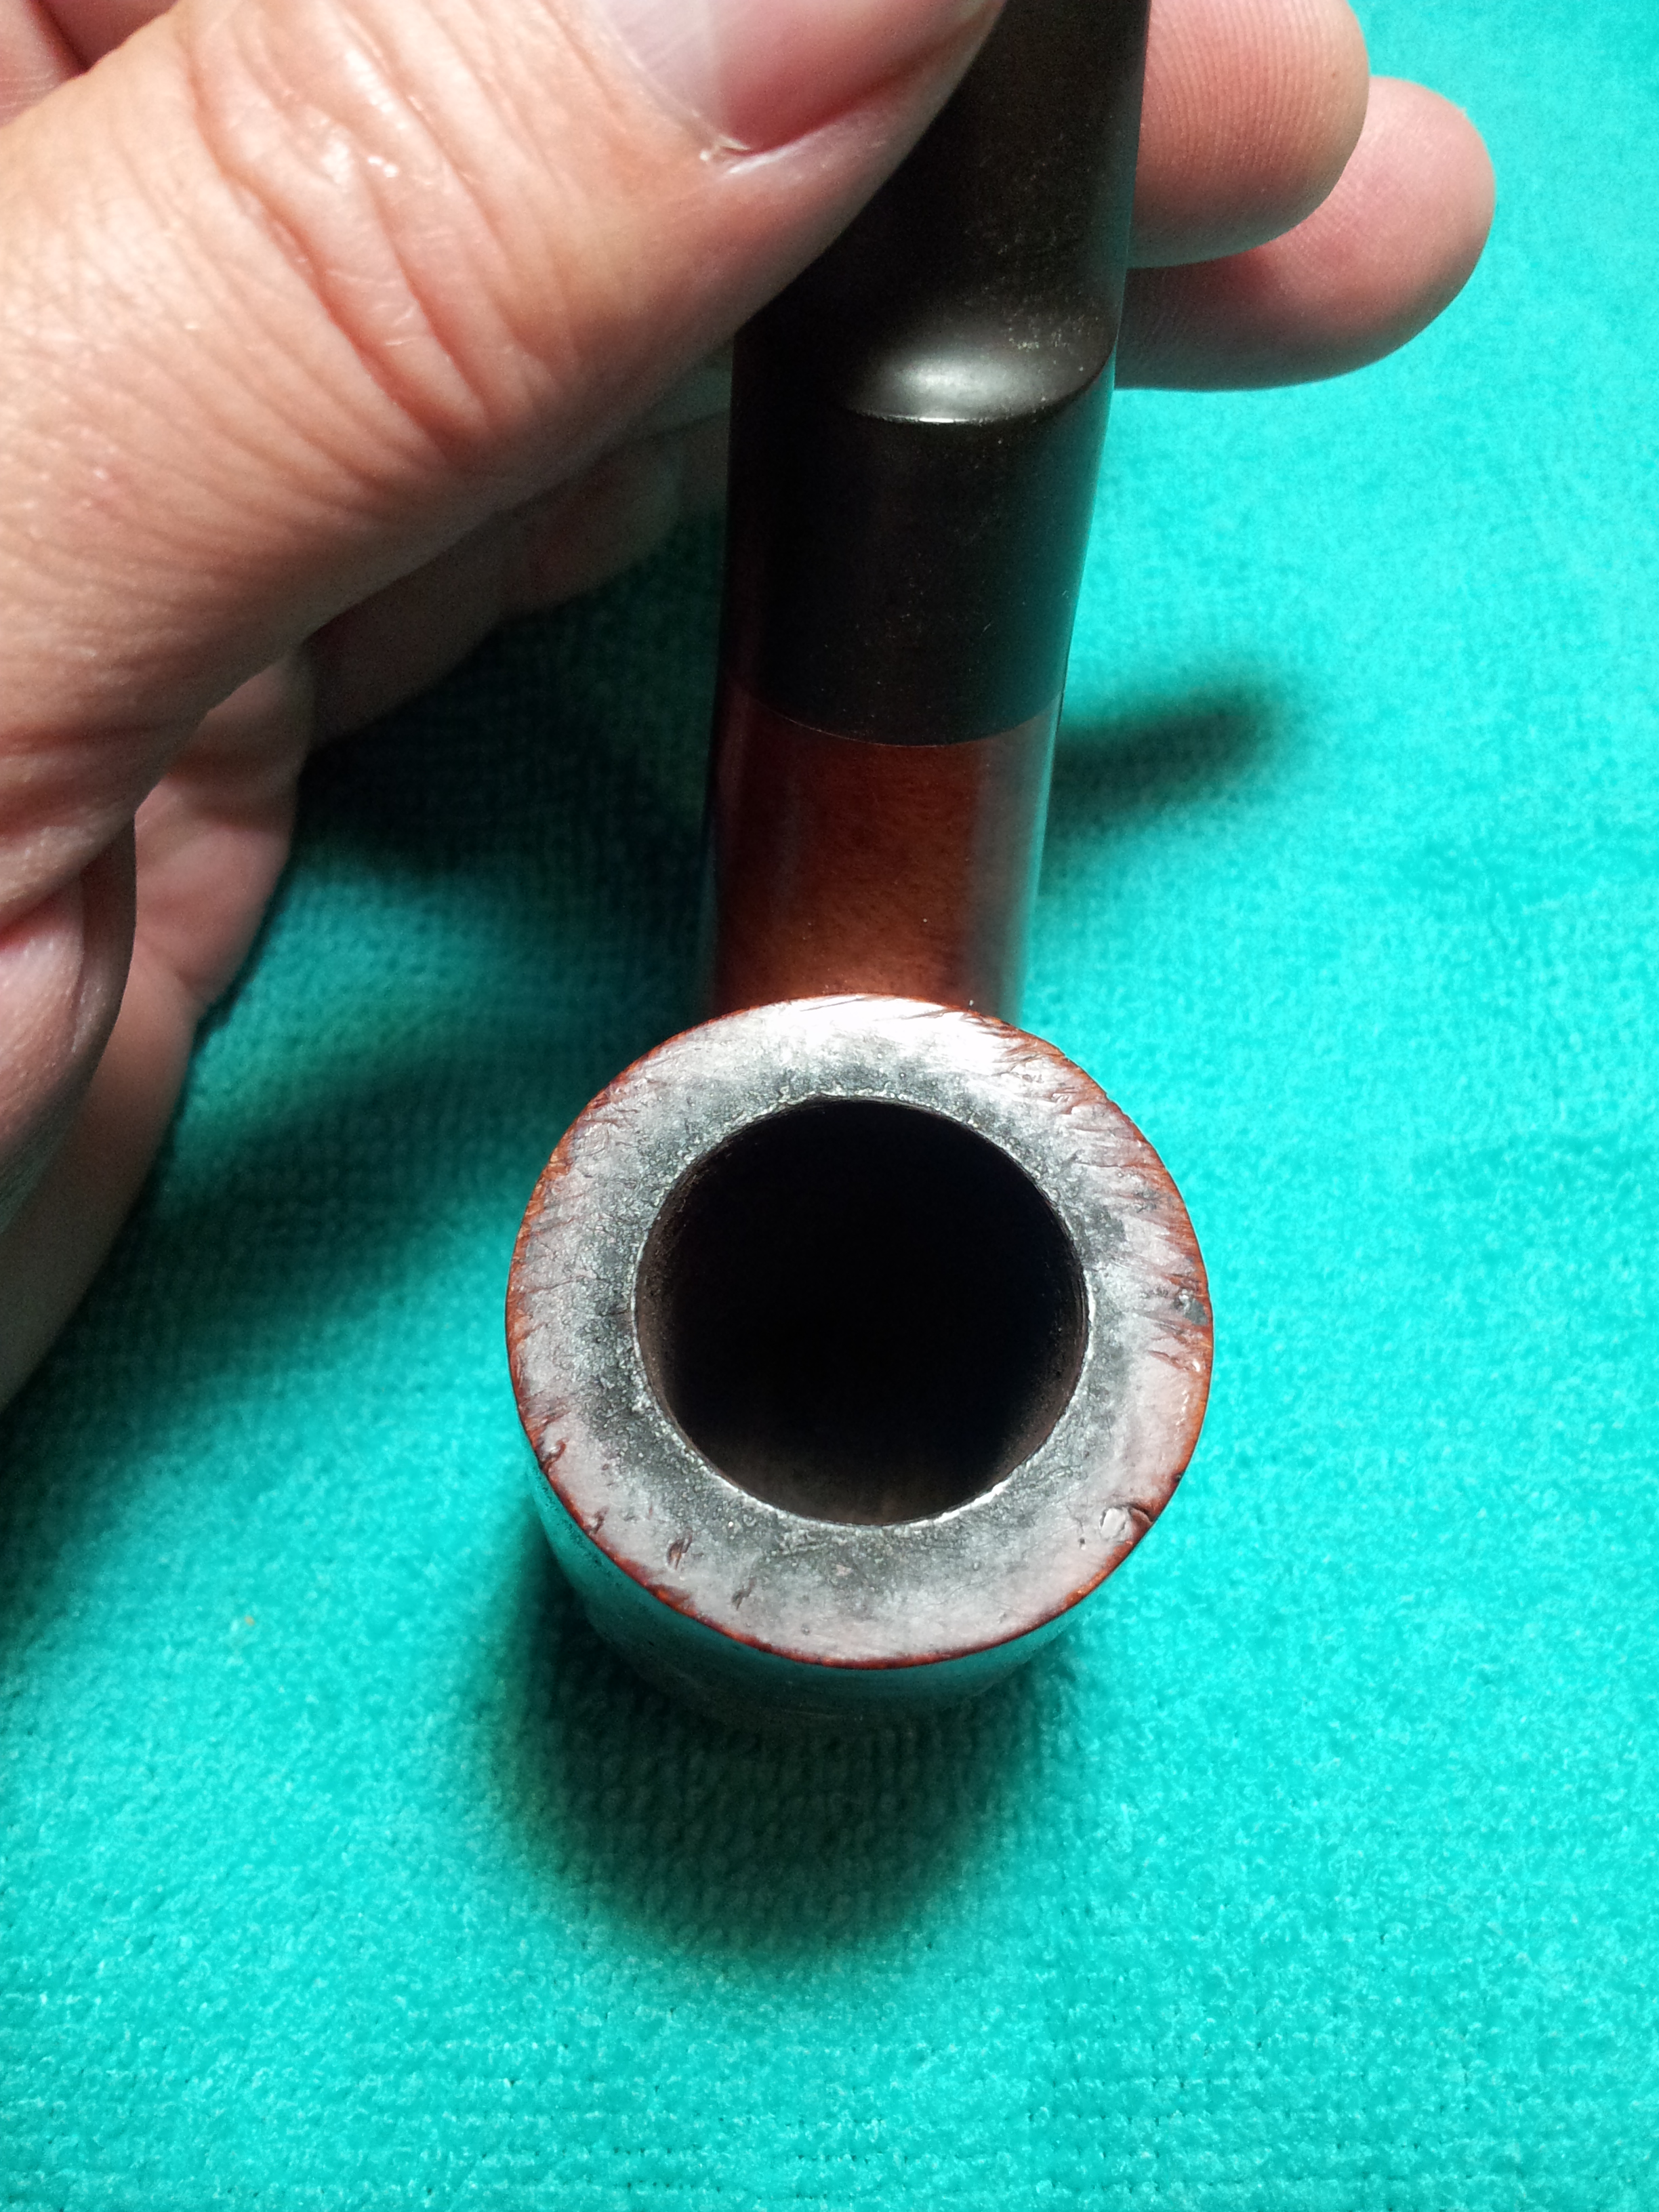

After reaming what little cake there was in the bowl and confirming that the briar was in very good shape inside, I removed the pipe stem and took the bowl to the topping board (a fancy term for a piece of 220-grit sandpaper held in place on a known flat surface, in this case, my desk). I had to take the rim down about 1/16 of an inch to get down past the knife marks and a few rim dents. I held the bowl rim-down on the sandpaper and moved it in a circular pattern. I did not press the briar into the paper; rather, I let the sandpaper do the work at its own speed. Much easier to control the result this way.
I did goof up here a bit, a mistake I’ll share in the hopes that readers might learn from it. I got a bit lazy and/or overzealous in my circular sanding, and accidentally grazed the leading edge of the stummel’s shank with the sandpaper. 220-grit being a fairly coarse paper, this left a small bevel in the outside mortise end of the shank. Not good. Correcting this gaffe required a very light topping of the shank end followed by some precision filling to regain the smooth transition from shank to stem. Take heed here, folks, and don’t make more work for yourself than necessary. Once back in shape, I wrapped the shank end with a few layers of electrical tape to protect it while I finished topping the bowl. I also sanded a small bevel in the outside of the rim to clean up a few tiny dents.
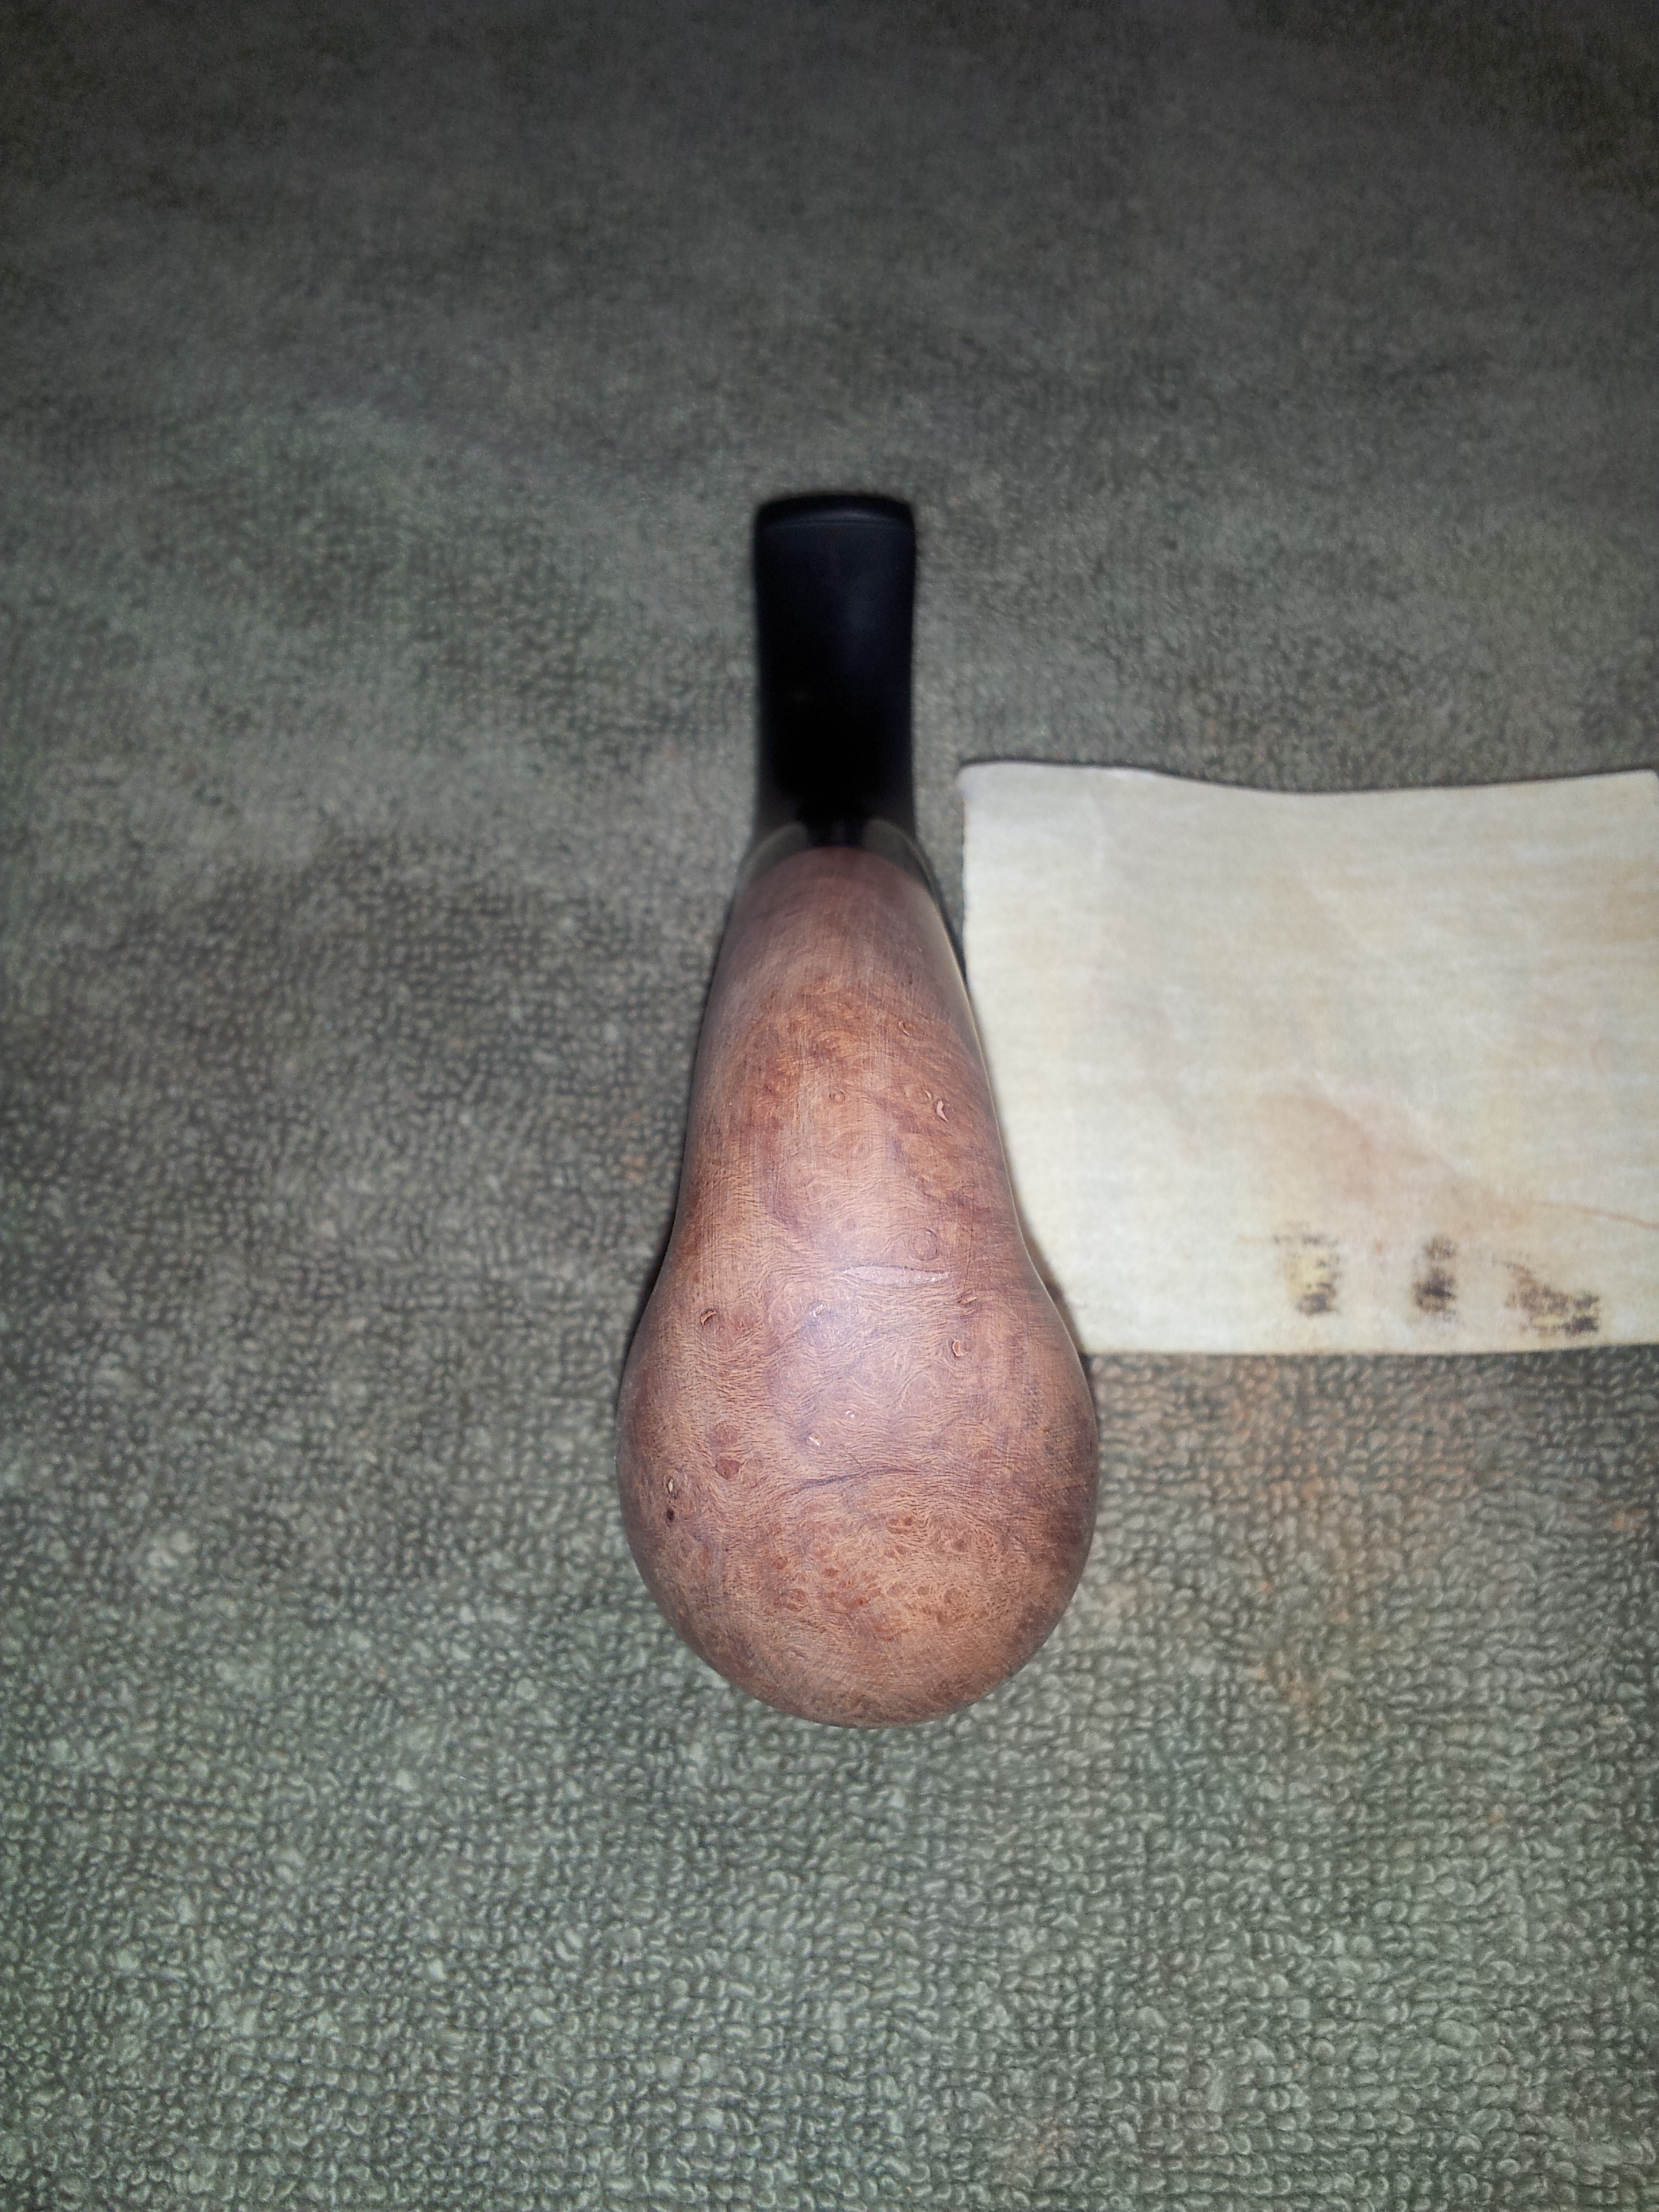
Here’s the pipe after topping.

The pipe’s factory finish was a shiny lacquer, which I generally don’t care for. I believe they impede the natural expansion and contraction of the briar during use, so I remove them where possible. The stummel, therefore, went into an alcohol bath while the stem enjoyed a dip in Oxyclean and warm water. The alcohol dissolved most of the lacquer, while a quick sanding with 320-grit removed the remaining traces.


The stem, meanwhile, had been scrubbed down with 0000 steel wool and a Magic Eraser to remove the oxidation, and then sanded with 600 – 2000 grit wet/dry paper. A few pipe cleaners dipped in isopropyl alcohol quickly cleaned out the small amount of tars and dirt from the pipe’s internals.
The pipe was ready for finishing at this point, and I had a decision to make – simply restain and buff or perhaps get a bit more daring? After looking at a lot of examples of pipe finishes online, I decided to give this nondescript Oom Paul a fresh new look – a rusticated, two-tone “collar & cuffs” job!
I started this makeover by applying a few layers of electrical tape to the rim and shank end of the stummel. This would serve both as a guide and a layer of protection for the rim and shank during rustication.

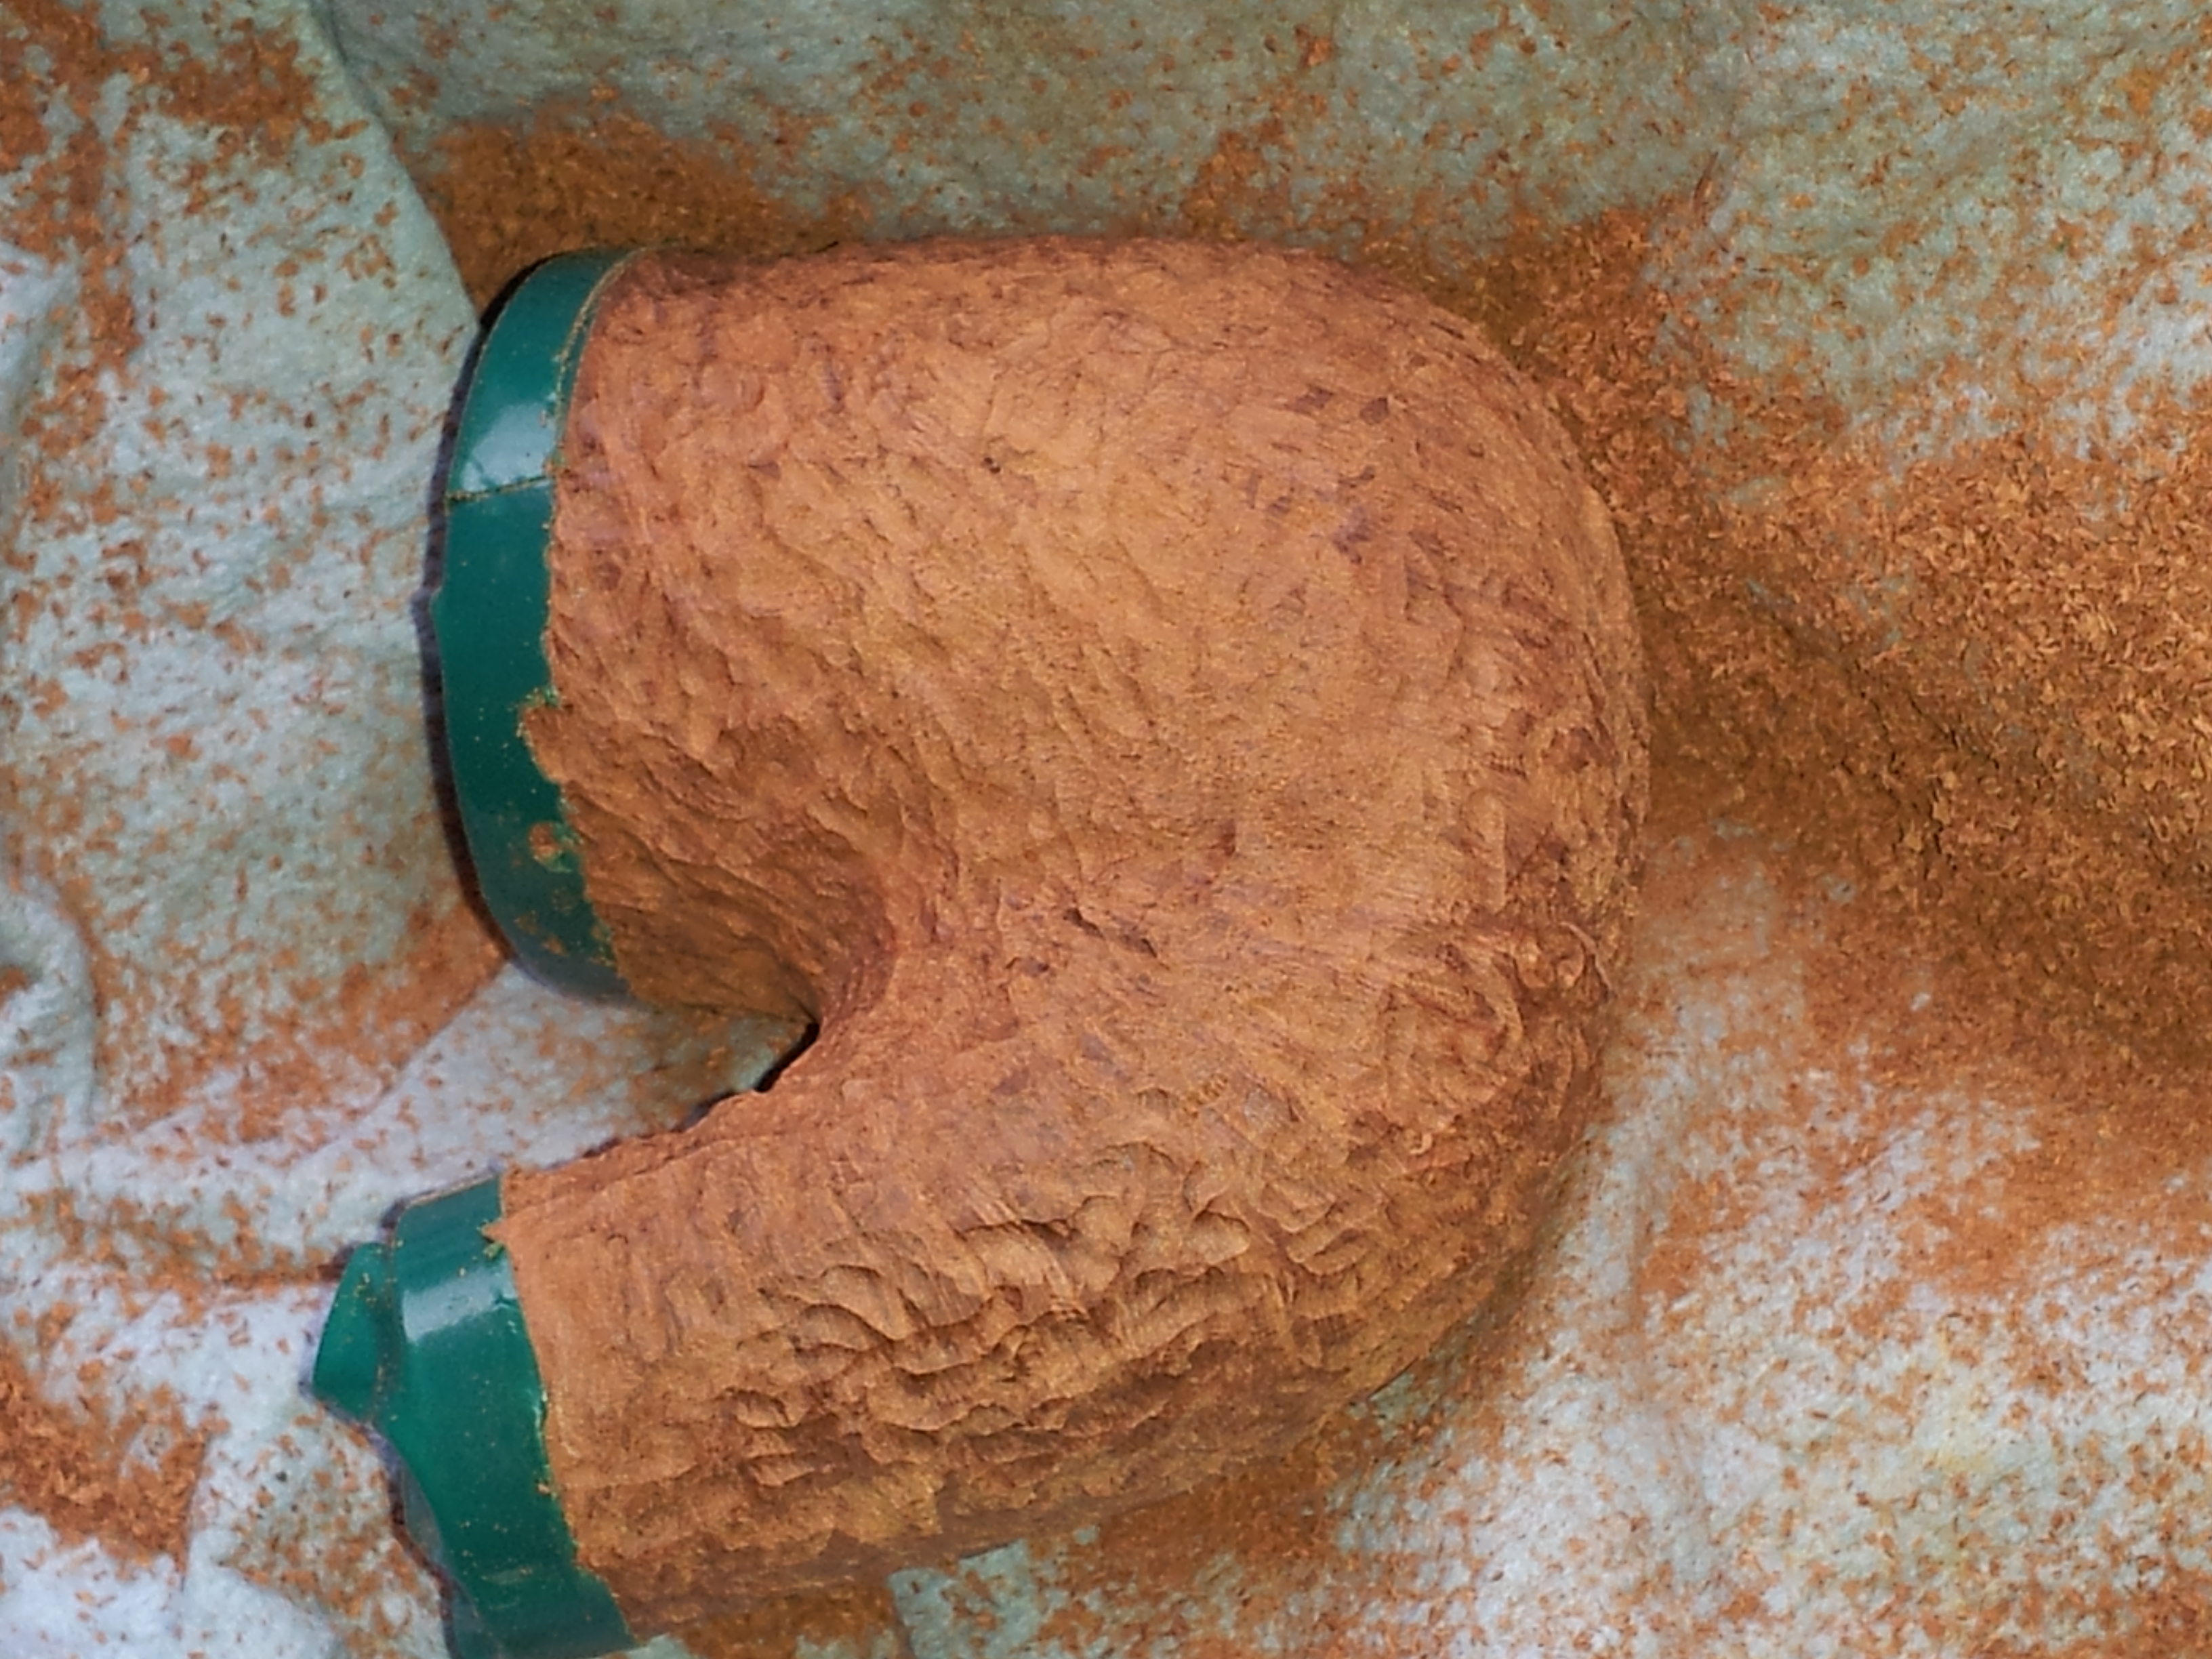
As I have on a few other projects, I used my rotary tool (generic Dremel) fitted with a small round carving bit to impose my will on the briar. I find the rotary tool can quickly get away from its handler if not treated with respect, so I worked carefully, keeping a firm grip on both tool and briar, with the tool set at a medium-low speed. Even working slowly, the rustication took less than 15 minutes to complete. After carving, I switched out the carving bit for a wire wheel brush and gently went over the stummel. This both removes the loose bits of wood and knocks down the rough edges pf the rustication, refining the overall look. Here is the freshly rusticated bowl.


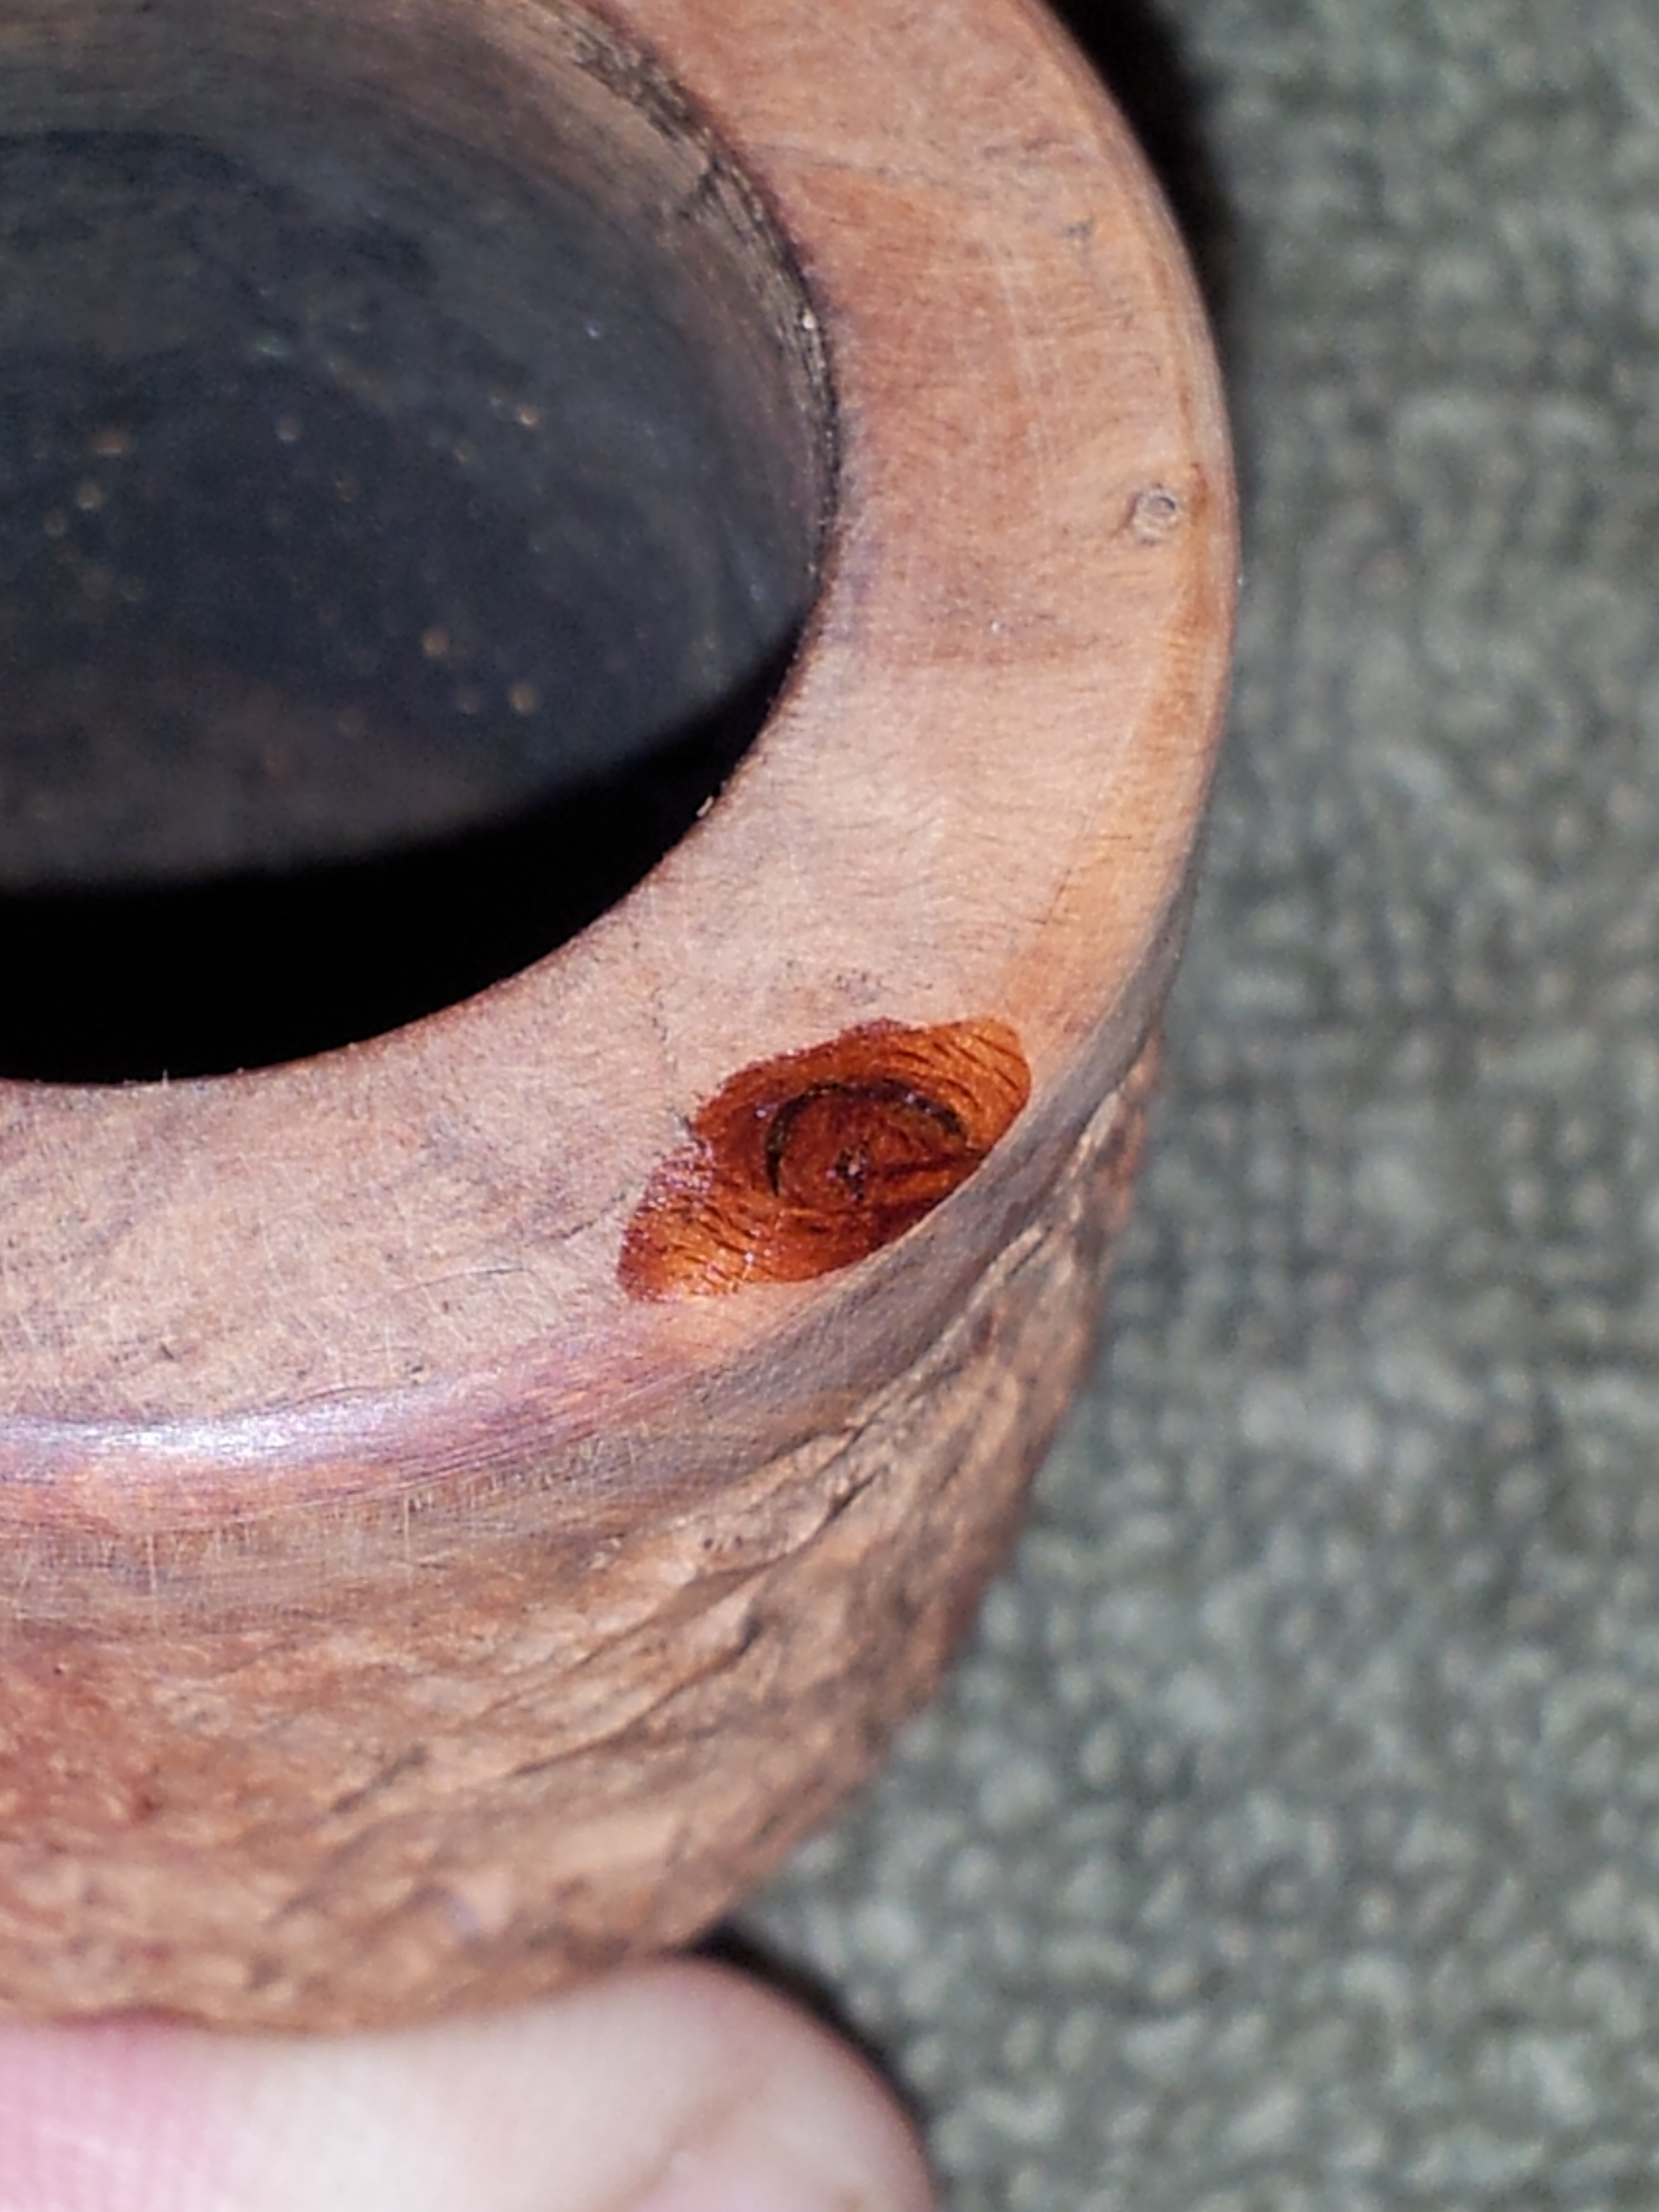
The topping and sanding of the bowl had exposed a small knot on the edge of the rim. A drop of CA glue quickly stabilized the knot and filled two tiny seams around it.
Then it was time to stain.

I applied two coats of Fiebing’s Black leather dye, full strength, using a cotton ball. I pushed the dye into the rustication to make sure it got right down into the deepest pockets. I let the stain dry completely before sanding the black off the smooth rim and shank ring. A coat of mineral oil brought life to the now exposed grain and added depth to the black colour of the rustication. Then it was off to the buffer for a run of Red Tripoli, White Diamond and several coats of wax. The pipe was then hand-buffed with a soft flannel to complete the transformation.
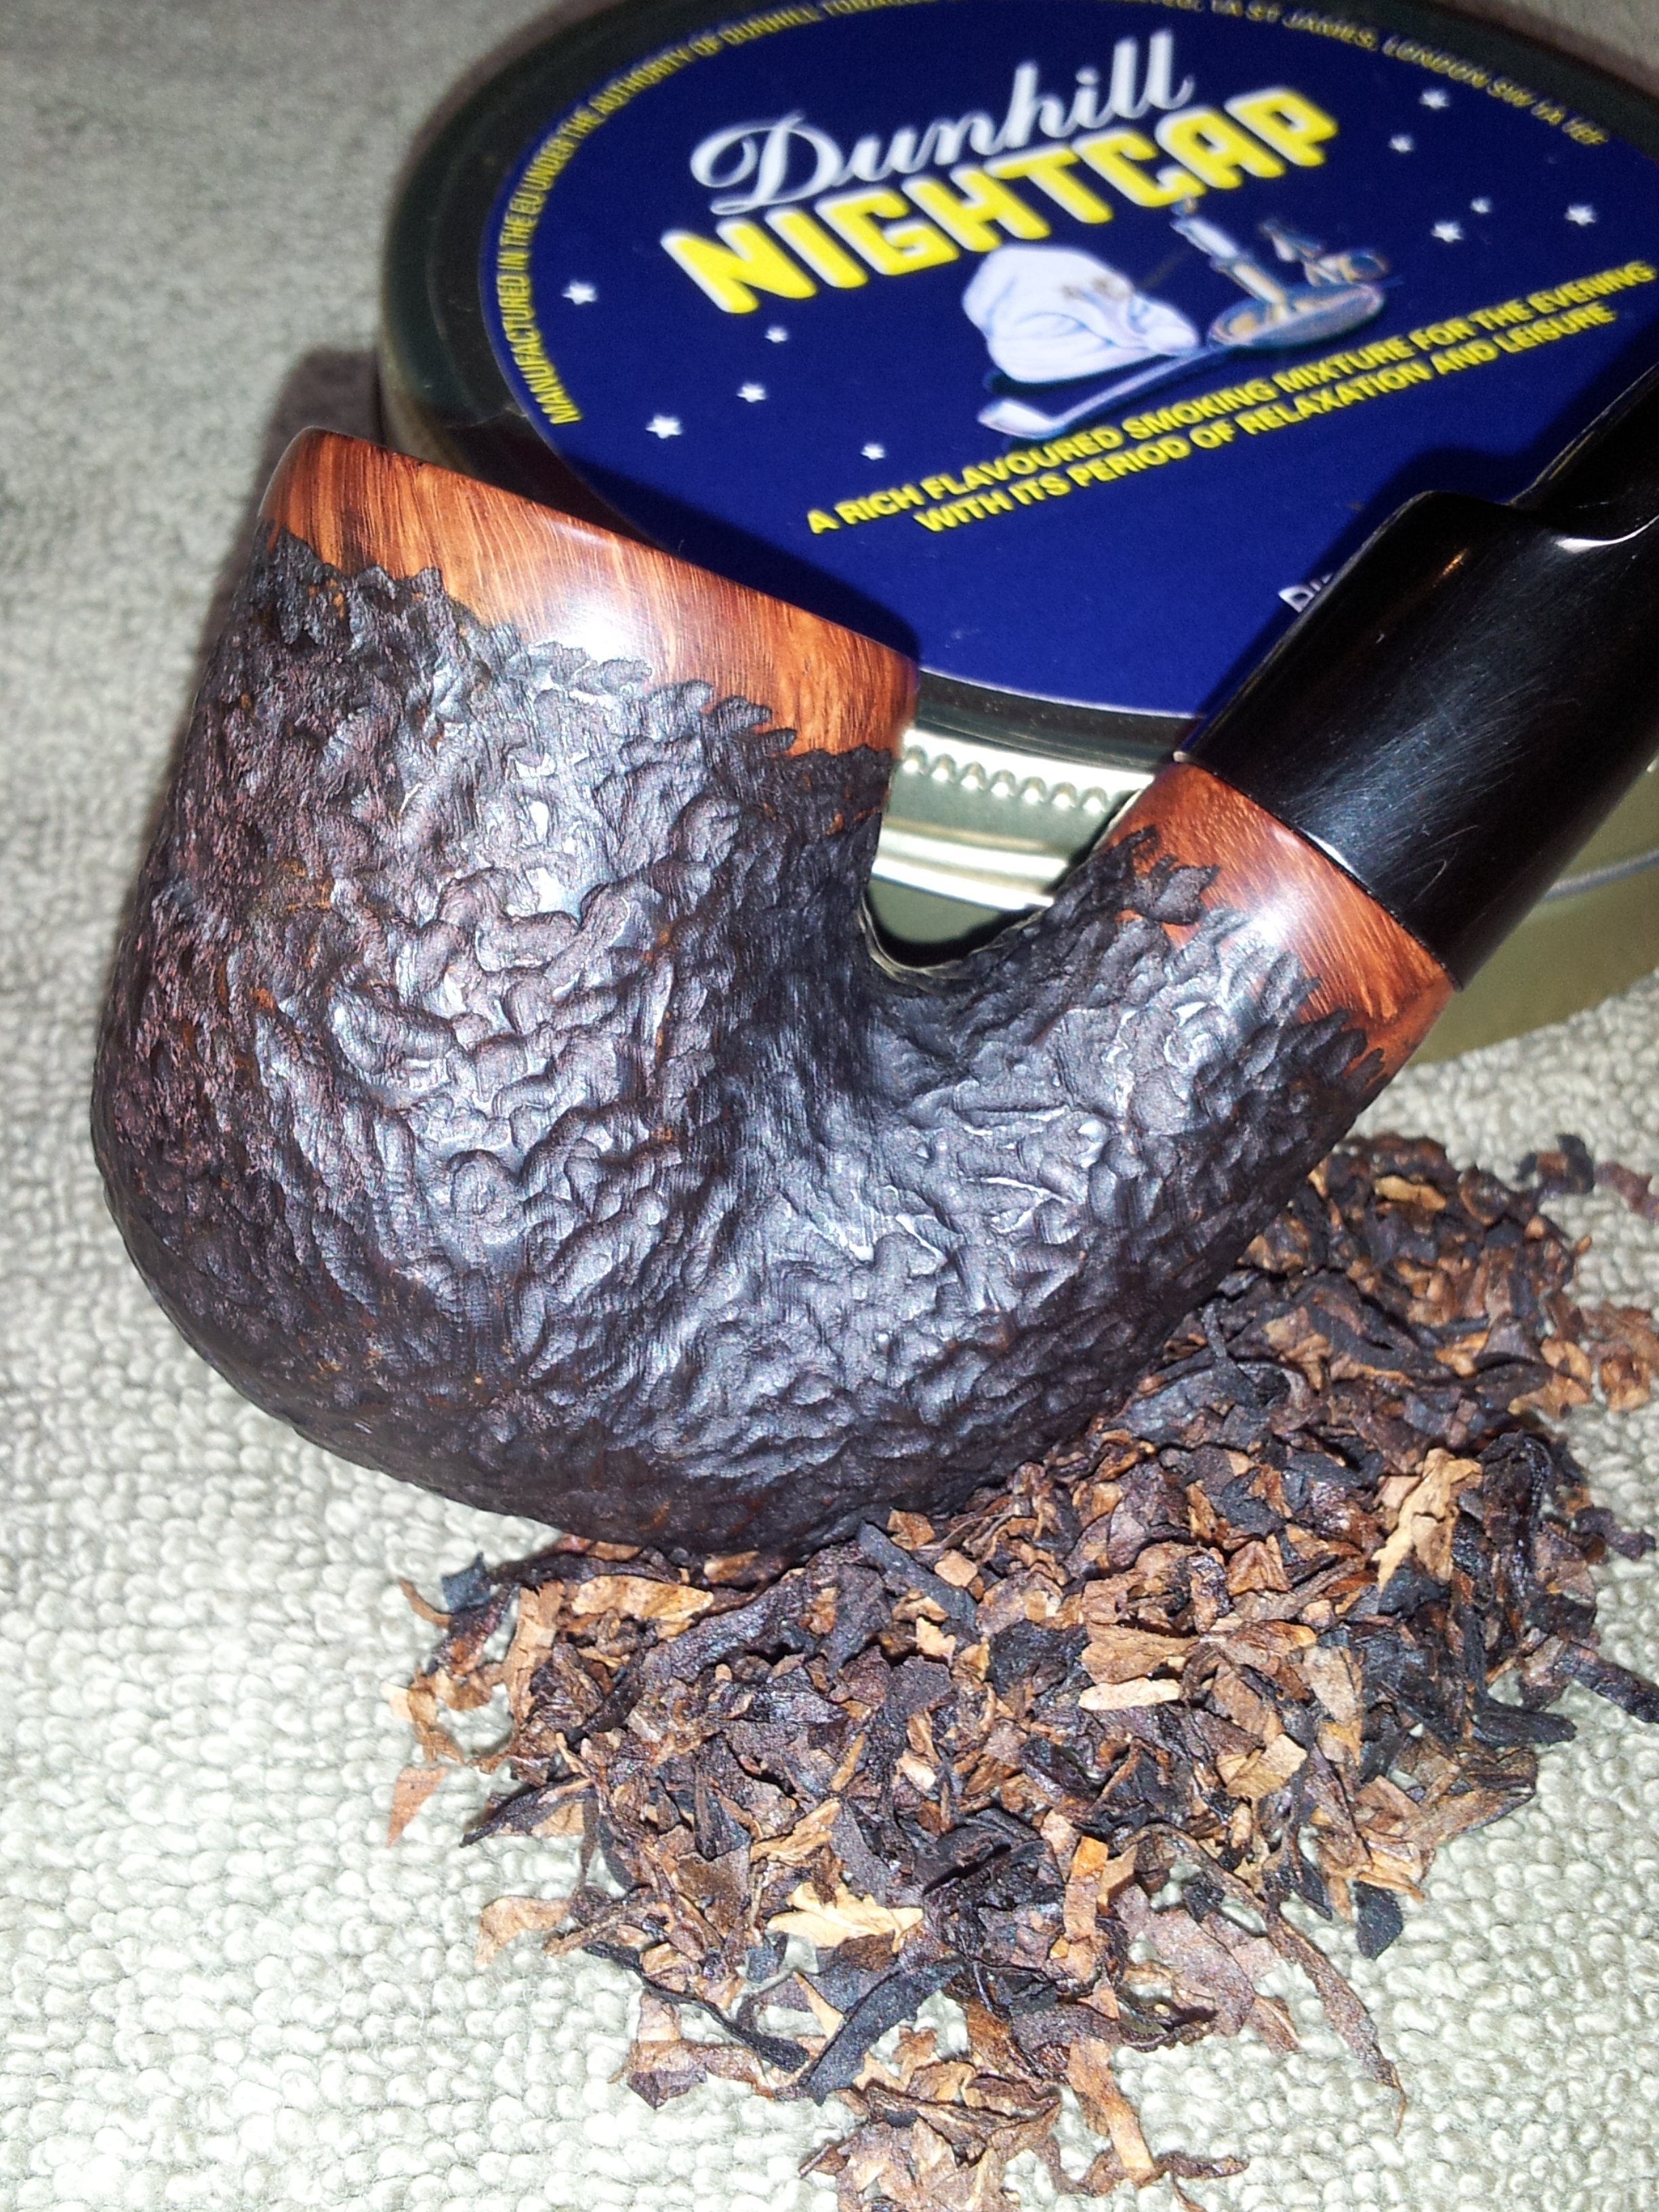
The finished pipe is pictured below. I’m pleased with the end result; I think the makeover has moved this no-name Oom Paul from “ho-hum” to “how ya doin’”. It’s now ready to strut its stuff with a fine tobacco and a happy piper!


Reblogged this on rebornpipes and commented:
Excellent step by step facelift for an Oom Paul. Well done
LikeLiked by 1 person
That looks great! I have an almost identical one, a VFQ, that I did a similar treatment to about 6-8 months ago … but haven’t been able to complete yet! 😦 This gives me hope that soon I will! LOL
LikeLiked by 1 person
That turned out excellent ! Nice work on the rustication .
LikeLiked by 1 person
Started with a nice solid pipe and turned into a real beauty. Rusticating with a Dremel is certainly not the easiest thing to do, and you did a great job. I’ve tried it and it walks away from me. Hats off to you!
LikeLike
Thanks Al. The Dremel does indeed require a firm grip on both the tool and the briar. I’m mounting the carving bit directly to the tool as you can see in the pics. It may (?) be a bit easier using a flexible extension. The grip on those is usually more comfortable than gripping the Torpedo of Terror that a Dremel can become.
LikeLike
What a transformation! Thanks for the in depth details, and photos. You give me hope to take on similar projects. Thanks again.
LikeLiked by 1 person
I would enjoy seeing a video of the rustication with the rotary tool…I have attempted it but not mastered it as yet. The pipe is Beautiful…Great Job!
LikeLiked by 1 person
Thanks Doug. I think I’ve got a long way to go before I master anything, but I appreciate your comment! I’m hoping to be able to post video down the road.
LikeLike